Welcome to Our Community

Some features disabled for guests. Register Today.

myOX : a 4' x 2' OX with potential

Discussion in 'CNC Mills/Routers' started by Serge E., Jun 19, 2014.

  1. James McKeand

    Builder

    Joined:
    Jun 3, 2014
    Messages:
    5
    Likes Received:
    1
  2. GrayUK

    GrayUK Openbuilds Team Elder
    Staff Member Moderator Builder

    Joined:
    May 5, 2014
    Messages:
    1,668
    Likes Received:
    627
    Yes James. Arctic Silver
    That is the business.
    And they know their product really well! :thumbsup:

    Gray
     
  3. snokid

    snokid Journeyman
    Builder

    Joined:
    Oct 11, 2014
    Messages:
    335
    Likes Received:
    104
    I haven't tried this yet but this might be the answer to your z problem... keep power to the stepper....
    $1 - Step idle delay, msec
    Every time your steppers complete a motion and come to a stop, Grbl will delay disabling the steppers by this value. OR, you can always keep your axes enabled by setting this value to the maximum 255 milliseconds. Again, just to repeat, you can keep all axes always enabled by setting $1=255.
    The stepper idle lock time is the time length Grbl will keep the steppers locked before disabling. Depending on the system, you can set this to zero and disable it. On others, you may need 25-50 milliseconds to make sure your axes come to complete stop before disabling. This is to help account for machines motors that do not like to be left on for long periods of time without doing something. Also, keep in mind that some stepper drivers don't remember which micro step they stopped on, so when you re-enable, you may witness some 'lost' steps due to this. In this case, just keep your steppers enabled via $1=255.
     
  4. Serge E.

    Serge E. Journeyman
    Builder

    Joined:
    May 6, 2014
    Messages:
    730
    Likes Received:
    252
    But why they say "It is NOT intended to be used between a CPU and the CPU heatsink" (they cap the 'NOT') ?? They further go on to recommend using their compound/grease instead. Is it just so one can easely replace CPU and/or heatsink ?
     
  5. Serge E.

    Serge E. Journeyman
    Builder

    Joined:
    May 6, 2014
    Messages:
    730
    Likes Received:
    252
    :confused: To quote their web site :

    "Arctic Silver Thermal Adhesive is a two part permanent adhesive for thermal joints in minimum bond line applications. It is NOT intended to be used between a CPU and the CPU heatsink. On a CPU please use a thermal compound such as Arctic Silver 5, Céramique 2, Arctic Alumina orMatrix. For proper use refer to the instructions here."

    Is it just because "Components you attach with Arctic Silver Thermal Adhesive will stay attached forever." ?
     
  6. Serge E.

    Serge E. Journeyman
    Builder

    Joined:
    May 6, 2014
    Messages:
    730
    Likes Received:
    252
    I was thinking about that. But wondered about the drivers and steppers running hot 100% of the time being always powered (?) The power supply would need to feed full power (143% or so of rated stepper amps) to all steppers all the time, about 15 amps total in my case (if not more) ?

    Does the .9 version of GRBL allow to control this per stepper instead of a all or nothing ? I could then do upgrade and just keep the Z powered as the X and Y seem happy with the current setting of ... 25 ms for idle delay.

    So I need to make certain the heatsinks stay on the drivers (adhesive it must be rather than grease/compound) AND I need to get the fans mounted to keep temps as low as possible, especially with the jobs which could run for hours non-stop. Might need to mount a prop on the rear shaft of the NEMA 23s o_O to get max air moving on them as they jet around. :duh: Maybe I can just wire in those tiny fans instead, I've got them. :thumbsup:
     
  7. James McKeand

    Builder

    Joined:
    Jun 3, 2014
    Messages:
    5
    Likes Received:
    1
    By between an CPU and a CPU heatsink I believe they mean the type of CPU/Heatsink combo like we see in a PC - with a large surface area (the last CPU I installed is a system had a 2 - 3 square inch area). For the surface area as small as we are talking about (well below an inch squared) the adhesives would be perfect.
     
  8. Rick 2.0

    Rick 2.0 OpenBuilds Team
    Staff Member Moderator Builder Resident Builder

    Joined:
    Dec 20, 2013
    Messages:
    2,892
    Likes Received:
    1,551
    It may also have to do with the massive size of most CPU heat sinks. They may not want people thinking they can just glue them on rather than using the elaborate screw down anchorage systems provided which anchor the heat sink to the board rather than just the CPU chip.
     
  9. Serge E.

    Serge E. Journeyman
    Builder

    Joined:
    May 6, 2014
    Messages:
    730
    Likes Received:
    252
    True, CPU heatsinks are usually clamped on tight, no need for glue in those cases. Just odd how they phrase it ...
     
  10. Serge E.

    Serge E. Journeyman
    Builder

    Joined:
    May 6, 2014
    Messages:
    730
    Likes Received:
    252
    Shields up ! Here is first public draft of the plexiglass pattern to make a shield which will wrap about the Y gantry plates (of at least myOX). You could always work from the base and do one for your own OX, if using Chris' plates.

    upload_2015-1-5_0-16-37.png

    So I've being "playing" with SketchUp (Make 2015) for a bit now ... Putting up with some of its odd behaviour - maybe from me just experimenting rather then reading the documentation (I have looked at some videos), but I'm managing my way through it. Nice program, especially for the price (free !)

    Next step is to convert to g-code. I could use SketchUcam with just inside and outside cuts, along with fold cuts, but I really want to see what it does with generating "3D" g-code.

    I have not yet cut the 'new and improved' shield (see attached SketchUp file), but thought I could share and, especially, see if any one spots any problem before I get myOX working at it (first on a piece of scrap wood, then on the target plexiglass). The ones on myOX (see past pictures), where handmade on a table saw a while back (third attempt was the good one). CNC version should be much cleaner and shareable.

    Note the target material will be 1/4" plexiglass/lexan. I'll work just one side (for now). So things like the myOX "logo" benefits from the transparency of the material. It will be 'frosted' in contrast with rest. So it is also 'mirrored'. Once I get to a two sided job, it could be engraved on the outside face ("bottom" view of current file, sorry) and filled with paint (ie. coloured plasti-dip ?) The three round holes are for the 'abort', 'pause/stop' and 'resume' switches. The fourth larger round hole is for the "Emergency Stop" button, although it might be wiser to have this one mounted to the table ... I am thinking of having a 2nd one at other end of myOX. The rectangular hole is for a two line display (volts/amps; not certain what I'll plug it too to be of any use). While the opening for the fan is generous, with a tiny bit of 'style' (I'm no artist and I didn't want to copy/paste from others), I do plan on having a filter mat sandwiched between the fan and the opening so I don't suck in dust/chips (nor the mat hopefully). The 'slots' are to hold the controller board support. Yes, I need to 'drill' a few holes for few screws (no glue so I can take things apart). And obviously, there are the fold lines - as wide as the material is thick and 1/2 as deep to get a nice clean bend under the heat gun.

    I'll film the cutting, probably do a 'build' for it (or would it be a ressource) and also do blurb on the bending as requested a while back by some (ok, just one or two myOX 'followers'). Since I'll be back at work, it may be next weekend before things show up ... However I do want to start regular use of myOX, so I could turn this around sooner than later.
     

    Attached Files:

    GrayUK likes this.
  11. GrayUK

    GrayUK Openbuilds Team Elder
    Staff Member Moderator Builder

    Joined:
    May 5, 2014
    Messages:
    1,668
    Likes Received:
    627
    Serge. I would be interested to see a video of you bending the Plexi.
    Any chance?

    Gray
     
  12. Serge E.

    Serge E. Journeyman
    Builder

    Joined:
    May 6, 2014
    Messages:
    730
    Likes Received:
    252
    The shield is already a (beta) ressource here.
     
  13. Serge E.

    Serge E. Journeyman
    Builder

    Joined:
    May 6, 2014
    Messages:
    730
    Likes Received:
    252
    Definitely. I just have to CNC the part ... I'm hoping tomorrow after work, if I can get off earlier than usual. So the video will definitely follow shortly thereafter (just don't expect a Spielberg production).

    With the 'folds' and a good heat gun it is relatively easy (especially the 90 degree bends). Keep an eye on the ressource (I just created it). The bending will probably be 'repeated' (or linked) as a tutorial as well.
     
  14. Serge E.

    Serge E. Journeyman
    Builder

    Joined:
    May 6, 2014
    Messages:
    730
    Likes Received:
    252
    Well, it hit me earlier in the week ... a revelation of sorts.

    In CAM there seems to be too options :

    1) The first is along the lines taken with SketchUcam - one pretty well optimizes the tool path and thus the job time, tool wear, etc. by pretty well hand picking the areas being machined. You tell it to do an inside or outside cut for this 'curve' or that 'pocket' and drill holes here and there.

    or

    2) the CAM software, like MeshCAM, "simply" goes back and forth, offsetting the parallel paths of the tool which covers the entire surface (!), occasionally lifting it above the piece being worked on and doing a rapid to an other part of the surface.

    More on this revelation in the resource : myOX Y gantry plate bent plexiglass dust shield (trying to keep things close to most appropriate build/resource).
     
  15. eagle2284

    eagle2284 New
    Builder

    Joined:
    Sep 8, 2014
    Messages:
    11
    Likes Received:
    3
    Do you have any problems with elasticity of the X axis belt? I have a similar design as yours and I have about 1.5mm of movement each direction just from the belt stretching.
    I have GT2 Belts with 20T pulleys. My carriage eccentric adjustments are probably tighter than they need to be, and I know the belt is probably much tighter than it should be.
    I am taking these measurement with a digital caliper while the stepper is powered ( and manually pushing the carriage.
    Is the GT3 any better for this? I went with the GT2 and 20T so I could get better resolution.

    Any insight is greatly appreciated.
     
  16. Tweakie

    Tweakie OpenBuilds Team
    Moderator

    Joined:
    Jan 18, 2014
    Messages:
    784
    Likes Received:
    326
    Hi Eagle,

    Just something to factor into the equation…

    In standby many stepper drivers reduce their current to the motor winding's – the drivers do, however, monitor the winding's back-emf to increase the current if any slight rotation of the rotor is sensed. This gives the motor a slight elasticity (for want of a better word) to it’s exact position.

    When measuring the belt stretch (pushing on the carriage) try fitting a long pointer to the motor pulley (sticky tape or similar) just to make certain that the motor is not rotating slightly during the test.


    Tweakie.
     
  17. eagle2284

    eagle2284 New
    Builder

    Joined:
    Sep 8, 2014
    Messages:
    11
    Likes Received:
    3
    Thank you for your response. I can assure you the motor is not budging. It would have to pass 7 full steps in each direction and returning back to the original step each time (5 full steps per mm of travel). At most, the motor would be cause for 0.2mm of play, not 3.0mm.

    I was skeptical building a CNC machine using belts designed for a 3D printer. :/
     
  18. Serge E.

    Serge E. Journeyman
    Builder

    Joined:
    May 6, 2014
    Messages:
    730
    Likes Received:
    252
    I'm using GT3 and, although I'm not looking for super precision at this point (think more of 'art' than 'jet plane parts'). I don't seem to have any stretching over a large work area (ex: family tree first run is about. Of course, the stretching might be more obvious after some time as things wear and fatigue ?
     
    GrayUK and sgspenceley like this.
  19. Tweakie

    Tweakie OpenBuilds Team
    Moderator

    Joined:
    Jan 18, 2014
    Messages:
    784
    Likes Received:
    326
    Oh well, It was just a thought. :)

    Perhaps changing to the twin belt system may be the way forward http://openbuilds.com/threads/fitting-dual-belt.1086/

    Tweakie.
     
  20. eagle2284

    eagle2284 New
    Builder

    Joined:
    Sep 8, 2014
    Messages:
    11
    Likes Received:
    3
    I had that exact same idea!! I was trying to figure out how to explain it without sounding like a moron. It essentially turns it into a rack and pinion.

    A little more research on the differences between GT2 and GT3 resulted in the discovery that GT3 is about 5 times stronger. Ill probably just upgrade to GT3 with the dual belts until I am set up for ball screws.


    At this point, I believe I have hijacked this thread - for which I apologize. Thank you again!
     
  21. Serge E.

    Serge E. Journeyman
    Builder

    Joined:
    May 6, 2014
    Messages:
    730
    Likes Received:
    252
    Just a tangent... not the end of the world as we know it.

    I do have some extra GT3. Maybe there is enough to give it a try ... I am just wondering how dust and chips will play in the mix ?

    I have to get the vacuum installed and/or maybe some air blowing unto the belt (compressor sits nearby ...

    Someone had mentioned/tried placing the Y gantry plates on the inside, thus having the belt and wheels facing outward. I do not recal seeing anything more on that idea... It would make my shield way different, but, with its fan(s), it could keep the wheels and maybe the belt clean(er) ?
     
  22. Rick 2.0

    Rick 2.0 OpenBuilds Team
    Staff Member Moderator Builder Resident Builder

    Joined:
    Dec 20, 2013
    Messages:
    2,892
    Likes Received:
    1,551
    A thin plex or fiberboard shield running along the edge may be just as useful as reversing the plates to protect the belt.
    Plex.jpg
     
    Mark Carew likes this.
  23. Serge E.

    Serge E. Journeyman
    Builder

    Joined:
    May 6, 2014
    Messages:
    730
    Likes Received:
    252
    I don't know, the dust from working MDF just gets everywhere. I mean the entire garage now has a thin layer of this dust. Takes forever to clean up. The barrier you suggest would be great when working other material, I suspect.
     
  24. Serge E.

    Serge E. Journeyman
    Builder

    Joined:
    May 6, 2014
    Messages:
    730
    Likes Received:
    252
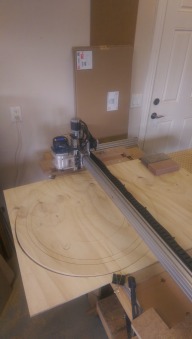
    Well, as you would see from post in the ressource myOX Y gantry plate bent plexiglass dust shield I flattened the layout from the orignal 3D and used SketchUcam to do pockets, traces and whatnots, tweaking generated "paths" to get rid of a few ... unruly areas by editing segments.

    I just could not go to bed without seeing what SketchUcam would do, especially since I tweaked and played a bit of shell game with it... Taking a peek at the resulting G-code with Universal G-code Sender's viewer I get this :

    View attachment 6422

    Get the full post over at the resource linked at beginning of this post. Yes, it is missing the outer cutout to separate the shield from rest of raw material. But, this is looking AWESOME and cutting it should only take minutes.

    If it wasn't nearly 3 am, I would run to myOX and give this G-code a try right now ... on a piece of scrap wood ... but I have to catch some :sleepy: before work - only a few hours away now.
     
  25. eagle2284

    eagle2284 New
    Builder

    Joined:
    Sep 8, 2014
    Messages:
    11
    Likes Received:
    3
    Ive considered (and may still do it once my workbench is completed) just swapping the gantry plates to achieve this. The nema23's I have are very large and would reduce my travel on the x axis (not a big deal, its plenty large enough as is).


    Did you happen to do anything to strengthen the X Axis? I have drilled, tapped and bolted ten points on the two 2060s and that helped a lot, but I still get a lot of chatter. Ive considered filling the channels in the 2060 with a cement or epoxy, but am unsure of what would be best.

    I need higher resolution and more precision. I want to get to the point where I can prototype PCBs. Isolation routing, Hole drilling, and solder paste dispensing. More than likely, I will make a smaller version of the OX specifically for this purpose. But I also want to be able to mill aluminum plates. Basically, I want it all :p
     
  26. GrayUK

    GrayUK Openbuilds Team Elder
    Staff Member Moderator Builder

    Joined:
    May 5, 2014
    Messages:
    1,668
    Likes Received:
    627
    I've considered using 2 x Brush draught excluders on each side on the Y axis's. The type that you screw to the bottom of doors. My idea is to put two pieces of wood or plastic down the length of the Y axis's, either side of the V rail, make brackets to hold them opposite one another with brushes pointing at each other and touching, then the Gantry plates running between them. :rolleyes:

    Gray
     
    Paruk, Knut Bøje and eagle2284 like this.
  27. Serge E.

    Serge E. Journeyman
    Builder

    Joined:
    May 6, 2014
    Messages:
    730
    Likes Received:
    252
    Nothing special done to my X axis as of yet ... But I'm working on something (can't go into details right now).
     
  28. Serge E.

    Serge E. Journeyman
    Builder

    Joined:
    May 6, 2014
    Messages:
    730
    Likes Received:
    252
    It's been a while, but I'm back with a few more tidbits on myOX.

    First, I had to use the snowblower three times in 24 hours as we got buried under over a foot of snow last Sunday (not counting the drifts well over 2' all over town). I know, a foot is not that much for many, but, here, in the Canadian Tropics, it was a record which nearly closed the entire region, not just the city :eek: To make things worse, my trusted and rusting big John Deere blower could not take the load ... it had turned into a shed potato I guess ... but it was a quick repair (5$ worth of parts !) It will need a sand blasting, some TLC and a fresh coat of paint. Maybe a job for the coming summer ?

    In further testing myOX, as I cut my dust shields, I came to realize a few more facts of DIY CNC and myOX. In no particular order :
    • I need to fix my sliding Z : vibration, NEMA17 and heavy router don't go together with precision. I did find a simple solution which I will test later today. It involves use of a bungy cord ! o_O The guy apparently swears by it ... I'll have to get NEMA23 upgrade though (but not quite certain it will fixe the problem for some reason). Here's a stupid question: what if I flip ACME around ? I mean I can't force the Z upward but it only takes a (blood filled) mosquito to force it downward ... :rolleyes:
    • Otherwise, the OX design is nice and strong as myOX plows through wood and plexiglass nearly like butter on a hot summer day. The NEMA23 have no problem moving the big router around the full working areas. :thumbsup: In fact, it pushed a clamp out of its way (ok, just a few mm, but still) !
    • Walking into Rockler's (there's one less than an hour away, customs time included) is like walking into a candy store ! :rolleyes: They also sale some 'fancy' CNC machines with the one closest in dimensions to myOX at over 7k$ without the table to sit it on - add 2k$ !! Sure makes the learning curve worth the investment in myOX or any other OX build. Best part of it, this Rockler's is few minutes away from one of the wife's shopping area ... :rolleyes:
    • Limit switches are for the weak of heart :confused: But there is a 'simple' solution, if the GRBL authors don't mind doing a little tweak (more on that in a separate post). It surprises me that no one actually thought of it before newbie me. Maybe it's my 'out of the box' thinking at work again ... For now, as I always admire myOX at work, for hours on, I disabled the limit switches, hand near power cord for a fast disconnect in case myOX goes wild.
    • Always have your video camera fully charged before filming a job in progress ! :banghead: So I unfortunately don't have much to show... for now, as my video camera is finally plugged to a charger. I'll have to use a webcam powered through the computer, eh ? Wait a second, I'll try one of those remote cameras for R/C planes and such, powered through myOX and wireless to computer ... :rolleyes:
    • DON'T plug everything into the same circuit, especially if only a 15 amp breaker ! :banghead:, :banghead: and :banghead: I made the mistake of adding small room heater to bring the garage temperature to a more confortable level and, as I realized I didn't turn the vacuum on, the power went out at the flip of the vacuum power switch. :oops: Stupid electrician putting only a 15 amp breaker in a garage, eh ? At least I had him separate all garage outlets into two circuits (both turn out to be only 15 amps !) And me that had myOX's power plugs on a 20 amp powerbar just to be be safe. :duh:
    • ...
    More to follow.
     
    sgspenceley likes this.
  29. GrayUK

    GrayUK Openbuilds Team Elder
    Staff Member Moderator Builder

    Joined:
    May 5, 2014
    Messages:
    1,668
    Likes Received:
    627
    Hi Serge
    I was just looking at some Stepper breaks. Sits between the motor and the Screw. Work really well, but oh soooo expensive for what is probably no more than an electro magnet. Someone also suggested a counter balance on a sliding rail.

    Gray
     
  30. Serge E.

    Serge E. Journeyman
    Builder

    Joined:
    May 6, 2014
    Messages:
    730
    Likes Received:
    252
    A short (13") bungy cord looks good. I have to force to freely move the Z down. Turning the spindle up or down seems just fine, at least for the short travel needed for 2.5D type work. Before I get into more than the 1 or even 2" Z travel used to date I will need to upgrade to a NEMA23.

    At 150 ipm, X and Y, I was also a bit agressive in the plexiglass, but it was cutting and making nice looking chips. In addition to slow down the routing, I'll tweak the design of the dust shield (go see the resource for details).
     

Share This Page

  1. This site uses cookies to help personalise content, tailor your experience and to keep you logged in if you register.
    By continuing to use this site, you are consenting to our use of cookies.
    Dismiss Notice