Welcome to Our Community

Some features disabled for guests. Register Today.

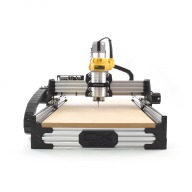
ooznest OX CNC Machine

Discussion in 'CNC Mills/Routers' started by Ryan Lock, Apr 28, 2015.

  1. Peter Van Der Walt

    Peter Van Der Walt OpenBuilds Team
    Staff Member Moderator Builder Resident Builder

    Joined:
    Mar 1, 2017
    Messages:
    14,917
    Likes Received:
    4,291
    Smaller endmill (1/4 inch would be great for 8mm holes) but make sure its a plunge capable bit. Then do a helical pocket operation so it ramps in while circling the diameter to make the larger hole.
     
  2. Ronald4418

    Ronald4418 Well-Known
    Builder

    Joined:
    Nov 4, 2015
    Messages:
    218
    Likes Received:
    33
    If I were you I would try using a Helix Entry cut with a quarter inch Endmill set around 12,000 rpm with 45 ipm Helix cut and 0.0148 Chip Load and 56 inch per minute Feed Rate. That is a Conservative calculation using GWizard, which I depend upon instead of the rates I get from VCarve Pro. I myself Hate Burning Up my Tool Bits and is why I depend upon it for my calculations. If you decide to try the Trial. Use the Shapeoko as your Default Profile the other option is to use the X-Carve though I have better results with the previous model.
     
    Alex Chambers likes this.
  3. paul.ludwa

    Builder

    Joined:
    Nov 17, 2020
    Messages:
    5
    Likes Received:
    0
    thank you both. Your advice is priceless !
    Unfortunately I don't have a dewalt d26200 6,35mm collet yet. I ordered it yesterday and am waiting to get it and then do trials.

    As it's ooznest cnc thread I will use the occasion to ask another question.
    For last few days I see a problem with voltage. It happened a few times that cnc paused during the operation and shown a message "auto paused - low voltage) or something of that sort. Has it ever happened to any others users of ooznest cnc ? what could it mean ?
     
  4. Alex Chambers

    Alex Chambers Master
    Moderator Builder

    Joined:
    Nov 1, 2018
    Messages:
    2,773
    Likes Received:
    1,358
    That's not something I have heard of before - are you using the Duet controller and the latest firmware from Ooznest? If so the Duet Web Control will tell you the supply voltage and the link below tells you how to adjust it. If that's not relevant for your setup tell us what you have, especially the specifications and make of your power supply.

    Alex.

    4. Testing Your WorkBee
     
  5. paul.ludwa

    Builder

    Joined:
    Nov 17, 2020
    Messages:
    5
    Likes Received:
    0
    I followed your advice and succeeded to drill (pocket) 200 perfect 8mm holes with 1/4 down/cut compression bit - no burning, everything went great!

    Regarding the other issue - I have followed link you delivered and corrected voltage.
    I had to set up PSU Voltage at 24.5V to get 24 in Duet Web Control. Unfortunately during the operation voltage is not stable. It fluctuates between 22-24V.
    When it falls to much the warning pops up like this:

    11/21/2020, 3:45:57 PM: : Resume state saved
    Print auto-paused due to low voltage
    11/21/2020, 3:46:57 PM: M24: Printing resumed

    Another issue I encounter regularly is Z-axis homing. Sometimes after finished operation when I want to Home Z Axis it moves down about 5mm instead of going up until it reaches the z axis sensor. It goes 5mm down and stops behaving like it's homed because after that I can only move it further down the bed.
    I've been having this problem for a while now. What I do then is to unplug Motor, plug it back in and then it's ok for some time until it happens again.
     
    #1085 paul.ludwa, Nov 21, 2020
    Last edited: Nov 21, 2020
  6. Alex Chambers

    Alex Chambers Master
    Moderator Builder

    Joined:
    Nov 1, 2018
    Messages:
    2,773
    Likes Received:
    1,358
    NEVER unplug a stepper motor with the power on. Take this up with Ooznest (sales @ooznest.co.uk) as you may have a faulty power supply, but also check your wiring very carefully for any possible short circuits - in particular look for any stray strands of wire around the connector from the power supply to the Duet, and any poor connections - trapping the insulation for example. Did you use the crimp connectors to terminate the wires from the power supply to the Duet? and are they securely on the wires?
     
    Peter Van Der Walt likes this.
  7. Ronald4418

    Ronald4418 Well-Known
    Builder

    Joined:
    Nov 4, 2015
    Messages:
    218
    Likes Received:
    33
  8. paul.ludwa

    Builder

    Joined:
    Nov 17, 2020
    Messages:
    5
    Likes Received:
    0
    I did open PSU and adjusted connections which seemed to be loose and was actually quite happy I saw it because I thought it would be the problem but it's not. the problem still appears.
    Vin Voltage on Duet Web Control fluctuates between 22.5-24 V during machine operations. When it's on but not working it's between 23.7-24V. I don't know if it's a normal behaviour for voltage to change a little bit.

    does the temperature have influence on voltage ? I am working in a basement with the window open and it's quite cold outside now (about 2-7 degrees).

    The other problem I have is Z-Axis which sometimes goes crazy and shows that it's homed when it's not. I changed limit switch cables from z to x axis but the problem is still with z-axis. I only hope that it's not a problem with Duet Controller.

    I have been using ooznest cnc for almost a year. Z axis problem started few months ago but at that time I thought it was one time thing but now it repeats more and more often. It happened a few times that I ruined my material because z axis after finished operation did not go up because it thought z axis limit switch was triggered (according to Duet Web Control panel).

    I don't know if it's worth mentioning but my y axis limit switch is wired opposite way that is why I have customconfig settings like this:
    ; ADD ANY CUSTOM SETTINGS BELOW
    ; Configure Endstops
    ;M574 X2 S1 ; Set active low endstops
    M574 Y2 S0 ;
    ;M574 Z2 S1 ;

    Is it possible to DISABLE LIMIT SWITCHES ? or at least Z axis limit switch ?
     
    #1088 paul.ludwa, Nov 23, 2020
    Last edited: Nov 23, 2020
  9. Alex Chambers

    Alex Chambers Master
    Moderator Builder

    Joined:
    Nov 1, 2018
    Messages:
    2,773
    Likes Received:
    1,358
    Your Z limit switch is normally closed - so any break in the wiring will be interpreted by the Duet as the switch being triggered - check especially where the wire is close to the X drag chain and at the connector at the Duet end. The Duet with Ooznest's firmware will, of course, only respond to the switches during a homing cycle - it ignores them the rest of the time.

    The voltage on your power supply should not drop low enough to cause the Duet to shut down. When I said to check connections I was mainly thinking of the Duet end - connections can work loose with vibration, or a whisker of loose wire could cause an occasional partial short.
    Alex.
     
  10. paul.ludwa

    Builder

    Joined:
    Nov 17, 2020
    Messages:
    5
    Likes Received:
    0
    On duet controller I have a lot of cables (limit switches, motor cables) coming from every side to the proper inputs. Some of them come in contact with each other as it's not possible to plug all these cables on such a small board without getting them together in contact.. Does this might be a problem ?
     
  11. Ronald4418

    Ronald4418 Well-Known
    Builder

    Joined:
    Nov 4, 2015
    Messages:
    218
    Likes Received:
    33
    Limit or Home Switches cannot be wired in a Star Configuration and if memory serves me right have to be in a Parallel Configuration. At the moment I don't have access to a reference drawing, though someone else should be able to post a reference that you can follow.
     
  12. Alex Chambers

    Alex Chambers Master
    Moderator Builder

    Joined:
    Nov 1, 2018
    Messages:
    2,773
    Likes Received:
    1,358
    @paul.ludwa, if you have had this machine for under a year it's still under warranty - if you got it from Ooznest email them and tell them the problems you are having.
    Alex.
     
  13. Abdul wahab

    Builder

    Joined:
    Jan 4, 2021
    Messages:
    1
    Likes Received:
    0
  14. AminR

    AminR New
    Builder

    Joined:
    Dec 9, 2021
    Messages:
    1
    Likes Received:
    0
    Hello everyone! This is a great build and we are going to make this with our group.
    We have a problem that we can't find any 2060 and 2080 V slot Extrusions in our country. but we have 2020 and 2040.
    So we are going to just use them and make 2080 ones with 2 x 2040 on each other but we are worrying if this has any problems or not.
    We want to add 2 more holes in the Y end plates to have 2 screws for each 2040 Extrusions.
    And so on for making 2060 Extrusions, we need to use one 2040 and one 2020.
    Is there any professional way to match v slots together? Or just fixing them on the end plates is enough?
    My friend says we should make a hole in the middle of v slots and screw them to each other. Is that good?
    I would appreciate your answers.
    Thank you very much!
    Amin
     
  15. blacksabbrath

    Builder

    Joined:
    Aug 8, 2022
    Messages:
    7
    Likes Received:
    0
    Hello!
    I assembled a similar machine. The first thing that catches your eye is the non-rigidity of the belt drive if you shake the carriage by hand. I did it like in v1.0 from the attached picture. When cutting out a circle, it makes an oval with a difference in minimum and maximum diameter of about 0.5 mm.
    How much do you think the error can be reduced by increasing the length of the arc around the pulley and reducing the free length of the belt in v3.0 from the attached picture?
    upload_2023-10-23_13-43-40.png
     
  16. Rick 2.0

    Rick 2.0 OpenBuilds Team
    Staff Member Moderator Builder Resident Builder

    Joined:
    Dec 20, 2013
    Messages:
    2,892
    Likes Received:
    1,551
    The issue here is belt stretch. The examples you have shown help reduce the probability of jumping teeth but don’t do anything about belt stretch. Do a forum search for dual belts and you will find a plethora of information on how to reduce belt stretch.
     
    Peter Van Der Walt likes this.
  17. blacksabbrath

    Builder

    Joined:
    Aug 8, 2022
    Messages:
    7
    Likes Received:
    0
    Thanks for the good advice, but I'm already using a double belt. Result on video: https://youtube.com/shorts/6r4GHNLfxGg?si=Mh_W9-BztZEO9dMp
    Just to reduce the length of the free belt, I depicted v.3.0. Compared to v.1.0, the length of the belt has been reduced by more than 1.5 times.
    The only thing that confuses me is that everyone uses v.1.0 in the construction of their machines, not v.3.0. WHY?
     
  18. Peter Van Der Walt

    Peter Van Der Walt OpenBuilds Team
    Staff Member Moderator Builder Resident Builder

    Joined:
    Mar 1, 2017
    Messages:
    14,917
    Likes Received:
    4,291
    Only one extra tooth of engagement? Correct positioning doesn't get much better the more teeth are engaged.
     
  19. blacksabbrath

    Builder

    Joined:
    Aug 8, 2022
    Messages:
    7
    Likes Received:
    0
    In v1.0, the belt covers the pulley by 28mm, and in v3.0 by 36mm, this is a difference of at least 3 belt teeth and that’s quite a lot. In general, the belt should fit the pulley fairly well, so this is not the main purpose of the upgrade. I think the free length of the belt from the wheel to the pulley is more critical here, and only the lower engine mounting screw does not allow me to reduce it in version 3.0.
     
  20. Peter Van Der Walt

    Peter Van Der Walt OpenBuilds Team
    Staff Member Moderator Builder Resident Builder

    Joined:
    Mar 1, 2017
    Messages:
    14,917
    Likes Received:
    4,291
    At some point its worth admitting that belt will only ever be "as good" and selling off the machine for a better machine like a LEAD would be a good idea.
     
  21. Misterg

    Misterg Veteran
    Staff Member Moderator Builder Resident Builder

    Joined:
    Aug 27, 2022
    Messages:
    350
    Likes Received:
    273
    If you're concerned about belt stretch, then it's the total length of the belt that's important - You will need a slightly longer belt (=slightly more stretch) to use V3 compared to V1.

    I don't run a belt driven machine, but looking at your video, I think you could increase the belt tension.
     
  22. Rick 2.0

    Rick 2.0 OpenBuilds Team
    Staff Member Moderator Builder Resident Builder

    Joined:
    Dec 20, 2013
    Messages:
    2,892
    Likes Received:
    1,551
    I watched the video. Move the motor up and take the slack out of the belt.
     
  23. Gary Caruso

    Gary Caruso OpenBuilds Volunteer
    Staff Member Moderator Builder

    Joined:
    May 19, 2016
    Messages:
    1,193
    Likes Received:
    532
    My new x plates are like your v3 (or more like v2) with the motor on the diagonal and using three bolts, so you can get the pulley closer, and with dual belt. As said the free belt over the pulley should be nice and tight.
    Cheers
     
    #1102 Gary Caruso, Oct 23, 2023
    Last edited: Oct 23, 2023
  24. blacksabbrath

    Builder

    Joined:
    Aug 8, 2022
    Messages:
    7
    Likes Received:
    0
    And how are you doing with backlash and rigidity? Not as bad as my video from previous post #1097?
     
  25. Peter Van Der Walt

    Peter Van Der Walt OpenBuilds Team
    Staff Member Moderator Builder Resident Builder

    Joined:
    Mar 1, 2017
    Messages:
    14,917
    Likes Received:
    4,291
  26. Gary Caruso

    Gary Caruso OpenBuilds Volunteer
    Staff Member Moderator Builder

    Joined:
    May 19, 2016
    Messages:
    1,193
    Likes Received:
    532
    Mine is better than that Yes, more tension will help, pull the motor up firmly while tightening the bolts.
     
  27. blacksabbrath

    Builder

    Joined:
    Aug 8, 2022
    Messages:
    7
    Likes Received:
    0
    I tightened the straps after I shot the video. Visually it became a little better, but did not affect the result in any way: I still get a milled oval instead of a circle with a difference of about 0.5 mm between the largest and smallest diameters. With what actual accuracy can you mill a circle?
     
  28. Peter Van Der Walt

    Peter Van Der Walt OpenBuilds Team
    Staff Member Moderator Builder Resident Builder

    Joined:
    Mar 1, 2017
    Messages:
    14,917
    Likes Received:
    4,291
    Did you calibrate? Consistent ovalness could be steps per mm
     
  29. blacksabbrath

    Builder

    Joined:
    Aug 8, 2022
    Messages:
    7
    Likes Received:
    0
    Yes, the steps per mm are calibrated. The oval is obtained diagonally, as happens in the case of backlashes along the X and Y axis. Backlashes according to the hour indicator is 0.22 mm on each axis when changing the direction of movement.
     
  30. Gary Caruso

    Gary Caruso OpenBuilds Volunteer
    Staff Member Moderator Builder

    Joined:
    May 19, 2016
    Messages:
    1,193
    Likes Received:
    532
    Maybe tighter still use a clamp or a lever, calibrating across a large distance and accept this will never be a pro milling machine will help.
    Also when you dual belted did you use a spacer (0.5mm) between the belt and the aluminum?
    Gary
     
  31. blacksabbrath

    Builder

    Joined:
    Aug 8, 2022
    Messages:
    7
    Likes Received:
    0
    Oops, no. Glued it with glue. Have you tried making a circle on your machine? How accurate is this?
     

Share This Page

  1. This site uses cookies to help personalise content, tailor your experience and to keep you logged in if you register.
    By continuing to use this site, you are consenting to our use of cookies.
    Dismiss Notice