Welcome to Our Community

Some features disabled for guests. Register Today.

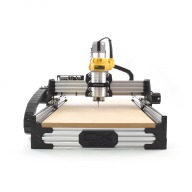
ooznest OX CNC Machine

Discussion in 'CNC Mills/Routers' started by Ryan Lock, Apr 28, 2015.

  1. Tom Stratton

    Builder

    Joined:
    Nov 17, 2015
    Messages:
    7
    Likes Received:
    0
    @davestrength @Ryan Lock Continuing on the bracing theme, I had wondered if using C-Beams for the Y axis would improve flex resistance (though maybe this is not necessary after Dave's comments). A set of wheels could run on the underside of the upper C leaving the lower C section for cross bracing. However with the price of beams relatively low this is something to consider after trying the basic setup. I have very low expectations and requirements for aluminum machining (more of a future nicety), however I do need to work on some very dense hardwoods. I would probably be looking at a 1m x 1m setup.
     
  2. davestrength

    Builder

    Joined:
    May 29, 2015
    Messages:
    18
    Likes Received:
    19
    I think C Beams definitely bring more rigidity. As far as dense hardwoods...I'll be milling out some Katalox next week. That's getting up there on the hardness scale!
     
  3. mel earp

    mel earp New
    Builder

    Joined:
    Oct 12, 2015
    Messages:
    30
    Likes Received:
    17
    Well, here's an opportunity for you Ryan. If you are selling the xPro and the chips on it specify cooling, why not have the correct size/shape stick on copper heatsinks available in your store as an add on to the xPro board. A quick search of Ebay says they are available for under £1.
     
  4. davestrength

    Builder

    Joined:
    May 29, 2015
    Messages:
    18
    Likes Received:
    19
    I made another run at 6061 aluminum. This time with a new Kyocera 2 flute 1/8" up cut endmill made for aluminum. Things went much much smoother. I probably could have been more aggressive with the feeds I established using the other eBay endmills. 10k rpm, 15ipm, 0.005 (.15mm)" doc.

    image.jpeg

    And the finished piece before any touch ups:
    image.jpeg
     
    olecam and Mark Carew like this.
  5. Tom Stratton

    Builder

    Joined:
    Nov 17, 2015
    Messages:
    7
    Likes Received:
    0
    @davestrength Looks like you did well with this one! What was the edge finish like? it's hard to tell from the photos...

    Cheers

    Tom
     
  6. Ryan Lock

    Ryan Lock Veteran
    Builder

    Joined:
    Oct 12, 2014
    Messages:
    530
    Likes Received:
    293
    @Tom Stratton Swapping the 20x80 for a C-Beam at a later stage would be possible. Another possibility would to have the 'C' point inwards, then double up the sets of wheels, and keep in the inner wheel plate.

    @mel earp We do actually have a whole bag full of square heatsinks collecting dust, i think with future xPro orders we will include them for free. They do overhang the driver a little bit, but i don't think this to be much of a problem. On my C-Beam machine i completely forgot to add heatsinks, and it has been working fine, i have two 30mm fans cooling the board though.

    @davestrength Looks like your mastering cutting aluminium. Your posts will be an excellent reference for anyone want to also cut alu.
     
  7. Tom Stratton

    Builder

    Joined:
    Nov 17, 2015
    Messages:
    7
    Likes Received:
    0
    @Ryan Lock My thoughts about switching to the C-Beam were to add strength but also to add cross braces. If I used the inner Y-Plate I still couldn't add the Y-Y brace. My thought was to have an upper and lower set of wheels and a third set hooked over the top to the upper inside of the C (Perhaps I need to draw this for it to make sense...). I would then still be able to add cross braces...
     
  8. mel earp

    mel earp New
    Builder

    Joined:
    Oct 12, 2015
    Messages:
    30
    Likes Received:
    17
    I didn't originally say, but the woodpeckers perched only on the x and y axes Being horizontal they were more comfortable there.. Since your comment is about a c-beam, which I presume is all acme driven, then the required torque on those is much lower, since the gearing is almost 8:1 compared to the belts. I am not surprised that all was OK with just fans.
     
    #188 mel earp, Nov 26, 2015
    Last edited by a moderator: Nov 26, 2015
  9. Ryan Lock

    Ryan Lock Veteran
    Builder

    Joined:
    Oct 12, 2014
    Messages:
    530
    Likes Received:
    293
    @Tom Stratton Yes I think i mis understood what you was thinking. I thought you wanted to brace the Y to your table.

    @mel earp I will probably add heatsinks anyway, no harm in doing so.
     
  10. mel earp

    mel earp New
    Builder

    Joined:
    Oct 12, 2015
    Messages:
    30
    Likes Received:
    17
    Cut my first piece of wood yesterday. Some left over red sapele. It's not super hard, but a fair trial. and a wood that I have lots of off cuts. I got all the positioning wrong, but the cuts were clean and I was really quite pleased for a first go.

    I think that the way I want to work would really benefit from a z-probe, and now I am going to ask a really stupid question, because no amount of googling has given me the answer..... Just where on the xPro do you connect the z-probe input (A5??)?
     
  11. davestrength

    Builder

    Joined:
    May 29, 2015
    Messages:
    18
    Likes Received:
    19
    Sale at Open Builds part store today! I bought some 80mm linear rail to implement Mel Earp's High Rise mod. I'll report back when it's done.
     
  12. John Meikrantz

    John Meikrantz Well-Known
    Builder

    Joined:
    Nov 2, 2014
    Messages:
    169
    Likes Received:
    56
    The A5 pinout is in the black connector by the USB end of the xPRO. I ordered some of these jumpers http://www.amazon.com/gp/product/B00ALQI12M that had a female end for ease of connection, and then wired the other end to a jack on my electronics enclosure. Attached pdf of pinouts.

    -- John
     

    Attached Files:

    Ryan Lock likes this.
  13. mel earp

    mel earp New
    Builder

    Joined:
    Oct 12, 2015
    Messages:
    30
    Likes Received:
    17
    Thank you very much that is incredibly useful.

    Going away today to visit my daughter, so won't have any time to investigate for a few days. However, I have the V2 board. The reason I couldn't find this information is that the pin out of this header is not on the V2 diagram and I didn't look at the V1 diagram. Also, it is physically different on the V2. There is a blanking section of plastic on it, which I am sure can be cut off to reveal the pins. But I wonder if there is some reason for the blanking plate. Am I not supposed to use this header?? Have sent a question to Spark Concepts on this.
     
    #193 mel earp, Nov 28, 2015
    Last edited: Nov 28, 2015
  14. John Meikrantz

    John Meikrantz Well-Known
    Builder

    Joined:
    Nov 2, 2014
    Messages:
    169
    Likes Received:
    56
    I also have a V2, the header pinouts are the same. I saw the V2 drawings from Spark didn't have it labeled, not sure why! But, I am using V2, and have probe working. Odd - my V2 didn't have the cover on the header.

    -- John
     
  15. mel earp

    mel earp New
    Builder

    Joined:
    Oct 12, 2015
    Messages:
    30
    Likes Received:
    17
    I managed to grab a few hours on the machine today. Some good some perhaps not yet so good.

    I solved the z-probe pin. The header just had a transit plug on it and it just pulled off. Then it worked just fine. So I have a z-probe. Also installed permanent heatsinks.

    I started a test piece, actually a wooden hold down with a 6mm slot to put an M6 through and then attach to M6 inserts in the base board I made. I already had loads of M6 stuff and they are more readily available and cheaper than M5's. My first shot had a mistake and I managed to put the cutter sideways through 15mm of red sapele. Amazingly it cut it, a bit noisily, but the cut was smooth and accurate - just not where I wanted it. Both the cutter and the machine were very forgiving. Nothing broke. I fixed that and made several hold downs of different sizes, all really accurate.

    I also have tested the repeatability and accuracy and it looks good. I can't measure any deviation.

    Now the problem. Despite not losing any steps, the motors are not totally happy. If I do a long move on any axis then it sounds sweet once that particular motor is up to whatever speed I have requested. This is also true if I do diagonal moves in 2D or 3D. However the acceleration up to speed sounds as though it is stuttering. I have the accelerations set at 100 mm/s^2, but have tried at 50 and 200. Nothing changes. Power pots are set at about 60%.

    Any ideas on what might make this sound better would be gratefully accepted.
     
  16. mel earp

    mel earp New
    Builder

    Joined:
    Oct 12, 2015
    Messages:
    30
    Likes Received:
    17
    Just placed an order for some extra bits, some of which will be used to raise my machine off the deck and lower the spoiler supports. I have been testing out with it on blocks and the supports dropped 40mm. This seems much better for me in terms of workpiece placement and cutting zone. The other bits are for something else entirely!
     
  17. Ryan Lock

    Ryan Lock Veteran
    Builder

    Joined:
    Oct 12, 2014
    Messages:
    530
    Likes Received:
    293
    @mel earp Thanks! Your order should be with you tomorrow, let us know how raising the machine goes.
     
  18. davestrength

    Builder

    Joined:
    May 29, 2015
    Messages:
    18
    Likes Received:
    19
    I managed to implement Mel Earp's idea of swapping the lower 40mm v-slot rails for 80mm. It worked perfectly. I now have a working travel of about 50mm...that is I can profile cut 50mm thick boards.

    The end caps on this lower cross bar no longer cover the entire bar. Maybe I'll make some new ones. Also, I had to cut the v-slot rails since you need a length of 994 (for the 1500x1000mm frame.) It installed fairly easy, just lots of sliding nuts and screws. Performance (tracking, rigidity, etc.) appears to be the same. Great idea Mel!

    IMG_7529.JPG IMG_7528.JPG
     
    GrayUK, Ryan Lock and Priit Paat like this.
  19. Ryan Lock

    Ryan Lock Veteran
    Builder

    Joined:
    Oct 12, 2014
    Messages:
    530
    Likes Received:
    293
    Nice, looks like a pretty simple mod.
     
  20. mel earp

    mel earp New
    Builder

    Joined:
    Oct 12, 2015
    Messages:
    30
    Likes Received:
    17
    Really pleased that it worked. I have the parts ready to go, but Christmas preparations seem to be getting in the way. All the family, including grandchildren are coming to ours this year and that is causing some minor panic:)

    I am getting a few hours here and there. I am using the set up as it is to make a toy for grandchild number three. It's something I have made before, but using the saw and router tables. I am really using this to test and hone my techniques. It involves a surprising number for something I could have made in about a day NOT using the cnc. I have managed to break two bits (0.5mm ones, so fragile) in the process. I'll write this up when I have finsihed.
     
  21. mel earp

    mel earp New
    Builder

    Joined:
    Oct 12, 2015
    Messages:
    30
    Likes Received:
    17
    It's been a while since I was able to do anything but this week has seen progress. I have raised the machine and tidied the wiring.

    In making the toy (more later) I came to realise that I won't be doing production runs, so pretty well everything will be one off and require a jig of some sort. I'm a big fan of jigs in my normal woodworking. So I need quite a lot of room under the spindle. So I have gone for broke and raised the machine by a full 80mm and not just the 40mm which would result from replacing 40 with 80. I made some plates and cut some 80mm to fit. I have done very little with aluminium before so I bought an aluminium cutting blade for the saw table and that really helped. A couple of pictures to show the new working height.
    IMG_20160120_115242.jpg
    IMG_20160120_115233.jpg
    With the new aluminium blade I also made a proper mount adapter for the spindle.
    IMG_20160120_115411.jpg

    I'll show you the wiring in the next post.

    Mel
     
    GrayUK and Ryan Lock like this.
  22. mel earp

    mel earp New
    Builder

    Joined:
    Oct 12, 2015
    Messages:
    30
    Likes Received:
    17
    So to the wiring.

    I mounted both the xPro and the spindle controller inside an ABS box attached to the gantry. The socket is for the touch plate, the switch is between manual and auto spindle control, and the potentiometer is the manual speed control.
    IMG_20160120_115437.jpg
    I used some echain for the y-axis. It carries four cables - controller 24V, spindle 48V, USB and an ethernet cable for the xPro control inputs.
    IMG_20160120_115314.jpg
    All the other cables are wrapped in white cable tidies. Since my x-axis is only 500mm it didn't need echain and it was quite simple to do. I also have put shielding on all the stepper cables and the cable tidies hold that nicely.
    IMG_20160120_115326.jpg
    It was very fiddly and took a while to make all the bits and ensure clearances etc. I had one heart stopping moment. When all was finished, so I thought, I switched on and - Nothing. After several hours of troubleshooting, it turned out that my ATX power supply had given up the ghost, so I have switched to a 24V supply.

    Mel.
     
  23. mel earp

    mel earp New
    Builder

    Joined:
    Oct 12, 2015
    Messages:
    30
    Likes Received:
    17
    Here's the little toy for the grandson. It's a counting box, with 7x100's, 25x10's and 50 singles. I cut the parts on the table saw. I used the Ooznest to do the grooves. This was a real voyage of discovery.
    IMG_20151219_093053.jpg
    At first I thought that the grooves would be best with a small bit. I tried a 1mm straight at 1mm depth and broke two of those. I ending up with a 2mm ball nose and that worked OK.
    The real challenge was figuring out how to do both sides of the 100's and all four sides of the 10's correctly aligned. So I made a jig which would hold 1x100 or 10x10's. The jig was clamped to the base board and the pieces placed in the jig in turn. That way alignment is pretty good. Given the numbers, this required the operation to be carried out 28 times, so the jig paid for itself.

    Mel.
     
    Ryan Lock likes this.
  24. Ryan Lock

    Ryan Lock Veteran
    Builder

    Joined:
    Oct 12, 2014
    Messages:
    530
    Likes Received:
    293
    Great work Mel! i am getting a lot of people looking to raise their OX, your posts and dave's are sure to help.
     
  25. Woodworksjoinery

    Builder

    Joined:
    Dec 13, 2015
    Messages:
    1
    Likes Received:
    0
    I will be rasing mine in a similar way to Mel...I like what he's done
     
  26. Chillimonster

    Chillimonster Well-Known
    Builder

    Joined:
    May 6, 2015
    Messages:
    153
    Likes Received:
    81
    Well after exchange some emails with Ryan over the last couple of days, i'll be ordering the 1000 x 1000 kit tonight / tomorrow. Going to be adding the second belt during the build process.

    The rapid response of Ryan, plus the thriving community of helpers is whats sold it for me. It'll be being used for my arcade machines ( www.facebook.com/ChillisArcade ) as some of the panels will be much easier to produce, and will allow me to prototype new ideas easier (and i have lots and lots of ideas!)

    It does however lead me onto a few questions.

    I already have a Kress 1050 spindle from my old stepcraft CNC (Excellent machine, if a little lightweight, and limited in what can be done upgrade wise), and a licensed copy of Mach 3, and a decent PC to run it from.

    I will however need a controller, and a PSU. I dont mind ditching Mach 3 if required.

    What would be the best options as far as ease of setup and use goes. With the stepcraft i just loaded the profile to Mach3 and away i went. I appreciate its not going to be quite that easy, but its the prie you pay for a better more flexible system i suppose.


    Chris
     
  27. takini

    takini New
    Builder

    Joined:
    Jan 24, 2016
    Messages:
    2
    Likes Received:
    0
    Hi all!

    I stand by this channel since I've been reading in recent weeks .. (clarifying that use the translator to write ..)

    I have recently ordered a kit to a cnc 1000X1500mm Ooznest! (I'm pretty excited and at the same time a little lost ..)
    I have some experience in cnc 3 axis with 3 stepper-motors
    but with this kit settings with 2 motors in Y ....

    Anyway, I have some doubts in reference to the appropriate driver.

    Greetings to all for sharing experiences in this channel.

    Jose B.
     
  28. Chillimonster

    Chillimonster Well-Known
    Builder

    Joined:
    May 6, 2015
    Messages:
    153
    Likes Received:
    81
    Order Placed:

    1000 x 1500 OX
    24V PSU
    CNC XPro Controler
    Additional belt for dual belting it all.

    Better get my workshop reorganised as i've gone a little bigger that i first thought i would , but what the hell - it just means i can do more at once / bigger projects!

    :)
     
  29. Ryan Lock

    Ryan Lock Veteran
    Builder

    Joined:
    Oct 12, 2014
    Messages:
    530
    Likes Received:
    293
    @takini Thanks for ordering with us. Regarding controller drivers etc, i recommended using the xPro controller, it has 4-axis driver which can clone any of the other 3. So you set it to clone the Y, and so you have a driver for each motor.

    @Chillimonster Thanks for the order!
     
  30. Chillimonster

    Chillimonster Well-Known
    Builder

    Joined:
    May 6, 2015
    Messages:
    153
    Likes Received:
    81
    While i wait for my kit to be delivered i'm going to be 'playing' with software options to control the CNC xPro.

    Originally i was going to run a PC in the workshop but thought about using a raspberry Pi (Connected to a monitor, with keyboard and mouse) due to size etc.

    I notice that GRBL controller is not recommended for the CNC xPro - is this still the case - what are the issues running this combo?

    If thats a no-go what are the alternatives for a self contained solution (No internet in workshop)?

    I used to use Mach3 on my Stepcraft, but as that is not compatible..........

    Any help is appreciated.
     

Share This Page

  1. This site uses cookies to help personalise content, tailor your experience and to keep you logged in if you register.
    By continuing to use this site, you are consenting to our use of cookies.
    Dismiss Notice