Welcome to Our Community

Some features disabled for guests. Register Today.

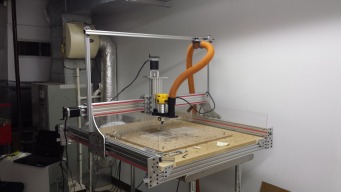
My CNC Router Built Around The New C-Beam Rail

Discussion in 'CNC Mills/Routers' started by Robert Bailey, May 30, 2015.

  1. gwandad

    gwandad Well-Known
    Builder

    Joined:
    May 12, 2014
    Messages:
    69
    Likes Received:
    55
    I discovered this same problem yesterday with the eccentrics & small wheels on the inner of the C. I discovered that I had some older eccentrics that were 8mm rather than the later ones which are 10mm.
    I think they came from OpenBuilds, but can't be sure. I had a few in my spare parts box. I'll be scrounging to get enough for my new build. Try OX CNC machine parts 5mm stainless steel eccentric spacer bouildlog Reprap ORD bot eccentricspacer V Slot aluminum extrusion-in 3D Printer Parts & Accessories from Computer & Office on Aliexpress.com | Alibaba Group
     
  2. Mark Carew

    Mark Carew OpenBuilds Team
    Staff Member Moderator Builder Resident Builder

    Joined:
    Jun 28, 2013
    Messages:
    2,759
    Likes Received:
    2,438
    All OpenBuilds eccentrics have now been redesigned for clearances but also contain a 10mm flange for a stable wheel to plate mount ensuring that no rocking occurs with the older smaller barrel of the 8mm eccentrics.
    Openbuilds Flange Eccentric Spacers
    [​IMG]
     
    David the swarfer likes this.
  3. gwandad

    gwandad Well-Known
    Builder

    Joined:
    May 12, 2014
    Messages:
    69
    Likes Received:
    55
    Thanks Mark. I've got a bunch on their way at present, so that should fix my problem. Also teach me to read the WHOLE description, won't it!
     
    Mark Carew likes this.
  4. Charles Roseberry

    Builder

    Joined:
    Mar 30, 2016
    Messages:
    68
    Likes Received:
    8
    I recently noticed the movement in the X on my machine as well. Probably due to the weight and mass of the Dewalt 611. Ill be watching this, as I do believe that another back plate and other wheels running adjacent would resolve this issue. Good call. Now to figure out what I need to add to my original X parts to make this happen.
     
  5. gwandad

    gwandad Well-Known
    Builder

    Joined:
    May 12, 2014
    Messages:
    69
    Likes Received:
    55
    Robert, I've been following closely your adventures with Frankinator & am very impressed with your work. I have just started a major rebuild and would like to use some of your design, but I have run into a real problem that will no doubt be a simple fix. No matter what I do I can't get yourGanrty 3.1 to build in full size. No matter what T do, the gcode makes the hole about 80 mm apart instead of 100! I took the advice I got & changed the camera in Script to parallel, but I'm still in trouble. I've imported it into aspire & a few other programs with the same result. Interesting that the ends worked out fine. I'm really stumped!Can you help, please? Just as an aside, I invested fifty bucks & bought Estlcam. It has trochoidal cutting. It really cuts well. I made your Y ends left & right in no time, cutting the full 6mm ali. at once. Amazing. I was pushing it at 35 mm/sec with the same cheap bits as you were using.
     
  6. gwandad

    gwandad Well-Known
    Builder

    Joined:
    May 12, 2014
    Messages:
    69
    Likes Received:
    55
    Robert, I've been following your "adventures" with Frankinator, for some time & want to use some of you designed parts in my rebuild. I've made a few OK & using Estlcam I was pushing those cheaap bits through the full 6 mm at 35 mm/sec. Amazing. However when I get to your sketchup files of Gantry 3.1 I have real problems. No matter what I do The size is wrong. I followed advice & changed the camera to parallel, but the distance between the wheel holes is around 80 mm instead of 100. I tried Aspire, same problem. Can you help, please? It will appear to measure OK, but the gcode always makes it small. The very little hair that I have left is in danger.
     
  7. Robert Bailey

    Robert Bailey Well-Known
    Builder

    Joined:
    Mar 23, 2015
    Messages:
    117
    Likes Received:
    71

    I use sketchucam so I am not sure how to help, I just pulled up the gantry and measured and it shows 99.7mm between the top and bottom holes for the wheels. my file is CNC Y Gantry Plate Rev-3.skp, I haven't loaded a 3.1. I am currently working on rev 4 of the end plates and the X & Z for more rigidity. I also created a internal bracket like Peter Oaks has to allow dual wheels on the gantry. I have it drawn up but haven't cut a test out
    yet. when testing I get the thin luan from lowes. cost a lot less than aluminum and lets me test fit before committing to aluminum.

    I have attached the internal gantry wheel bracket, be warned I haven't test cut it yet so double check the measurements. I modified the gantry file to make it so the hole positions should be the same.
     

    Attached Files:

  8. David the swarfer

    David the swarfer OpenBuilds Team
    Staff Member Moderator Builder Resident Builder

    Joined:
    Aug 6, 2013
    Messages:
    3,435
    Likes Received:
    1,908
    I am guessing you are exporting DXF from Sketchup and importing it into Estlcam, right?
    DXF is unitless, you have to set the import units before importing otherwise it will default to 'something', usually the one you did not want (-:
     
  9. gwandad

    gwandad Well-Known
    Builder

    Joined:
    May 12, 2014
    Messages:
    69
    Likes Received:
    55
    Sorry Mate, I wasn't specific enough. Your drawings measure spot on. To cut them I need to convert to .dfx, or import them to Aspire. They both seem OK until I convert them to gcode. That's where the problem ocurs. When I cut them, they are now incorrect! Would you be kind enough to let me know how you get from .skp file to gcode. I would prefer a way to get them to an accurate .dfx if possible because I really like Estlcam for cutting.
     
  10. gwandad

    gwandad Well-Known
    Builder

    Joined:
    May 12, 2014
    Messages:
    69
    Likes Received:
    55
    You are talking to simple old man! Yes that is what I am doing, but I'm afraid I don't understand the rest. How do I make dxf meaningful?
     
  11. Robert Bailey

    Robert Bailey Well-Known
    Builder

    Joined:
    Mar 23, 2015
    Messages:
    117
    Likes Received:
    71
    I use sketchucam by David the swarfer, I think a good portion of the forum uses it, plus if you have issues he sets you on the right path. I use it and sketchup because it is free. here at work we have solidworks and I have done a few projects for the engineering department, but they prefer to have it in their cad format.
     
  12. David the swarfer

    David the swarfer OpenBuilds Team
    Staff Member Moderator Builder Resident Builder

    Joined:
    Aug 6, 2013
    Messages:
    3,435
    Likes Received:
    1,908
    Now that is a million dollar question.... one I don't have an answer to. I am an IT geek and DXF has defeated me many times over the years. I avoid it.

    I guess I should look at the parts you are trying to make, but maybe you can get them cut directly from Sketchup using SketchUcam for the Gcode?
    Begin here...
     
  13. David the swarfer

    David the swarfer OpenBuilds Team
    Staff Member Moderator Builder Resident Builder

    Joined:
    Aug 6, 2013
    Messages:
    3,435
    Likes Received:
    1,908
    right, just looked at the gantry inside plate Robert Bailey posted. He has coded it for SketchUcam but using a rather odd size bit. If you need to change the bit size you have to remove and replace the outside cut (orange line) after doing so.
    The countersunk holes will bore just fine without change so long as the bit you use is smaller than the bored diameters (and is end cutting).
    All the other holes have 'inside cut' applied (blue lines) so they will have to be reapplied after a bit size change. I would remove the existing cuts and use bored holes instead.
    Read the help on the plunge hole tool and find out how to use the locked diameter feature. Remove the circle for the bottom right 7.12mm hole, it will interfere with the plunge hole.
     
  14. David the swarfer

    David the swarfer OpenBuilds Team
    Staff Member Moderator Builder Resident Builder

    Joined:
    Aug 6, 2013
    Messages:
    3,435
    Likes Received:
    1,908
    Here is a plot of my G-code using plunge holes.
    GantryX.png

    With ramping on at 10 degrees, the bit will not plunge straight down at any time, instead it will spiral bore the center of the holes and then either spiral out in layers(diam first) or spiral down (depth first) using stepover% as a step size.
     
  15. Robert Bailey

    Robert Bailey Well-Known
    Builder

    Joined:
    Mar 23, 2015
    Messages:
    117
    Likes Received:
    71
    yep that is the cheap ebay bits I get from china, they say 1/8 but when you measure the cutting tip it is .115. but for a 10 count of bits for around $20 Its better than $35 for a bit from toolstoday.com
     
  16. gwandad

    gwandad Well-Known
    Builder

    Joined:
    May 12, 2014
    Messages:
    69
    Likes Received:
    55
    David, Thank you indeed Mate!I spent a lot of the day going through 2 of your videos. I now know what SketchUcam is & will soon be able to manage what I need, Especially after the detailed instructions. You must have spent a lot of time on it I'm really appreciative of all this help. I've been using the same bits as Robert & that will make life easier. I've installed SketchUcam & am starting to play with it. Your excellent tutorials are so easy to follow. As soon as I can I'll be cutting those gantries. For the next few days there will be no tv, while I try to absorb the "David the Swarfer" videos on YouTube
    Done. I thought it great! I even did most of it myself. You are a very talented group!
    .
     
    David the swarfer likes this.
  17. gwandad

    gwandad Well-Known
    Builder

    Joined:
    May 12, 2014
    Messages:
    69
    Likes Received:
    55
    Thanks again. I can't believe the assistance you are giving!
     
  18. gwandad

    gwandad Well-Known
    Builder

    Joined:
    May 12, 2014
    Messages:
    69
    Likes Received:
    55
    Thanks Mate. I didn't realise the use of Sketchucam. I appreciate access to your files & hope to make good use of some of them.
     
  19. Robert Bailey

    Robert Bailey Well-Known
    Builder

    Joined:
    Mar 23, 2015
    Messages:
    117
    Likes Received:
    71
    here is a sample of what I do before cutting aluminum. pre test with luan
     

    Attached Files:

    David the swarfer and Mark Carew like this.
  20. gwandad

    gwandad Well-Known
    Builder

    Joined:
    May 12, 2014
    Messages:
    69
    Likes Received:
    55
    A very smart move! Robert & David, I tried your file Y Gantry Right flipped Rev-3 & had some really strange things happen. When I set everything to zero & set the start at lower left corner. On start, the gantry of my OX crashed into the back stops. On looking at the code it was only doing what it was told. After a lot of head scratching I started it in the middle of the piece of masonite I was using & away it went. I let it drill all the holes & then found I was back where I started. The holes for the carriage wheels are still only 80 mm apart. Can you offer any suggestions, please?
     

    Attached Files:

  21. David the swarfer

    David the swarfer OpenBuilds Team
    Staff Member Moderator Builder Resident Builder

    Joined:
    Aug 6, 2013
    Messages:
    3,435
    Likes Received:
    1,908
    See the little hourglass shape in the middle of the drawing? that is the X0Y0 point.
    If you prefer to have bottom left at 0,0, then you can remove that by using the tool with the hourglass icon, just select the tool then select the current position of the marker, the marker will disappear, and now 0,0 will be the bottom left corner of the 'safe area', the dotted lined rectangle.

    so, I'd say that this looks more and more like your machine calibration is off.
    if you position and zero the tool on the left somewhere, then give the command
    G21 G0 X100
    does it actually move 100mm to the right?
    and with Y of course
    g21 G0 Y100
    should move it exactly 100mm

    HOWTO Calibrate your OX or C-Beam
     
    #171 David the swarfer, Jun 24, 2016
    Last edited: Jun 24, 2016
  22. gwandad

    gwandad Well-Known
    Builder

    Joined:
    May 12, 2014
    Messages:
    69
    Likes Received:
    55
    David, you are right, as usual. I've had the OX for about 3 years and have gone through a series of control cards starting with tiny G and the last one with the X pro. A week or so ago, I changed to all separate M542 drivers. I had used the same settings for Mach3 as I had used in Grbl, or at least I thought so. The truth of the matter is I had it all stuffed up. I spent a fair bit of time this afternoon sorting it all out is now running well. There is a silver lining to this crap cloud. If I hadn't made this mistake, I would never have found out about SketchUcam, so therefore it has been a win for me. Thank you again for all your help. I don't know where I would have been. Just as an aside, the way I was taking the files from Sketchup into Estlcam actually works. What I was doing was deleting everything in the drawing except the absolute minimum. I needed to show the position of the holes. I then exported that as a DXF file into Estlcam. The reason it didn't work out for me was the fact that my machine was stuffed up. I wouldn't necessarily recommend the methodology, but it does work! However SketchUcam and I have started a firm friendship that I think we'll go a long way together. I'm sure I'll be calling on you yet again but at least I will have watched your videos and have a clue about what I'm talking about.
     
    David the swarfer likes this.
  23. Robert Bailey

    Robert Bailey Well-Known
    Builder

    Joined:
    Mar 23, 2015
    Messages:
    117
    Likes Received:
    71
    yes calibrate and then some. I used my dial indictors for short runs, but still had issues on long travel. I picked up an aluminum straight edge that had English and metric on it from home depot
    and started running it 750mm using an engraving bit, comes to a nice point. I found that at that distance I gained over 1mm. we did a lot of measurements and calculations and finally came
    up with the best repeatable movement. we did several test cuts on 1/4" acrylic making 30mm squares and we got it within a couple thousands, which was good enough for what I am doing
     
  24. gwandad

    gwandad Well-Known
    Builder

    Joined:
    May 12, 2014
    Messages:
    69
    Likes Received:
    55
    I took your advice & made trial cuts (1/8 3 ply). No probs. Cut alum. & my machine won't cut as deeply as yours. Anything over .345, it digs in & wrecks. Tried a large cut eventually using .333. Did quite well until it broke thru on the last bit. The x axis visibly slowed down & when it thought it was at the end, it turned left & cut into the body. (lost steps??). This has happened in wood as well. It seems there isn't enough power? I have the drivers set at 1600. Would I get a significant improvement dropping that to 800, do you think? This is part of the reason for going to a larger machine with acme instead of belts. Have you had anything like this?
    I'll keep at it until I get it done. It's just frustrating!
     
  25. Robert Bailey

    Robert Bailey Well-Known
    Builder

    Joined:
    Mar 23, 2015
    Messages:
    117
    Likes Received:
    71
    I am running the TinyG with the current pots turned up to about 2/3 and running a 240w / 24vdc supply. since the bit I get come from china, I don't have any specs for speeds and feeds so I use the
    attached sheet for the toolstoday.com bits. before david sit me on the right path I broke 2 of their $32 bits. I cut aluminum at .004 per tooth and no more then .0394 d.o.c, but most of the time I use .0156 or 1/64"
    takes more time but seems to work best for me. most of the aluminum I cut is 6061-t6 and 5005.
    I also use aluminum cutting fluid, really makes a difference.

    use the formulas at the bottom of the page, and remember that the files I uploaded may have been last used on wood.
     

    Attached Files:

    #175 Robert Bailey, Jun 27, 2016
    Last edited: Jun 27, 2016
  26. David the swarfer

    David the swarfer OpenBuilds Team
    Staff Member Moderator Builder Resident Builder

    Joined:
    Aug 6, 2013
    Messages:
    3,435
    Likes Received:
    1,908
    Stepper power drops off sharply with increased microstepping.
    This is why you will see me say 'use the lowest microstepping that gives you the resolution you NEED'.
    More resolution than you need is robbing you of power. More power translates to faster rapid movement, faster cutting, or deeper cutting. (of course we can get more power from higher voltage or more amps through the motors, or both, but then we need to deal with the heat).

    So, yes, dropping from 1600 microstepping to 800 will probably solve your problem.

    For most uses we probably don't need more than 0.1mm accuracy, roughly 0.004". So if we set resolution to about half that, we should be doing pretty well, right? (except PCB's...).

    Note that resolution is not the same as accuracy. We can set a high resolution (more microsteps) but we can never get that much accuracy. This is because there is always some error in the motor position due to load either pushing it ahead of the commanded position, or pulling it back.

    At the other end of the scale, stepper motors behave poorly when full stepping, suffering from major resonance problems, so we don't want to go to 1x microstepping.

    If you want to cut aluminum then I think you need Acme rods rather than belts. Or you need to go with a smaller machine (more rigidity) with careful setup, dual belts etc etc.

    Keep in mind that the OX was designed for wood and plastics, and the C-Beam Plate maker was designed for aluminum. The OX is big and belt driven, the C-Beam plate maker is small and Acme driven.
    I am never surprised when someone makes a 1.5mx1.5 OX and then complains about it being flexible (-:
     
    gwandad likes this.
  27. Robert Bailey

    Robert Bailey Well-Known
    Builder

    Joined:
    Mar 23, 2015
    Messages:
    117
    Likes Received:
    71
    David here is you an issue I have ran into with sketchucam, I am laying out a new hold down board and a spoil board, the spoil board is just through holes lined up with the hold down which worked fine.
    the issue I am having is I need the bottom holes on the pegs to be pocketed 50% for the alignment pegs, so they wont fall through. when I do a pocket on them I can get a couple of them done then sketchup
    goes into lala land with the circle of death. can you look at it and see what is happening.
     

    Attached Files:

  28. Robert Bailey

    Robert Bailey Well-Known
    Builder

    Joined:
    Mar 23, 2015
    Messages:
    117
    Likes Received:
    71
    forgot the other part of this piece, this is the counter bores for the 1/4-20 threaded inserts. they worked, didn't have a problem creating them.
     

    Attached Files:

  29. David the swarfer

    David the swarfer OpenBuilds Team
    Staff Member Moderator Builder Resident Builder

    Joined:
    Aug 6, 2013
    Messages:
    3,435
    Likes Received:
    1,908
    So you want all the little circles to make a hole 0.313" in diameter and 0.375" deep?
    and you are trying to pocket all 72 holes?

    Well, I didn't even try that (but I will later)....
    The right way to do those is to use the plunge hole tool to lay out a multihole pattern.
    1. I first inserted a couple of guidelines to make sure I have the position of the bottom left hole of the pattern since your drawing seems to be missing some of the holes
    2. Then I selected all the existing circles and made a group. This is to prevent those little circles interfering with the plunge holes.
    3. select the plunge hole tool
    4. hold down SHIFT and ALT and click the bottom left most hole position. SHIFT for 'large hole' and ALT for 'hole pattern'.
    5. enter the hole size, 0.313
    6. enter the spacing (3.5" for both) and hole counts, 9 wide by 8 high
    7. bingo, we have 7 holes on 3.5" spacing
    Yes, those are all 100% deep. Since they are all the same, I just set material thickness to 0.375" and overcut% to 100.
    Now, routing bits are not all created equal in term of plunging/drilling so I changed some parameters:
    • Ramping on: this prevents it plunging, instead it will spiral in
    • Stepover%: 51% will ensure that it cuts those 0.313 holes in one pass with the 0.25" bit. less than 50% would cut in 2 passes, a waste of time in this size.
    • Multipass depth: I did not actually change this but you can probably increase it and let the ramping angle limit do the job. This might cut quicker. Spiral bores are limited to the lesser of angle limit and multipass depth per turn.
    hmmm, some error uploading the file... I will try again later... (intermittant Firefox problem...)
    solved, my version of your file attached....
     

    Attached Files:

    #179 David the swarfer, Jun 29, 2016
    Last edited: Jun 29, 2016
  30. Robert Bailey

    Robert Bailey Well-Known
    Builder

    Joined:
    Mar 23, 2015
    Messages:
    117
    Likes Received:
    71
    yep that many holes, what I came up with is these holes fit 5/16" dowel pins so I can line up the material I am working with in the X and Y direction, the other points will be for the 1/4-20 inserts
    for the hold downs. after I have the material held down I remove the pins. it may be too many , but it gives me more options.

    thanks, I didn't even think about that way to do the holes, I have had several pockets that have done the same thing, the only way we found to get past it is to delete the object and recreate it. but I figured
    you might want to look at one to see if it is a but or operator error.

    Thanks again
     

Share This Page

  1. This site uses cookies to help personalise content, tailor your experience and to keep you logged in if you register.
    By continuing to use this site, you are consenting to our use of cookies.
    Dismiss Notice