Welcome to Our Community

Some features disabled for guests. Register Today.

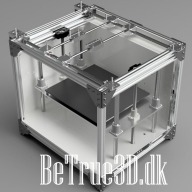
BeTrue3D Printer

Discussion in '3D printers' started by BeTrue3D, Jan 12, 2017.

  1. BeTrue3D

    BeTrue3D New
    Builder

    Joined:
    Dec 31, 2016
    Messages:
    20
    Likes Received:
    25
    BeTrue3D published a new build:

    Read more about this build...
     
  2. MaryD

    MaryD OpenBuilds Team

    Joined:
    Apr 13, 2016
    Messages:
    649
    Likes Received:
    639
    V-Slot would fit this project nicely.
     
  3. BeTrue3D

    BeTrue3D New
    Builder

    Joined:
    Dec 31, 2016
    Messages:
    20
    Likes Received:
    25
    I've looke at V-slots but I'm trying to keep noise and cost down, so rods with bushings are the perfect match for me. More importantly, I have no working knowledege about V-slots and it's just too expensive to start playing around with.
     
  4. BeTrue3D

    BeTrue3D New
    Builder

    Joined:
    Dec 31, 2016
    Messages:
    20
    Likes Received:
    25
    Maybe OpenBuilds would care to sponsor the needed V-slots in return for having the name displayed and mentioned whenever suitable. I have allready bought everything except aluminium extrusions and rods :)
     
  5. Jeffrey Drake

    Builder

    Joined:
    Mar 11, 2016
    Messages:
    8
    Likes Received:
    1
    What kind of DC-AC SSR have you got?

    I have been looking for a nice din rail mount one that doesn't break the bank :).
     
  6. BeTrue3D

    BeTrue3D New
    Builder

    Joined:
    Dec 31, 2016
    Messages:
    20
    Likes Received:
    25
    I have spent A LONG time adding all the parts, with descriptions and link to the shops I've bought them in, but my parts list is cleared now? What goes on here?

    Also, it asked me to specify build progress and license even though I did that at the very beginning...
     
  7. BeTrue3D

    BeTrue3D New
    Builder

    Joined:
    Dec 31, 2016
    Messages:
    20
    Likes Received:
    25
    Hello
    Hello Jeffrey.
    I had added ALL my items with links to the shops I used and description, but for some reason they have wiped my list :blackeye: It really took me a long time to add it all sigh.:cry:

    I'm using a DC-AC Solid State Relay from Robotdigg, where I've bought most of the internals. Link to the SSR: SSR10A DC-AC Solid-state Relay - RobotDigg
    I've used these for a long time (years) and been very happy using them.
     
  8. BeTrue3D

    BeTrue3D New
    Builder

    Joined:
    Dec 31, 2016
    Messages:
    20
    Likes Received:
    25
    Mark Carew likes this.
  9. Satiner

    Satiner New
    Builder

    Joined:
    Feb 20, 2017
    Messages:
    3
    Likes Received:
    0
    I see that the printer is in the process of building. What is missing in this article specify the drawings in format dwf / dwx same sinkers for motors and for example to the inner cladding .... Number of bolts details of all the elements .... just complete the form with straps and hotendom .... Then the chic project would have been without any complaints))
     
  10. Satiner

    Satiner New
    Builder

    Joined:
    Feb 20, 2017
    Messages:
    3
    Likes Received:
    0
    It was interesting to view options for this project:
    1. Set the electronics under the bottom.
    2.Install motors in the inside of the printer.
    3. Use linear guides instead of rollers.
     
  11. BeTrue3D

    BeTrue3D New
    Builder

    Joined:
    Dec 31, 2016
    Messages:
    20
    Likes Received:
    25
    Thank you for your feedback.
    I have the printer fully drawn in Autodesk Fusion 360 and it will be made available for viewing and download in any format you could wish.
    I had made a complete BOM including descriptions and links, but they disappeared. Later learned it was because I worked in 2 tabs, which Openbuilds doesn't like. I havn't had time to fill it all in again.

    I don't know what "just complete the form with straps and hotendom" means?
    What is a "chich project"?
    I'm Danish with english as foreing language, so sometimes misses some things :)

    I might have to remove my proejct though, as I'm not allowed to link to my blog for people to get builddetails etc, nor am I allowed to put graphics on my photos/images to protect myself against stupid lawsuits where people use my imagery, put their logos on it, and try to force me to remove my stuff - which has happened a few times.

    I feel it so extremely silly, as I'm just a private person, doing this as a hobby project and earning absolutely nothing on it. I write for free on instructables.com as well, where there is no such restrictions on writings on photos/images.
    dintid
     
  12. BeTrue3D

    BeTrue3D New
    Builder

    Joined:
    Dec 31, 2016
    Messages:
    20
    Likes Received:
    25
    Thank you for your feedback and input. Guess we just have different priorities, which is understandable. The reason for my choices is listed here :)
    1. I did not put electronics under the pritner, as I wanted easy access to it.
      The compartment I made just makes use of unused space.
      Putting the Duet WiFi under the printer would mean I'd have to make the legs higher as the WiFi antenna on the board needs external access and the controller board is rather high, so it doesn't fit under the aluminium extrusions as it is now.
      I have electronics under my um2 clones, and it's really annoying having to put the printer on the side when I need to change things as I have to put it on the side.. change.. raise it up an test.. then back down if it doesn't work etc.
      It might not be an issue if you never make changes, but making changes is what I do, and I'm pretty fed up with doing it like this. This printer is also heavy, so it just makes it worse :)
    2. Installing motors inside would be nice, but it would mean casing would be that much bigger with a lot of wasted inside space. A cardianl point was to make as small a case as possible, so putting motor inside was quickly removed as an option.
      I found a page where they have put the idlers inside, which I believe I can use though, so that is nice. two_axis_gantry.jpg
    3. I did not use linear guides as they make more noise and are much more expensive with no apparant gain. I have no experience building use linear guides, and wanted to make sure I got a perfect movement system.
      I would like to try using linear guides in a future project, as they can make more efficient use of the space in the cabinet. I'd have to enlarge the case in order to get electronics on the side or rear though, so most of the gain would be removed fast.
     
  13. Satiner

    Satiner New
    Builder

    Joined:
    Feb 20, 2017
    Messages:
    3
    Likes Received:
    0
    I understood. I myself have so far only read and watch the options of printers constructions, but thinking about the creation of the printer itself.
    I became interesting, and the location you get the coordinates for this type? The firmware will not inconvenience you?
    [​IMG] [​IMG]
    And it was not convenient to stay for example so ..?
    [​IMG]

    Russian language you probably do not know? I wanted to know more, maybe not careful I was, but you hodend by type Diamond Hotend - RepRapWiki
    Then how do you implement all of the colors, 5 colors?
     
  14. Pelted

    Pelted New
    Builder

    Joined:
    Mar 16, 2017
    Messages:
    26
    Likes Received:
    3
    I really like what you're doing with this design. The panels to keep things tidy are one of the biggest issues I've had with some other designs. This also seems to be very sturdy. I've looked at the Duet for my next printer because of the option to expand the number of extruders and you have done an awesome job with this. I've begun a BOM for a clone of your design here that utilizes a 300mm x 200mm heated bed plate. Just a slight widening on the Y axis. Anyway, can't wait to see how you finish this off. I think this will be my first custom build.
     
  15. panch47

    panch47 New
    Builder

    Joined:
    Dec 1, 2017
    Messages:
    2
    Likes Received:
    0
    your build looks great ! Have you done the 3d file to be downloaded? Thanks
     
  16. Jason Schoeman

    Builder

    Joined:
    May 24, 2022
    Messages:
    1
    Likes Received:
    0
    Did you finish this project?
     

Share This Page

  1. This site uses cookies to help personalise content, tailor your experience and to keep you logged in if you register.
    By continuing to use this site, you are consenting to our use of cookies.
    Dismiss Notice