Welcome to Our Community

Some features disabled for guests. Register Today.

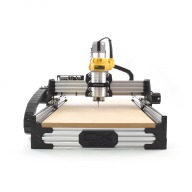
ooznest OX CNC Machine

Discussion in 'CNC Mills/Routers' started by Ryan Lock, Apr 28, 2015.

  1. Ryan Lock

    Ryan Lock Veteran
    Builder

    Joined:
    Oct 12, 2014
    Messages:
    530
    Likes Received:
    293
     
  2. srod

    srod New
    Builder

    Joined:
    Mar 11, 2017
    Messages:
    11
    Likes Received:
    0
    Hi,

    wondering if someone can help out / advise with my OX 1500x1500 build. The mechanical part is more or less all done (no belts installed yet), but I am a wee bit puzzled and worried because the gantry does not run true and straight when I move it by hand. What I mean is that I can move the left side of the gantry independently of the right side - at least to an extent I am not happy with. I cannot believe the machine will run with any kind of accuracy if I cannot address this.

    If I tighten the wheel eccentrics on both side plates then I can reduce this problem somewhat, but I then find that quite a bit of effort is required to move the gantry which cannot be right. I loosen the wheel eccentrics and the gantry moves smoothly, but not in a balanced way.

    I have triple checked the build and everything seems to be square.

    Is this something I need to be worried about or will the drive system remove this problem?

    At the moment I have little recourse but to remove the entire gantry assembly to see if there is a lot of inherent flex and if not, try to open up the distance between the y-end plates by a couple of mm perhaps, as I cannot otherwise see what might be the root cause here?

    Thanks in advance for any suggestions/advice.

    Regards.

    Stephen.
     
  3. Conehead

    Conehead New
    Builder

    Joined:
    Aug 30, 2016
    Messages:
    38
    Likes Received:
    5
    So you tried to loosen all the eccentric spacers?

    By the way. I want to flatten my wasteboard. What is the maximum feedrate I should go for?
    If I calculate the Feedrate with 0.023 chip load and 3 flutes and 18.000 rpm it suggests a feed rate of 3400 mm / min (for MDF wasteboard)?
    This sounds way too much, or can this machine handle it?
     
  4. srod

    srod New
    Builder

    Joined:
    Mar 11, 2017
    Messages:
    11
    Likes Received:
    0
    Yes all eccentrics loosened. I will remove the gantry tomorrow and disassemble the base to see if I can see what is afoot. A bit of a puzzle at the moment.
     
  5. Rodm

    Rodm Well-Known
    Builder

    Joined:
    Jan 3, 2017
    Messages:
    121
    Likes Received:
    42
    A newbie (don't have working machine yet) question. Would it be uncommon or a problem if the gantry racks a bit when moved by hand - motors not loaded? I though or was thinking when y is run with two motors they should have independent home switches to align - realign before a new project is started?
     
  6. Dale Y

    Dale Y New
    Builder

    Joined:
    Jun 20, 2016
    Messages:
    46
    Likes Received:
    6
    Still somewhat a rookie here too, but unless you have a problem with your drive system, once put together, the "Y" motors should always bein sync. The control board I have only have a limit switch connection to one motor as well.
     
  7. Giarc

    Giarc OpenBuilds Team
    Staff Member Moderator Builder Resident Builder

    Joined:
    Jan 24, 2015
    Messages:
    3,008
    Likes Received:
    1,676
    Your two y steppers will keep them both running straight. I can do the same with my gantry. Due to the distance between the two sides it is easy to move one side without the other. Think of it this way, if you pushed equally on both sides with your hands at the same time, it would run true. That is the stepper's job which is why there is one on each side of the gantry.

    I surfaced mine at 4000mm/min.
     
  8. srod

    srod New
    Builder

    Joined:
    Mar 11, 2017
    Messages:
    11
    Likes Received:
    0
    Ah I was hoping that might be the case with the combination of belts and steppers. That makes me feel a bit better. Was just a little alarmed by the amount of this 'lateral movement'. It has left me a bit unsure though how much to tighten up the wheel eccentrics on the two y-plates? How easy should the gantry be to move by hand (without belts and steppers connected) ? For example, should I be able to move it by jabbing at it with my fingers or should it require a bit more force?

    I will actually disassemble it today and with the aid of a second person (initial assembly was just me alone) reassemble and recheck everything. No point leaving anything to chance.

    Thanks for your help - much appreciated.

    Stephen.
     
  9. DazTheGas

    DazTheGas Journeyman
    Builder

    Joined:
    Jan 27, 2015
    Messages:
    75
    Likes Received:
    142
    @srod you will be surprised once your belts are installed and motors energized how rigid things will become, I often test profiles for other users and have forgoten on one occasion to switch off the psu to the steppers, man you want to see how well you can rip a gantry apart when the Y axis motors run in opposite directions................:cry::cry::cry::cry::cry:

    DazTheGas
     
  10. srod

    srod New
    Builder

    Joined:
    Mar 11, 2017
    Messages:
    11
    Likes Received:
    0
    Now that is something I do not want to see... at least not with my own machine! ;)

    Things are running much smoother now. I took the gantry and the entire base apart and with some assistance this time, re-tensioned the wheel eccentrics and reassembled paying far more attention to keeping everything square. The aforementioned 'lateral movement' problem is now much improved and the gantry runs much smoother. A 1001 measurements in all directions and planes confirms that all is square.

    Just gives me confidence to continue the build now knowing that the belts and energised motors will tension everything up nicely.

    Thanks guys.

    Stephen.
     
  11. Giarc

    Giarc OpenBuilds Team
    Staff Member Moderator Builder Resident Builder

    Joined:
    Jan 24, 2015
    Messages:
    3,008
    Likes Received:
    1,676
    I tighten my wheel eccentrics to the point I can still spin the wheels against the v slot by hand but with some difficulty. Pretty vague, huh? ;)
     
  12. Ryan Lock

    Ryan Lock Veteran
    Builder

    Joined:
    Oct 12, 2014
    Messages:
    530
    Likes Received:
    293
    Hi, sorry i wasn't about to answer the questions, but they seem to be all answered. Regarding the feed rate, on some calculators you can set a percentage of that feedrate to run at for roughing/fine pass etc.
     
  13. Ronald4418

    Ronald4418 Well-Known
    Builder

    Joined:
    Nov 4, 2015
    Messages:
    218
    Likes Received:
    33
    I know it's an added expense and that some of us are in it for the experience or for hobby use. But if you would are interested in a Feed and Speed Calculator that can be geared towards our benchtop machines. Take a look at G-Wizard. It can compensate for our machines which aren't as rigid as professional machines which tool manufacturers list their rates for. Though not a paying customer as of yet. I have used the trial version to great success. In other words, No Broken Endmills or Router Bits.
     
    GrayUK and Ryan Lock like this.
  14. srod

    srod New
    Builder

    Joined:
    Mar 11, 2017
    Messages:
    11
    Likes Received:
    0
    Well, finally got the mechanical and electrical parts of the OX 1500x1500 build completed (only had a couple of hours each day to work on it) and plucked up the courage to flick the power switch and connect the laptop up. Issued some jog commands from UGS and... well, beat me with a frying pan if the darn thing responded and ran very well indeed. To say I was surprised would be a bit of an understatement as I was expecting to have overlooked some electrical connection or other or indeed wired the whole thing up backwards - but nope! Very impressed.

    The assembly instructions and labelling of parts from Ooznest are first class - they leave absolutely nothing to chance. If a dim-witted bumpkin like myself can follow the instructions and complete the build then absolutely anyone can.

    Must admit I was expecting the steppers to be somewhat noisy or 'clunky' at first, but they seem to run very sweetly. Didn't even need to adjust the current for any of the motors (not yet anyway!)

    Passing a more critical eye over the near completed machine, and knowing that this machine is going to get a lot of use, the one aspect of it that has me a little concerned in terms of an apparent 'weak point' is the fact that the drive belts are secured at each end of the relevant rails with screws. Seems to me that it will not take much for the belts to slip or, worse, simply tear from underneath the said screws. Has anyone developed a better way of securing these belts? I would ideally like not to rely on these screws. Has anyone, for example, tried looping the belt through the end plate and back on itself and then simply using a small hose clip or some such?

    Thanks.

    Stephen.
     
  15. Rhys Gerrard

    Builder

    Joined:
    Mar 3, 2017
    Messages:
    8
    Likes Received:
    0
    @srod Sounds great! Cannot wait to get ours next week. We're planning to make some jigs for CNC sewing machines we supply. Here is an example of one we've done with a laser cutter (outsourced) but now with the CNC Ooznest Router we should be able to do it all in our now and make things much quicker.

    [​IMG]

    I think belts will snap or perish overtime so once ours arrives I'll be treating them as a consumable part and maybe keep a couple just incase!

    Good luck!!
     
  16. srod

    srod New
    Builder

    Joined:
    Mar 11, 2017
    Messages:
    11
    Likes Received:
    0
    Hi Rhys, the image doesn't show for me for some reason? That sounds like some business you have there!

    Yes I intend ordering a 'maintenance' pack from Ooznest as soon as I get the machine actually cutting and earning it's keep. Some spare belts, wheels, even a couple of spare steppers wouldn't go amiss. Mind you spare belts are one thing, but I wouldn't want a belt to slip in the middle of some job or other which is why I will look at options for securing the belts in a different manner.
     
  17. Rhys Gerrard

    Builder

    Joined:
    Mar 3, 2017
    Messages:
    8
    Likes Received:
    0
    [​IMG]

    Let's see if this works now @srod - Maybe a bracket can be made and the belt ran down onto the brackets holding the v-slot aluminium together.

    Excited to say the least.
     
  18. srod

    srod New
    Builder

    Joined:
    Mar 11, 2017
    Messages:
    11
    Likes Received:
    0
    Now that is an awesome looking machine! Wow. Could you guys not simply build a cnc router yourselves?
     
  19. Rhys Gerrard

    Builder

    Joined:
    Mar 3, 2017
    Messages:
    8
    Likes Received:
    0
    I suppose we could! But it's having the time to design, test etc. I'm used to different software languages so using GRBL is going to be new for me. We draw the jigs or plates in CAD and then have already done some testing from converting .STL file from CAD into the VCarvePro Software and job has been a good on screen, now just need to run it on the Ooznest and we make our jigs out of Glass Reinforced Tufnol.

    The CNC machines we use run a simple X & Y axis, but like said previous. This new Ooznest machine should increase our jig design, R&D and production a hell of a lot now.

    One thing to ask actually, does anyone know if in the future I need to extend my CNC router (bought the 750mm X 750mm) how easy would it be to do? Just buy the V slot aluminium I guess?

    Rhys
     
  20. Bjorn Mikkelsen

    Builder

    Joined:
    Jan 22, 2017
    Messages:
    27
    Likes Received:
    1
    Hi people

    Im having an issue surfacing my spoilboard. I just finished attaching it after getting done with the build :)

    Attached pictures to show the problem.
    Im using the tool in the picture but with a diameter of 16mm.
    My stepdown is 0.8mm, feedrate is 800. Using Kress 1050 at 12500RPM.

    Another issue I might have, is that when the machine is moving in the Y axes it shackes alot more than when moving in the X and Z. Is that normal ?

    Thanks alot for the help.
     

    Attached Files:

  21. Ryan Lock

    Ryan Lock Veteran
    Builder

    Joined:
    Oct 12, 2014
    Messages:
    530
    Likes Received:
    293
    @srod Regarding the belt attachment, we haven't head of any issues relating to this. But looping it over on to itself would probably work.

    To extend the machine, just aluminium rails, belt, and the cable carrier would need extending.

    The vibration shouldn't be too bad on the Y-Axis with the V3 Controller, maybe try upping the current a bit?

    This is due to the router not being square to the spoiler board, so i would take a look at this.
     
  22. Jestah

    Jestah Well-Known
    Builder

    Joined:
    Dec 4, 2013
    Messages:
    148
    Likes Received:
    84
    I have found that sliding a little copper shim onto the belt under the screw helps give a "washer" that help stop the twisting action of the screw face cutting into the the belt. Thin plastic shim slid in may work to the same effect.

    If you have a 3d printer I also think the belt tensoners on thinigyverse are amazing. Print only adjustable versions if your running double belts as this also helps adjust the top belts "timing" in relation to the glued in bottom belt.
    Openbuilds OX CNC router Belt Tensioner by Tklus
    Openbuilds OX CNC router Belt Tensioner by Tklus

    @Ryan Lock What is the best way to get a hold of you for a chat about stocking your kits in our shop in NZ? Feel free to DM your skype or number and a good (your local) time to call as it will save you having to decipher my dyslexic spelling!
     
  23. srod

    srod New
    Builder

    Joined:
    Mar 11, 2017
    Messages:
    11
    Likes Received:
    0
    Now that looks absolutely ideal. I don't have a 3d printer though.

    I reckon I can knock something up which is quite similar from plywood though. Worth a try. :)

    Thanks.
     
  24. Ryan Lock

    Ryan Lock Veteran
    Builder

    Joined:
    Oct 12, 2014
    Messages:
    530
    Likes Received:
    293
    Thanks for the link to that belt tensioner, haven't seen that one before. @Jestah I will shoot something over.
     
  25. Robert Towner

    Builder

    Joined:
    Sep 26, 2015
    Messages:
    9
    Likes Received:
    1
    These adjustable belt tensioners seem to be perfect for the single belt option. I actually just found this last week and have printed them in a couple different materials trying to find the best combination of strength and rigidity. I started with PLA, to brittle, next was PETG, to flexible, I think my last print of Matter Hackers NylonX seems to be just what the doctor ordered, very strong and rigid. I will be testing further over the next week and if they seem to be holding up well I would be willing to print some for cost of material and shipping for anyone interested. Feel free to pm me if you are interested. I will post up some pics tomorrow if all goes well after the 9-5 :)

    Cheers~
    Robert
     
    Ryan Lock likes this.
  26. Rodm

    Rodm Well-Known
    Builder

    Joined:
    Jan 3, 2017
    Messages:
    121
    Likes Received:
    42
    Nylonx? I'll look it up. What bed and extruder temps? Can an average 3d printer handle it?
     
  27. Robert Towner

    Builder

    Joined:
    Sep 26, 2015
    Messages:
    9
    Likes Received:
    1
    Average is definitely subjective, but a couple things to consider... It is definitely recommended to be using a hardened steel nozzle for this as the carbon is very abrasive. I think most printers could handle this but then there are the temps. I am following the recommended settings from Matterhackers with very good results at 260*C extruder temp. Bed temps though, I have bumped up a bit and using pva glue stick to get good adhesion at 80*C.

    I think it is also recommended to use an enclosed build chamber to keep the temps a bit more stable but I am printing in a fully open printer in a chili garage and it seems to be doing ok.

    As long as your printer can handle the higher temps I think you would be just fine and I definitely recommend this filament. It is one of my favorites!

    I will try to post some pics in the next day or two.

    edit: thought I would include a link MatterHackers - 3D Printing Supplies
     
  28. Muxa

    Muxa New
    Builder

    Joined:
    Sep 9, 2016
    Messages:
    23
    Likes Received:
    12
    @Ryan Lock, is it possible/safe to upgrade xPro v2 board with Grbl v1.1?
     
  29. Ryan Lock

    Ryan Lock Veteran
    Builder

    Joined:
    Oct 12, 2014
    Messages:
    530
    Likes Received:
    293
    Yup should be fine, may want to double check with @Michael
     
  30. Chillimonster

    Chillimonster Well-Known
    Builder

    Joined:
    May 6, 2015
    Messages:
    153
    Likes Received:
    81
    Finally got round to removing the CNC Xpro V2 from the machine (Mine is mounted on one of the side plates so a PITA to remove), and soldered the jumpers for fast decay. Also tweaked the current pots slightly as the y steppers were slightly noisier that i thought they should be.

    A few test runs and its night and day noise wise. The noisiest thing now is the spindle (Kress 1050 so a noisy bugger - must look at alternatives!)

    My advice to anyone that has not done this mod yet - get it done - its seconds of a job and makes a huge difference.

    Just the belts to change now and we are back in business (Didn't order the right amount of belt so thats a job for next weekend)
     

Share This Page

  1. This site uses cookies to help personalise content, tailor your experience and to keep you logged in if you register.
    By continuing to use this site, you are consenting to our use of cookies.
    Dismiss Notice