Welcome to Our Community

Some features disabled for guests. Register Today.

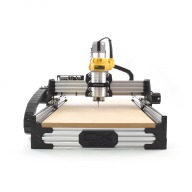
ooznest OX CNC Machine

Discussion in 'CNC Mills/Routers' started by Ryan Lock, Apr 28, 2015.

  1. Ryan Lock

    Ryan Lock Veteran
    Builder

    Joined:
    Oct 12, 2014
    Messages:
    530
    Likes Received:
    293
    Hi,

    On our shop OX, we pretty much use it to exclusively mill aluminium. Without cutting lubricant we cut at 0.25mm pass depth @ 600mm/min. We get 0.1mm accuracy without any mods made to the machine.

    Cutting lubricant helps alot! We once made a mistake, and set it to 2mm pass depth in alu, it did cut it but not very. Once I noticed i stood there spraying oil, and the rest of the part actually came out pretty well. Also investing in good quality end mills is a must.

    Ryan
     
  2. Ryan Turner

    Builder

    Joined:
    Mar 1, 2016
    Messages:
    68
    Likes Received:
    13
    @Ryan Lock

    What cutter are you using for this Ryan, just curious as your aluminium turns out pretty good :)
     
  3. gizmoo

    gizmoo New
    Builder

    Joined:
    Jul 3, 2017
    Messages:
    5
    Likes Received:
    1
    Well shallow cuts are fine , as long as the depth keeps increasing , sometimes panels are 3mm sometimes theya re 5/6 mm thick

    its hobby so time is not a concern, if machine needs 20min or 60min i dont care :)

    so ooznest ox or other machine ????
     
  4. Ryan Turner

    Builder

    Joined:
    Mar 1, 2016
    Messages:
    68
    Likes Received:
    13
    You are always going to get a trade off. With these home brew machines you get a bit of flex in the z axis when cutting. Generally as a rule you can cut at a max depth of half the diameter of your bit. So, if you want to cut through in 6mm passes get a 12mm bit.

    Its not as simple as the though, buy a 12mm bit, cut at 6mm depth and you waste a lot of material. Thats fine if you are happy to factor in the cost. Cutting MDF it works like a charm. Try that with aluminium and you are heading for trouble.

    Due to the rigidity of these machines I wouldn't even consider cutting at 6mm in one go when cutting aluminium. You'd probably end up with some wonky cuts in various places. When cutting aluminium, you are basically pushing the machine to the limits of what it can cut. You can't increase the depth of cut each time, you'll break something. You are better off spending the money on a bit you can use at a fast feed rate and nice and shallow.

    That's why I've asked Ryan what tool he's using. At the mo I am using a single flute that is for acrylic and can do aluminium. Its a slow feed rate at about 176mm/min.

    600mm/min would be great!


    Oh, you'll also need to find different size collets, that opens up the range of bits you can buy. The Dewalt I have can take 6mm and 8mm collets.

    Oh and another thing, you can't plunge cut with these bits generally, you can drill helical holes but your bit will have to be ( at a guess ) at least a third smaller than the hole you are drilling. Helically drilling a 6mm hole in aluminium with a 5mm bit will make the machine struggle. Do that in mdf and it will be ok.

    Have a look at Estlcam, its a great program, £50 and I bought it because I thought it would take some of the mystery of setting up my cuts. It's absolutely brilliant for creating tool paths and can control the new version of the CNC X Pro.

    Estlcam.de 2D / 3D CAM Software und CNC Steuerung...
     
    #754 Ryan Turner, Jul 6, 2017
    Last edited: Jul 6, 2017
    GrayUK likes this.
  5. gizmoo

    gizmoo New
    Builder

    Joined:
    Jul 3, 2017
    Messages:
    5
    Likes Received:
    1
    Thx Ryan, i have to digest it for a while , see my options ....
     
  6. Ryan Turner

    Builder

    Joined:
    Mar 1, 2016
    Messages:
    68
    Likes Received:
    13

    It's a lot to get your head around I know.
     
  7. Ryan Lock

    Ryan Lock Veteran
    Builder

    Joined:
    Oct 12, 2014
    Messages:
    530
    Likes Received:
    293
    The plates supplied in the kit we don't cut ourselves it would be way to much work. Everything we prototype we cut ourselves. I use a 1/8" solid carbide, 2 flute up cut for aluminium work. We will be stocking solid carbide cutting bits on our site very soon, along with 1/8" collets for the dewalt :duh:
     
  8. Ryan Turner

    Builder

    Joined:
    Mar 1, 2016
    Messages:
    68
    Likes Received:
    13
    Oh great. Makes sense to do this. Then you can say with this cutter at this spindle speed and feed rate you will get excellent results.
     
  9. Ryan Lock

    Ryan Lock Veteran
    Builder

    Joined:
    Oct 12, 2014
    Messages:
    530
    Likes Received:
    293
    Also take a look at getting a calculator like gwizard, coming in handy when working out what speeds to run at.
     
  10. gizmoo

    gizmoo New
    Builder

    Joined:
    Jul 3, 2017
    Messages:
    5
    Likes Received:
    1
    I read about stuff like that , still i would buy any machine that fits the bill even if i have to pay more , better to pay once then to pay 2x ( cheap can end up expensive )
     
    GrayUK likes this.
  11. Ryan Turner

    Builder

    Joined:
    Mar 1, 2016
    Messages:
    68
    Likes Received:
    13
    Yeah I tried G wizard, seems pretty good but

    @gizmoo There is a massive price difference between buying a machine that fits the bill at £10000 rather than £1500 that you can get on with. The £1500 machine will pay for itself faster and if you want a £10000 machine later you can get that.
     
    Ryan Lock likes this.
  12. olecam

    olecam New
    Builder

    Joined:
    Jun 6, 2017
    Messages:
    30
    Likes Received:
    6
    Hi -

    Is there any instructions on the best way to put limit switches on the machine, especially on the Z axis?

    Thanks in anticipation.

    --
    Olivier
     
  13. Ryan Lock

    Ryan Lock Veteran
    Builder

    Joined:
    Oct 12, 2014
    Messages:
    530
    Likes Received:
    293
    Hi,

    You can use limit switch kits like these: Limit Switch Mounting Kit

    But you would lose some Z-Travel. What you can do is glue them on back side the X-Plate Front, and have them trigger when the Threaded rod mounts come in contact.

    Ryan
     
    olecam and GrayUK like this.
  14. olecam

    olecam New
    Builder

    Joined:
    Jun 6, 2017
    Messages:
    30
    Likes Received:
    6
    Thanks Ryan
    Thanks Ryan! I just received a couple of inductive sensors and I'm going to give them a try. OpenBuilds limit plates are also ordered at a local dealer. I'll let you know my progress. :)

    --
    Olivier
     
    Ryan Lock likes this.
  15. olecam

    olecam New
    Builder

    Joined:
    Jun 6, 2017
    Messages:
    30
    Likes Received:
    6
    I'm doing my first pockets and I'm wondering if the result is conform with the OX. The real (build) sizes are always ~0.6 mm smaller than what I could expect according to the gcode. For example, I have a 30x30 pocket (software/gcode dimensions) which is actually cut at 29.4 x 29.4 in a particule board. Is it usual to eventually adding an offset in order to compensate this?

    Thanks! :)

    --
    Olivier
     
    #765 olecam, Jul 21, 2017
    Last edited: Jul 22, 2017
  16. Ryan Turner

    Builder

    Joined:
    Mar 1, 2016
    Messages:
    68
    Likes Received:
    13
    That's pretty good. You could try adjusting your steps. However you need to realise that different materials will be more accurate than others due to density and structure. You could probably get it better than 0.6 of a mm but you also need to take into consideration your feeds and speeds (slower will be more accurate, are your belts quite tight enough etc etc.
     
    olecam likes this.
  17. olecam

    olecam New
    Builder

    Joined:
    Jun 6, 2017
    Messages:
    30
    Likes Received:
    6
    Thanks Ryan! I've added a 0.6 positive offset in Fusion 360 and I got perfect holes (I'm doing a 20mm diameter holes grid, sort of MFT-like board)! :)

    BTW, is it best to really stretch all the belts (with the drawback of making the motor movements doing an horrible grating noise)?

    I also read somewhere around that some people use a double belts. Can it help, indeed?

    Any tips which might improve accuracy and reliability is of course welcome! Thanks in anticipation.

    --
    Olivier
     
    #767 olecam, Jul 22, 2017
    Last edited: Jul 23, 2017
  18. GrayUK

    GrayUK Openbuilds Team Elder
    Staff Member Moderator Builder

    Joined:
    May 5, 2014
    Messages:
    1,668
    Likes Received:
    627
    Olecam.
    Hi.
    The use of double belts, one could say, is almost essential. It is a small price to pay for what is a method of reducing stretch and increasing accuracy. :rolleyes:
    Stress, on the existing belts, is reduced to the small amount being lifted off the track momentarily, wrapped around the wheels and pinions, and then being put back down.
    Secondly, and just as important, the belt affixed to the track has become the control for the upper belt, and seeing as how that is not going anywhere, has become an additional means of accuracy.
    If you haven't done it yet, then I recommend you should. :thumbsup::thumbsup:
    Cheers
    GrayUK
     
    olecam likes this.
  19. olecam

    olecam New
    Builder

    Joined:
    Jun 6, 2017
    Messages:
    30
    Likes Received:
    6
    Ok, many thanks for the advice @GrayUK. I'll place my order for additional GT3 belts.

    Is there anything useful I should include also in my order? ;) Some kind of "great, you have your belts but did you pay attention to also order "the-very-important-thingummy" which is necessary in order to use them?"... if you see what I mean! :) Or, of course, any other stuff which is prety cool to have with the OX. Thanks!
     
  20. Ryan Lock

    Ryan Lock Veteran
    Builder

    Joined:
    Oct 12, 2014
    Messages:
    530
    Likes Received:
    293
    @olecam If your machine is always constantly 0.6mm below the size, then you could adjust your steps/mm. So in your case you need to set it 26.83.

    Double belting is a good mod to do. You just need double belt, and some double sided tape to stick the belt down. If cut the bottom one slightly short of the ends, then you still have room to use the tee nuts for the top belt.
     
    GrayUK likes this.
  21. olecam

    olecam New
    Builder

    Joined:
    Jun 6, 2017
    Messages:
    30
    Likes Received:
    6
    Hi!

    I expect to receive my belts order today (thanks Ryan!) and I won't be able to wait any longer to make the upgrade!

    I have found some threads in the forum which I have collected information from in order to make the double belts upgrade. Here is what I retained. Could you confirm that the following steps are OK? (sorry for my english) Please correct me if something is wrong or could be made in a better way.

    1. Cut the bottom belt approx. 40mm shorter than the length of the v-slot, in bevel, so that the top belt transitions smoothly down to the v-slot channel.

    2. Put the bottom belt in place in the v-slot channel using a double sided tape (VHB 4019 3M, 6mm). It is not necessary to stretch the belt overmuch (just straight it).

    3. Press the bottom belt with a roller to ensure that it is properly glued.

    4. Unscrew the motor and install the upper belt.

    5. Stretch the top belt moderately and secure it with tee nuts at each ends.

    6. Lift the motor upwards so that the belt is well clamp, then tighten the motor bolts.

    Any help/comments will be greatly appreciated. Thanks a lot! :)

    --
    Olivier
     
    spirre and GrayUK like this.
  22. Ryan Lock

    Ryan Lock Veteran
    Builder

    Joined:
    Oct 12, 2014
    Messages:
    530
    Likes Received:
    293
    @olecam Yup sounds like a suitable plan to me :thumbsup:
     
  23. lees76

    lees76 New
    Builder

    Joined:
    May 29, 2016
    Messages:
    15
    Likes Received:
    3
    anyone found anywhere to get the VHB 4019 3M, 6mm tape at a reasonable price, obviously only need about 4 meters of it
     
  24. Ryan Lock

    Ryan Lock Veteran
    Builder

    Joined:
    Oct 12, 2014
    Messages:
    530
    Likes Received:
    293
    I can see it for £24 on eBay, but that is for 33m :banghead:
     
  25. olecam

    olecam New
    Builder

    Joined:
    Jun 6, 2017
    Messages:
    30
    Likes Received:
    6
    I bought mine at rs-online.com for +/- the same price. I think amazon has some as well. I'd have gladly sent you a few of it but I'm afraid that it is impossible due to the strong glue it is coated with!

    BTW, I've upgraded the X axis without so much problem (only need to remove a couple of wheels). I still not yet finished the Y axes but most of the job is done (just need to tighten the motor bolts and put back the front v-slot in place). :D

    --
    Olivier
     
    Ryan Lock likes this.
  26. Ed Alger

    Ed Alger New
    Builder

    Joined:
    Jun 12, 2017
    Messages:
    1
    Likes Received:
    1
    It appears that for V2 xPro boards that pin A5 pinout is suggested to connect a probe. My question is: Is A5 the suggested connection for a "V3" xPro?? Or what is the correct probe connection for the V3 xPro please?

    Edit: Never mind. There is an obscure URL to "what's new in V3 which shows the Z-Probe pin.
     
    #776 Ed Alger, Aug 8, 2017
    Last edited: Aug 8, 2017
    Ryan Lock likes this.
  27. olecam

    olecam New
    Builder

    Joined:
    Jun 6, 2017
    Messages:
    30
    Likes Received:
    6
    Hi -

    The grub screws of both Y-axis GT3-Pulley are unscrewing by themselves regularly. I suspect that it is caused by the the vibrations which are still very high even after the double belts upgrade. Could it be due to the fact that I have clamped the belts too much when I lifted the motor back upwards during the upgrade? Is there anything I can do in order to prevent the screws to pull out?

    --
    Olivier
     
  28. lees76

    lees76 New
    Builder

    Joined:
    May 29, 2016
    Messages:
    15
    Likes Received:
    3
    You could use some clear nail polish obviously this will fill the hex key hole on the grub screw. meaning they may need replacing if you ever decide to remove them yourself
     
  29. Ryan Lock

    Ryan Lock Veteran
    Builder

    Joined:
    Oct 12, 2014
    Messages:
    530
    Likes Received:
    293
    Hi,

    You could try changing the grub screws to some small m3 bolts, you will be able to get a tighter turn on these with stripping the head.

    Ryan
     
  30. Marcus1

    Marcus1 New
    Builder

    Joined:
    Jan 13, 2017
    Messages:
    65
    Likes Received:
    13
    Olecam

    I bought some 10mm M3 Socket Cap screws. When inserting add some threadlock. No issues now.
    I am afraid the grub screws supplied strip the head too easily - preventing proper tightening.
    Make sure one locks onto the motor spindle flat!
     
    Ryan Lock likes this.

Share This Page

  1. This site uses cookies to help personalise content, tailor your experience and to keep you logged in if you register.
    By continuing to use this site, you are consenting to our use of cookies.
    Dismiss Notice