Welcome to Our Community

Some features disabled for guests. Register Today.

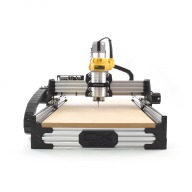
ooznest OX CNC Machine

Discussion in 'CNC Mills/Routers' started by Ryan Lock, Apr 28, 2015.

  1. Gary Caruso

    Gary Caruso OpenBuilds Volunteer
    Staff Member Moderator Builder

    Joined:
    May 19, 2016
    Messages:
    1,193
    Likes Received:
    532
    For the bumps, did it start after dual belting? what method of securing the bottom belt did you use? i'm thinking maybe the belts are not meshing well.
     
  2. Bjorn Mikkelsen

    Builder

    Joined:
    Jan 22, 2017
    Messages:
    27
    Likes Received:
    1
    Hi Gary. Its a long time since I did the dual belt, so yes it might have started at that time.
    For securing Im using the same methods as without dual belt (nut/bolt). If it was the belt not meshing wouldnt that occur when jogging the machine around too then ? It only does it when moving "freely/from spot to spot" in a job. Maybe I just dont see it when its actually cutting ?

    When I put the dual belts in, I just let slightly tightened the upper belt. If I tried to tension it, it would mesh right I felt. I tightened it by moving the motor upwards. How tight should the upper belt be ? THe lower is clued down.
     
  3. Gary Caruso

    Gary Caruso OpenBuilds Volunteer
    Staff Member Moderator Builder

    Joined:
    May 19, 2016
    Messages:
    1,193
    Likes Received:
    532
    The lower belt should be glued down, but with about 0.5mm in-between the belt and the v-slot extrusion, some use double sided tape of the right thickness, i used 0.5mm carbon fiber and glue, otherwise the wheels will not press the belts together well. maybe only when doing rapid movement it is an issue? the uper belt should not have tension end to end, just held down. but the loop going over the stepper pulley should be tight.
     
    Bjorn Mikkelsen likes this.
  4. Ryan Lock

    Ryan Lock Veteran
    Builder

    Joined:
    Oct 12, 2014
    Messages:
    530
    Likes Received:
    293
    @Bjorn Mikkelsen Also for the juddery motion under 800mm/min, putting the board in fast decay mode would solve this issue. This is done using the solder jumpers on the back of the board.

    This is where it gets confusing, on some boards the silkscreen is incorrect, so when you are soldering for fast decay it could actually be slow decay. I think yours will have the correct screen, however if you put it into fast decay mode, but it gets more juddery, then it is the wrong way round, so you need to solder the other jumper pairs.

    Ryan
     
    Bjorn Mikkelsen likes this.
  5. Bjorn Mikkelsen

    Builder

    Joined:
    Jan 22, 2017
    Messages:
    27
    Likes Received:
    1
    I already have soldered it to fast decay, but I didnt notice any difference. So you are saying I should try to solder the other pair instead ?
    Like if I have left and middle soldered I should solder mid+right and try that out ?
     
  6. Bjorn Mikkelsen

    Builder

    Joined:
    Jan 22, 2017
    Messages:
    27
    Likes Received:
    1
    Hmmm... I dont have anything under my lower belts, I thought the double tape was only to hold it down.
    Yes it seems like its only under rapid movements. So you are saying I NEED the 0.5mm extra thickness to make the belt mesh right ?
    And I dont have any tension end to end, just tightened using the motor.
     
    #816 Bjorn Mikkelsen, Sep 19, 2017
    Last edited: Sep 19, 2017
  7. Gary Caruso

    Gary Caruso OpenBuilds Volunteer
    Staff Member Moderator Builder

    Joined:
    May 19, 2016
    Messages:
    1,193
    Likes Received:
    532
    yes you need the extra thickness to make it mesh well, what glue did you use?
     
  8. Bjorn Mikkelsen

    Builder

    Joined:
    Jan 22, 2017
    Messages:
    27
    Likes Received:
    1
    Loctite :( So I have a bit of work infront of me. Do you have a link to what you used between the belt and the rail ?

    And thanks alot for the tip/info!
     
  9. Gary Caruso

    Gary Caruso OpenBuilds Volunteer
    Staff Member Moderator Builder

    Joined:
    May 19, 2016
    Messages:
    1,193
    Likes Received:
    532
    you mean loctite CA glue? might peal right off.. might not, can always flip the extrusion ;)
     
  10. Bjorn Mikkelsen

    Builder

    Joined:
    Jan 22, 2017
    Messages:
    27
    Likes Received:
    1
    Yeah just tried at the end, seems to come of pretty easily. And of course, I could just flip the extrusion, why didnt I think of that! :D
     
  11. Ryan Lock

    Ryan Lock Veteran
    Builder

    Joined:
    Oct 12, 2014
    Messages:
    530
    Likes Received:
    293
    I think you could have one of the boards where it is printed wrong. So you need to solder the other pair as you have described.

    Ryan
     
  12. Bjorn Mikkelsen

    Builder

    Joined:
    Jan 22, 2017
    Messages:
    27
    Likes Received:
    1
    I will do this later today. Thanks for the tips, I will come back with the result :)
     
  13. Bjorn Mikkelsen

    Builder

    Joined:
    Jan 22, 2017
    Messages:
    27
    Likes Received:
    1
    I just checked and I have soldered for fast decay as shown on this picture CNC xPRO V3 Controller Stepper Driver

    That should be correct?
     
  14. Ryan Lock

    Ryan Lock Veteran
    Builder

    Joined:
    Oct 12, 2014
    Messages:
    530
    Likes Received:
    293
    Hi,

    So a batch has been printed incorrectly. You need to solder for slow decay, to get fast decay.

    Best Regards

    Ryan Lock
     
  15. Gary Caruso

    Gary Caruso OpenBuilds Volunteer
    Staff Member Moderator Builder

    Joined:
    May 19, 2016
    Messages:
    1,193
    Likes Received:
    532
    is there a picture of the correct graphic? is this one correct?
    upload_2017-9-24_8-43-13.png
     
  16. Ryan Lock

    Ryan Lock Veteran
    Builder

    Joined:
    Oct 12, 2014
    Messages:
    530
    Likes Received:
    293
    It depends on what batch your board was in. But if you have bought within the last 2 months, you solder for slow to get fast decay mode.
     
  17. Gary Caruso

    Gary Caruso OpenBuilds Volunteer
    Staff Member Moderator Builder

    Joined:
    May 19, 2016
    Messages:
    1,193
    Likes Received:
    532
    That pic i posted is from the spark website.
     
  18. Bjorn Mikkelsen

    Builder

    Joined:
    Jan 22, 2017
    Messages:
    27
    Likes Received:
    1
    I bought mine 8 months ago. And it have the same print on the back as the one Gary posted.

    Im a bit confused, is it the print on the back that is printed the wrong way? If so then it should always be soldered the same way.

    Or is the printing the same but the components are switched around?
     
  19. Marcus1

    Marcus1 New
    Builder

    Joined:
    Jan 13, 2017
    Messages:
    65
    Likes Received:
    13
    Thanks Ryan

    Have joined the rails together using M3 Bolts and Nyloc nuts. It does increase the stiffness.
    The 3mm cutter I use for finishing is an Up-Down Spiral compression bit.

    It seems that there is a witness on the plunge (only slight) when it ramps down at 30 deg
    The 1st cut on the rough seems to be approx 1.5mm outside the rough profile. The other cuts are fine (3 levels in 9mm mdf) the finishing cut is only .5mm around the cut out therefeore leaving a "step" 3mm deep on the neg X face.

    Will try with a 6mm cutter to see if it is a flex in the cutter issue

    I have added 2 Idler pulleys on the X Motor mount screws to allow the belt (doubled) to have a larger contact with the G3 Gear. This has had a massive effect, stopping any belt jumping. It doesnt look possible to do the same mod on the Y axis(s)

    To anybody else struggling with Cut quality - before you cut anything and the motors are locked, put a small force on each of the x and y axis - if it moves at all, your belts need retensioning! Common sense, but still took me a while to learn!!!!!
     
  20. Ryan Lock

    Ryan Lock Veteran
    Builder

    Joined:
    Oct 12, 2014
    Messages:
    530
    Likes Received:
    293
    Hi,

    Ok, have you tried do a similar job but with just a normal straight cutter, and see how that turns out?
     
  21. Marcus1

    Marcus1 New
    Builder

    Joined:
    Jan 13, 2017
    Messages:
    65
    Likes Received:
    13
    Tried with a 6mm Straight Cutter. Better result, but it seems the first rough cut is .5mm different in X - the other 3 cuts in the level are good???????

    Any more ideas?
     
  22. Ryan Lock

    Ryan Lock Veteran
    Builder

    Joined:
    Oct 12, 2014
    Messages:
    530
    Likes Received:
    293
    Are you doing your finishing cut as a full depth cut? Because in V-Carve this is what it defaults to. What i like to do is make a separate profile cut, but set the allowance to zero.
     
  23. Gary Caruso

    Gary Caruso OpenBuilds Volunteer
    Staff Member Moderator Builder

    Joined:
    May 19, 2016
    Messages:
    1,193
    Likes Received:
    532
    What micro steps are you running? also post your GRBL $$ settings
    that is rough!

    You should probably start a new thread for yourself, or get this it going in a build discussion
     
  24. Biglouie

    Biglouie New
    Builder

    Joined:
    Apr 8, 2017
    Messages:
    11
    Likes Received:
    2
    Evening all...I wonder if anyone can help me..

    I have an Ooznest OX. Still havent cut anything with it yet :)

    I have put microswitches at each end of the 3 different axis. They all work, when I click them, they alarm and shut down the machine independently.

    But I have noticed some strange behaviour and it wont $H

    when I load up I immediately get this MSG: Check Limits. question, is that always the case if you have Hard Limits ON, or is this a problem? I am assuming its an issue, before I start unwiring stuff, I thought I would ask.

    Grbl 1.1f ['$' for help]
    [MSG:Check Limits]
    [MSG:'$H'|'$X' to unlock]
    [verbose]<Alarm|MPos:0.000,0.000,0.000|Bf:15,128|FS:0,0|Pn:YZ|WCO:0.000,0.000,-1.000>
    [verbose]<Alarm|MPos:0.000,0.000,0.000|Bf:15,128|FS:0,0|Pn:YZ|Ov:100,100,100>
    >>> $X

    [MSG:Caution: Unlocked]
    ok
    [verbose]<Idle|MPos:0.000,0.000,0.000|Bf:15,128|FS:0,0|Pn:YZ>
    ok

    So now its verbose and gone to idle, no alarm??? So does that mean I dont have a hard limits problem?

    If I try and $H it alarms immediately...

    >>> $H
    ALARM:8
    ok

    I'm not sure what good looks like, or bad looks like, so if anyone can help it would be magic. Ive had wires on and off and done various tests. It does seem seem to be a hard limit alarm, thats cleared when I $X??

    All help gratefully received,

    Rob
     
  25. Marcus1

    Marcus1 New
    Builder

    Joined:
    Jan 13, 2017
    Messages:
    65
    Likes Received:
    13
    Hi Ryan

    The tests I have done have not included the finishing cuts as this confuses the result. Only Roughing cuts 0.5 inside profile 3 Levels. Its the first level that is off.
     
  26. Ryan Lock

    Ryan Lock Veteran
    Builder

    Joined:
    Oct 12, 2014
    Messages:
    530
    Likes Received:
    293
    @Biglouie Ok, did you want to just try getting the machine homing first. So only have 1 limit on each axis, and hard limits turned off. Did you buy the limits off us? Also are you using UGS 2.0? Just so you are getting correct readouts of the work and machine position.
     
  27. Ryan Turner

    Builder

    Joined:
    Mar 1, 2016
    Messages:
    68
    Likes Received:
    13
    I've never had an issue with this. I don't use glue or double sided table, double sided can be a pain to remove and so can superglue. Super glue also give up at low temps. I just used knock down fittings to tension both belts.
     
  28. Ryan Turner

    Builder

    Joined:
    Mar 1, 2016
    Messages:
    68
    Likes Received:
    13
  29. Gary Caruso

    Gary Caruso OpenBuilds Volunteer
    Staff Member Moderator Builder

    Joined:
    May 19, 2016
    Messages:
    1,193
    Likes Received:
    532
    If you don't use glue or double sided tape why even dual belt? reminded me of the Flaming Lips "She Don't use Jelly" song!
     
  30. Ryan Turner

    Builder

    Joined:
    Mar 1, 2016
    Messages:
    68
    Likes Received:
    13
    Nevermind.. As I've said I tensioned both belts, it works
     

Share This Page

  1. This site uses cookies to help personalise content, tailor your experience and to keep you logged in if you register.
    By continuing to use this site, you are consenting to our use of cookies.
    Dismiss Notice