Welcome to Our Community

Some features disabled for guests. Register Today.

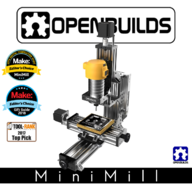
OpenBuilds MiniMill

Discussion in 'CNC Mills/Routers' started by Mark Carew, May 26, 2017.

  1. Michael Dwyer

    Builder

    Joined:
    Sep 26, 2017
    Messages:
    43
    Likes Received:
    10
    I did put the shim between the wheel and the spacer. I completely forgot about it and it would be easier to remove the shims from the wheels than add them to the screw nut assembly. After working 25 years as a mechanical engineer I can certainly appreciate that sometimes two minds are greater than one. I am never afraid to say I wasn't the one to think of it first. I truly like brain storming and engineering by committee so to speak. I can now add "engineering by internet forum" to my list of sayings.

    In any event, the x-axis was the easiest to add shims to the lead screw nut assembly and that did the trick. I'll probably remove the shims from the wheels on the y-axis so I don't have to remove the x-axis beam to accomplish adding shims to the lead screw nut assembly.

    Thanks Rick!
     
  2. Michael Dwyer

    Builder

    Joined:
    Sep 26, 2017
    Messages:
    43
    Likes Received:
    10
    Has anyone noticed that the MiniMill in its stock configuration has +80mm of z-axis travel, but there is only about 60mm of clearance under the end of the z-axis beam end plate? If I add a spoiler plate or some v-slot rail for securing work pieces, I lose more of the clearance.

    Mark and OpenBuilds team, this is not a criticism. Please think about the above as an improvement for MiniMill version 2. It will definitely be something I address for myself.
     
  3. Rick 2.0

    Rick 2.0 OpenBuilds Team
    Staff Member Moderator Builder Resident Builder

    Joined:
    Dec 20, 2013
    Messages:
    2,892
    Likes Received:
    1,551
    Plate should glide easily over the profile but without any looseness or play.
     
  4. Rick 2.0

    Rick 2.0 OpenBuilds Team
    Staff Member Moderator Builder Resident Builder

    Joined:
    Dec 20, 2013
    Messages:
    2,892
    Likes Received:
    1,551
    Shim the mini V-wheels, don't shim the regular solid V-wheels.

    And if you're really after accuracy, add a piece of aluminum tape beneath the nut block. When you go through the math there is a 0.1mm discrepancy between the center of the lead screw and the threaded hole in the nut block. This will help account for it.

    IMG_0580.JPG
     
    viljami, MaryD and Scotty Orr like this.
  5. evgeny156

    evgeny156 New
    Builder

    Joined:
    Mar 14, 2017
    Messages:
    5
    Likes Received:
    8
    I've prepared a project with vise directly gliding on X-axis CBeam profiles replacing x-axis plate. Base, insert nut and jaws are made of steel the rest is aluminium. Can send a project if you like.

    vise-steel-base-3.png vise-steel-base-2.png vise-steel-base-1.png IMG_3598-18-10-17-03-11.JPG
     
  6. alvingm

    alvingm New
    Builder

    Joined:
    Sep 8, 2016
    Messages:
    5
    Likes Received:
    1
    Hi @evgeny156 , can you please send me your vise design? Looking to make the SL vise but not sure if yours is much simpler :) thanks!
     
  7. Peter Van Der Walt

    Peter Van Der Walt OpenBuilds Team
    Staff Member Moderator Builder Resident Builder

    Joined:
    Mar 1, 2017
    Messages:
    14,917
    Likes Received:
    4,291
    Or instead of sending, post it on the Projects tab above
     
    Ariel Yahni and alvingm like this.
  8. evgeny156

    evgeny156 New
    Builder

    Joined:
    Mar 14, 2017
    Messages:
    5
    Likes Received:
    8
    I will post a project of this vise right after real build will be completed and checked for correct work =) Now only plate is ready.
     
    alvingm and Peter Van Der Walt like this.
  9. Peter Van Der Walt

    Peter Van Der Walt OpenBuilds Team
    Staff Member Moderator Builder Resident Builder

    Joined:
    Mar 1, 2017
    Messages:
    14,917
    Likes Received:
    4,291
    Super! Can't wait to see it
     
  10. Michael Dwyer

    Builder

    Joined:
    Sep 26, 2017
    Messages:
    43
    Likes Received:
    10
    I removed the shims from the wheels on the y-axis and that also did the trick. With shims added to the lead screw nut assembly on the x axis and the shims removed from the wheels on my y-axis, I no longer hear noise. Both move as smooth and effortless as could be expected.

    I made my first cut yesterday cutting a circle into a piece of plywood. I've never seen a prettier cicle in my life. LOL!
     
    Scotty Orr and MaryD like this.
  11. Michael Dwyer

    Builder

    Joined:
    Sep 26, 2017
    Messages:
    43
    Likes Received:
    10
    It gets better - I successfully generated g-code from a design within Fusion 360 and it performed perfectly on the mill as far as I can tell. I faked the work zero just to watch the motion. The code was for a joining plate to join two pieces of 20x60 v-slot rail to make a slotted bed on my mill. The plate is 120mm x 20mm with 6 holes so I can joint the v-slot rail at the ends. Unfortunately, I don't have a bit to make the holes. I thought I could tighten a 7/32 drill bit in my 1/4" collet, but the collet doesn't have that much play. The 7/32" (5.55mm) holes seemed the right size for 5 mm screws. I guess I will have to purchase a smaller (probably 1/8") end mill and mill the holes.

    I wish someone made a full set of drill bits with 1/4" round shanks. Any other ideas anyone?
     
  12. Scotty Orr

    Scotty Orr Journeyman
    Builder

    Joined:
    May 21, 2015
    Messages:
    315
    Likes Received:
    178
    I've also got the Makita router. I purchased a 1/8" collet (MRP-1250) from Elaire Corp: Elaire Corporation
    Then you can use 1/8" shank bits. (Some good ones available from Kodiak Cutting Tools.) BTW, 5.1mm is a better size for M5 screws.
     
  13. Michael Dwyer

    Builder

    Joined:
    Sep 26, 2017
    Messages:
    43
    Likes Received:
    10
    I made my own collet reducer last night with a piece of 0.016" aluminum sheet rolled around the 7/32" Cobalt steel drill bit. The my plunge rate was too fast on the first attempt and the drill bit walked. I slowed the plunge rate on the second attempt, which significantly reduced how much the bit walked. It was hardly noticable, but I ended up with a lot of burs around the edge of the hole on both sides of the aluminum flat bar. I also noticed that my hole spacing was larger than 20mm even with the 199.1 steps/mm settings suggested by OpenBuilds, which means I'm going to have to come up with my own calibrated setting. I'll set-up my dial indicator and get to work on measuring the actual distances.
     
  14. Michael Dwyer

    Builder

    Joined:
    Sep 26, 2017
    Messages:
    43
    Likes Received:
    10
    I discovered some play in the z axis that was contributing to the bits walking. I tightened things up a bit and everything looks great. Combined with some calibration, tightening up the z axis allowed be to drill 6 holes 20mm apart on a straight line. I look forward to doing some full blown milling as soon as I order some bits. I may play around with some wood using a router bit in the mean time. Probably a good idea to experiment with some wood anyway before I start milling aluminum.
     
  15. Peter Van Der Walt

    Peter Van Der Walt OpenBuilds Team
    Staff Member Moderator Builder Resident Builder

    Joined:
    Mar 1, 2017
    Messages:
    14,917
    Likes Received:
    4,291
    Real machinists will kill me for saying this, but I exclusively use woodworking routerbits on Alu: (;

    Because they are designed for high RPM i get a cleaner cut that using a proper endmill on the router (routers spin way faster than milling machines, thus many of the cheap router bits are designed for 4000-5000rpm. Dewalt 611p's slowest is like 16000rpm)


    Here's two videos of me milling Alu with 1/4 shank, single flute, straight woodworking bits


    alvingm, GrayUK and Scotty Orr like this.
  16. pete2015

    pete2015 New
    Builder

    Joined:
    May 28, 2015
    Messages:
    4
    Likes Received:
    0
    nice model, beginner question
    i checked XL plate 125x125mm
    X axis Cbeam rail 250mm but travel 120mm then Y axis rail 390mm but travel 195mm can assist me please?
     
  17. Scotty Orr

    Scotty Orr Journeyman
    Builder

    Joined:
    May 21, 2015
    Messages:
    315
    Likes Received:
    178
    The gantries run into obstacles. X-axis, you have the C-beam end plates, so subtract 125 (XL plate width) leaves 125mm travel. Y-axis has the support tower placed on top (80mm plus corner and other brackets, so subtract 80 and 125. In reality, max build area is about 125 x 150. My spoiler was 4.875 inches by 5.875 inches. (Had to raise the spoiler to get to 4.875.) The bit can't reach any more than that. There is a bit of extra travel at the front of the Y-axis for removing the work piece.
     
  18. pete2015

    pete2015 New
    Builder

    Joined:
    May 28, 2015
    Messages:
    4
    Likes Received:
    0
    thanks alots Scotty, understand now
     
  19. Rob.T

    Rob.T New
    Builder

    Joined:
    Dec 30, 2016
    Messages:
    1
    Likes Received:
    0
     
  20. BobenhamHotspur

    Builder

    Joined:
    Dec 21, 2015
    Messages:
    5
    Likes Received:
    0
  21. Cowbell321

    Builder

    Joined:
    Nov 24, 2017
    Messages:
    15
    Likes Received:
    17
    Will the makita 1 1/4 hp 6.5A router fit? It goes down to 10k rpm so I think that would be a good choice.
     
  22. Scotty Orr

    Scotty Orr Journeyman
    Builder

    Joined:
    May 21, 2015
    Messages:
    315
    Likes Received:
    178
  23. Cowbell321

    Builder

    Joined:
    Nov 24, 2017
    Messages:
    15
    Likes Received:
    17
  24. Giarc

    Giarc OpenBuilds Team
    Staff Member Moderator Builder Resident Builder

    Joined:
    Jan 24, 2015
    Messages:
    3,008
    Likes Received:
    1,676
    My experience with those DRV8825 drivers is they overheat and miss steps even with a fan blowing on them. Also, the arduino is not an official board, and some clones use inferior chips which are not compatible with GRBL. This one may work, but it may not (Known Issues · gnea/grbl Wiki · GitHub). The power supply is only 12 volts. I would go for 24 volts minimum. If you are planning on milling aluminum, I would get bigger stepper's. I use one roughly that size, but only on my Z axis.
     
  25. Cowbell321

    Builder

    Joined:
    Nov 24, 2017
    Messages:
    15
    Likes Received:
    17
    Thanks for the response. Okay, I can probably find steppers around 200-300 oz in on steppers online, but I have no idea how to find a control board and drivers for them. I definitely want to use grbl and I would like the steppers and controller to be under about $120 if possible. Any ideas?
     
  26. Cowbell321

    Builder

    Joined:
    Nov 24, 2017
    Messages:
    15
    Likes Received:
    17
    I think Im going to go with the kit, but get a 24v power supply. These steppers have about the same torque as the ones open builds sells with the mini mill, so they should work like everyone else's. I'll definitely add a cooling fan in the enclosure and see how it goes. I would get the prox, but it is too expensive.
     
  27. Michael Dwyer

    Builder

    Joined:
    Sep 26, 2017
    Messages:
    43
    Likes Received:
    10
    What's the best method to level the x axis gantry plate so that a dial indicator holds relatively steady (measuring vertical movement) when traversing a square pattern around the perimeter of the plate? If I had thin (0.001") shim washers, I would shim each of the wheels as required. Of course, I don't know where I could get 0.001" thin shim washers.

    Any ideas? How have others leveled the gantry plate on th Mini Mill?
     
  28. Cowbell321

    Builder

    Joined:
    Nov 24, 2017
    Messages:
    15
    Likes Received:
    17
    Foil tape? Maybe
     
  29. Rick 2.0

    Rick 2.0 OpenBuilds Team
    Staff Member Moderator Builder Resident Builder

    Joined:
    Dec 20, 2013
    Messages:
    2,892
    Likes Received:
    1,551
    Shave the plate level using the router and a surfacing bit. (This is of course assuming you are shaving a sacrificial/wear surface and not the gantry plate itself.) Be sure the router is true and perpendicular to the plate though or this will leave ridges in the surface.
     
    SuperDave42 likes this.
  30. Vasilis Vorrias

    Builder

    Joined:
    Jan 26, 2017
    Messages:
    2
    Likes Received:
    0
    Hi all
    Grate design. Congratulations to the designer team.
    I have a question about this mini mill. I am in electronics business but I do mechanics as well.
    This is my first CNC make and I want to use it for milling wood and aluminium (witch does it very nice as Ι can see) .
    My question is :
    1 - Can I do PCB milling as well with accuracy? Do you know anybody how did it? This is a must for my work.
    2 - Do you think that is wise to start building it now or to wait for version 2?
    In Greece where I live we have a supplier for V slot framework (which is grate) and this is a "key" for the make of the minimill
    Thanks in advance
     

Share This Page

  1. This site uses cookies to help personalise content, tailor your experience and to keep you logged in if you register.
    By continuing to use this site, you are consenting to our use of cookies.
    Dismiss Notice