Welcome to Our Community

Some features disabled for guests. Register Today.

Prusa i3 Bear Upgrade V2

Discussion in '3D printers' started by pek, Feb 8, 2018.

  1. pek

    pek Journeyman
    Builder

    Joined:
    Apr 17, 2017
    Messages:
    196
    Likes Received:
    130
    SteverJ likes this.
  2. pek

    pek Journeyman
    Builder

    Joined:
    Apr 17, 2017
    Messages:
    196
    Likes Received:
    130
    Here is the evolution of my Prusa i3 Bear Half Upgrade V1.0. As you can see it is now split into two versions depending your needs (HALF and FULL upgrade). There is also 3 different versions of the Full upgrade : one for MK2(s), one for MK2.5 and one for MK3.

    Because of all these versions, it is much more easier to store files and arrange everything in my GitHub than here (let me know if this is an issue). For now it is still in the DEV branch, will be moved soon ;)

    As there is several versions there is a different status for each of them.
    Half Upgrade : Build complete, manual and assembly instructions finished, currently waiting feedback from first users
    Full Upgrade MK2(s) : Build ongoing, will be finished before end of February. Assembly instructions will be ready soon after the build.
    Full Upgrade MK2.5 : I am waiting for my MK2.5 upgrade but it will be very very close to MK2s, only the RAMBo cover hinges are different. Assembly instructions will be ready soon after the build.
    Full Upgrade MK3 : No build as been tried yet but parts have been tested individually. Everything is ready except assembly instructions. I do not have the privilege to own a MK3, if someone would like to try the adventure that would be awesome!

    Big THANK YOU for all of you that support me in V1.0 and try the build as well !

    Another big THANK YOU to OpenBuilds team, without you that was not possible! And you have the best open source hardware!
     
    #2 pek, Feb 8, 2018
    Last edited: Feb 8, 2018
    SteverJ likes this.
  3. pek

    pek Journeyman
    Builder

    Joined:
    Apr 17, 2017
    Messages:
    196
    Likes Received:
    130
    Comparing with the Half upgrade V1.0, here are the new features :
    • Use smaller screws on Y motor mount to easily remove all motor screws when tightened to the frame
    • Improved manual
    • Stronger rod holders (and use less plastics)
    • PSU lower mount uses pockets for nuts to ease assembly
    • Feet are thinner
    • Nicer LCD supports
    • Minor improvements for better printing quality and durability
     
    SteverJ likes this.
  4. pek

    pek Journeyman
    Builder

    Joined:
    Apr 17, 2017
    Messages:
    196
    Likes Received:
    130
    I really hope this build will be eligible for the Ultimate PowerPack Giveaway :nailbite:. I have several ideas for a strong CNC machine and it will very useful for my projects and future!
     
    mcateerandy and SteverJ like this.
  5. pek

    pek Journeyman
    Builder

    Joined:
    Apr 17, 2017
    Messages:
    196
    Likes Received:
    130
    Some pics of the Full MK2s ongoing build

    5D3_1165.jpg

    5D3_1167.jpg

    5D3_1171.jpg

    :)
     
    SteverJ likes this.
  6. Terry Rector

    Builder

    Joined:
    Jul 2, 2017
    Messages:
    1
    Likes Received:
    0
    What is better or not between this design and the AM8 design?
     
  7. pek

    pek Journeyman
    Builder

    Joined:
    Apr 17, 2017
    Messages:
    196
    Likes Received:
    130
    Interesting question, I have never own an Anet8 nor build an AM8 frame but here why my design is better :
    • Prusa i3 is superior to Anet8 (heated bed, community, support, upgrades, ...)
    • More reliable and stronger because use more metal and less plastic (thx to openbuilds hardware)
    • My printed parts are optimized in lots of maters : selective infill, sharp angle, clean vertical holes, material saving, perfect fit and easy alignment, etc. The AM8 parts look very big and use too much plastic
    • Fix some dimensional errors made by Prusa (they might have been copied in the Anet8 as well). Check the issues here : Z rods are not parallel nor perpendicular to X, Dimension error on Z-axis-bottom-right and -left . I also improve the alignment of the Y idler which is a problem on MK3 for example
    • V shape of v-slot offers one more dimension to print part compared to T-Slots
    • Evolutive by supporting several versions of Prusa i3 : MK2, MK2s, MK2.5 and MK3 (for now)
     
    SteverJ likes this.
  8. pek

    pek Journeyman
    Builder

    Joined:
    Apr 17, 2017
    Messages:
    196
    Likes Received:
    130
    Some new pics of the building...

    5D3_1190.jpg

    5D3_1192.jpg

    5D3_1196.jpg

    5D3_1198.jpg

    5D3_1205.jpg

    I found one little issue for now, the top RAMBo base mount is a bit backward from the v-slot (this part is not visible in these pictures). I will have to double check why because in my Fusion 360 project using it fits perfectly using the original RAMBo cover from Prusa github.
     
    SteverJ likes this.
  9. pek

    pek Journeyman
    Builder

    Joined:
    Apr 17, 2017
    Messages:
    196
    Likes Received:
    130
    Okay so some bad news from this afternoon :
    • I have to increase a bit height of Z motor because I could not insert the motor otherwise
    • Bottom of Z axis is larger than top which is really weird and I do not understand where it come from. I have first mounted the "n" of the Z axis and then used it to define the larger of the Y base so it should be good. My printed parts and design looks good. I will go deeper in this.
    • I can do some small improvement on the RAMBo cover mounts to ease build and increase rigidity
    Y axis works fine, but I see some very little improvements I can do...
     
  10. pek

    pek Journeyman
    Builder

    Joined:
    Apr 17, 2017
    Messages:
    196
    Likes Received:
    130
    I found the problem! The Y axis is larger than the top by 0.9mm (the extrusion positions, not the printed parts). I will try another way to have top and bottom perfectly aligned.
     
  11. pek

    pek Journeyman
    Builder

    Joined:
    Apr 17, 2017
    Messages:
    196
    Likes Received:
    130
    I finish the build with a successful calibration \o/ . I have to apply several fixes, specially on Z axis, so wait before trying this V2 Full upgrade or you will be in trouble :D

    It is impressive how rigid is the printer now! Nothing comparable to MK2s or MK3! I am very happy :)
     
  12. pek

    pek Journeyman
    Builder

    Joined:
    Apr 17, 2017
    Messages:
    196
    Likes Received:
    130
    Some pics ...


    5D3_1251.jpg


    5D3_1256.jpg


    5D3_1257.jpg


    5D3_1266.jpg


    5D3_1272.jpg


    5D3_1284.jpg


    5D3_1297.jpg

    5D3_1211.jpg
     

    Attached Files:

  13. Stam

    Stam New
    Builder

    Joined:
    Dec 6, 2017
    Messages:
    3
    Likes Received:
    0
    I really like your design. You put a lot effort and thought in your build.
    I am looking forward to my MK2 upgrade! Now I need to find the money.
    The only thing, I was thinking that it could be better(?), is the orientation of the extrusions at the z axis. Placing the 40mm side (of the 4020 extrusion) along the y axis would make the build more resistant to back and forth vibrations thanks to the longer footprint along this direction. Just my thought.
    (Sorry for my English).
     
    #13 Stam, Feb 16, 2018
    Last edited: Feb 16, 2018
  14. JustinTime

    JustinTime Veteran
    Builder

    Joined:
    Dec 18, 2013
    Messages:
    784
    Likes Received:
    259
    Stam, it looks to me, in the pictures, that the z axis extrusions are exactly as you suggest, the 40 along the y axis the the 20 along the x axis.
     
  15. Stam

    Stam New
    Builder

    Joined:
    Dec 6, 2017
    Messages:
    3
    Likes Received:
    0
    May be my description isn't so clear. The narrow side looking front and the wide side looking inside.
     
  16. pek

    pek Journeyman
    Builder

    Joined:
    Apr 17, 2017
    Messages:
    196
    Likes Received:
    130
    First of all your english is good, at least as good as mine :D

    If you rotate the current Z axis extrusion by 90° that means the RAMBo cover will be 40-6=34mm further back. The problem is that all cables for extruder and heat bed will also be 34mm further back and they will be too short when the bed is moving forward. You will then need longer cables and the spiral wrap.

    Trust me, the Z axis like on the full upgrade is very strong ... much more than the X axis! I am also using 4x 90° aluminum joining plates for a reason (if you compare to Haribo mod). If you build it you will see how strong it is!

    Before starting the V2, I did some analysis to move the Z axis just in front of X axis in order to have bigger vslots, here is why I did not choose this method :
    • not necessarily stronger as the X axis rods will be more far away from the Z axis
    • it will be painful when you have to remove some print or clean up the heat bed
    • it was over complicated for no real advantage
    If you really need to make it stronger, first rework the X axis (I have several ideas for that). Then you can add an inverted L of vslots in front of the X axis (like the Lulzbot Taz 6 printers).
     
    #16 pek, Feb 16, 2018
    Last edited: Feb 16, 2018
  17. pek

    pek Journeyman
    Builder

    Joined:
    Apr 17, 2017
    Messages:
    196
    Likes Received:
    130
    Some news of the build. I have improved almost all printed parts for full MK2(s) and MK2.5! The Z motor mount was too low to mount the motors, so I had to move up everything by few millimeters. I also did few improvements on half upgrade parts. I did not touch the MK3 for now, it is quite a huge work to maintain 4 different versions! I will start during the week-end.

    I am printing the new parts now :)

    5D3_1319.jpg

    5D3_1314.jpg
     
    #17 pek, Feb 16, 2018
    Last edited: Feb 16, 2018
  18. pek

    pek Journeyman
    Builder

    Joined:
    Apr 17, 2017
    Messages:
    196
    Likes Received:
    130
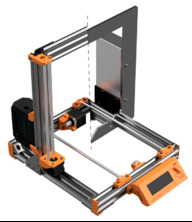
    And here is a rendering of the new Full Upgrade MK2s :

    full_mk2s_v2.jpg
     
    GrayUK likes this.
  19. pek

    pek Journeyman
    Builder

    Joined:
    Apr 17, 2017
    Messages:
    196
    Likes Received:
    130
  20. pek

    pek Journeyman
    Builder

    Joined:
    Apr 17, 2017
    Messages:
    196
    Likes Received:
    130
    Some pics of the latest (final) MK2s Full Upgrade build

    5D3_1321.jpg

    5D3_1331.jpg

    5D3_1342.jpg

    5D3_1356.jpg

    5D3_1363.jpg

    5D3_1369.jpg

    5D3_1372.jpg

    5D3_1381.jpg

    5D3_1385.jpg

    5D3_1402.jpg


    Here is a view of approx a third of the pieces produced for V1 and V2 development :

    5D3_1327.jpg
     
  21. pek

    pek Journeyman
    Builder

    Joined:
    Apr 17, 2017
    Messages:
    196
    Likes Received:
    130
    I have finished to adapt modifications from Full Upgrade MK2s "final" build to MK3. Here are some rendering :

    home_left.jpg

    right.jpg

    top.jpg

    bottom.jpg

    As explained, I cannot build this one as I do not have the chance to own a MK3. However, all parts are tested individually and Full Upgrade MK2s should have raised most of the build problems. If someone try, please give me some feedback, that will be useful for everybody that would like to build it!
     
    #21 pek, Feb 21, 2018
    Last edited: Feb 21, 2018
  22. pek

    pek Journeyman
    Builder

    Joined:
    Apr 17, 2017
    Messages:
    196
    Likes Received:
    130
    I am now working on finalizing all other renderings and working on assembly manual (Half Upgrade is done, starting on the Full Upgrade MK2(s)/MK2.5 at first, then Full upgrade MK3).

    Once manuals are done, I will have to convert the GitHub pages to OpenBuilds, that is not easy because of the multiple different versions of this project. I hope everything will be finished on time for the 28th February...
     
  23. jay3D

    jay3D New
    Builder

    Joined:
    Feb 21, 2018
    Messages:
    36
    Likes Received:
    3
    Hello Pek,


    I sent you an email before finding this thread. Sorry about that.

    While reading the Prusa forum I notices your github project regarding upgrading original Prusa i3’s to a rigid aluminum frame body.
    As status for the MK3 upgrade you list “? No build has been attempted”.

    Guess what: my MK3 arrived a while ago. :)

    What I am looking into at the moment is to silence the MK3 as much as possible. As side effect, print quality – which is already great – shall be improved too.
    Due to the many modifications “necessary” (see the ‘tune the x-/y-/z-axis’ threads from RDH) I have to disassemble the MK3 almost completely anyway.
    In addition, I would like to investigate if and how your upgrade could be used to switch to linear rails. The V-Slot profile should help quite a lot to solve adjustment problems with linear rails…

    --> I want to give your mod a go!

    Couple of questions before I start ordering parts:
    • Do you have any experience on how vibrations are propagated through the V-Slots compared to the original design? Does it make sense to put dampening elements between each joint?
    • I read an issue about dimensions in your drawings and BOM. Any tips what I should double check before ordering?
    • I also saw an open issue regarding dimensions of the MK3’s PSU. Which details / measurements are you missing about the MK3? I guess Prusa’s SCAD files are more precise than what I can measure…
    • What feedback / pictures would you like to receive of the build process?
    • Do you have any experience with 90 degree hidden corner links? (V-Slot : Inside Hidden Corner)
      I wonder if I shall throw in a couple of these on top of your design. The “Tank Full Upgrade” so to speak. ^_^
    • Any experience on the weight difference? The MK3 seems to be lightweight for transportation. I have seen aluminum frames in 3D printer which are heavy as ****.
    • I am missing a filament guide or similar. I would use something like Filament from Behind Guide by cabbey and place the spool somewhere else. What do you think?
    If all goes well, I should have all parts within 1-2 weeks. My printer is running 24/7 to print all the improved parts to upgrade to a mix of forum, R2, MK2(s) and Haribo Edition mods. Throwing in the parts from the Full Bear Upgrade is icing on the cake at this point.

    Assembly will take place mid of March, I think. (my girlfriend is away 1.5 weeks… enough time to play ^_^)

    What do you think?


    I sliced the parts and looked over your design. Very impressive. Very clean. I like it already.
     
  24. jay3D

    jay3D New
    Builder

    Joined:
    Feb 21, 2018
    Messages:
    36
    Likes Received:
    3
    Side note:
    Where does the electronic end stop on the y-axis come from? As far as I know the original Prusa's don't have end stops in any version.
    Do you a link for that mod? I wonder how this is attached to the mainboard and integrated into the firmware...
     
  25. pek

    pek Journeyman
    Builder

    Joined:
    Apr 17, 2017
    Messages:
    196
    Likes Received:
    130
    That is awesome, thank you very much! I will take time tomorrow to answer you carefully :)

    MK3 does not have any end stop (switch, optical or hall) and you will not find place for them on my Full Upgrade MK3. However, on previous versions like MK2s there is one for Y axis and one for X axis : 2. Y-axis assembly (and so they are present in Half Upgrade, Full Upgrade MK2(s) and Full Upgrade MK2.5)
     
  26. pek

    pek Journeyman
    Builder

    Joined:
    Apr 17, 2017
    Messages:
    196
    Likes Received:
    130
    No worry, I have seen your email but I prefer to talk here as information can be shared to anybody ;) . Thanks for joining this community, clearly the best place to talk about my project.


    Again, thank you for helping me and future builders!


    I can confirm that Half Upgrade and Full Upgrade will make the printer quieter coming from MK2s! The advantage of the Full Upgrade is that you can move the printer in an enclosure with PSU out to avoid overheating it. With the enclosure also comes a better print quality and reduced fume (I have a project in my head for an open source filtered enclosure for Prusa printers).

    I know well the RDH threads, I have also created a Z motor mount that fix the motor cage issue (it is the same as the Full Upgrade but for MK2/3 aluminum plate) : Prusa i3 Z Motor Mount Fix by pekcitron

    I also have in my head several ideas for linear rails! Something like a "Pro" full upgrade but without the idea of keeping as much as possible original parts (totally opposite way in fact). This is one of the several reasons why I choose V-Slot instead other types of extrusion.


    I have the impression that when I have moved from MK2s Half Upgrade (same design as MK3) to Full Upgrade the noise as been reduced, but it is only an impression not 100% sure about this.

    Interesting point about damping elements. It might works but I am not sure how print quality could be affected by this. Plus, build might be more difficult. I think there are other ways to go before this. Enclosure is definitely a far better solution for example.


    It has been solved now, I was waiting to finish the "final" Full Upgrade MK2s build before.


    The problem is that there is no SCAD/STL files for the MK3 PSU cover, or I did not find them... I have just added an image of needed dimension in the GitHub issue : MK3 PSU dimensions · Issue #11 · gregsaun/prusa_i3_bear_upgrade · GitHub . If you cannot measure all of them it will still be better to have one than none!


    • PSU lower mount
    • RAMBo Einsy mounts
    • Cables management
    • Y motor mounts with Y rod holders
    • Z tops
    • All details you see that need some improvements (even small one)

    Never tried them, they does not look very rigid, it is more for "connection" than "rigidity" (do not know if that is clear :D ). You can try but be careful with Z motor mounts, screw might enter in contact. You can also imagine do add one more black angle corner next to the 4 in each bottom corners. Or two on top v-slot in the corners.

    For information, before going to two 90° joining plates on each side of Z axis I did these tests :
    1. 1x 90° + 1x 3 Hole Joining Strip Plate (on each side)
      => was to have more place for cable management but in fact it is not necessary
    2. 1x 90° plates + 2x black angle corner (on each side)
      => black angle corner have tendency to twist a bit when you tighten them and it is less rigid than another 90° joining plate
    And again the most important thing to take into account is that the X axis is way less rigid than the rest of the Full Upgrade frame, so we should concentrate on this first. (yes I am thinking of V-Slot style X axis).


    My Full Upgrade MK2s weight around 6-7kg, hard to tell you precisely


    I will add accessories in a later time. If you would like or have time, feel free to create one and I can add it to the "optional parts"

    Sounds perfect, the assembly instructions will be finished at this time.


    I try to put useful 3D printing techniques that I have created myself (like the sharp angles) or improved from Prusa SCAD files. Some details of these features can be found in my GitHub here : maker_cheatsheet/techniques.md at master · gregsaun/maker_cheatsheet · GitHub .

    My requirements are also a bit different than Prusa, he needs to print parts very quickly and has a team of people cleaning and verifying the parts. In my case I can increase size and strength as it going be printed by builders. However I have to be careful on tolerances and print quality because not everyone will have the same "eye" as a trained team dedicated to this.

    Finally, OpenScad is a very powerful tool but when you increase complexity it takes too much time. And lots of tools are missing: measures, constraints, drawings, etc. One of the biggest advantage of 3D printing over other techniques (like CNC... well not the 5 axis ones...) is that you can make incredibly complex parts, and OpenScad is not very good in this. This is why I take the Fusion 360 way... (I think not everyone will be ok with this comment :D , anyway this is my 2 cents...)
     
    #26 pek, Feb 22, 2018
    Last edited: Feb 22, 2018
  27. jay3D

    jay3D New
    Builder

    Joined:
    Feb 21, 2018
    Messages:
    36
    Likes Received:
    3
    Great minds think alike! I have seen laser cut alumium x-axis which I found quite cool. Thought about V-Slot as well. I am wondering though how well this would work with the added weight. I guess we can always go OpenBuild CNC style and use NEMA 23 steppers. (overkill is underrated ;))

    Or I might go with a double wide linear rail as x-axis some day... Got some ideas. But first things first.

    I am on the road right now. Will take some first measurements on Monday afternoon.

    I use Fusion 360 as well. :D
     
  28. pek

    pek Journeyman
    Builder

    Joined:
    Apr 17, 2017
    Messages:
    196
    Likes Received:
    130
    Yes this is another type of development... Aluminum is quite light compared to 2x 370mm long 8mm steel rods, but what about the rest... As you said, first things first


    Thank you very much!
     
  29. jay3D

    jay3D New
    Builder

    Joined:
    Feb 21, 2018
    Messages:
    36
    Likes Received:
    3
    What do you think about this design? Reminds me of a Cetus. I like the axis design quite a bit.
    The Cantilever Printer

    I guess it doesn't get any lighter than this when using aluminium extrusion parts.

    Or just stripping this down to the rail only... I am eyeballing a Misumi wide rail. That should be plenty of stiff. :cool:
     
    #29 jay3D, Feb 23, 2018
    Last edited: Feb 23, 2018
  30. pek

    pek Journeyman
    Builder

    Joined:
    Apr 17, 2017
    Messages:
    196
    Likes Received:
    130
    Nice one, and Cetus is known to be a very good printer (except for heated bed). But I still prefer to have bigger two Z axis, it has several advantage when you would like to increase the print size and speed. Have you seen this one?
     

Share This Page

  1. This site uses cookies to help personalise content, tailor your experience and to keep you logged in if you register.
    By continuing to use this site, you are consenting to our use of cookies.
    Dismiss Notice