Welcome to Our Community

Some features disabled for guests. Register Today.

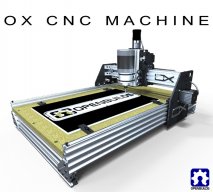
OpenBuilds OX CNC Machine

Discussion in 'CNC Mills/Routers' started by Mark Carew, Dec 15, 2013.

  1. Anthony Bolgar

    Anthony Bolgar Journeyman
    Builder

    Joined:
    Jan 14, 2016
    Messages:
    354
    Likes Received:
    198
    Where did you get the plates from?
     
  2. PaulM82

    PaulM82 New
    Builder

    Joined:
    Jan 9, 2018
    Messages:
    7
    Likes Received:
    1
    The plates are from the same people. I'm not sure where they got them from...
     
  3. Gary Caruso

    Gary Caruso OpenBuilds Volunteer
    Staff Member Moderator Builder

    Joined:
    May 19, 2016
    Messages:
    1,193
    Likes Received:
    532

    There is an easy way, with Estlcam, watch the video
     
    Mark Carew, Giarc and GrayUK like this.
  4. Giarc

    Giarc OpenBuilds Team
    Staff Member Moderator Builder Resident Builder

    Joined:
    Jan 24, 2015
    Messages:
    3,015
    Likes Received:
    1,680
    View attachment 29486
    I just made the switch to Estlcam yesterday and am about to cut a new 3d printer plate out of aluminum with my Ox variant. I plan to try this for fun since the plate is aluminum, it should be easy to probe. It is really not necessary for what I am doing, but good practice. I also have a roll of aluminum tape I use for probing that was left over from a duct repair job I did. I used it for cutting my Acro tapes and the 0.06 mm thickness referenced in the Estlcam video was pretty spot on. Finally a use for that tape. I believe the stuff I have is this from Home Depot:
    tape.png
     
    #3424 Giarc, Jan 21, 2018
    Last edited: Jan 21, 2018
  5. Lasersc

    Lasersc New
    Builder

    Joined:
    Feb 2, 2018
    Messages:
    28
    Likes Received:
    23
    Hello all, I am very new to the world of the CNC machine but am looking forward getting going with this build. Ordered my extrusions and other hardware that should be arriving in a couple of days. I am preparing a table stand for the build and would like to know what would be a safe working height of this build. I am planing on putting a shelf above the build. I am shooting for 1000mm X 500mm and useing the plates that are given with this build. Thank you for an awesome site and for any help you can give me. Well, let me go ahead and ask, are there anyone in the United States make the plates?
     
  6. Giarc

    Giarc OpenBuilds Team
    Staff Member Moderator Builder Resident Builder

    Joined:
    Jan 24, 2015
    Messages:
    3,015
    Likes Received:
    1,680
  7. Rob Mitchell

    Rob Mitchell Well-Known
    Builder

    Joined:
    Nov 29, 2015
    Messages:
    105
    Likes Received:
    35
    So now that I've had my OX for a few years I'm getting the urge to change to a linear rail system, ball screws or something else besides the belt driven approach. Is there any builds out there that started with belt system and successfully converted?
     
  8. Paul Gregory

    Builder

    Joined:
    Oct 19, 2015
    Messages:
    5
    Likes Received:
    1
    Rob,

    Check out this thread. https://openbuilds.com/threads/ox-upgrade-kit.8523/
    He also has an excellent youtube video on the build.
    Also check out this build:

    I have attached a photo of my upgrade, before completing the spoil board, installing the control box fan and calibrating the machine. I have ran a couple of projects, but I need to have a re look at my speeds and feeds since I think they need some adjustments from the previous belt drive system.

    Cheers
     

    Attached Files:

  9. AirDale41

    AirDale41 New
    Builder

    Joined:
    Dec 7, 2017
    Messages:
    6
    Likes Received:
    0
    @Lasersc a quick eBay search will reveal a few USA plate producers such as BLUE OX
     
  10. gaou

    gaou New
    Builder

    Joined:
    Feb 26, 2018
    Messages:
    2
    Likes Received:
    0
    Guys cheers from Greece. this is my first post i think here and i need some help as i am totally lost trying to set up a ox 1500x1000 that i bought back on 2017.

    Some specs beyond the known ones ( belt pitch, z acme etx) are that i am using a g540 for a controller and mach3. The whole system runs on a 24v from one power supply

    Now i am in the process of setting steps per unit for x axis ( bipolar series wired stepper) and the way the stepper moves doesn't sound like it should.

    I am using mach3 calculator for the steps but it gives me slower than slow movement. I know that there is something that i am doing and/or did something wrong and wish it is just a software matter. I tried to search for a easy formula i am reading here and on the cnczone some posts but i cant get where is the problem.
    Even this that looks very similar to mine setup doesn't help it run well.

    Anyway if anyone can help me look in the right direction to get this thing up and running would very much appreciated.

    Pavlos

    edit: guys i am feel a complete a**e . It was a velocity problem as it was very low. All up and running well ( so far).

    Something else i have notice about the spindle and the vfd. The spindle has 4 pins saying the 4th is the earth-ground. I have left it unwired . is it ok? I have read here somewhere that i have to ground it to earth.
    What is the case, do i have to plug it or it is not needed?
     
    #3430 gaou, Mar 26, 2018
    Last edited: Mar 26, 2018
  11. AirDale41

    AirDale41 New
    Builder

    Joined:
    Dec 7, 2017
    Messages:
    6
    Likes Received:
    0
    Congrats on your OX build!! I am having a similar problem with mine but I’m curious what the gcode velocity setting is. Is this the acceleration setting? How did you repair the issue?
     
  12. gaou

    gaou New
    Builder

    Joined:
    Feb 26, 2018
    Messages:
    2
    Likes Received:
    0
    it is the "speed" as i understood. no the acceleration is a different thing. i had my velocity down to 100 so i raised it up on 3000 and things work better this way . just double check that this is the problem for you . if i were you i would wait for some gury from here to step in and guide you,
     
  13. AirDale41

    AirDale41 New
    Builder

    Joined:
    Dec 7, 2017
    Messages:
    6
    Likes Received:
    0
    Hmm. I am using bCNC...different software but surely it has a similar setting that can be adjusted like your velocity in Mach3. I will take a look! Thank you for your help!
     
  14. David the swarfer

    David the swarfer OpenBuilds Team
    Staff Member Moderator Builder Resident Builder

    Joined:
    Aug 6, 2013
    Messages:
    3,458
    Likes Received:
    1,915
    in bCNC click 'terminal'
    type $$ and press enter
    it shows all the GRBL settings from the controller.
    THAT is where you set the maximum speed and acceleration.
    $110,$111,$112 set max speed in mm/min for X Y and Z
    $120, $121, $122 set acceleration in mm/min/min for X Y And Z


    an OX should be quite happy at about 3500mm/min and about 1000mm/min/min acceleration
    but you have to experiment and see because it depends on many things in your specific
    setup.

    All GRBL setup is in mm

    The maximum speed is used when moving between cuts (the G00 code)

    For cutting the speed is given in the Gcode, something like
    G01 X10 F750
    will tell X to go to 10mm from wherever it is now, and use a feedrate of 750mm/min
    You should be able to confirm this by doing something like
    G0 X0
    G01 X200 F200
    and it should take exactly one minute for that move. (200mm at 200mm/min)

    Yes, it can use inches, the controller is told what to expect in the Gcode by the Gcode
    G21 tells it to expect metric numbers
    G20 tells it to expect inches

    How to figure out a good maximum speed?
    Start lowish, and work up....
    so set all accelerations to 250
    now set speeds to 500 and test. I do this one axis at a time. you should see and hear it accelerate and then maintain the given speed and then decelerate and stop. So assuming you have set 0,0,0 in a safe place on the left somewhere and have enough space to go 250mm to the right....
    G0 X250
    will send X 250mm to the right. Use a good scale to make sure it does 250mm if not you need to calibrate first.
    now do
    G0 X0
    and it should end up where it started.
    now double the X max speed and do the test again, and again ... until you find a speed where it fails, it will stop and whine or hum. at that point go back to the last working speed. (you will have to reset 0,0,0 because it no longer knows where it is)

    Now you can do the same process with the acceleration, doubling it until it does not work and going back to where it worked.

    Now you can fine tune the max speed by increasing it in small steps.
    Say you tried 3000 and all was fine, but 6000 failed.
    try half way between them, 4500. if that is ok, then try half between 4500 and 6000.
    when you find where it stops working, say 5250, reduce by 10 to 20% and that is your max speed that will most likely be reliable.

    However, if you change the mechanics this max speed may be too fast. for example if you do the tuning with a Dremel tool as the cutter and later change to a Dewalt router which is much heavier you may have to reduce max speed, or acceleration, or both, on X and Z to allow for the increased weight. (Y has 2 stepper motors so can probably handle it)
     
  15. beazleybub

    Builder

    Joined:
    Mar 28, 2018
    Messages:
    10
    Likes Received:
    4
    Just downloaded the plate .dxf files. Why are they so big? Shouldn't they be drawn to scale?
     
  16. Gary Caruso

    Gary Caruso OpenBuilds Volunteer
    Staff Member Moderator Builder

    Joined:
    May 19, 2016
    Messages:
    1,193
    Likes Received:
    532
    They are in mm :)
     
    Mark Carew likes this.
  17. beazleybub

    Builder

    Joined:
    Mar 28, 2018
    Messages:
    10
    Likes Received:
    4
    Yes, I am aware of this.

    When importing them into my sketchup model they came in huge. 2.5mm holes were 5in.
     
  18. David the swarfer

    David the swarfer OpenBuilds Team
    Staff Member Moderator Builder Resident Builder

    Joined:
    Aug 6, 2013
    Messages:
    3,458
    Likes Received:
    1,915
    when importing dxf you need to set the import scale before the import.
    but why import dxf when you can just use the Sketchup files directly?
     
  19. beazleybub

    Builder

    Joined:
    Mar 28, 2018
    Messages:
    10
    Likes Received:
    4
    I'm working on a hybrid version of the OX and making custom modifications that come from a few different files. I've been using sketchup for over a year and have never seen an option for import scale. Where can I find it? Thanks

    EDIT: Never mind, I found it. (Always thought Sketchup was advanced enough to automatically convert units!)
     
    #3439 beazleybub, Mar 29, 2018
    Last edited: Apr 2, 2018
  20. AirDale41

    AirDale41 New
    Builder

    Joined:
    Dec 7, 2017
    Messages:
    6
    Likes Received:
    0
    David thank you for the guidance. Issue resolved! I hope that this helps someone else in the future...
     
  21. Governor

    Governor New
    Builder

    Joined:
    Jan 29, 2016
    Messages:
    30
    Likes Received:
    6
    Can someone please help me! I built my C-Beam about a year ago and I'm having the hardest time trying to get it to work properly. I am trying to use Grbl panel release 1.0.3.0 with Fusion 360. I have an Arduino uno with a V3 shield. The problem I'm having is in trying to cut a simple pocket, 1" dia x 1/8" deep with maltible depth of cuts. The first cut looks great but when the bit retracts and moves over to start the second depth of cut it rapidly plunges into the part and at other times it will start the second cut in a new location. I have checked the code and the code appears to be correct. I have a 2.2 kw spindle with a cutting speed of 15,000 rpm and feed of 20 inches per minute and entry speed of 8 inches per minute. I am at a loss and ready to give up again.
     
  22. beazleybub

    Builder

    Joined:
    Mar 28, 2018
    Messages:
    10
    Likes Received:
    4
    Those VFD spindles cause a whole heap of electromagnetic interference. Sounds like your VFD is causing it. Take the bit out power off the VFD completely and try running your code. If it runs smoothly, you've found your problem. If that's the case you will need to shield and properly ground your VFD and cables.

    Read here.Electromagnetic Interference: What Drive Users Need to Know | Control Engineering
     
  23. Governor

    Governor New
    Builder

    Joined:
    Jan 29, 2016
    Messages:
    30
    Likes Received:
    6
    I'm sorry this is still really new to me and I am unsure what you mean by taking the bit out power off the VFD.
     
  24. beazleybub

    Builder

    Joined:
    Mar 28, 2018
    Messages:
    10
    Likes Received:
    4
    It's ok, I was new once:)

    Remove your cutting bit also known as your end mill from your spindle. A 2.2kW spindle is powered by a VFD (Variable Frequency Drive). Do not run the spindle. It produces a huge magnetic field through the wires that lead to your spindle. When large voltages are present in an unshielded wire it produces a magnetic field which can affect sensitive electronics and cause data errors. What I'm suggesting you to do is to remove your cutting tool from the spindle (so you don't crash the tool) and run your program as if you were cutting your part but, do not power on the spindle. If your spindle is not running there will be no electrical interference (magnetic field) present. If your machine does not do unexpected moves (as you suggested before) while running the program then, your spindle will be where your trouble is coming from.
     
    Gaou² and GrayUK like this.
  25. Gaou²

    Gaou² New
    Builder

    Joined:
    Nov 17, 2014
    Messages:
    20
    Likes Received:
    2
    what can somebody do if this is the problem. are there any workarounds ?
     
  26. JustinTime

    JustinTime Veteran
    Builder

    Joined:
    Dec 18, 2013
    Messages:
    784
    Likes Received:
    259
    Put the VFD as far away as possible from the electronics and/or put the VFD in a metal housing that is grounded. Also, as beazlybub has writtne " When large voltages are present in an unshielded wire", shield your wire that go from the VFD to the spindle.
     
  27. Ruben Barrios

    Builder

    Joined:
    Apr 23, 2018
    Messages:
    12
    Likes Received:
    7
    Hello everyone, I was wondering if you can help with a new build. I am very green and really have no idea of what I am doing, but I thought I can learn in the process. I am in the process of acquiring parts to build a 500x1000 Ox using some electronics I purchased years ago when I first attempted to build a machine. That machine never got off the ground for a number of reasons, but none of that matters. The reason I am going with that odd size is that I will mostly be doing small inlays in wood and saw a great technique where someone was using a v-bit to engrave a name, then in a contrasting color wood, engraved a mirror image that was then glued into the first engraving. They then planed off the contrasting wood to leave an inlay of the name in the wood. These would then be made into small boxes to be given as gifts.

    The hardware is all ordered and I will be placing an order soon for the rails, but the 2040 I will source locally through Graingers. I have an account through work which will save me on shipping. The price is the same as mailing for it, but by not having to pay for shipping, I can get about double the length for a bit more. The only problem is that it only comes in 4 or 6m lengths, so I might have to hacksaw it in the parking lot to get it home. The remainder will be used for building an Acro which I will cut the plates using the Ox after I get it running.

    My question is with the electronics. The machine that I had planned on before was totally different and as a result, I have 3 270oz NEMA 23's, 3 Keling KL-4030's, and an breakout box that runs off a parallel port. I also have 3 Arduino Uno's along with some LCD panels that I can use to display locations kind of like a 3d printer. I also have 3 NEMA 17's and 4 NEMA 14's along with DRV8825's if I can find what box I threw them into. The power supply I currently have is a 36v 9.7amp. I may have a 12v supply around somewhere also, or I can source one if needed.

    My first question is since I will be making this first build with belts, should I run 2 of the 23's for the x axis and use a NEMA 17 for the Z, or go ahead and buy another 23? also, with the KL-4030, could I run both 23's off of one driver, or should I also source another one of those.

    Secondly, I plan on eventually upgrading to the Vectric software, but will start with mach 3 or something similar. Could anyone recommend a controller that will work with my hardware that will not break the bank or should I use an arduino or the parallel board I already have?

    I know I will have a million more questions when I start my build. Any help will be appreciated. Thanks for any comments.
     
  28. David the swarfer

    David the swarfer OpenBuilds Team
    Staff Member Moderator Builder Resident Builder

    Joined:
    Aug 6, 2013
    Messages:
    3,458
    Likes Received:
    1,915
    Hi
    You need a driver per motor. You cannot run reliably with 2 motors on one driver.
    Yes, use a NEMA23 on the Z
    The axis with two motors is actually the Y axis (-:
    Use the 36v power supply.

    Software. you are confused....
    Mach3 is a controller. It will work with your parallel port breakout to drive the machine from a instructions in a Gcode file.
    GRBL runs on an Arduino Uno and is also a controller, you send it Gcode (via USB) and it moves the machine.
    in contrast...
    Vectric is CAD/CAM software, it lets you draw shapes and then generate Gcode files.
    Sketchup is (free) CAD software. SketchUcam is a plugin that allows you to generate Gcode from Sketchup.
     
  29. Ruben Barrios

    Builder

    Joined:
    Apr 23, 2018
    Messages:
    12
    Likes Received:
    7
    Thank you for all that. I had thought Vectric had the controllers built in. So, breakout board or Arduino? If I do Arduino, it will give me leg up when it comes to building the Acro. But if it is easier to use, then I can always get a new board.

    Sketchup still scares me. The last time I used CAD software was in 1984 with a old version of AutoCAD. I was planning on using the Vectric to idiot proof my first few projects, but I'm sure I will make a few errors anyways along this process.

    One reason I was looking for a different board is that this old breakout board has no memory and requires the computer to do most of the work. It also cannot use a laptops because of the power features on them. Also, I was considering picking up a laptop for the shop without the parallel port, so I would need a work around if I kept the old board. If I stick with the Arduino, then I am going to have to learn a whole new language along with all the CAD and Gcode, so it might be a little overwhelming.

    Thank you again for taking the time to walk me through this build. I have been reading as much as I can and soaking it all in, but until I actually get hands on building, it's still a bit over my head. BTW, can you recommend any setup videos or resources. I'm fairly confident in my building abilities, but the electronics is still new to me, so any research I can do before I get to that point will help.
     
  30. Gary Caruso

    Gary Caruso OpenBuilds Volunteer
    Staff Member Moderator Builder

    Joined:
    May 19, 2016
    Messages:
    1,193
    Likes Received:
    532
    If you know Autocad... even 1984.. was that even R2 on floppy? I started with R10 on about 12 floppy disks!
    You can use Draftsight for free (it's just like autocad even the keyboard shortcuts, but less Bugs!), and use DXF files in Estlcam and save yourself a lot of money..
    Ventric is great, it's really good, but it's $$$!
     

Share This Page

  1. This site uses cookies to help personalise content, tailor your experience and to keep you logged in if you register.
    By continuing to use this site, you are consenting to our use of cookies.
    Dismiss Notice