Welcome to Our Community

Some features disabled for guests. Register Today.

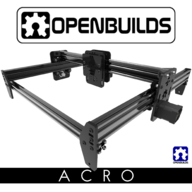
OpenBuilds ACRO Laser System

Discussion in 'Laser Cutters' started by Mark Carew, Sep 12, 2017.

  1. Peter Van Der Walt

    Peter Van Der Walt OpenBuilds Team
    Staff Member Moderator Builder Resident Builder

    Joined:
    Mar 1, 2017
    Messages:
    14,917
    Likes Received:
    4,291
    "Tight enough" - yeah I know that doesnt say much, but tight as in pulled tight, not tight as in "i pulled it with a pair of pliers or a crowbar". Ie if you pull it by hand, and then tighten, its fine.
    A quick check is to lock the motors ($1=255 in Grbl gnea/grbl) and then try moving the axis by hand. If you can make it slip over the pulley, its not tight enough. If it grips the pulley, but you can easily rotate the motor while its enabled, your stepper current is too low
     
    crispin and cathode like this.
  2. cathode

    cathode New
    Builder

    Joined:
    Apr 22, 2018
    Messages:
    26
    Likes Received:
    5
    Mine aren't skipping. I just made them tight by pulling with my hand while I tightened the bolt. It's snug but you can't play a tune on it.
     
  3. nrymaker

    nrymaker New
    Builder

    Joined:
    May 5, 2018
    Messages:
    21
    Likes Received:
    6
    Yesterday when I tried to use some C-clamps to secure my Acro to the table, I broke two of the legs. The plastic legs on the side of the frame that I attached the clamp snapped as soon as I started to even slightly tighten the clamp.
    I used some Jbweld to glue the two plastic legs back together that broke. My new plan is to get two strips of wood and put a screw through the plastic legs to secure them to the boards and then instead clamp the wood strips to the table. This should allow me to clamp down the wood without putting pressure onto the plastic legs.
    Has anyone else figured out a good way to secure the acro to the table. I was experiencing it moving around on the table quite a bit and the drawings I will be engraving will be fairly intricate.
    Thanks in advance for the help!
     
  4. cathode

    cathode New
    Builder

    Joined:
    Apr 22, 2018
    Messages:
    26
    Likes Received:
    5
    I bolted mine to the table using the included angle brackets, they did not break. but now I'm using my own taller, 3d printed legs.

    IMG_7886.JPG
    IMG_7888.JPG
    IMG_7889.JPG
     
    Mark Carew, MaryD and GrayUK like this.
  5. nrymaker

    nrymaker New
    Builder

    Joined:
    May 5, 2018
    Messages:
    21
    Likes Received:
    6
    That setup looks really nice. I don't have access to a 3d printer to make more beefy legs like you did. Do those angle brackets come with the acro bundle kit?
    I did not see them but I have some parts left that I did not take out of the little plastic zip lock bags.
     
  6. cathode

    cathode New
    Builder

    Joined:
    Apr 22, 2018
    Messages:
    26
    Likes Received:
    5
    Yeah those angle brackets were in the kit I got - I don't really know what they were for but that seemed a good use for them :)
     
  7. bubba

    bubba New
    Builder

    Joined:
    Jan 14, 2016
    Messages:
    24
    Likes Received:
    11
    I believe the angle brackets were for mounting the power supply/controller to the back rail.

    Really like the legs you made. After I bolted my machine to my table I removed the front rail. Sure made access a lot easier.
     
  8. cathode

    cathode New
    Builder

    Joined:
    Apr 22, 2018
    Messages:
    26
    Likes Received:
    5
    Y eah I had my rail off too for awhile, but I like it on for stability - so I moved it down so that I can access the "zero" y position with the laser point.
     
  9. nrymaker

    nrymaker New
    Builder

    Joined:
    May 5, 2018
    Messages:
    21
    Likes Received:
    6
    Has anyone made any metal legs using their openbuild CNC machines? Such as aluminum? If so could I buy some?
    Or maybe Cathode, would you sell me some of those 3d printed legs like you made for your laser cutter frame? It just seems like the acrylic legs that come with the system are very easy to break.
     
  10. Mark Carew

    Mark Carew OpenBuilds Team
    Staff Member Moderator Builder Resident Builder

    Joined:
    Jun 28, 2013
    Messages:
    2,759
    Likes Received:
    2,438
    Hey guys just wanted give a heads up that we updated the xPRO diagram on the Build page as well as a few of the grbl settings that should help setting up the machine a little easier until we are able to complete a proper wiring / software Build style video.
    Hope this helps
     
    nrymaker likes this.
  11. nrymaker

    nrymaker New
    Builder

    Joined:
    May 5, 2018
    Messages:
    21
    Likes Received:
    6
    I got help from OpenBuilds support and they suggested that I try these settings:
    $110=5000.000 (x max rate, mm/min)
    $111=5000.000 (y max rate, mm/min)
    $112=5000.000 (z max rate, mm/min)
    $120=2000.000 (x accel, mm/sec^2)
    $121=2000.000 (y accel, mm/sec^2)
    $122=2000.000 (z accel, mm/sec^2)
    $130=1000.000 (x max travel, mm - Set this to your machine safe cut area)
    $131=1000.000 (y max travel, mm - Set this to your machine safe cut area)
    $132=1000.000 (z max travel, mm -Set this to your machine safe cut area)

    That seemed to help a lot! They told me that those settings are meant to help so that the Acro is not jumping so fast which was causing the entire frame to move around on the table. I also secured the machine to the table using the small L shaped brackets that came with the Acro bundle. OpenBuilds was nice enough to offer to send me a couple of replacement legs for the two that I broke. In the meantime I was able to make two legs out of wood. Actually they might be stronger than the plastic ones. Someone suggested testing first by cutting some circles and squares and that helped a lot. I had to tighten some of the belts a bit to make sure they were all even. Then I also measured to make sure that the gantry was even on both sides.

    Now I am able to cut intricate drawings perfectly. I really love this machine so much now! I spent a bunch of time messing around with a Link Sprite Mini Desktop CNC machine that I put one of the eBay 15W lasers on. The laser died fairly quickly and that CNC machine was horrible. It would constantly crash in the middle of a job and leave the laser on. I am really glad I found the L-Cheapo laser. Great customer support from both OpenBuilds and Robots Everywhere! I will post some more photos later on when I start engraving my knives. In the meantime here are a few photos of practice drawings I cut tonight on some particle board. The knives are custom made for Army Forward Observers. www.fistblades.com
     

    Attached Files:

    Mark Carew likes this.
  12. nrymaker

    nrymaker New
    Builder

    Joined:
    May 5, 2018
    Messages:
    21
    Likes Received:
    6
    Anyone else using LaserWeb with their Acro system? Couple of things I still trying to figure out:
    1. This is the bigger issue for me. I often have trouble figuring out exactly where the laser will start cutting. Sometimes it even goes way off to one corner and hits the limits. I don't have limit switches yet so this is painful to hear and see.
    2. My drawings are being inverted. I have been flipping all text horizontally in order to get it to cut so that it reads correctly. Otherwise it is like looking at in a mirror when it cuts. However on the screen in laserweb the text looks correct.
     
  13. BNMaker

    BNMaker Well-Known
    Builder

    Joined:
    Jul 13, 2017
    Messages:
    62
    Likes Received:
    38
    With openbuilds and Gates belt, I always ‘double belt’ on the extrusion: you cut some belt the same length as the extrusion and glue it, face-up, into the track. This takes all the stress out of the drive belt, acting like a rack and pinion arrangement. Then your drive belt just has to be tight enough to not slip on the pulley, without stretching.

    It also pays to do a full calibration of your travel using a digital caliber, or similar
     
    leviOfTheWood and Fety Mann like this.
  14. Steven Yampolsky

    Builder

    Joined:
    Sep 13, 2017
    Messages:
    23
    Likes Received:
    8
    I just want to report another great Acro laser build! I've 20x40 version with 6W OptLaser being driven by xPro CNC board. I've been cutting balsa and plywood for the past 2 months and here's a few "lessons learned":
    • After trying every possible kind of software, including latest LaserWeb(which I used to like a lot), I found LightBurn to be THE best software out there for laser. The support is excellent, regular version upgrades keep adding new features and it runs on MacOS, Linux and Windows. Compared to LaserWeb, LB is just easier and more polished.
    • Typical balsa(or plywood) sheets are 36" long but the workspace is only 33.85" which results in a lot of wasted material or required tiling approach which slows down the process significantly. The best thing about OpenBuilds store is that they make it super easy to modify the design. Here's what you need to order to extend the workspace to full 36":
    I am extremely happy with the way the system works. The only thing I'm hoping to improve next is laser focusing process. lack of z-axis is really making hard to cut multiple thicknesses in a single session(ex. 1/8 balsa followed by 1/32 ply). I am hoping to adopt one of the solutions presented by several members of this forum.
     
    MaryD, Mark Carew and GrayUK like this.
  15. Rich C

    Rich C New
    Builder

    Joined:
    Aug 4, 2014
    Messages:
    66
    Likes Received:
    11
    So, I have a 15w laser that I installed onto my Acro....no instructions (of course). Is anyone using one of these that could help to make sure I am wiring it up correctly please?

    I am using the CNC xPro v3 controller card. The laser is wired correctly to the laser driver board. I need to wire the laser driver board to the xPro card.

    There is a 'K1" (white) and a "T1" (blue) slot on the driver board. I don't know which (or if both) goes to the xPro card. (I know the LD2 slot isn't used as that would be for a second laser).
     

    Attached Files:

  16. Rich C

    Rich C New
    Builder

    Joined:
    Aug 4, 2014
    Messages:
    66
    Likes Received:
    11
    I believe I got it figured out....

    guess there's not much traffic on here anymore...
     
  17. Mark Carew

    Mark Carew OpenBuilds Team
    Staff Member Moderator Builder Resident Builder

    Joined:
    Jun 28, 2013
    Messages:
    2,759
    Likes Received:
    2,438
    Hi @Rich C I have a 6W on mine set up here and the connections are a little different. Please share what you found was the right way to hook you 15W diode up.
    I would love to see that 15W in action and see what you are capable of cutting!
    Thank You
     
  18. BNMaker

    BNMaker Well-Known
    Builder

    Joined:
    Jul 13, 2017
    Messages:
    62
    Likes Received:
    38
    Sorry to burst your bubble, but no you don’t (unless you have a multi-$1000 fibre laser). Laser makers lie.

    The most powerful laser diode in the world is the Nichia NUBM44/47 which is rated at 4.5W by the company, but selected diodes have been tested at 5.5 and 6.0W

    I have 4.5W, 5.6W, 6.0W, 8.0W amd 10.0W modules from the same supplier - they all use the same Nichia NUBM44.

    The difference is in the voltage and current.

    Pump more power in, get rid of the heat effectively and you can claim 10W from a 6W diode.

    15W is pure AliExpress marketing hype - they will last a few hundred hours and if you try and run them continuously, will burn out in a few..

    My ‘best’ laser is my cheapest - US$95 for a 4.5W-rated unit that outperforms my US-made 8.0W unit and ANY Chinese unit of any wattage claim.

    I don’t have a problem with Chinese lasers, but I object to paying $495 for a ‘15W’ laser with an inferior controller and the same diode as my 4.5W units.

    The reality is that with diode lasers, the controller and constant-current power supply (together called a ‘driver’) are the important bits. Once you get over 4W they are ALL using the same Nichia diode.

    As with any electronic component, more power = shorter lifetime. The diode, in spec, has a lifetime of 100,000 hours. I would be wearing my shocked face if a ‘15W’ laser lasts 600 hours, or can run for four hours without burning out.

    There are lasers marketed as 10W out there that deliver equivalent of 10W power, but they have high-quality drivers and three or more fans, big heatsinks, etc. They have pumped the amps and volts outside of Nichia’s spec but are keeping a lid on runaway lasing by keeping things cool. If your Chinese laser has a single 12v 40x40x10mm fan, it’s going to be - AT BEST - 6W at 100% with a good PSU.

    My 5.6W with a handmade driver with fkn big heatsinks, SMD components, 2x 40x40x20mm 24v fans, a Peltier transform HEC with 40x40mm heatsink just for the MOSFET gets good performance and can literally cut all day.

    My Russian-made 4.5W with a Peltier, 40x40x20 heatsink and fan can run all day without hitting over 60C and outperforms any ‘15W’ marketed laser, which will usually shut down after less than two hours running.

    Download the NIchia datasheet and ask any prospective seller what the diode is in his high-watt laser. If they balk at telling you, they’ve got something to hide.
     
    #378 BNMaker, Jul 26, 2018
    Last edited: Jul 26, 2018
  19. BNMaker

    BNMaker Well-Known
    Builder

    Joined:
    Jul 13, 2017
    Messages:
    62
    Likes Received:
    38
    Nice unit. I wish I had bought an OptLaser the first time. True 6W performance, rock-solid.

    Thanks - never heard of them, but always looking for options.

    Why cut perfectly good extrusion (unless you really can’t fit that extra 400mm?)


    I hear ya - but it’s one of the drawbacks of diode lasers. I’ve seen 3D printed gears, but adding weight to the head is not what I want.

    A mechanised bed is the obvious answer.

    Post a pic!
     
  20. BNMaker

    BNMaker Well-Known
    Builder

    Joined:
    Jul 13, 2017
    Messages:
    62
    Likes Received:
    38
  21. Rich C

    Rich C New
    Builder

    Joined:
    Aug 4, 2014
    Messages:
    66
    Likes Received:
    11
    Bnmaker, supposedly, my 15w is an 8w continuous. I ready could care less, I just didn't want to settle on a 2-4w laser. If I can pump 6w out of it, I'll be happy. I just needed some help wiring the card to the laser.

    I'm also considering purchasing me a 60w co32 laser.... next year maybe, we'll see.
     
  22. Steven Yampolsky

    Builder

    Joined:
    Sep 13, 2017
    Messages:
    23
    Likes Received:
    8
    This is the optimal distance that results in a frame that fits on top of 2'x4' MDF panel while allowing to fit full 36" balsa sheets. If I kept extrusions any longer, I would not fit in 2x4 surface while the extra width would provide zero benefit. The next size up is 48" balsa sheets and those are typically more expensive.


    I see that new generation of 3D printers use distance sensor placed next to printing head that is used to establish absolute zero position of the printing table. The sensor is used to measure precise distance at each corner of the table and print is automatically adjusted to accommodate misalignment in the table surface. Perhaps something similar can be used for lasers
     
    crispin likes this.
  23. 3boysdad

    3boysdad New
    Builder

    Joined:
    May 27, 2017
    Messages:
    27
    Likes Received:
    14
  24. JTechPhotonics

    Builder

    Joined:
    Jun 30, 2016
    Messages:
    1
    Likes Received:
    1
    Hi Steven- We now have a Z Axis Upgrade to the ACRO system. Perfect for cutting thick items with multiple passes.
    https://jtechphotonics.com/?product=z-stage-upgrade

    Works with our lasers for mounting, but you probably can modify a plate to use any laser with it.

    Hope this is of interest.
    Jay
     
    Steven Yampolsky likes this.
  25. 3boysdad

    3boysdad New
    Builder

    Joined:
    May 27, 2017
    Messages:
    27
    Likes Received:
    14
    shut up and take my money...
     
    BNMaker, GrayUK and JTechPhotonics like this.
  26. cmwwebfx

    cmwwebfx New
    Builder

    Joined:
    Dec 2, 2017
    Messages:
    62
    Likes Received:
    5
    5.6 watt (5600 mW) diode laser attachment (improvement) for any 3D printer and CNC router. Laser cutting / engraving instrument. - EnduranceLasers
     
  27. Northern Woods Crafts

    Builder

    Joined:
    Aug 13, 2018
    Messages:
    2
    Likes Received:
    0
    Hi Everyone,
    Not good in drawings and need help with 3 axis CNC Router drawings including cost of machine parts to guide me in building my own machine.
     
  28. minhducpm

    minhducpm New
    Builder

    Joined:
    May 7, 2018
    Messages:
    1
    Likes Received:
    0
    please help me, the .dxf resources can show on any software, i same corel x3 but no results
     
  29. Leo Chan

    Leo Chan New
    Builder

    Joined:
    Jun 6, 2018
    Messages:
    6
    Likes Received:
    0
    Hi, I have a question to ask you guys. I'm a newbie here please forgive me if i ask something stupid. Is it i just follow the cnc shield diagram will do?? Just plug in my laser module to the Z+ then will work?
     
  30. BNMaker

    BNMaker Well-Known
    Builder

    Joined:
    Jul 13, 2017
    Messages:
    62
    Likes Received:
    38
    I guess I was trying to point out to those that DO care, that there isn't any such thing as a 15W diode laser under $1000. It wasn't meant as a dig. This is meant to be an informative forum and there's a lot of new laser buyers that will be sucked in by the lying hype that they are buying something other than a NUBM06 or NUBM44.

    I was.

    Even when they claim that 8W 'continuous', they're still lying.

    It really does matter - they are charging $300+ by claiming it's something it isn't. I have done back-to-back testing of my $90 4.5W Russian-made laser using the NUBM06 diode with an '8W continuous' Chinese laser and the Russian one beat it hands down.

    Try running at 8W continuously - I reckon somewhere in the second hour it will stop working. I have seen time-lapse video footage of the 'true' rated 6-8W Russian and US units literally working continuously for hour after hour.

    Those pumped-up Chinese ones have a projected lifetime in the hundreds of hours, as opposed to the tens of thousands of hours Nichia designed them for.

    Hey, I was in the same boat - I paid US$360 for my first laser that claimed to be 10W... But I learned.
     
    crispin and GrayUK like this.

Share This Page

  1. This site uses cookies to help personalise content, tailor your experience and to keep you logged in if you register.
    By continuing to use this site, you are consenting to our use of cookies.
    Dismiss Notice