Welcome to Our Community

Some features disabled for guests. Register Today.

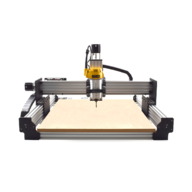
WorkBee CNC Machine

Discussion in 'CNC Mills/Routers' started by Ryan Lock, Sep 21, 2017.

  1. Metalguru

    Metalguru Veteran
    Builder

    Joined:
    Dec 29, 2015
    Messages:
    752
    Likes Received:
    547
    Sure. Just building a new machine, so I'll do some photos over the next couple of days.

    MG
     
    sharmstr likes this.
  2. Jacob123

    Jacob123 New
    Builder

    Joined:
    Jun 15, 2018
    Messages:
    33
    Likes Received:
    3
    Do you know where I can learn to wire this thing? I havent been able to find any diagrams for the arduino and dm542t drivers
     
  3. Metalguru

    Metalguru Veteran
    Builder

    Joined:
    Dec 29, 2015
    Messages:
    752
    Likes Received:
    547
    Come on, Jacob, you don't know how to use Google? Ten seconds on Google brought up the photo below. (Although I prefer to use a +5 based wiring scheme for the drivers, connect all the + inputs to +5v on the Arduino, and all the P+D outputs to the - inputs on the drivers. You'll have to invert the driver signals in the GRBL settings.) Do not connect the ground pins to chassis ground as shown!

    I already mentioned, read my Website Blog - Blog Everything you need to know is there.

    3921872cede679d4a97bfc041ac8043e.png

    MG
     
    #393 Metalguru, Jul 3, 2018
    Last edited: Jul 3, 2018
    Giarc and GrayUK like this.
  4. Antonio Pereira

    Builder

    Joined:
    Nov 27, 2017
    Messages:
    6
    Likes Received:
    4
    Like @Ryan Lock said, you can go for a bigger size, but as i already experienced, you will get to much flex and vibration on Y and X axis.... i built a 1700mmX2200mm and i had a lot of problems... after making a lot of upgrades, now i have a lot more robust machine.


    Added double belts to avoid stretch
    Replaced Y Axis plates by stainless stell plates
    Removed the Inner y Axis Plate and add suport to C-Beam
    Added a new Inner Plate to secure the screws
    Added Wheels to Y axis to secure the belt
     
    sharmstr likes this.
  5. Antonio Pereira

    Builder

    Joined:
    Nov 27, 2017
    Messages:
    6
    Likes Received:
    4
    What kind of stepper motors are you using? Maybe a simple Arduino Uno + CNC Shield + DRV8825 is more than enough and its very cheap.
     
  6. Ryan Lock

    Ryan Lock Veteran
    Builder

    Joined:
    Oct 12, 2014
    Messages:
    530
    Likes Received:
    293
    That is a monster of a machine! Looks like you worked out alot of the kinks of going that big in the end. I like the idea of the new Y-Plate-Inner :thumbsup:
     
  7. Adam Filipowicz

    Adam Filipowicz Journeyman
    Builder

    Joined:
    Dec 21, 2014
    Messages:
    261
    Likes Received:
    135
    What is the difference between this workbee and the openbuilds kit version?
     
  8. Adam Filipowicz

    Adam Filipowicz Journeyman
    Builder

    Joined:
    Dec 21, 2014
    Messages:
    261
    Likes Received:
    135
    What is the difference between this workbee and the openbuilds kit version?
     
  9. Metalguru

    Metalguru Veteran
    Builder

    Joined:
    Dec 29, 2015
    Messages:
    752
    Likes Received:
    547
    About 2.75 square meters! :jawdrop:

    MG
     
    Ryan Lock likes this.
  10. Antonio Pereira

    Builder

    Joined:
    Nov 27, 2017
    Messages:
    6
    Likes Received:
    4
    This is based on the OpenBuilds version with some tweaks to provide stability to the size.

    I attached the inner plate i used in my machine.
     

    Attached Files:

  11. Alva B. Eaton

    Builder

    Joined:
    Aug 13, 2018
    Messages:
    1
    Likes Received:
    2
    I ordered my kit today... I am looking forward to building my first Workbee and first CNC overall... ;-)
     
    Ryan Lock and GrayUK like this.
  12. Ryan Lock

    Ryan Lock Veteran
    Builder

    Joined:
    Oct 12, 2014
    Messages:
    530
    Likes Received:
    293
    Great news! Can't wait to see what you will make with it
     
  13. John Mayer

    Builder

    Joined:
    Aug 17, 2018
    Messages:
    24
    Likes Received:
    8
    Can you please provide the diagram you are using for the dual Y axis (i.e, to what pins I should wire the 2nd Y motor, and do I need to slave it?) and the GRBL settings?
    I'm trying to use a Nano or Uno to control my workbee cnc.
    Thanks!
     
  14. Metalguru

    Metalguru Veteran
    Builder

    Joined:
    Dec 29, 2015
    Messages:
    752
    Likes Received:
    547
    Just connect the two Y axis stepper driver inputs in parallel, ie:

    Step Y1 > Step Y2 > Arduino D3
    Dir Y1 > Dir Y2 > Arduino D6

    Also need to parallel all drivers +5V pin together to Arduino 5V, and Enable line from all drivers paralleled to Arduino D8.

    Then, make sure your motors are wired exactly the same, ie RD GN YL BL, If this is a screw drive machine. If it's belt drive like an OX, wire one phase of one of the motors in reverse, ie GN RD YL BL, because one of the motors must turn in the opposite direction.

    20180703_172740.jpg
     
  15. John Mayer

    Builder

    Joined:
    Aug 17, 2018
    Messages:
    24
    Likes Received:
    8
    Thanks for the quick response!
    I can see fuses and capacitors?
     
  16. joe williams

    joe williams Well-Known
    Builder

    Joined:
    Nov 9, 2015
    Messages:
    100
    Likes Received:
    59
    From what I've seen of Metalguru's usual setup,. the fuses are inline on the positive DC lines from the power supply to each drivers' +DC in....the caps in the above pic are already existing on the driver boards if I'm not mistaken.

    @Metalguru ,...Are you using 5 amp fuses in this application?
     
  17. Metalguru

    Metalguru Veteran
    Builder

    Joined:
    Dec 29, 2015
    Messages:
    752
    Likes Received:
    547
    Yes. The fuses are 5A automotive type blade, one for each driver. Separate power and ground lead for each driver back to the power supply. Just a precaution to prevent a fire if a driver goes south.

    And yes, the caps are on the driver boards.

    MG
     
  18. John Mayer

    Builder

    Joined:
    Aug 17, 2018
    Messages:
    24
    Likes Received:
    8
    Are you referring to the ENA+ (+5v)?
     
  19. Metalguru

    Metalguru Veteran
    Builder

    Joined:
    Dec 29, 2015
    Messages:
    752
    Likes Received:
    547
    No, the driver should have a power pin for the inputs. The drivers shown have a common +5V terminal that powers all the input optocouplers. Some drivers have a common +5V, some have a common ground, and some have both + and - pins for all inputs so you can wire it up however you want.
    The DIR pin is the direction pin for the driver, connected to the axis DIR output pin on the Arduino.
    The ENA pin enables the driver, when it is disabled, it ignores step and direction inputs. This also puts the driver into a low current hold mode which locks the stepper motor in the last step position.

    MG
     
    #409 Metalguru, Sep 8, 2018
    Last edited: Sep 8, 2018
  20. Metalguru

    Metalguru Veteran
    Builder

    Joined:
    Dec 29, 2015
    Messages:
    752
    Likes Received:
    547
  21. John Mayer

    Builder

    Joined:
    Aug 17, 2018
    Messages:
    24
    Likes Received:
    8
    I'm not quite sure what are you referring to. I'm planning on using DM542T drivers. Can you please tell me which pin?
    Thanks!
     
  22. Metalguru

    Metalguru Veteran
    Builder

    Joined:
    Dec 29, 2015
    Messages:
    752
    Likes Received:
    547
    See the schematic above. VCC = +5V

    Tie all driver +5v pins together to +5v on the Arduino.
    Tie all driver ENABLE pins together to arduino output D8

    The DQ542 is one of the drivers I referred to as having both + and - terminals for each input. On each driver, you have to externally connect all the + terminals to +5v, and all the - terminals to the respective Arduino outputs. The outputs then need to be set for Active Low.

    You could also wire all the - terminals together to Arduino ground, wire the + driver inputs to the Arduino digital outputs, and set the outputs on the Arduino to Active High.

    All of the +5 or Gnd terminals on all of the drivers have to be connected together, depending on which setup you use. Also, all ENA pins on all drivers have to be connected together to D8 on the arduino.

    Refer to the DQ542T Manual for more information.

    MG
     
    #412 Metalguru, Sep 8, 2018
    Last edited: Sep 11, 2018
  23. jeffmorris

    jeffmorris Journeyman
    Builder

    Joined:
    Nov 6, 2017
    Messages:
    496
    Likes Received:
    115
    View attachment 34724

    Which stepper drivers are those shown the in image? The ones that Open Builds Store sells are different kind.
     
  24. Metalguru

    Metalguru Veteran
    Builder

    Joined:
    Dec 29, 2015
    Messages:
    752
    Likes Received:
    547
    Yes, they are. The ones in the photo are sold by Sainsmart, you can find them on Amazon or at Sainsmart.com.

    Different physical layout, almost identical wiring.

    MG
     
  25. John Mayer

    Builder

    Joined:
    Aug 17, 2018
    Messages:
    24
    Likes Received:
    8
    Can you please do me a favor and check if I get this right?
     

    Attached Files:

  26. Metalguru

    Metalguru Veteran
    Builder

    Joined:
    Dec 29, 2015
    Messages:
    752
    Likes Received:
    547
    Uh, no, not even close. Don't hook it up this way, you'll blow stuff up! Try this one. Same except you have 2 Y drivers just wired in parallel. Also, since your driver has separate + and - connections for each input, wire all + connections together to +5, and all - connections to their respective arduino outputs. Again, READ THE DQ542 MANUAL, its on the OB store DQ542 page.

    mycnc_connections.jpg

    MG
     
    #416 Metalguru, Sep 11, 2018
    Last edited: Sep 11, 2018
  27. John Mayer

    Builder

    Joined:
    Aug 17, 2018
    Messages:
    24
    Likes Received:
    8
    Thanks for taking the time to check my setup. However, this is were I get confused "wire all + connections together to +5" My step driver don't have a designated +5V pin, it has +5 Pul, +5 Dir, and +5 Ena. I know that I need to connect +5 Pul to it respective Arduino output.
    +5 Dir to respective Arduino output.
    That's leave me with +5 Ena's which I need to connect together and then to the D8 in the Arduino output.
    They only other output pins I have left are the -5 Pul, Dir, and Ena which I need to connect together and then to the ground in it respective Arduino output. Am I getting it right?
     
  28. Metalguru

    Metalguru Veteran
    Builder

    Joined:
    Dec 29, 2015
    Messages:
    752
    Likes Received:
    547
    NO! WRONG!

    "wire all + connections together to +5" How is this in any way ambiguous? Connect everything that has a + sign in front of it to +5V terminal on arduino. Nothing Else! That means you will have 12 terminals on 4 drivers connected to +5V. I don't know how I can explain it any simpler... Just like this diagram:
    60efa893db0adec2d3010b1b1de4b0c0.jpg
    And no, you don't connect ANY pins marked + to ANYTHING but 5V.

    All pins with a - sign in front of them go to the Arduino outputs:

    If you still don't get it, I give up.

    MG
     
    John Mayer likes this.
  29. SugarJ

    SugarJ Well-Known
    Builder

    Joined:
    Nov 16, 2015
    Messages:
    126
    Likes Received:
    47
    Also note that you have to set $2=7 to invert the logic on the X, Y, and Z Pulse ports so that it drops the signal to 0V to send the signal. (Active Low). Default configuration is Active High.

    MG has built so many of these machines it's second nature for him. Sometimes not so easy for the rest of us to follow.
     
    John Mayer likes this.
  30. John Mayer

    Builder

    Joined:
    Aug 17, 2018
    Messages:
    24
    Likes Received:
    8
    Thanks! I got it this time!
    I was thinking that I need to connect the + pins into the arduino the whole time. Thanks for your time, patient and explanation! :duh::D
     

Share This Page

  1. This site uses cookies to help personalise content, tailor your experience and to keep you logged in if you register.
    By continuing to use this site, you are consenting to our use of cookies.
    Dismiss Notice