Welcome to Our Community

Some features disabled for guests. Register Today.

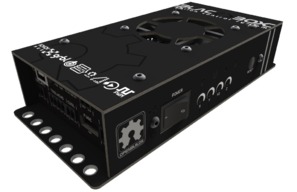
BlackBox

Discussion in 'Other Builds' started by Mark Carew, Feb 22, 2019.

  1. devloop

    devloop Well-Known
    Builder

    Joined:
    Dec 9, 2017
    Messages:
    61
    Likes Received:
    91
    So your saying that Probe would not work? With the current electronics I use, it has Ohmic sensing, it simple uses the what you have for your Z-Probe but I clamp it to the sheet I'm cutting instead of that base you sell, if you incorporate the software to raise the torch head after Z probe touch off then I'm wanting to throw away what I have for electronics and use this, I love the interface and smart phone compatibility
     
  2. Peter Van Der Walt

    Peter Van Der Walt OpenBuilds Team
    Staff Member Moderator Builder Resident Builder

    Joined:
    Mar 1, 2017
    Messages:
    14,917
    Likes Received:
    4,291
    Correct, Grbl does not support THC (Torch Height Control)
     
  3. devloop

    devloop Well-Known
    Builder

    Joined:
    Dec 9, 2017
    Messages:
    61
    Likes Received:
    91
    How would you set this up for plasma configuration? I dont use or need THC, just figure I need a way for the torch to automatically detect the plate height so the Z axis is controlled by something other than preset G-code
     
  4. Peter Van Der Walt

    Peter Van Der Walt OpenBuilds Team
    Staff Member Moderator Builder Resident Builder

    Joined:
    Mar 1, 2017
    Messages:
    14,917
    Likes Received:
    4,291
    Initial Height Sensing. Each time the torch goes off, it moves to new position, probes down to find height, sets zero, starts cut on that plane. When path is complete, before starting next entity, it probes the the height again. To use this way best, build a floating head mount that has some "give" and use Drag tips (that contact the surface, dragging along, the "give" in the floating head allows it to float up/down as appropriate if material warps mid-cut. Initial height sense helps with Piercing (as even with a drag tip you want to be about 2mm above the surface to avoid slag damaging the tip.
     
  5. devloop

    devloop Well-Known
    Builder

    Joined:
    Dec 9, 2017
    Messages:
    61
    Likes Received:
    91
    Also, how do I adapt the Black Box to my plasma to trigger it, Hypertherm powermax 45
     
  6. Peter Van Der Walt

    Peter Van Der Walt OpenBuilds Team
    Staff Member Moderator Builder Resident Builder

    Joined:
    Mar 1, 2017
    Messages:
    14,917
    Likes Received:
    4,291
  7. devloop

    devloop Well-Known
    Builder

    Joined:
    Dec 9, 2017
    Messages:
    61
    Likes Received:
    91
    Thanks, that is what I was looking for!, I c with the floating torch head this will work
     
    Peter Van Der Walt likes this.
  8. Peter Van Der Walt

    Peter Van Der Walt OpenBuilds Team
    Staff Member Moderator Builder Resident Builder

    Joined:
    Mar 1, 2017
    Messages:
    14,917
    Likes Received:
    4,291
    Yip, touch off before each 'path', set zero, move up to pierce height. Trigger, G4 dwell to pierce, lower down to drag height and run while it floats.
     
  9. David the swarfer

    David the swarfer OpenBuilds Team
    Staff Member Moderator Builder Resident Builder

    Joined:
    Aug 6, 2013
    Messages:
    3,435
    Likes Received:
    1,908
    the torch height control is mostly used to keep the height constant when the metal plate is not flat. they never are. and they bend more with the cutting heat. so, the floating head that follows the surface is the way to go.
     
    Peter Van Der Walt likes this.
  10. Woodie49

    Woodie49 New
    Builder

    Joined:
    Feb 7, 2014
    Messages:
    61
    Likes Received:
    1
    Is there written Assembly Instruction for the Black Box some where ?
    Thanks
     
  11. sharmstr

    sharmstr OpenBuilds Team
    Staff Member Moderator Builder Resident Builder

    Joined:
    Mar 23, 2018
    Messages:
    2,059
    Likes Received:
    1,448
    Peter Van Der Walt likes this.
  12. Woodie49

    Woodie49 New
    Builder

    Joined:
    Feb 7, 2014
    Messages:
    61
    Likes Received:
    1
    I was able to access from the above link two times, but now all I get is the Photo of the Black Box in the upper left hand coner . Same thing from the web site. Any one know what is going on?
    Thanks
     
  13. sharmstr

    sharmstr OpenBuilds Team
    Staff Member Moderator Builder Resident Builder

    Joined:
    Mar 23, 2018
    Messages:
    2,059
    Likes Received:
    1,448
  14. Woodie49

    Woodie49 New
    Builder

    Joined:
    Feb 7, 2014
    Messages:
    61
    Likes Received:
    1
    Ok now, But I can't open from the list on the left side. I would like to printout the Instructions .
    Thanks
     
  15. sharmstr

    sharmstr OpenBuilds Team
    Staff Member Moderator Builder Resident Builder

    Joined:
    Mar 23, 2018
    Messages:
    2,059
    Likes Received:
    1,448
    Again. Working fine for me. I've attached a PDF version of them. There's also a video:
     

    Attached Files:

  16. Woodie49

    Woodie49 New
    Builder

    Joined:
    Feb 7, 2014
    Messages:
    61
    Likes Received:
    1
    I got that it's the other docs like set up and etc. I like to print..
     
  17. Woodie49

    Woodie49 New
    Builder

    Joined:
    Feb 7, 2014
    Messages:
    61
    Likes Received:
    1
    Got it finely!
    Thanks
     
    sharmstr likes this.
  18. Arzak

    Arzak New
    Builder

    Joined:
    Feb 5, 2018
    Messages:
    6
    Likes Received:
    6
    Question from a rookie
    Running Openbulids control v1.0.179 on Black box. On running program about half way into project ran into error

    [13:36:07] [ G1 F1000 X214.1997 Y74.8826 Z-1.0000 S1000 ] ok
    [13:36:07] [ disconnect ] PORT INFO: Port closed

    When I reconnected port it lost place and wasted material. Any Idea on cause and or how to recover from this error without loosing place and wasting material.
     
  19. sharmstr

    sharmstr OpenBuilds Team
    Staff Member Moderator Builder Resident Builder

    Joined:
    Mar 23, 2018
    Messages:
    2,059
    Likes Received:
    1,448
    Cant recover unless you know the exact line it died on.

    For the port disconnect, there are a few possibilities. 1 is a sleep or power saving feature for your usb port. The other is EMI.

    Port Disconnect
     
  20. Denis Lapratte

    Builder

    Joined:
    Jan 4, 2015
    Messages:
    27
    Likes Received:
    8
    Is there any BB documentation (other then the assembly guide) I can download? I'd like a version I can install on my PC when not connected to the net.
     
  21. Peter Van Der Walt

    Peter Van Der Walt OpenBuilds Team
    Staff Member Moderator Builder Resident Builder

    Joined:
    Mar 1, 2017
    Messages:
    14,917
    Likes Received:
    4,291
    Not at this time, except the longish way:
    Go to docs.openbuilds.com/blackbox
    Click each link on the left in turn
    Click the print button at the top and save each page you are interested in, to PDF using a PDF Printer
     
  22. thinman

    thinman New
    Builder

    Joined:
    Jul 25, 2015
    Messages:
    7
    Likes Received:
    7
    I can't find a link to the schematic. Is something broken or are my old eyes just getting worse?
     
  23. sharmstr

    sharmstr OpenBuilds Team
    Staff Member Moderator Builder Resident Builder

    Joined:
    Mar 23, 2018
    Messages:
    2,059
    Likes Received:
    1,448
    Scroll up and click on the Files and Drawings tab.

    Edit
    For some reason, you need to be in the build tab in order for the Files and Drawings tab works correctly. So, scroll up, click on Build, then click on Files and Drawings.
     
  24. thinman

    thinman New
    Builder

    Joined:
    Jul 25, 2015
    Messages:
    7
    Likes Received:
    7
    Got it. Thanks.
     
  25. brab626

    brab626 New
    Builder

    Joined:
    May 10, 2019
    Messages:
    8
    Likes Received:
    10
    i want to to be able to turn my spindle off and on through the software. I have a Huanyang vfd and from what i read all i need on the vfd side is to connect FOR and DCM but im unsure to what pins on the blackbox side. Can anyone help?
     
  26. sharmstr

    sharmstr OpenBuilds Team
    Staff Member Moderator Builder Resident Builder

    Joined:
    Mar 23, 2018
    Messages:
    2,059
    Likes Received:
    1,448
  27. RV6APilot

    RV6APilot Well-Known
    Builder

    Joined:
    Apr 23, 2019
    Messages:
    29
    Likes Received:
    23
    Love this BlackBox. I have been following @Sean Griffiths VFD wiring diagram and although I have a 110V
    VFD. Just curious if the external relay is really needed to change the direction(fwd/rev), wouldn't the DIR on the BlackBox
    be able to control Fwd and Rev? Just curious as I am hooking up my VFD and do not want to fry anything.
     
    Peter Van Der Walt likes this.
  28. Juan Alonso

    Builder

    Joined:
    Nov 12, 2018
    Messages:
    2
    Likes Received:
    2
    Hi all, I have finished assembling Blackbox and reading the documentation I see that I have to "adjust the stepper driver current for each axis" could I read any additional indication to verify that the motors have been properly configured? Thank you!
     
  29. sharmstr

    sharmstr OpenBuilds Team
    Staff Member Moderator Builder Resident Builder

    Joined:
    Mar 23, 2018
    Messages:
    2,059
    Likes Received:
    1,448
  30. Juan Alonso

    Builder

    Joined:
    Nov 12, 2018
    Messages:
    2
    Likes Received:
    2
    Thank you!
     
    Peter Van Der Walt and sharmstr like this.

Share This Page

  1. This site uses cookies to help personalise content, tailor your experience and to keep you logged in if you register.
    By continuing to use this site, you are consenting to our use of cookies.
    Dismiss Notice