Welcome to Our Community

Some features disabled for guests. Register Today.

myOX : a 4' x 2' OX with potential

Discussion in 'CNC Mills/Routers' started by Serge E., Jun 19, 2014.

  1. Serge E.

    Serge E. Journeyman
    Builder

    Joined:
    May 6, 2014
    Messages:
    730
    Likes Received:
    252
    Excellent. I took the 'buy and keep in box' approach, waiting for some feedback and surfing for reviews... I have one sitting in the back of the van for the last 24 hours. The store only had 4 in stock, including one on display. Seems just about everyone sells these, but it is not seen or talked about that much. Weird ...

    As for reminding me of the safety aspects, I would rather hear/read them too often than trying to pick up bits of (my) fingers and some how head to the nearest emergency room.

    I noticed the Rage3 comes with two different clamps : top and front mounted. I haven't open the box yet, but it should also have a pair of goggles and ear plugs. I doubt these would be more than average, right ?

    Noise level and sub-par laser ("hard to see line on a sunny day") seemed to be the only bad aspects found in the reviews of the Rage3. A few talked about alignment being off. Those who didn't were the ones who check and correct before using. Its little bro, a DIY version - the Fury (green instead of orange), with a weaker motor, was not getting nice reviews (possibly type of users rather than the machine ?)

    The garage is mine for the next 4 days. :cool: So I will be taking myOX's X beam apart to recut the 3 lengths of 20x60... Let"s hope it does the trick to square my X and Y. Then I can redo my plexiglass shields: incorporate fans, buttons, etc., do the limit switch and stoppers as well and be off with a "completed" myOX.

    Of course, first and foremost, I'll have to square the Rage3, do a few practice cut in wood and then with the 2' or so off cut 20x40 V-slot. I'll also cut a few length of steel bars and pieces of aluminum downspout as I rework the gate to the backyard ... A few projects await the Rage 3 unboxing.
     
  2. Serge E.

    Serge E. Journeyman
    Builder

    Joined:
    May 6, 2014
    Messages:
    730
    Likes Received:
    252
    Thanks for the heads up. In reading the PDF version of the manual, there seems to be ways of adjusting squareness in all directions. It will be up to my not so sharp eyes (brand new square, ...) to get it right. I'm only going to do a few precision cuts, for now. I should have plenty of time to recheck squareness between cuts (tests and actual needed cuts) to learn if I can trust the machine's precision.
     
  3. Paruk

    Paruk Journeyman
    Builder

    Joined:
    Jul 13, 2014
    Messages:
    397
    Likes Received:
    149
    Check also for play in bearings etc. of the sliding mechanism. You can square perfectly and than indeed, if you cut, the play will cause the machine to be off. I'm pretty sure these machines are made in China (as most things these days). Don't worry, China produces a lot of high quality stuff (as I know of experience) but also bad stuff. It's the price (as always) that makes the difference. I have PV panels from China, which are to be the best available in the world (this brand has only 1 panel failure in the 100,000!). They were not cheap, but the price was very competitive to other brands with the name of being good but actually are not. Also, the real life output of these panels is higher than specified, opposite to practically all other brands (promise a lot, get less).

    The more precise you are with squaring and adjusting for perfection, the better the result will be. Take your time and do it all slowly but surely. The time and energy invested now, will be paying off handsomely when you start to use it and have a perfect cut every time.
     
  4. Serge E.

    Serge E. Journeyman
    Builder

    Joined:
    May 6, 2014
    Messages:
    730
    Likes Received:
    252
    I plan on taking my time, It's a hobby and part of the journey / learning curve ... No particular rush, aside from wanting to succeed with the build.

    Indeed, what is not made in China or some other part of Asia these days ? Like every where else, there is some good/excellent and more bad, usually for the masses who just want to consume/replace. Pricing and source of products are not the best way to determine quality. High ticket items are too often targeting bigger suckers ... Add fact some manufacturers cover a wider market by having entry level and professional versions of products, the lower quality stuff often being what didn't pass the name brand quality control... Then, just to add spice to the mix, there is the odd lemon which sneak by quality control ... Not easy to pick the right solution. For many items, we end up going for the cheapest and replace as needed as we might get tired of the product and it most likely comes from the same manufacturer anyways.

    Last winter, the rear wiper arm of my van broke right in my hand as I was removing snow. Went to the dealership to be told the part is nearly 100$ to replace, crapy and I could get a much better quality new all metal design which required a new wiper blade... That would be over 200$, before installation ! Who do they think we are ?!? I surfed the Internet for days only to find out they seemed to have the market cornered. Then, I decided to look for "look alikes", comparing pictures of various rear wiper arms (thanks to Google) and trying to find those with dimensions that were close enough. Eh, it's just a wiper arm and blade an inch more or less is not going to be the end of the world. Bingo ... a Chinese source I was dealing with on other items had a very very close fit. It actually had a tiny extra feature to avoid the cause of my original wiper arm to fail. It's designed for an Opel of some sort, I have a Chrysler T&C... Total cost, delivered to my front door from half way across the world : less than 10$ with a brand new wiper blade included ! Took all of a minute to install. The supplied blade was about 1/2 too long with no way to adjust. I went to a local store, grabbed their cheapest wiper for an other 10$. The wiper blade needs to be changed about now. At the original dealer quoted cost, I can go 10 years and still save. I'll have changed my car probably twice before then (I drive way more than the average). We are all about throw away these days... running out of landfills in the process.

    But I'm way off the subject of OX's here ... Back to our regular programming.
     
  5. Serge E.

    Serge E. Journeyman
    Builder

    Joined:
    May 6, 2014
    Messages:
    730
    Likes Received:
    252
    The one aspect I knew better but did not keep in mind during my 'design' and build : the longer any one axis is, the more evident any error, as tiny as it might seem, will become as you travel the length of the axis. The smallest detail can become the biggest challenge.

    Maybe I should of built a smaller OX as a first design, get satisfaction earlier and then tackle myOX. Too late now, so time to roll up sleeves, pull out the slide rule and work my way through the proper squaring of Y/X and X/Z even if it means a complete rebuild. I learned quite a bit with the build thus far, so no time or material was wasted. It comes down to : "measure twice, cut (build) once".
     
    Jestah likes this.
  6. Serge E.

    Serge E. Journeyman
    Builder

    Joined:
    May 6, 2014
    Messages:
    730
    Likes Received:
    252
    Finally unpacked the Evolution Rage3 multi purpose miter saw. I love it ! I should of got one years ago !!

    Checked for squareness : fence, blade, table, laser, etc. It all seems real good... I must be getting lucky. :confused:

    So I took a scrap piece of 2"x10" and did a first cut. It was like cutting butter. Beautiful cut, even through the knot that lied within. I turned the cut edge to the fence and did a second cut. Hmmm ... both squares agree, the blade and fence is not quite square. Adjust, according to manual, a few more cuts and ... still off. Scratch the head, look around ... looks like there is a bit of "flex" when the saw is all the way out (maximum overhang) - moves just a bit left and right, but enough to loose the squareness when all the way out (~12")! Narrow pieces, like 2" x 3" get "perfect" 90 degree corners.

    The motor does not turn on right away at the press of the trigger, it takes about a second or so then an other 2 seconds or so to get hit speed. For a second I though I had a lemon, letting go the trigger almost right away. Second try and ... there it goes.

    The chip bag is pretty much useless ! Even if a vacuum was used, the chips seem to be going straight out the back and underside. This could be a problem when cutting aluminum or steel ... They actually indicate to plug the output to bag (plug is supplied) when cutting metal.

    So the Rage3, or just about any similar saw will likely have this problem (Prauk's warning). If I lock the slide, saw all the way in, seem loads better ... just can't cut much more than a few inches wide. Which should be ok for the V-slot, maximum being 80 mm wide. For what it's worth, it could cut that vertically ...

    Before cutting V-slot, let's cut some other stuff needed for other projects.

    Square 3"x3" (really 2 3/4" x 2 3/4") downspout (aluminum) : beautiful cut, nut much louder than just the motor running. No sparks, chips being spit mostly out back and underside. No crushing of the downspout. It's so easy to cut ... A few measurement, a few cuts & finally rerouted a downspout across top of gate. A few cuts in fence board (wood) to frame the whole thing and... tada... one saw made the job so easy.

    Now I need to cut round brushed aluminum thick tube. It's about an 1.5" OD, 1/8" wall thickness. I use the stuff has rod to hang draps. Did one in kitchen long ago ... cut by hand. What a pain it was, but looks great. I needed to replace the bamboo 'rod' in the bedroom... measured, cut within seconds. To attache finials, I needed to use 1 1/8" wood dowels on the aluminum rod side but only about 3/4" in the finials. I set the Rage3 depth stop, marked the 1 1/8" dowel every 4" and ... tada ... trimmed down 3/4" wide sections up to each of those 4" ... sliced, bit of glue and everything fits. Draps are back up.

    This saw is just fantastic.

    Now for some V-slot. had a piece I hand cut a while back, a bit over 30" long. Marked it at 30", lined up with laser and initiated cut. I was not smooth with the movement, kind of scared of kickback, chips, etc. It showed in the quality of the cut. Areas are so smooth it's like a mirror finish ! Others show tooth marks, almost as if the material was being ripped off. As for squareness, actually pretty good, especially if I had been smoother with the cut. If not for 'chips' I had a hard time distinguishing with the factory cut end. This was with 20x60 mm.

    The 'stop' on the supports is rather cheap. A piece of plastic which slides and has two wing nuts to tighten. It's so loose I can't use for reliable precise repeat cuts. I'll have to figure a better way ... Odd how they used plastic in some areas I would of expected metal : the lever for bevel lock, the clamp for set angles (that will wear out in no time !), etc. It can all be adjusted later on, if needed.

    The Rage3 might just make it for the odd careful cut of V-slot, at least with its brand new multi-purpose Rage blade and in a chop saw mode (locking slide at its shortest).

    I'll have to practice some more cutting of aluminum and see how it does with the steel bars (need to cut a couple lengths). oh, no heat ! Even hand sawing had hot cuts. These are barely warm to the touch right after the cut.

    Once comfortable, it should be like slicing bread. :duh:

    It's a keeper, if not for V-slot cutting for just about everything up to about 12" wide. I'll have to get descent stand and bolt it on. That might make it a bit firmer as the base is not that thick (makes it relatively light weight). Wish I had this saw when I did the deck and sheds and fence and basement and ... I'll have to find other projects !

    Now to decide if I take those three lengths of 20x60 out of myOX and trim them down to equal precise square lengths. I might have to cut off more than just the few extra mm... maybe go down to 1490 as a first attempt. I have 4" to play with to keep at least 48" width of work area for myOX.

    Wish me luck ...
     
  7. Paruk

    Paruk Journeyman
    Builder

    Joined:
    Jul 13, 2014
    Messages:
    397
    Likes Received:
    149
    Luck has nothing to do with it, Serge.:)

    First i check if the surface of the saw table and the blade are at 90 degree angle with a precision square (this one is Japanese and perfectly calibrated)
    IMG_1164.jpg IMG_1165.jpg
    As you can see the blade is slightly hollow (and needs to be replaced by now!;)) But I know it still makes perfect cuts with the tooth, so I can hold on a bit.

    Next step is a double check with an digital angle meter:
    IMG_1166.jpg IMG_1167.jpg
    This confirms that the vertical cut can be 90 degrees.

    Next step is checking the horizontal cut:
    IMG_1168.jpg IMG_1169.jpg
    Once with the digital angle gauge and once with the Japanese square.

    So measure twice, cut once.

    Then you make a test cut on a piece of wood, turn the other piece 180 degrees around and hold the cutting edges together on a perfect flat surface. If it closes perfect, then do the same with turning both ends 90 degrees to check the vertical cut with the same procedure. When both tests come out perfect (means perfect cut, no light shines thru) you're confident to make the cut in the aluminum v-slots. No luck involved.

    Clamp the v-slot profiles together, and try to make a very thin cut on one side (I often use the blade, going up and down to shave of until it's perfectly cut). Turn the profiles around and cut off an ultra thin slice using the up and down for shaving it as perfect as possible with the saw blade. That way you should only loose a minimum of the length.

    Now, keep them clamped together, and use a fine file to perfect the cuttings.

    If you follow these instructions (the digital stuff is not needed, but a perfect square is mandatory) I see no reason why you would not have perfect 90 degrees cuts on the profiles (other than human error, humans arrrrhhh).

    Now, go get them tiger!

    BTW; if you want a really perfect cut, don't use a miter saw but a table saw with the right blade and a calibrated miter sled. Success guaranteed!
     
    #157 Paruk, Oct 28, 2014
    Last edited: Oct 28, 2014
    Mark Carew likes this.
  8. Serge E.

    Serge E. Journeyman
    Builder

    Joined:
    May 6, 2014
    Messages:
    730
    Likes Received:
    252
    Thanks for the procedure, much appreciated. At this stage, I checked with two different squares - an older one and a more recent with a sliding ruled edge and a 45 degree portion. They can't both have the same exact "error", if any, right ?

    Table to blade : checked. Both squares show same results - square (as far as my eyes allow - no light between blade and squares, had to avoid blade tooth obviously). A good digital meter would confirm this (avoid any effect due to my 'eyes' being more or less good). Even the 45 degrees (bevel) showed good (could only use newer square for this). I did not try in between angles as this would definitely need a good angle gage, digital or not.

    Rear fence to blade, table set at "90 degrees" : slight gap, confirmed with a cut in wood and rotated 90 degrees to make a 'square' cut, it was not square. Adjusted the fence a few times only to return to same state. Then, more recently, it hit me, maybe the table is not really at "90 degrees" :duh: The position is 'locked in' with plastic against cast metal. This won't be precise, at least not for long. I will check this 'now' (tonight) since it was always off by about same amount on all cuts and with... how can I say it ... same pivot/centre point. It could just be the miter markings being off (like some reviews point out about the Rage3) : ok for contractors, not ok for precision cuts.

    Fully extending the slide, there seems to be a bit of flexing/movement. It's probably expected in this price category (?) and type of saw: long slide, only two columns. But this could partially be due to my current setup - saw just sitting on work surface not clamped to it (?) I'll check to see if clamping saw down makes any difference, stiffening it somewhat ?

    I really like your trick of repeat "shaving" a cut to get the squarest cut possible, assuming everything else is in order. I always thought a bit flexing in the blade would work against us, humans, especially with thin cuts. But, as you suggest, a few passes of thinning cuts can make up for that (probably, as there would be less and less material to push the blade off square). Not certain what it does to the tooth wear though by jut skimming the material being cut ...

    I was also thinking about clamping the related lengths together to make as certain as possible that they end up equal in length. "Thin" cutting/shaving from multiple faces, like you suggest, should also give a final cut as square as possible, where part has fixed surface to rest against (rear fence and cut length). A bit of filling, if done right (which could be a problem in my hands), cleans the cut ... possibly centre portion with a bit of bulge depending how truly square everything is. It would probably need some visual marker (like blue) to file just right. Price to pay for not going with a high end (usually expensive) tool.

    I'm learning ...

    If I get a calibrated miter sled, the old ShopSmith actually allows adjustment to the RPM since it can drive multiple tools, each with its requirements ... Cutting aluminum and even light metal, the right blade mounted, should be a breeze. I just need a better guard as the chips are all directed at me, while the miter saw directs them away. I just need to do a lot of checking each time I change mode (which is not often given work needed).

    I'll see where this journey leads me. I might just get into various projects. A customs officer actually asked if I could help with cabinets (needing to redo his kitchen !) when I declared a few parts for the router ... It's obviously not the opportunities that are missing. myOX could eventually engrave designs onto those cabinet doors !

    I need to get it going as people are already asking me if I can do Christmas gifts, like making a family tree, engraved frames, etc. Not a whole lot of precision needed for most, but I would prefer doing it as nice as possible, especially for gifts ...
     
  9. Serge E.

    Serge E. Journeyman
    Builder

    Joined:
    May 6, 2014
    Messages:
    730
    Likes Received:
    252
    Well, look at that (actually you can't) ... I aligned the horizontal blade to rear fence properly, as you explained/showed, using only my two squares, just to put the odds in my favour, even if luck has nothing to do with it, and I did one slim cut out of the leftover 2" x 10". It shaved a bit of a wedge compared to the previous cut on that face. Thus showing a difference in angle. I then rotated the piece 90 degrees, new cut against the fence, and did second cut. Again, a slender wedge came off.

    Guess what, both squares seem to agree, the newly cut corner is square ! :thumbsup: At least as much as my two squares and both eyes can tell. Maybe not aviation precision square, but mighty square especially compared to my previous attempts a few days back. :cool::D:thumbsup:

    So I rotated an other 90 degrees and did a 3rd cut. Wow, nice and square still. Last rotation and fourth and final cut ... Still square, I could slice like this all day ! o_O But I won't.
     
  10. Serge E.

    Serge E. Journeyman
    Builder

    Joined:
    May 6, 2014
    Messages:
    730
    Likes Received:
    252
    Just did a (slim) cut and 'shave' into V-slot and near mirror finish as well as square cut. There is a bit of blade deflection on first pass, especially of the slimest of slim cuts I made. Then, as I brought the blade up and back down a few times, I could hear it shave that V-slot smooth.

    The piece needs to be clamped nice and solid. Used the Rage3 top clamp, on left side. The front clamp won't hold a 20mm firmly on back fence. Two layers should work. Maybe standing the 20x60 on a narrow side, but that would probably worsen blade's deflection for a slim cut and shave.

    Thanks Prauk :thumbsup:, made a new Rage3 owner real happy. :) I'll have to get myself a good protractor to carefully check miter angles at each setup. That's ok, I'm in no rush and measuring at least twice is not a bad idea.

    Now, me thinks I'm going to cut that rear 20x60 into two and make myself a half size myOX just to get started. I have a third piece of 20x60 left over from the 1000mm length used to make my Z. I might have enough GT3 left over as well ... Once the 1/2 myOX is nice and tuned, I will do a few projects before going back to the full size. It was sort of overkill on my part, at least for now. I'll just have to use the extra length of 20x40 for the rearmost X beam when time comes to grow myOX back to full size.

    Isn't it wonderful how things work themselves out along the way ?
     
  11. Paruk

    Paruk Journeyman
    Builder

    Joined:
    Jul 13, 2014
    Messages:
    397
    Likes Received:
    149
    Nice to hear you're on your way now. Remember to set up your Rage3 every time you have to do that precision work. Changing from 45 to 90 and back will change the settings. So check and adjust when needed before every cut. The filing you have to take it easy and slow. Make a pass and check, make a pass and check, etc. It pays to work like that, since when the material is taken of too much, you'll have to start again. What's gone, is gone. With a Zen attitude, you can even regard it as a meditative exercise.:) The reward is a perfect result and a machine that is as precise as it can be. I have no difference between left and right of the Y, the X perfectly square with it. Z the same. It's one worry less when you start cutting.

    Stay sharp!
     
  12. Serge E.

    Serge E. Journeyman
    Builder

    Joined:
    May 6, 2014
    Messages:
    730
    Likes Received:
    252
    Indeed, it will be a Zen like experience each time.

    What I also did is flip the V-slot over, edge against back fence now facing towards me, brought the freshly cut/shaved edge against the blade (off and down), clearing the teeth, and then repeated what is basically just the shaving action. This seems to finish the cut edge darn near perfect - doesn't look like filing is actually needed. I will have to see how many cuts can be done this way. I figure plenty, if blade can do over 700 cuts in steel before needing to be changed. Right ?

    I'll need to figure out a consistent way of doing equal lengths. As you say, wether filling or shaving, once the material is gone it's gone. Will probably need some sort of jig ... maybe a piece of extrusion with a good measuring tape to position or an Incra miter guide ?
     
  13. Paruk

    Paruk Journeyman
    Builder

    Joined:
    Jul 13, 2014
    Messages:
    397
    Likes Received:
    149
    To achieve consistent length, use a stop. Take a block of wood big enough to reach the hight of your miter saw base and clamp it into position on the workbench. First cut one side perfectly square, turn it around with the cut facing the stop, bump it gently against the stop, check if it is sitting there tight and right and make your final cut. That's it. You can repeat the cuts as many times as you like, same result every time, providing your Rage3 stays in line over the cuts. Check in between cuts if you doubt it. Work slowly and consistently to get the best result. The extra time spent here will save you time in the next steps.

    Oh, and measure twice, cut once. Don't flip it over and cut again (even the shaving!). Your first cut should be perfect enough (with the shaving to clean and fine tune the cut). If the first cut is not to your satisfaction, do the aligning of your miter saw again and again until it is perfect. Once you're there, you'll know how to get it right the next time with much less time needed.

    If you can't get it perfect with the miter saw, use your Shopsmith and a miter slide. It WILL give you perfect cuts. I guess the Rage3 blade can be used in the Shopsmith? 10", arbor 16.4mm?
     
    #163 Paruk, Oct 29, 2014
    Last edited: Oct 29, 2014
  14. Serge E.

    Serge E. Journeyman
    Builder

    Joined:
    May 6, 2014
    Messages:
    730
    Likes Received:
    252
    Doing it that way would be for a cut of a given length, not much adjustment aside by making an other stop/block. Still cheaper than an Incra fence (80$ with stop for 52"). But later should allow for any length up to its maximum. There's a telescoping version which goes to 64", but more expensive. I'll have to play with the wood approach for now, I only need one specific length at this time.

    The Rage3 blade has a 1" arbor (so more like 25.4mm). There's some various adaptors for it. I'll have to check the bag of goodies ... it might be in there somewhere. But I'll have to invest in the miter slide which is much more expensive ... Incra has one specific for the ShopSmith. Will need to think hard before going in that direction.

    Sounds like retirement will become a full time hobby :rolleyes: :nailbite: I'll have to sleep on that one :sleepy:
     
  15. Paruk

    Paruk Journeyman
    Builder

    Joined:
    Jul 13, 2014
    Messages:
    397
    Likes Received:
    149
    You can easily make a cross cut sled yourself (miter sled is another one! sorry), from some plywood and a 2x3 or so. Google for it, have a look at the examples of Izzy/Mathias Wandel/Jay Bates/Savvas Papasavva or Norm of the New Yankee Workshop etc.
    Here's one of Savvas:


    To get it perfect square follow the (long) instructions in this video:

    This guy, William Ng, is good and worth while to see the whole video.
     
    #165 Paruk, Oct 29, 2014
    Last edited: Oct 29, 2014
  16. Serge E.

    Serge E. Journeyman
    Builder

    Joined:
    May 6, 2014
    Messages:
    730
    Likes Received:
    252
    Looks simple enough when following his instructions. I'll be looking at them closer as I should use a sled for some of cuts - safer and easier with a sled.
     
  17. Serge E.

    Serge E. Journeyman
    Builder

    Joined:
    May 6, 2014
    Messages:
    730
    Likes Received:
    252
    Great news ! myOX should be done any time soon now ... Turns out the three lengths of 20x60 extrusion were not square on their 20 mm width, both ends, even the ends I had left from factory. That was weird. Admittedly, I twirled those things so much lately I might of filed (poorly, obviously) both ends at some point (should of marked the good one before).

    So I tweaked the miter saw (yes, the Evolution Rage3) so it could do the squarest cut possible. It is darn near perfect, especially with a bit of 'shaving' motion to avoid any effect of blade deflection or whatnot. It takes maybe 15 minutes or so, me taking my sweet time. :nailbite:

    Took the shortest length (1502+ mm) and just barely shaved both ends. Checked for squareness of both faces, both orientation. Nice !

    Took the other two lengths and very carefully 'shaved' one end square and then worked the other end until each where equal to the 1st. No filling done anywhere ! Just a light deburring to remove any remaining chips left over from the shaving.

    Rebuilt myOX, just the two main X beams, no X gantry (with its Z and heavy router): beautiful ! The Y plates were as square as can be with the extrusion. Took it apart and rebuilt with everything in place, along with a few T-nuts extra on the front face of forward facing beam. They'll be used for the resettable limit/home switches I can now make using myOX ...

    Moving everything by hand, beautiful ! Gone is the 17.5mm difference between both ends of 1500 mm (or so) ! :thumbsup: As interesting as it might of been, the learning curve was a tough one to go through. I should of check for this much earlier ...

    Now I have to fish the wires from the far Y stepper back through the rear most length of extrusion, reconnect to CNC xPro and do tests under power.

    Making chips should follow soon there after. Making for a complete myOX, even if not fully pimp'd out o_O
     
  18. slittle

    slittle New
    Builder

    Joined:
    Oct 31, 2014
    Messages:
    33
    Likes Received:
    6
    Glad to hear that Serge! sometimes we gather and flounder knowing full well what we have to do to get er done. Must be a mental thing Lord knows I have been there before. Glad your saw worked out. Which controls do you have and software? I have been downing large doses of Mach3 in the past few days learning what I can and it's starting to sink in. My problem is I want too much I guess like, spindle speed control duel touch pads vacuum table and on and on you get the drift. I have worked out a vacuum pump and storage tank for the table already which cycles like a air compressor if vac. drops below 20".
    I have my parts list ready If I keep the usb style cnc xpro in the list I am not sure I have the electronic skills Robert and others have to slave the RC motor to Mach3.
    The Kv890 I can do, If it's mechanical no issues. I know squat on boards and chips and would let the magic smoke out.
     
  19. Serge E.

    Serge E. Journeyman
    Builder

    Joined:
    May 6, 2014
    Messages:
    730
    Likes Received:
    252
    For now, I'm with the CNC xPro as well. It's almost too easy to get going with. For software, I'm still not settled on anything beyond the GrblController running on my spare MacBook (rescued from the dumpster - poor thing was in bad shape but I got it running like new)... Playing with SketchUp on the 'design' side, ...

    I do have to tweak settings for best compromise between what the CNC xPro can do, what the steppers I have can take, router, bits, etc.

    I know the feeling, myOX wants to have a deep Z (topless table, bottomless OX), a 4th axis (even if manual at first to work on faces of a mold type of use), slide work pieces through for 'infinity' x nearly 52" wide of work area. Actually rethinking my table so it could go the full depth for probably 48" width instead of just the 20+" opening currently allowed for, ... Seeing some are going with a vacuum table, why not do it too ... at least for smaller work pieces.

    Not to forget a few alternate designs which keep popping into mind along the way, some are ... literally ... off the wall ;)

    I'll just draw a line for now : get myOX to start producing something - most likely engravings, maybe even a large family tree. The rest will just follow. I can hardly wait to get started. It's been four long (but very slow) months so far, mostly a few hours on weekends.

    I will also cut a "control" plexiglass shield : buttons, Emergency switch, display of something (voltage/amps ?), fans, ... 2nd generation of the shield seen in an earlier photo up above somewhere ... and, ok, here :
    P8242310 - myOX - prototype lexan shield.JPG
    Bent plexiglass which snaps on the Y plates (I'm using Chris'). It protects the CNC xPro as well. The power supply hides beneath table surface. I'll film and/or take pictures of hopefully myOX milling/cutting the plexiglass as well as the bending process so I can share the process here as a resource or such. If all goes well, that will be the project for this coming weekend.
     
  20. slittle

    slittle New
    Builder

    Joined:
    Oct 31, 2014
    Messages:
    33
    Likes Received:
    6
    That's awesome to here that chips will be flying soon! nice work. what voltage/amp PS do you have attached? I guess I am being strong willed wanting to use Mach3 when I could just use a free program
    to get up and going. Since I am having to learn the software anyways. Good luck
     
    #170 slittle, Nov 3, 2014
    Last edited: Nov 3, 2014
  21. Serge E.

    Serge E. Journeyman
    Builder

    Joined:
    May 6, 2014
    Messages:
    730
    Likes Received:
    252
    For now, I'm only using a 12 Volt (yes, I know better now ... should probably be using a 24V, if not higher) 33 amps power supply ... I'll see (and learn better) soon enough as I start making real chips.

    I'll grow through the software side as well ... It will be more of a factor has I head into a true 4th axis, which will need a new controller as well.

    The journey goes on ... and on ... and on. Which is fine with me as I don't want to get bored as a few of the other hobbies fell to wayside.
     
  22. Balu

    Balu Well-Known
    Builder

    Joined:
    Apr 14, 2014
    Messages:
    81
    Likes Received:
    30
    The only important length should be the three extrusions from the Y-Gantry, right?

    Z doesn't need to be squared and X should be adjustable because it's sitting on top of the two frame pieces?
     
  23. Serge E.

    Serge E. Journeyman
    Builder

    Joined:
    May 6, 2014
    Messages:
    730
    Likes Received:
    252
    Those are the most critical, in my mind, especially the wider your machine is. At 1500 mm wide, 3.5 mm off at 30 cm out from a Y plate translates to about 17.5 mm at the other end of those 1500 mm (or so) X beams ! :eek:

    Z does need to be squared with both the X assembly/carriage and work surface which you can always skim level with proper tool in your router once everything else is squared to your satisfaction. You have the three eccentrics, in a standard OX build, to play with. Although the current hole spacing and tolerances of everything involved could work against you and not leave a whole lot of adjustment room. The X plates were recently updated to bring the respective holes a little tighter in to help.

    Yes ... and no, it is probably the 'easiest' to adjust (again, eccentrics to help out) BUT most likely the one to keep an eye on the most. The wheels will likely wear if not just collect dust and chips introducing bumps on the tracks. The longer those beams, the most likely deflection will come into play ... depending on the weight of your router/spindle ... Getting those 2 beams nice and tight : bolt, glue, wedge and/or otherwise 'fused' together while being in perfect alignment, is also very important. Easier approach would be to get a single 40x60 beam. But that is not available to this date with V-slot ...

    Of course, it all depends on how precise you want your machine to be ... Tuning and maintenance will be as important as first setup, if not more.

    There is a controller out there, I forget which right now, which can sort of self adjust for the bit of misalignment and uneven table surface. The function is mainly to align the work piece, but it can take care of tilt and such. The user goes through sort of a setup before each job : move to certain 'reference' points, the more the better, and then the controller figures a transform to map your job in consequence. You just have to pay more for that controller. If you have everything squared, it lets you do rapid positioning of your work piece : fix it down, check four 'corners' and away your machine goes nibbling at the volume ... or was this just a dream of mine? :confused: If a projector can make certain the image being projected is squared, the CNC should at least be able to get X and Y squared and level as well, right ? Z might be a tad tricker to figure out ... height of those corners ? With a probe, the machine could 'search' for the work piece, align the job to it... maybe even scale it if found work piece is too small ? :rolleyes: That's mostly software (assuming the hardware has the probe and computing power) ...
     
  24. Serge E.

    Serge E. Journeyman
    Builder

    Joined:
    May 6, 2014
    Messages:
    730
    Likes Received:
    252
    Well, I finally got around to fully reassembling myOX after the strip down to trim the X lengths of V-slot and ... YES :thumbsup::cool: the precision is way better.

    I'll do a clean video shortly of myOX doing something, but here is a picture with the before (bottom) and after (top) difference for now :

    IMAG0016.jpg
     
    Steve123 likes this.
  25. hellracer

    hellracer New
    Builder

    Joined:
    Jul 17, 2014
    Messages:
    4
    Likes Received:
    0
    Serge,

    Could ou explain why you chose the have a very long X compare to the Y. At 1500mm you have more risk to have some flex on the X...If you just swap X and Y lengh would would be the difference?
     
  26. Serge E.

    Serge E. Journeyman
    Builder

    Joined:
    May 6, 2014
    Messages:
    730
    Likes Received:
    252
    Easy enough : I'm thinking of eventually working on projects which could be 48+" wide (X working width is currently about 52" !) and as long a piece as I need (like a table top, a full size door panel, etc.) by sliding it through and working on it in sections of ~18" - think "infinity" o_O I still have to figure out a good way of sliding such pieces through myOX. Time will tell ...

    By eventually joining the two X beams, or maybe going triple beam, the flex should be reduced. I also have a few ideas to help with this and other planned uses for myOX (like having Z reach down towards the floor , 4th axis, ...)
     
  27. hellracer

    hellracer New
    Builder

    Joined:
    Jul 17, 2014
    Messages:
    4
    Likes Received:
    0
    That is smart move ;-)
     
  28. Serge E.

    Serge E. Journeyman
    Builder

    Joined:
    May 6, 2014
    Messages:
    730
    Likes Received:
    252
    Well, playing a bit with some software and mostly doing a lot of reading about many choices, looks like I'll start off with SketchUp (the free version for now) and MeshCAM to generate the Gcode files. I am using the evaluation for now.

    What I really like from MeshCAM, aside from running native on my Mac OSx machine (a welcomed bonus), is it will let me move into my "manual" 4th axis right away ! It can compute two sided and multi sided ("rotations") generating individual files for each 'pass'. I could thus have three passes/files : top, left side and right side of R/C model body bucks ... As well, with the use of "machine areas", I can slice parts into Gcode files to fit in my cutting area (my Y is physically limited to about 19" but it can do infinite length, like a door panel, by sliding the part through).

    The weekend is so far away ...
     
    pmany likes this.
  29. Serge E.

    Serge E. Journeyman
    Builder

    Joined:
    May 6, 2014
    Messages:
    730
    Likes Received:
    252
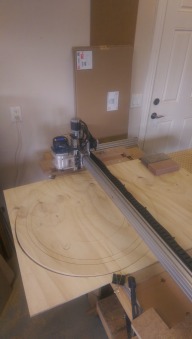
    After a bit of an absence (health and work), I finally got around to a practice 'real' cut on a piece of wood ... An 80x80 fan grill. It's an STL found on the 'net, fed through meshCAM to generate just enough Gcode to run on myOX. I used a 1/8" double flute straight bit and a piece of 2x that I had to spare, so the result is obviously not the working grill.

    The 1/8" bit should of been ok even for those tight areas ... Yet, meshCAM missed some not so tight areas as well. Odd, no ? It most likely is due to me not setting things like stepover correctly, generating all cuts but to only us the waterline cuts to generate the Gcode probably did not help either.

    Fan-test.png

    I generated the "Mech3 mm" Gcode file only for with the waterline cuts to keep the job run as short as possible, it's a thin 2.5D type pattern. Included are the generated Gcode file and the STL file.

    I first did an "air" run, just to make certain I didn't get any wild movements of the router. Then I did a real cut.

    The cut seemed to go quite well for initial 3/4 of the job run, but then it suddenly jumped quite a bit ... to me, it seems more than just missing a few steps. Maybe it's just wishful thinking on my part, but could it be missed G code in the communication between my computer and the CNC xPro ?

    So here is the long, yet compressed to 480P, video - uncut (10 minutes or so). Turn your sound down, router is kind of noisy. Also sorry for the lighting - it was late, I had a spot light on and the router added its own lighting in the mix. I'll do better next time.

    If you don't want to watch through the whole thing, but want to help me figure out what happened near the end, the trouble starts at about the 7 minutes mark. The engraving of the fan grill was almost done ...


    If you spot anything I could of done wrong, please let me know. Of course, if it's my stepover, feed rate or such, it will be difficult to say just by watching the video (?)

    I'll try a few other files late tomorrow - something meant to be routed/milled.
     

    Attached Files:

    #179 Serge E., Nov 24, 2014
    Last edited: Nov 24, 2014
  30. Serge E.

    Serge E. Journeyman
    Builder

    Joined:
    May 6, 2014
    Messages:
    730
    Likes Received:
    252
    Thanks. I thought so. Those areas should have the tool end where it begins - seems obvious as it does it fine with the smaller circles. Why would it not do it for the larger one ? I doublt it is meshCAM at fault, I might of messed up some parameters... I also picked a rather random STL file off the net, one for printing the part not routing it.

    I'll go find some not too complicated STL meant for CNC routing/milling. I was figuring they would be more 'ready' than one made by me from scratch (possibly introducing some beginner design errors).
     

Share This Page

  1. This site uses cookies to help personalise content, tailor your experience and to keep you logged in if you register.
    By continuing to use this site, you are consenting to our use of cookies.
    Dismiss Notice