Welcome to Our Community

Some features disabled for guests. Register Today.

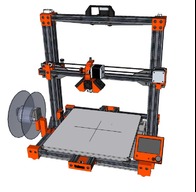
Vulcan MAX

Discussion in '3D printers' started by Keith Davis, Jul 3, 2020.

  1. Keith Davis

    Keith Davis Veteran
    Builder

    Joined:
    Dec 11, 2013
    Messages:
    507
    Likes Received:
    398
    Correct. But only if you use the probe as the endstop trigger instead of the mechanical endstop.
     
    JustinTime likes this.
  2. WilberMaker

    Builder

    Joined:
    Oct 10, 2015
    Messages:
    21
    Likes Received:
    1
    Keith, thanks for all the effort you have put into this and making it available. Can’t wait to start this build! The single stepper is going to save a lot of headaches. Are you certain that this is where all the problems come from? I have never actually measured it so I don’t have any real data. However, I was under the impression that the multiple probe pattern across the bed was to compensate for any warps in the bed that might have developed from all the heating cycles. Again , have not measured this. Yet.
     
  3. Keith Davis

    Keith Davis Veteran
    Builder

    Joined:
    Dec 11, 2013
    Messages:
    507
    Likes Received:
    398
    Actually a Prusa machine is so sloppily constructed that they need 9 point leveling :) And that may be true with PCB heat beds, especially if the 4 corner springs are so strong the PCB bed cannot expand. I use aluminum heat beds and have run posi-drive printers more than 1 million layers that remained level with a dial indicator. I routinely start a new print by hitting the PRINT button and walking out of the room, confident that the first layer will go down exactly like the one on the previous print job.
     
  4. WilberMaker

    Builder

    Joined:
    Oct 10, 2015
    Messages:
    21
    Likes Received:
    1
    I can agree with that. Looks like life will get a little simpler with this printer. Might be able to learn more about printing instead of just learning to adjust the printer. Lol
     
  5. Keith Davis

    Keith Davis Veteran
    Builder

    Joined:
    Dec 11, 2013
    Messages:
    507
    Likes Received:
    398
  6. JustinTime

    JustinTime Veteran
    Builder

    Joined:
    Dec 18, 2013
    Messages:
    780
    Likes Received:
    257
    Yes, of course. I set the end switch to the lowest possible but after that the probe is doing the individual settings.
     
  7. Keith Davis

    Keith Davis Veteran
    Builder

    Joined:
    Dec 11, 2013
    Messages:
    507
    Likes Received:
    398
    That is not how the firmware works. If you use an auto-leveling probe, the probe is what sets the nozzle height, not the end switch.
     
  8. Keith Davis

    Keith Davis Veteran
    Builder

    Joined:
    Dec 11, 2013
    Messages:
    507
    Likes Received:
    398
    Giok44 likes this.
  9. Samsamit

    Samsamit New
    Builder

    Joined:
    Aug 16, 2020
    Messages:
    15
    Likes Received:
    1
    Finally got my mechanical build ready. Now i need to test the electrical parts and figure out how to nonnect the cords and all. And im going to remove the blTouch as Keith succested.
     

    Attached Files:

    Giok44 likes this.
  10. WilberMaker

    Builder

    Joined:
    Oct 10, 2015
    Messages:
    21
    Likes Received:
    1
    @Samsamit: I like your mount design. Not at all like what I threw together but I like yours better. Is that a 40x10mm fan or a 40x20mm? I had tried a 40x10mm and could not get enough cooling. Have ordered a 20mm and hoping it will do. The stock fan is really loud! Also you said you were removing the BL touch. I your photos it looks really close to the hot end, is this an issue with it getting to hot?
     
  11. WilberMaker

    Builder

    Joined:
    Oct 10, 2015
    Messages:
    21
    Likes Received:
    1
    Keith I was over on your site 3DWrx.com. Vulcan shipping has been suspended because the owner had a stroke? Are you doing all right man? Hope so, best wishes. Sam
     
  12. Keith Davis

    Keith Davis Veteran
    Builder

    Joined:
    Dec 11, 2013
    Messages:
    507
    Likes Received:
    398
    Well, I'm living alone so, yeah it's a struggle. MY sister does grocery and meds shopping once a week. Rehab is not going well since I have no help, but, so....

    I'm trying to get local jr. college to adopt Vulcan and produce them as their own product. Lots of legal problems with them doing that, but they are working on it.

    THANKS!!
     
  13. WilberMaker

    Builder

    Joined:
    Oct 10, 2015
    Messages:
    21
    Likes Received:
    1
    Yea, living alone is a real *****. Wife passed away two years ago. I could not take it alone at the house so I shut down the farm and got a job as a long haul truck driver. Better now and ready to get back home. Having a mid foot fusion in Nov. so I’m going to be down for several months. That is why I’m getting everything together for this printer build. I’m a mechanical designer by training turned farmer (long story). Wish there was someway I could help you with your printer development. Best wishes and take care of yourself.
     
  14. Samsamit

    Samsamit New
    Builder

    Joined:
    Aug 16, 2020
    Messages:
    15
    Likes Received:
    1
    That is 40x20 fan. I dont have the wirings done yet so no tests are made. That BlTouch mount is from some thingieverse user that has been using that mount for long so i think it will be fine. The mount will lower the amount of air that goes to the cooler block but hopefully it will be enough. I have two more of those fans to be used as part coolers but the cooling system i found is not that good. My z axis is not moving correctly. i think the mount that ties the leadscrew to the wheels is too tight and its pulling the screw... Im gonna make the holes wider so they can be adjusted. Maby if the connection would go all around the z extrusion it would be better? just an idea for Keith.

    ps. at least there is internet so you guys are not really alone. There is always people that share the same interest so there will always be friends!
     
  15. Keith Davis

    Keith Davis Veteran
    Builder

    Joined:
    Dec 11, 2013
    Messages:
    507
    Likes Received:
    398
    iIf you are using an 8x1.25mm threaded rod and a nylon nut, you may need to chase the threads in the nylon nut with an 8x1.25mm tap. Some manufactures make those nuts tight enough to be used as locking nuts like nyloc nuts. Chasing them out with a tap will leave them tight enough to still eliminate backlash
     
  16. Keith Davis

    Keith Davis Veteran
    Builder

    Joined:
    Dec 11, 2013
    Messages:
    507
    Likes Received:
    398
    WilberMaker
    I don't mind living alone, what I meant was I have only have one working arm and one working leg. Getting a bottle of pills opened today required me hollering across the street for help from my neighbor. Most daily chores are a real ***** when done with only one hand while done from a wheelchair. Like typing!

    What are your plans for when you are healed up?
     
  17. Samsamit

    Samsamit New
    Builder

    Joined:
    Aug 16, 2020
    Messages:
    15
    Likes Received:
    1
    im using T8 Lead screw with 2mm inclime and a brass nut that came with it. I made a new mount for that with the same dimensions as your nylon nut holder. It will pull the lead screw away from the printer center and make it really tight.
     
  18. Keith Davis

    Keith Davis Veteran
    Builder

    Joined:
    Dec 11, 2013
    Messages:
    507
    Likes Received:
    398
    Check out Open Build's nylon nuts for T8 lead screws.
    Transmission - OpenBuilds Part Store
    either will work as a direct bolt-in replacement for my Z axis nut.

    if you placed a bearing around the Z screw bottom end in a bearing mount bracket instead of the 9mm hole bracket, remove that bearing - the 3 point engagement can cause binding.
     
  19. Keith Davis

    Keith Davis Veteran
    Builder

    Joined:
    Dec 11, 2013
    Messages:
    507
    Likes Received:
    398
    I use only AquaNet hairspray on a mirror for ABS, PLA, Flex, and Nylon, no tape. I have different first layer heights for each of those, I use Slic3r, and set a different first layer height for each filament and save that as a unique Slic3r>Printer Settings profile for each filament.
     
  20. JustinTime

    JustinTime Veteran
    Builder

    Joined:
    Dec 18, 2013
    Messages:
    780
    Likes Received:
    257
    Keith, have you ever tried PTEG? And if yes, how did you print it, with the spray? I tried it on a flex bed and it stuck to it like s*it to hair and wouldn't let go. It ruined the flex.
     
  21. Keith Davis

    Keith Davis Veteran
    Builder

    Joined:
    Dec 11, 2013
    Messages:
    507
    Likes Received:
    398
    Yes. I had to soak the mirror in hot water to dissolve the hair spray on one, but usually a Painter's 6in1 tool pops them right off (place the beveled side on the mirror and tap the handle).
     
  22. WilberMaker

    Builder

    Joined:
    Oct 10, 2015
    Messages:
    21
    Likes Received:
    1
    @Keith, Couple questions for you. First, can you explain how to order the closed belt for the two screws? I see the part number on the BOM but they had two lengths on thier website. What is the length? Also, I have a new 12V silicon bed on the printer I'm using for parts. Can you tell a big enough difference going to 24V. I'm cheep. I understand the current would be less, but the mosfet is handling the current. Any difference? Thx Sam
     
  23. Keith Davis

    Keith Davis Veteran
    Builder

    Joined:
    Dec 11, 2013
    Messages:
    507
    Likes Received:
    398
    The 1080 on the BOM is the length. 1080mm. The higher the voltage the lower the amps. A 24 volt does not need a mosfet for the lower amps. A 12 volt will need a mosfet to handle all of the amps needed to heat a big 300x300mm heat bed.
     
  24. WilberMaker

    Builder

    Joined:
    Oct 10, 2015
    Messages:
    21
    Likes Received:
    1
    I'm just missing something with the belt. I do not see anything in a 1080mm length. Did anyone else find one? Found a 1100mm on Amazon. might just make the printer 10mm wider.
     
  25. WilberMaker

    Builder

    Joined:
    Oct 10, 2015
    Messages:
    21
    Likes Received:
    1
    I'm just missing something with the belt. I do not see anything in a 1080mm length. Did anyone else find one? Found a 1100mm on Amazon. might just make the printer 10mm wider.
     
  26. Keith Davis

    Keith Davis Veteran
    Builder

    Joined:
    Dec 11, 2013
    Messages:
    507
    Likes Received:
    398
    Looks like RobotDigg quit carrying 1080mm. The idler bracket should have enough slot room for the center idler to tighten the 1100mm one. If not, just extend that center slot, rather than make the printer wider.
     
  27. Keith Davis

    Keith Davis Veteran
    Builder

    Joined:
    Dec 11, 2013
    Messages:
    507
    Likes Received:
    398
  28. WilberMaker

    Builder

    Joined:
    Oct 10, 2015
    Messages:
    21
    Likes Received:
    1
  29. Keith Davis

    Keith Davis Veteran
    Builder

    Joined:
    Dec 11, 2013
    Messages:
    507
    Likes Received:
    398
    GOOD FIND

    When I buy from RobotDigg I buy a lot (pulleys, bearings, etc) so adding 10 or 20 belts to shipping is almost cost free.
     
  30. WilberMaker

    Builder

    Joined:
    Oct 10, 2015
    Messages:
    21
    Likes Received:
    1
    Hey Keith, I not real familiar with Slice3r, only used it a little early on with Repetier. I have a full version of Slice3r How do you slice up one of your zip files with Slice3r?

    Thanks Sam


Share This Page

  1. This site uses cookies to help personalise content, tailor your experience and to keep you logged in if you register.
    By continuing to use this site, you are consenting to our use of cookies.
    Dismiss Notice