Welcome to Our Community

Some features disabled for guests. Register Today.

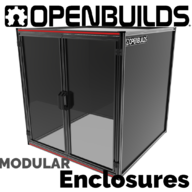
OpenBuilds Enclosure Series

Discussion in 'Other Builds' started by OpenBuilds, Oct 6, 2020.

  1. OpenBuilds

    OpenBuilds Well-Known
    Staff Member Moderator Builder Resident Builder

    Joined:
    Sep 23, 2019
    Messages:
    22
    Likes Received:
    110
    OpenBuilds published a new build:

    Read more about this build...
     
    Giarc likes this.
  2. Giarc

    Giarc OpenBuilds Team
    Staff Member Moderator Builder Resident Builder

    Joined:
    Jan 24, 2015
    Messages:
    3,017
    Likes Received:
    1,682
    I like it! It makes ordering the parts easy and I have a little money burning a hole in my pocket. The 510 would go well with the new lathe I am building. :thumbsup: So basically you could combine a 1010 and a 510 for a 1510 machine? The dimensions look like that would work.
     
    Mark Carew and sharmstr like this.
  3. jeffmorris

    jeffmorris Journeyman
    Builder

    Joined:
    Nov 6, 2017
    Messages:
    496
    Likes Received:
    115
    If you're going to use the enclosure with a CNC router that has a vacuum hose for dust shoe, how will the hose move around?
     
    MakerJoe likes this.
  4. Andrew Haidet

    Builder

    Joined:
    Feb 20, 2016
    Messages:
    1
    Likes Received:
    0
    I was curious what thickness panels are recommended for this? I see a note that mentions 1/4" plywood. I want to use acrylic or polycarb and just realize that the slot covers can also double as panel holders. What thickness panel is required to use the slot covers as panel holders? Does the kit come with enough slot covers to use them as panel holders for all sides?
     
  5. Patrick McKenna

    Builder

    Joined:
    Apr 22, 2019
    Messages:
    1
    Likes Received:
    0
    and are there nominal dimensions\drawings for the panels? it looks like there would need to be corners cut for where the frames meet.
     
  6. MakerJoe

    MakerJoe New
    Builder

    Joined:
    Oct 6, 2020
    Messages:
    4
    Likes Received:
    0
    I purchased a Workbee 1010 and haven't assembled it yet. I've been designing a tablesaw outfeed/assembly table which would have the Workbee underneath. I had been planning for around 22" of clearance, and thought this would be adequate. But am given pause by this enclosure's dimensions, which are 29" height. Perhaps other models needs much more headroom, or have I misjudged the space I'm likely to need.
     
  7. Giarc

    Giarc OpenBuilds Team
    Staff Member Moderator Builder Resident Builder

    Joined:
    Jan 24, 2015
    Messages:
    3,017
    Likes Received:
    1,682
    The enclosure is much taller than it needs to be for a Workbee.
     
    MakerJoe likes this.
  8. Christian James

    Christian James Journeyman
    Builder

    Joined:
    Jun 8, 2018
    Messages:
    462
    Likes Received:
    219
    I would have an adaptor fixed into the top panel. The main hose from the vacuum pump would then clamp onto the outside of the adaptor, then a hose of appropriate length from the router itself clamped to the underside of the adaptor (inside the cabinet).
     
    sharmstr and Peter Van Der Walt like this.
  9. Mark Carew

    Mark Carew OpenBuilds Team
    Staff Member Moderator Builder Resident Builder

    Joined:
    Jun 28, 2013
    Messages:
    2,758
    Likes Received:
    2,441
    We are actually testing this now :) I was thinking that if I am able to run the hose in from the top of the back panel it would have enough room to flex to all locations of the 1010 XY space. Keeping the hose in place and from slipping out of the cabinet is where we need that adapter @Christian James mentions :thumbsup: Will share some pics and let you know how we make out with this.
     
  10. Mark Carew

    Mark Carew OpenBuilds Team
    Staff Member Moderator Builder Resident Builder

    Joined:
    Jun 28, 2013
    Messages:
    2,758
    Likes Received:
    2,441
    Yes the drawings and dxfs are included on the main Build Page as well as in the Files and Drawing Tab.
    The top panel needs a 5x5mm notch on each corner. Nothing major or precise just enough to allow enough room for the panel edges to hit out. You can use a jigsaw to make these notches
    You will also need to notch the plexi panels for the doors to give the inside corner bracket some room as you will see in the drawings these are 13mm x 7mm again just rough cuts as the majority will slide into the track. We were able to get a couple 1/4" sheets from Lowes and again you can use the jigsaw to make the notches.
     
  11. Mark Carew

    Mark Carew OpenBuilds Team
    Staff Member Moderator Builder Resident Builder

    Joined:
    Jun 28, 2013
    Messages:
    2,758
    Likes Received:
    2,441
    That's a good question because we have tried everything from the 1/4" floor underlayment to the fluted plastic political signs and we found the 1/4 floor under laminate is actually a little smaller than 1/4" as well as plexi (here anyway) so they really worked great. Warning: we have found some floor underlayment thats right at 1/4" it does not want to fit the track 6.1mm so be sure you either bring your calibers or a piece of V-Slot with you rot the store and measure that it will fit.

    On using the slot covers you should be good with 1/8" panels or even 3mm (looser fit)
    Here is a pic I took of a 3mm panel pushed to one side so you can see the slight gap
    Remember this is and enclosure to keep in dust and sounds so its not designed to be a brick house, so anything you can find that fits should do the job nicely.
    20201008_100620.jpg

    The fluted plastic looks amazing but hard to find the large sheets but work great as well. fyi we are looking to offer the panels pre-cut in the future so that will be a nice option.
     
  12. Rick 2.0

    Rick 2.0 OpenBuilds Team
    Staff Member Moderator Builder Resident Builder

    Joined:
    Dec 20, 2013
    Messages:
    2,893
    Likes Received:
    1,552
    I would suggest entering the case at a point centered on the rear panel near the bottom edge. From a 90 degree upward bend connection attach enough hose to reach the front corners comfortably and then attach a soft bungee to the hose at about the 1/3rd point from the back and tie it off to the top edge above the insert point. This should allow your hose to maintain a comfortable arc as the spindle moves about the system.
     
    Mark Carew and Giarc like this.
  13. Mark Carew

    Mark Carew OpenBuilds Team
    Staff Member Moderator Builder Resident Builder

    Joined:
    Jun 28, 2013
    Messages:
    2,758
    Likes Received:
    2,441
    Hey guys wanted to give you a heads up, we just updated the enclosure dxf files as well as the drawings.
    We added some corners to the doors to ensure they are more ridge as that acrylic has some weight to it on the larger doors and there was some measurements that needed updating.
     
    sharmstr likes this.
  14. David Bunch

    David Bunch Veteran
    Builder

    Joined:
    Oct 27, 2014
    Messages:
    624
    Likes Received:
    433
    I have been wanting to put a nice enclosure around my Sphinx 55 & this seems like it almost fits the bill. I want mine to be about the size of the table it is on plus I would like to triple its use by sizing it big enough to go over my miter saw for cutting aluminum extrusion & over my little laser engraver I am building. That said, I drew your 55 size design up in fusion 360 to get relative measurements for the door gaps. I see you have allowed a 2mm gap around the door frames & 4mm gap in the middle or at least measurements that add up to those gaps. One question I have is your outside height is 761mm where I get 760mm, so where does that extra 1mm come from? Also, have you thought of having an option for laser safety shielding like: 250nm to 520nm Laser Shielding – 12″ x 12″ .

    Having drawn this up in fusion 360, I am now creating a parametric openscad file to look at different sizes. I find openscad easier to do this type of parametric drawing than fusion 360. I only have to add the doors to the file now. I could publish this openscad file on thingiverse after it is finished if that would be ok with you?
     
  15. Mark Carew

    Mark Carew OpenBuilds Team
    Staff Member Moderator Builder Resident Builder

    Joined:
    Jun 28, 2013
    Messages:
    2,758
    Likes Received:
    2,441
    That one comes from error on my part I must have bumped it trying to leave a gap for the panels, good eye :)
    yes! I love this stuff and in the renders of the 510 added it to help inspire some ideas ;) We also hope to someday be able to supply this to the community at a more affordable cost to make it available to everyone.
    By the way we have the hardware (vitamins) only version for creating custom sizes, just add the V-Slot.

    That would be fantastic David, the more people it can help the better, thank you! :thumbsup:
     
  16. David Bunch

    David Bunch Veteran
    Builder

    Joined:
    Oct 27, 2014
    Messages:
    624
    Likes Received:
    433
    That is cool. I did not see that bundle.

    After adding the hinges, looks like the offset for the side of the doors should be .4mm on each side since the M5 hole spacing on the hinges is 20.4mm in the model. So taking that in to account, I get a gap of 2mm at the top & bottom of the doors & 6.8mm between the doors. The thickness of the sketchup model of the 3 way bracket measures 5.5mm, but seems to be 5mm when working with the lengths you specified. Does that sound correct?

    I attached a spreadsheet of my calculations which might be all anyone needs to calculate the V-slot cut lengths for a custom size. Only the Length, Width & Height are needed to calculate the correct lengths. That is assuming the my gap variables & thickness of the 3 way connector is correct. A double check of the calcs can easily be done by plugging in the sizes of the other 2 enclosure sizes.
     

    Attached Files:

    Mark Carew and sharmstr like this.
  17. David Bunch

    David Bunch Veteran
    Builder

    Joined:
    Oct 27, 2014
    Messages:
    624
    Likes Received:
    433
    I have this openscad script just about worked out. I just need to clean it up a little. I did find what appears to be an incorrect dimension on the top panel for the 510 series. You have the it dimensioned as 1188x728. Think that 728 should be 688mm instead to match the side widths and not the height of back & sides.

    I updated the excel spreadsheet to add the panel cut sizes, so I am attaching that latest version here as well as a screen shot of the openscad model. I added variables for panel colors, so you could see the difference in choice of colors. I also made some of the hardware different colors so they are easier to see.
    Enclosure_Rev6.jpg
     

    Attached Files:

    sharmstr likes this.
  18. David Bunch

    David Bunch Veteran
    Builder

    Joined:
    Oct 27, 2014
    Messages:
    624
    Likes Received:
    433
  19. Mark Carew

    Mark Carew OpenBuilds Team
    Staff Member Moderator Builder Resident Builder

    Joined:
    Jun 28, 2013
    Messages:
    2,758
    Likes Received:
    2,441
    Ok guys well I went back to the drawing board on this one and made some modifications.I just was not happy with it and wanted it to be better.

    I really like the idea of trying to use all the same material with the 20x20 but to be honest I really thought it needed a header after working up some different sizes (sorry @David Bunch but maybe you will be able to add it?) So we now have a nice beefy 20x60 header that helps to ensure a strong enclosure in most any size.

    The parts list are updated, the dxf are updated, there is a new updated build video in the works and will be posted once it's ready, I also worked up some models in SketchUp for scale but cannot share them just yet as they contain a little something thats not ready to be shown just yet ;) Hope you enjoy.
    1010_series_render_white_open.jpg

    Also the other day my brother stopped by and was liking on these enclosures and he presented and idea that we had not thought before and that is, in place of the thin plywood we have been adding for the sides you could use something like 1/4" construction foam or depron floor underlayment which would really help with noise damping. I thought it was a good idea and so though I would share it in case someone wants to give it a go.
     
    Rick 2.0 and David Bunch like this.
  20. David Bunch

    David Bunch Veteran
    Builder

    Joined:
    Oct 27, 2014
    Messages:
    624
    Likes Received:
    433
    I will rework the openscad file when you finalize this. I was looking at those 1/4" insulation sheets in one of the big box stores the other day, but they seem to be folded & not one big piece like the thicker rigid insulation is. A less expensive option & gives a little insulation would be to use foam core. the 20x30 sheets are $1 at the dollar store.
     
    Giarc and Mark Carew like this.
  21. David Bunch

    David Bunch Veteran
    Builder

    Joined:
    Oct 27, 2014
    Messages:
    624
    Likes Received:
    433
    Here are some other options for panels. You can get wider widths of foam board both white & black color in sizes up to 48x96" from Foam Board, Foam Core Boards, Black Foam Boards in Stock - ULINE , https://www.dickblick.com/categories/paper/boards/foam-board/ or how about cork board Elmer's® Cork Foam Board . Those size foam boards are more expensive though.

    How about the 3/4"x4'x8' rigid insulation cut 1/4" wider than the openings & use a router to cut for fit into the slots or just a press fit size for the openings might work. They are only $13 a sheet. This might be the way I go as I could rough cut the sheet in the parking lot to fit in my car.
     
    Mark Carew likes this.
  22. Mark Carew

    Mark Carew OpenBuilds Team
    Staff Member Moderator Builder Resident Builder

    Joined:
    Jun 28, 2013
    Messages:
    2,758
    Likes Received:
    2,441
    That's great I was not aware you could get them in these sizes, but I really like your idea of using the 3/4" and routing it down to fit the slot it would really sound proof!
    If you really wanted to get crazy :) You could set up a little hotwire fence to run them though to get a center tab
    Iol I keep a knife in my car just for this same reason :D
     
  23. David Bunch

    David Bunch Veteran
    Builder

    Joined:
    Oct 27, 2014
    Messages:
    624
    Likes Received:
    433
    I updated my openscad script & spreadsheet on thingiverse to allow for the 2060 option. You can change the header from 2020, 2040 or 2060 by setting the variable Hd_Size = 60; //can be 20, 40 or 60. I also added the option for 3 or 4 door joining plates. Seems like smaller builds will not need as much support? Maybe you could give a guideline for size that would need beefier header?

    For routing the 3/4" insulation you could probably use a tongue & groove router bit.
     
    Mark Carew likes this.
  24. Giarc

    Giarc OpenBuilds Team
    Staff Member Moderator Builder Resident Builder

    Joined:
    Jan 24, 2015
    Messages:
    3,017
    Likes Received:
    1,682
    Great minds think a like. I was just going to suggest that but you beat me to it.

    To avoid rough cutting, just buy the vehicle you want, let your wife drive it a few times, and then you get stuck with the old Manivan (not spelled wrong) which easily fits sheet goods.:thumbsup:
     
    Mark Carew likes this.
  25. Rob Taylor

    Rob Taylor Master
    Builder

    Joined:
    Dec 15, 2013
    Messages:
    1,470
    Likes Received:
    749
    F-150s cower at the sight of a 2008 Town and Country. :ROFL:
     
    Giarc and Mark Carew like this.
  26. David Bunch

    David Bunch Veteran
    Builder

    Joined:
    Oct 27, 2014
    Messages:
    624
    Likes Received:
    433
    I can get most supplies I need in my 2012 Honda Civic Coupe. I did push the limits of it the other week hauling 6 - 4x4x8' boards. I have also carried 4 - 2x6x10' boards. My main problem of course is carrying wider stuff than 24"-36". I can usually get 4x8 sheets cut by the store, but they probably would not cut insulation.
    Speaking of insulation, think I found a better option. I was in a larger Lowes this morning & they had 1/2"x4x8' rigid insulation for $10. Think I can cut them 1/4" oversize on all sides & smush the side ends to fit in the V-slot . That seems like the way to go for me.
     
    Mark Carew and Giarc like this.
  27. David Bunch

    David Bunch Veteran
    Builder

    Joined:
    Oct 27, 2014
    Messages:
    624
    Likes Received:
    433
    Did you ever consider using blind joints for the corners of the V-Slot? This video below uses this method with what looks like T-Slot. Testing a button head or low profile screw looks like it might work with V-Slot, but with the V it does not have as much aluminum to grab hold of. I measure about 2mm on each side of M5 head that touches the aluminum. Would this method hold adequately with V-Slot? That would save a chunk of money on the hardware, but is a little more manual labor drilling the allen wrench access holes.
     
  28. Mark Carew

    Mark Carew OpenBuilds Team
    Staff Member Moderator Builder Resident Builder

    Joined:
    Jun 28, 2013
    Messages:
    2,758
    Likes Received:
    2,441
    The the 1010 seemed to me that it would benefit most from this in all the testing even the 510 was ok but we added it to all to make them cohesive and it really helps.
    Just gave my 150 to my brother as he does more work in it then me. I never realized how much I need that truck now that its gone! Now I am using the old razor knife cutdown in the parking lot trick :D
    I have done it and it works fine but I think it will be a lot of work for most guys to jump into this method. I am actually working on some simple L brackets we can all use. I find that I need them a lot during a build.
     
  29. Mark Carew

    Mark Carew OpenBuilds Team
    Staff Member Moderator Builder Resident Builder

    Joined:
    Jun 28, 2013
    Messages:
    2,758
    Likes Received:
    2,441
    Build video has been updated to include the new header :thumbsup:
     
    sharmstr likes this.
  30. Prometheus

    Builder

    Joined:
    Mar 21, 2015
    Messages:
    17
    Likes Received:
    0
    @Mark Carew , Is it possible to get a kit for a 1015? :( Remember, some of us have a larger machine and would love to also be able partake in this wonderful enclosure!
     

Share This Page

  1. This site uses cookies to help personalise content, tailor your experience and to keep you logged in if you register.
    By continuing to use this site, you are consenting to our use of cookies.
    Dismiss Notice