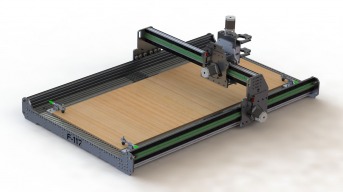
I'm glad to hear the debris isn't a problem anymore,and I understand about the HDU ,I kind of figured that might be the issue. The only 3D signs I've done have been sandblasting HDU. At the time decided to give up 3D sign making and just stay with vinyl. Although I continued to dream about what I could do with a CNC, the only thing available at that time, even thinkable, was a ShopBot. I knew I coul build it ,but I wasn't sure I could pay for it. Since then I've bought a couple sets of plans, but the machines weren't built using any kind of standard parts and I wasn't sure they were capable of daily use. I just recently came across OpenBuilds and I thought the parts and designs looked tight, then I read your build and saw the photos and I thought this might be it! Looks like I'll be right behind you! Stay with the upgrades! Charlie
Well got 4 nice fresh off the mill rack clamps ready to put into service !! Just waiting on material to cut the rest now. Rack has arrived, this upgrade will be in full swing shortly..
Ok I completely disassembled the Ox and started rebuilding, got the Openrail mounted to one of the 2080 Y extrusions, and installed the rack with the clamps I already cut out, btw I still need to add about 4 more clamps to hpld that rack securely. REV3 plates are cut, mounted and tested. Ran the plate back and forth up to 1000IPM, backed it down to 600 in the video. The gear mesh noise in the video is coming from between the clamps, the rack is flexing and causing that noise, 4 more clamps on the way. Ran smooth and fast, cutting out the other side tonight. Still need to finish off the tensioning system, there will be a spring on top of the bolt providing constant even tension for the drive.
This is for sure the next generation driving system for the OX. Saw some people already making comments on the old driving belt system, for it's getting loose after a while.
When you've got the time, could do with a bit more info on the "tension side" of the rack and pinion side of it. Different ways etc. Cheers Gray
They say a picture is worth a thousand words.... I'm not sure of a better way to do it than this. The spring keeps constant tension on the spur gear and rack teeth engagement while at the same time taking up for any irregularities in the rack.
hiya, love your build. it's going to be one of the nicer ones around. would you be kind enough to tell me the name you purchased the chocolate brown phenolic under? is it called seaboard? rich
Yep I buy quite a few parts from there. The electronics for my Florida Ox build came from there.... Good stuff..
Ok, time to kick this in high gear and get it done... Both Y plates are assembled, and all the clamps are installed on the right side, waiting on a couple bits to finish the clamps for the gantry and the left side. Prototype tensioner is tested and works great. Seven rack clamps took care of the flex in the rack. Twelve wheels per side should do the trick . I hope to be wrapping this up this coming week, just waiting on a few supplies. Here are a few photos,
Just waiting on a 4080 Misumi extrusion to be delivered... Found out using the rack clamps 4060 is too small to mount it, it would only work if mounted directly to the extrusion. After discovering I wasn't going to use the 4060 I went in and adjusted the Y paltes to raise the gantry about another inch. The motion on the rack and running on the Openrail is smooth... !! I tried to move the plate while the stepper was powered up, couldn't do it with a considerable amount of force, also couldn't feel any backlash at all in the rack engagement. I'm pretty excited to get it all back together now. Here's a vid of the plate in motion;
So is it still flexing the Rack a bit? It still sounds different as it goes over the areas without the rack clamps. or is that the same video as before, when you still needed to add the additional clamps? do you feel a thicker rack would have been better? Looking forward to the whole thing coming together, really great work! --Paul
It's a new video. Pushing on the rack between the clamps I can't flex it, it's a 1/4 x 1/4 rack. A thicker rack would be better but that means going to a 1/2 x 1/2 20 pitch, I felt it was just a bit big for this little machine. My big machine runs 1/2 x 3/4 20 pitch 20 degree pressure racks. Another option might be to make the clamps longer, rather than 3 inches, why not do a 6 inch clamp.. Either way it's works fine now with the 24 pitch rack. Using the 1/4 rack allowed me to eliminate the wheel spacers on the inside of the plates, easier to mill and less parts to deal with.
Listening to it again and its probably the sound resonating differently along the unclamped area. If the 1/4 x 1/4 work good, and they sure look good. There is no reason to add 1/2 x 1/2 at added expense, work, and time. --Paul
Well..... Ran into a little snag, turns out the 4080 extrusion I ordered from Misumi is held up in customs per Misumi "Please be advised that at this time this order that is scheduled to ship today is currently being held by a customs delay. At this time, we have no further information on when the items will be released; however, we will ship according to the purchase order when we receive the parts." so that sux. Apparently even though they have a office in the US they don't stock this stuff here, I should have known when they reboxed the last extrusion I got from them, still had a japan air freight bill attached to it. So another change of plans, i'm going with extrusions that are readily available here in the US from 8020. I ordered a 25-5010 50mm x 100mm extrusion to use for the gantry beam. I have already redesigned the files for the axis plates to accommodate the 5010, just need to cut them out. I also turned the stepper drive pocket slightly in order to be able to add a t nut to lock the shoulder bolt. I'll be cutting the new plates in the next couple days, the 5010 is scheduled to arrive tomorrow so hopefully we will have a operational gantry by this weekend. Thanks for following along !!
Ok, well the the Misumi 4080 arrived so we're going with it for this build. All future builds with be built with locally (US) sourced materials whenever possible. Gotta say though, 4080 beam is nice and heavy for it's size. Made a couple more changes to the design, first off, the only real wildcard in the equation now is the z slide so we're going with a more commercial version with linear ball bearings, solid aluminum construction, and a 2 start 1/2 leadscrew. Going to get Chris Laidlaw to cut me a new router mount back plate, already redesigned the front X axis plate to accommodate this slide. Should give me the performance and rigidity i'm looking for. Finally got the right springs to tension the stepper drives. I'm going to work on the 2 plates to box the gantry carriage tonight. Just waiting on some more T nuts and 8 more v wheels and this project will be closing in on the finish line. Hopefully i'll have this wrapped up by next weekend. As for the vacuum table, slight change there. A lot of the cuts I do are 3D and go for close to 4 hours at a time. Running vacuum motors for that length of time will be hard of them and my electric bill. We're going to make some vacuum pods with 3/4" phenolic board and use a vacuum pump setup. I'm going to incorporate mounts in the base to be able to bolt and unbolt the pods/jigs at will. That should be alot easier on my electric bill and initial setup cost. Here are a few photos of where i'm at now:
Can you explain which stepper motors you use and the electronics package? I see your using a larger router than most people. Does the nema 23 lift this unit ok? I'm still on the fence if the stepper motor kit from cncrouterparts is worth the money. It looks like a good kit. I have already decided on using 4 nema 23, with the idea of using a spare larger router at times.
if you look on my Florida Ox build you'll see alot better photos of the inside of the enclosure. This is the kit I bought from cncrouterparts for the small machine: http://www.cncrouterparts.com/4-axis-plug-and-play-nema-23-system-p-260.html I also chose the 380oz motors, the z slide motor has waaay more than enough torque and speed for the Ox, the Dewalt 611 i'm using is actually very light. Now after putting it all together and running into a few problems with the electronics package from cncrouterparts, I won't do it again or recommend it to people. They used a good ESS smooth stepper BOB but piggybacked it on a POS chinese controller board you can get off ebay for 7.00... Not enough inputs to wire it correctly for homing, squaring, and probing. No instructions or paperwork of any kind. And they left open holes in the bottom .. Go with the Grecko 540, good support and solid customer service... Plus reasonable prices.. Check my profile and you'll see the electronics that went into my big machine, if I do this again thats the way i'll do it...
Forgot to add, to attest to the Nema 23 strengths, my big machine runs a Velox slide with a 5 start screw carrying a 11 lbs Porter Cable 7518 and dust shoe with a Nema 23. Been running it 5-6 days a week for over 2 years... No issues, knock on wood..
Thank you. I read your other post, very interesting and educational. I will go with the grecko 540 kit from cncrouterparts and build my own enclosure. Not sure I know enough about electronics to buy from separate suppliers.