Welcome to Our Community

Some features disabled for guests. Register Today.

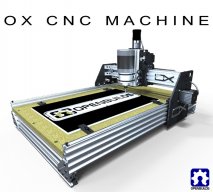
OpenBuilds OX CNC Machine

Discussion in 'CNC Mills/Routers' started by Mark Carew, Dec 15, 2013.

  1. Mossha

    Mossha New
    Builder

    Joined:
    Jan 1, 2015
    Messages:
    11
    Likes Received:
    0
    I'm still looking at building the OX but still studying the other builds. I particularly like Hytech2k's F117 build and how he converted his OX to rack and pinion drives. I thought I saw someone's OX build where they modified/upgraded their gantry beam to use three v-slot extrusions instead of two, but I can find it anymore. Does anyone know if there is one and how well it worked? Has anyone tried to sandwich a steel plate between the two aluminum extrusions to create a flitch beam for the gantry?
     
  2. Nick W

    Nick W Well-Known
    Builder

    Joined:
    Oct 22, 2014
    Messages:
    99
    Likes Received:
    61
    So while going to bed last night, my wife casually says "oh, your big order of router parts came today". What!?!?! I jumped up and started digging through the box to be sure everything made it. I think it was a cunning plan to get me out of the room so she could take over the bed. haha. Thank you OpenBuilds Team! Now I gotta think up a name for my creation....
    [​IMG]
     
  3. Mark Carew

    Mark Carew OpenBuilds Team
    Staff Member Moderator Builder Resident Builder

    Joined:
    Jun 28, 2013
    Messages:
    2,762
    Likes Received:
    2,446
    LOL Glad to see the eagle has landed safely :thumbsup:
    All the best with your build @Nick W
     
    Nick W likes this.
  4. Tweakie

    Tweakie OpenBuilds Team
    Moderator

    Joined:
    Jan 18, 2014
    Messages:
    784
    Likes Received:
    326
    I just love it when they do that. :D

    Good fortune with your build.

    Tweakie.
     
    Nick W likes this.
  5. greypanda

    greypanda New
    Builder

    Joined:
    Jan 13, 2015
    Messages:
    2
    Likes Received:
    1
    It looks like some of the later builds have moved the idler wheels closer together to give the belt almost a 180 degree wrap. ( On your 12/26 post. ) Is this just on the z-axis or all 3?
     
  6. Rick 2.0

    Rick 2.0 OpenBuilds Team
    Staff Member Moderator Builder Resident Builder

    Joined:
    Dec 20, 2013
    Messages:
    2,898
    Likes Received:
    1,556
    That photo is not related to the OX build. If you read the intro on the post it is merely showing the new style wheels that were being added to the parts store a year ago. There is really no way to move the wheels much closer as they would cover the stepper mount screw. The best solution is to try and get the motor as high up as possible.
     
  7. pmany

    pmany New
    Builder

    Joined:
    Nov 24, 2014
    Messages:
    35
    Likes Received:
    6
    I have some 1"x2" steel .125 wall and was thinking that it might work in that manner, or just going with a 4080 extrusion...but have not started a build yet, still planning and finishing up other projects.

    --Paul
     
  8. Scooter

    Scooter New
    Builder

    Joined:
    Dec 25, 2014
    Messages:
    9
    Likes Received:
    10
    When I ordered the parts for my OX I selected the gt3 belt. But have had trouble getting the gt3 pulleys. Did I mess up, should I have just ordered the gt2 belt and pulleys. This is a 2.0 machine for me but I have not yet worked with the timing belts. What do you guys think.
     
  9. Nick W

    Nick W Well-Known
    Builder

    Joined:
    Oct 22, 2014
    Messages:
    99
    Likes Received:
    61
    I too am looking for the GT3 pulleys. there are a few sources in Europe and Austrailia that have them but the taxes and shipping are more than the pulleys.
     
  10. Mark Carew

    Mark Carew OpenBuilds Team
    Staff Member Moderator Builder Resident Builder

    Joined:
    Jun 28, 2013
    Messages:
    2,762
    Likes Received:
    2,446
    Hey guys, Just a heads up that it looks like the GT3 pulleys will be back in stock in a few days.
    We apologize for the delay but please know we have been working hard on this and that they will be here very soon.
    Thank you
    Mark
     
    Nick W likes this.
  11. plexer

    plexer New
    Builder

    Joined:
    Sep 5, 2014
    Messages:
    93
    Likes Received:
    5
    I notice that the low profile bolts are quite expensive would button head socket ones work?

    Ben
     
  12. Mark Carew

    Mark Carew OpenBuilds Team
    Staff Member Moderator Builder Resident Builder

    Joined:
    Jun 28, 2013
    Messages:
    2,762
    Likes Received:
    2,446
    @plexer Using the button head screw should work in most areas, but there may be some clearance issues in areas of the build where the low profile ones will be helpful.
     
  13. plexer

    plexer New
    Builder

    Joined:
    Sep 5, 2014
    Messages:
    93
    Likes Received:
    5
    @kram242 ok thanks, which particular areas do you think may cause problems?

    Ta
     
  14. Rick 2.0

    Rick 2.0 OpenBuilds Team
    Staff Member Moderator Builder Resident Builder

    Joined:
    Dec 20, 2013
    Messages:
    2,898
    Likes Received:
    1,556
    Mainly the Z-axis mount and motor mounts. You need to call up the Sketchup file of the OX and work your way through it verifying as you go.
     
    plexer and Mark Carew like this.
  15. arc1979

    arc1979 New
    Builder

    Joined:
    Sep 4, 2014
    Messages:
    21
    Likes Received:
    0
    I am new to the world of CNC and made it through the mechanical portion of the OX build with little problems but now I am stumped with the power supply. I have the 24V/20A Power Supply and I've wired it up and nothing happens. I see a green LED but it does not light up when I plug the supply into the wall. Any suggestions from the group? Thanks
     
  16. Rick 2.0

    Rick 2.0 OpenBuilds Team
    Staff Member Moderator Builder Resident Builder

    Joined:
    Dec 20, 2013
    Messages:
    2,898
    Likes Received:
    1,556
    Can you provide a photo showing how you have it hooked up? Is the 115V/220V switch set properly?
     
  17. arc1979

    arc1979 New
    Builder

    Joined:
    Sep 4, 2014
    Messages:
    21
    Likes Received:
    0
    I am at work so no photo right now but I can tell you that I have the black wire to "L", white wire to "N", and green wire to ground. I did ensure that the switch was set to 110v.
     
  18. Mark Carew

    Mark Carew OpenBuilds Team
    Staff Member Moderator Builder Resident Builder

    Joined:
    Jun 28, 2013
    Messages:
    2,762
    Likes Received:
    2,446
    Hello @arc1979 It sounds like you have it hooked up properly and it could be a bad PS. If when you get home and find this to be the case please send the OpenBuilds Part Store Team an email and let them know.
    They will take care of you. http://support.openbuilds.com/support/home
    Sorry for any delay this will cause on your build
    Thank you
    Mark
     
  19. Nick W

    Nick W Well-Known
    Builder

    Joined:
    Oct 22, 2014
    Messages:
    99
    Likes Received:
    61
    Do you have anything connected to the DC side of the power supply? maybe there is a short and the supply is going into a protected mode. I would disconnect anything on the DC side to eliminate that possibility.
     
  20. arc1979

    arc1979 New
    Builder

    Joined:
    Sep 4, 2014
    Messages:
    21
    Likes Received:
    0
    Thanks for the replys!
    Yes, tried that with my VOM and got nothing.
     
  21. arc1979

    arc1979 New
    Builder

    Joined:
    Sep 4, 2014
    Messages:
    21
    Likes Received:
    0
    Nothing was connected on the output side of the PS. I should mention that not even the cooling fan is working on the power supply.
     
  22. GrayUK

    GrayUK Openbuilds Team Elder
    Staff Member Moderator Builder

    Joined:
    May 5, 2014
    Messages:
    1,668
    Likes Received:
    627
  23. arc1979

    arc1979 New
    Builder

    Joined:
    Sep 4, 2014
    Messages:
    21
    Likes Received:
    0
    Just pulled the cover and located the fuse. The fuse is not blown. Guess I will be putting the PS portion of my build on pause until the new unit arrives. Thanks for all of the suggestions!
     
  24. Tweakie

    Tweakie OpenBuilds Team
    Moderator

    Joined:
    Jan 18, 2014
    Messages:
    784
    Likes Received:
    326
    It sounds like the PSU is dead and a replacement is needed.

    On a side note - With many PSU's the cooling fan is temperature controlled and only operates when the internals of the unit reach a certain temperature.

    Tweakie.
     
    Joe Santarsiero likes this.
  25. 1972

    1972 New
    Builder

    Joined:
    Sep 21, 2014
    Messages:
    24
    Likes Received:
    20
    Hi guys,

    I've just started putting together my OX build with the latest longer Z plate, just a tip this is what I did to provide a spacer for the extra set of wheels.

    I cut a standard spacer in two, there is a small amount of waste in the middle and each part is approximately 39.5mm long, you still have the m5 threaded hole so could utilise this to fix the new small spacer in place.

    Cheers,
    Chris
     

    Attached Files:

  26. Mopar32985

    Mopar32985 Well-Known
    Builder

    Joined:
    Dec 7, 2013
    Messages:
    128
    Likes Received:
    47
    @kram242 is there anyway or know of somewhere to get smaller gt3 pinions. Or if I want smaller need to go with a different belt. Thanks
     
  27. Nick W

    Nick W Well-Known
    Builder

    Joined:
    Oct 22, 2014
    Messages:
    99
    Likes Received:
    61
    2 days. that is how long I waited to start putting together what I have parts for. My son (6) and I assembled the wheels and bolted them onto the Y plates. I have nearly everything but the electronics. But the biggest limiting factor is that I have a broken leg. I cannot make room (ie. clean up) in my workshop for the router. Hopefully I can get started on the new workbench next month when I am more mobile.

    My son can't wait until my "robot" is finished so it can make parts for his creations. This is gonna be fun!
     
    Robert Hummel and Mark Carew like this.
  28. Tweakie

    Tweakie OpenBuilds Team
    Moderator

    Joined:
    Jan 18, 2014
    Messages:
    784
    Likes Received:
    326
    Very neat idea Chris. :thumbsup:

    Tweakie.
     
  29. davidbrowne

    Builder

    Joined:
    Jul 25, 2014
    Messages:
    30
    Likes Received:
    20
    My first Project. I'm really happy with the results. Quite a learning experience with ARTCAM.

    The second photo shows what happens when a large chunk of wood lands in the channel
    to jam the Y wheels. I don't think any one will notice as its on the bottom.
    It took about 8 hours to cut as a have yet to master the rough out of bulk material.
    nutbowl.jpg nutbowl 2.jpg
     
  30. Tweakie

    Tweakie OpenBuilds Team
    Moderator

    Joined:
    Jan 18, 2014
    Messages:
    784
    Likes Received:
    326
    Excellent work David :thumbsup: (nobody will notice the gouge :D )

    Tweakie.
     

Share This Page

  1. This site uses cookies to help personalise content, tailor your experience and to keep you logged in if you register.
    By continuing to use this site, you are consenting to our use of cookies.
    Dismiss Notice