Welcome to Our Community

Some features disabled for guests. Register Today.

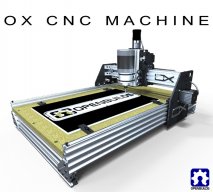
OpenBuilds OX CNC Machine

Discussion in 'CNC Mills/Routers' started by Mark Carew, Dec 15, 2013.

  1. Gopal

    Gopal Well-Known
    Builder

    Joined:
    Jan 12, 2014
    Messages:
    41
    Likes Received:
    25
    eBay and Chinese made products are very attractive for hobbyists on tight budget. Many of the electromechanical products are quite ok but I would be very hesitant to use built electronics. There is so much fun in doing the electronics as there is with the XYZ tables. Just ask Robert who seems to be enjoying all these. He even dabbles with Laser optics, wow!

    If I can get into this sort of play with all thumbs I am sure all of you can and keep it open for others to jump in.

    As for me, I am trying to build a 6axis controller using Arduino Mega for the Gcode parsing using GRBL and USB interface and use either VNH2SP30-E (from STMicroelectronics) which is rated at 30A and 40VDC and THB6064. Unlike the TB6560, which absolutely requires logic power be stable before motor power is applied, the THB6064AH can survive motor power without logic power and will not intermittently short on power up. This is a VERY common failure of the cheap TB6560 drives. Besides THB6064 can microstep to 1/64! It can also handle 4.5amps@50V.

    Another parameter I would like to point out is the fact that stepper motor load is primarily inductive (the coil) and can produce opposing voltage (back EMF) proportional to the running speed. So if you want to run the axes fast you would normally use high voltage drivers but keeping a constant current specific to motor. I am just passing these on as I am going through the learning and design process.....
    Gopal
     
    silopolis, Sonny and (deleted member) like this.
  2. Public Do Omens

    Guest Builder

    Nice find thanks.

    http://www.ecomorder.com/techref/ecomprice.asp?p=416074

    £75 for a full 3 axis kit. http://www.massmind.org/Techref/io/stepper/THB6064/index.htm
     

    Attached Files:

  3. cliff

    cliff New
    Builder

    Joined:
    Jan 12, 2014
    Messages:
    3
    Likes Received:
    1
    Alternate Gantry Support
    Here is an idea for an alternate gantry, more similar to the routy than the existing garolite OX. It primarily uses 2080 uprights, with brackets to hang the bearings and stepper mount. This would seem to offer more rigidity, as well as adjust-ability and expandability vertically for different material thicknesses, the trade off being higher parts count. At least 3 versions are possible, a single flat plate with bearings and stepper mount; two plates one with bearings at bottom and stepper mount and the other with bearings on top so the bearing gap can be adjusted on the 8020 upright, or L angle brackets with bearing sets and stepper mount on each. gantrySides.jpg gantrySides2.jpg

    Does anyone see a problem with this approach?
     
  4. wrdutcher

    wrdutcher New
    Builder

    Joined:
    Dec 4, 2013
    Messages:
    19
    Likes Received:
    11
    I am not sure about rigidity of the 2080 over just having the 1/4" Graolite plate OZ design, since I am new to CNC Routers. But is does have some resemblance to the Routy gantry plate design, so someone experienced with that may be able to better answer your question.

    I like the second design better using a single plate. This gives me an idea on how to transform the OZ into a CNC/3d printer. By allowing the plate mounted 2080 Vslot pieces to move up and down a few inches, I could raise and lower the gantry. This could be done with a simple dual screw drive or just a move and lock system. Fully retracted for CNC work and fully extended for 3d printing. Of course the Z axis would have to be extended for more travel, but would only use the first 3-4" of travel for CNC work and a full 8-10" for 3d printing. This would allow for larger Z axis 3d printing without sacrificing Z axis rigidity for CNC routing.
     
  5. Mopar32985

    Mopar32985 Well-Known
    Builder

    Joined:
    Dec 7, 2013
    Messages:
    128
    Likes Received:
    47
    Mark any updates on the files for the plates and video.
     
  6. Mark Carew

    Mark Carew OpenBuilds Team
    Staff Member Moderator Builder Resident Builder

    Joined:
    Jun 28, 2013
    Messages:
    2,762
    Likes Received:
    2,446
    Hi @Mopar32985 , the wiring for the video is done, and I have been editing a I go so that will save some time. :) Now we are working up the software video and then it will be complete.
    Once I see it up and running I will be posting everything. I just need to say its done and post what I have once I do we can all go in and make changes where we feel we could improve on the OX. I think thats going to be the fun part. We will have a good foundation to work from and I am looking forward to everyone's help in making this a great machine! I apologize for the delay lots to do here in a day :)
     
  7. Greenman

    Greenman New
    Builder

    Joined:
    Jan 21, 2014
    Messages:
    63
    Likes Received:
    19
    I have a rigid 2401 that I use on the binding jig I will post a picture. It is nice because the base is tapped and the mounting is easy I was thinking of using this type of router. Variable speed I weighed it and it is a little heavier than the colt 3.6 pounds. I think you can make it out from the picture. fleish rt 3.JPG
     
  8. Gopal

    Gopal Well-Known
    Builder

    Joined:
    Jan 12, 2014
    Messages:
    41
    Likes Received:
    25
    Hi Mark/Robert and everyone else!

    I came across this linear actuator design (meant for a hexapod aircraft simulator) but the concept of the belt drive taken to a large scale! Enjoy...

    Gopal
     
  9. Mark Carew

    Mark Carew OpenBuilds Team
    Staff Member Moderator Builder Resident Builder

    Joined:
    Jun 28, 2013
    Messages:
    2,762
    Likes Received:
    2,446
    @Greenman that is an awesome jig!
    @Gopal I have seen this video and love it! This guy makes some serious cool stuff, thanks for the share.
     
  10. Nick Lancaster

    Builder

    Joined:
    Dec 20, 2013
    Messages:
    60
    Likes Received:
    13
    He should have used Constant force springs, instead of bungee cord. Would have worked much better, as they provide a near identical amount of tension over the entire motion range.
     
    silopolis likes this.
  11. Mark Carew

    Mark Carew OpenBuilds Team
    Staff Member Moderator Builder Resident Builder

    Joined:
    Jun 28, 2013
    Messages:
    2,762
    Likes Received:
    2,446
    Little update, just finished up a quick overview of the software and now on to editing (getting there) :)
     
    wrdutcher and Robert Hummel like this.
  12. Mark Carew

    Mark Carew OpenBuilds Team
    Staff Member Moderator Builder Resident Builder

    Joined:
    Jun 28, 2013
    Messages:
    2,762
    Likes Received:
    2,446
    Hey guys just posted build video 2 of the OX build :)
    Just scroll up and click the Build tab to check it out. (Still work to be done before I can say build complete but getting closer)
     
    Mopar32985 likes this.
  13. Mopar32985

    Mopar32985 Well-Known
    Builder

    Joined:
    Dec 7, 2013
    Messages:
    128
    Likes Received:
    47
    Great video mark thanks for taking your valuable time and making this video
     
    Mark Carew likes this.
  14. bobt

    bobt Well-Known
    Builder

    Joined:
    Dec 4, 2013
    Messages:
    89
    Likes Received:
    38
    I have one suggestion. One of the final test items done on the build should be to draw a design on paper attached to the table with a pen/marker attached to the Z-axis. Just tape the pen/marker to the the Z-axis and set up the zero point so that when extending down it just touches the paper. This method is what proved that the 2 motor Y-axis was required because of racking of the gantry on the ShapeOko. It is also final proof for significant others that your time was not a compete waste. Besides I like the idea so that you can frame it and hang it on the wall just like new business owners do with their first dollar. I can prove that it works. It is a certificate of final build completion.

    Bob
     
    silopolis likes this.
  15. Mark Carew

    Mark Carew OpenBuilds Team
    Staff Member Moderator Builder Resident Builder

    Joined:
    Jun 28, 2013
    Messages:
    2,762
    Likes Received:
    2,446
    Thanks guys
    Good idea Bob! Why didn't I think of this? I would have included this in the video. After the video was complete I have been running though ways to set up a quick and dirty router mount for it. I have on now that I think will do the trick so i am going to do a test cut in foam to see. Once done I will post some pics/video :)
     
  16. Greenman

    Greenman New
    Builder

    Joined:
    Jan 21, 2014
    Messages:
    63
    Likes Received:
    19
    Great video I am a Newbie to this and I learned a lot. I am a retired teacher and I was impressed with the clarify of the build. As it should it left me with the feeling I can do this. The part I find off putting is learning enough Cad and Cam so I can actually make something. Any ideas about places to go on the net to learn this. Remember I am an old guy I didn't grow up with computers just erector sets and tinker tools. I was a builder then to.
     
    Mark Carew and Robert Hummel like this.
  17. Greenman

    Greenman New
    Builder

    Joined:
    Jan 21, 2014
    Messages:
    63
    Likes Received:
    19
    torsion box.jpeg I just watched the video again and I had an idea about the platform. One way woodworker make a stable panel is to do something called a torsion box. It is a stable way to make a box that is much lighter than a solid muti layered top. Maybe the top layer could act as a vacuum chuck if the box was sealed up air tight and finish to seal it. The valves I showed in the vacuum chuck could be installed at regular intervals. I have to get going on this build so I can try this out. There would have to be holes inside the box so the air could be pulled out of it. Google torsion box to see a lot of good picture. While I was writing this I realized it could be a big vaccum table as well.
     
    silopolis likes this.
  18. bobt

    bobt Well-Known
    Builder

    Joined:
    Dec 4, 2013
    Messages:
    89
    Likes Received:
    38
    Yes and if you use the whole table then you could say the it really sucks for the whole project. LOL.. Sorry I just could not pass up the bad joke. Use a torsion box table with built-in suction would greatly increase the utilization of the system and allow for a more stable structure.

    Bob
     
  19. The Dude

    The Dude Well-Known
    Builder

    Joined:
    Jan 2, 2014
    Messages:
    243
    Likes Received:
    103
    I'm planning on doing this with my routy and eventually OX. Instead of ordering extra v-slot for the frame to support an mdf table, I'm making a torsion box and mounting it to the frame. On top of that, I'd like to add a scratch-pad and suction table. I need it to be removable so I can put on a heated bed. Maybe I could make that same suction attachment you posted before and the top would be a sliding piece that can be quickly changed out with a new scratch/suction top or heated bed. Have different tops for different devices. Maybe a laser-proof one too :).
     
    silopolis likes this.
  20. Mark Carew

    Mark Carew OpenBuilds Team
    Staff Member Moderator Builder Resident Builder

    Joined:
    Jun 28, 2013
    Messages:
    2,762
    Likes Received:
    2,446
    @JustinTime I was not aware of this thanks for the tip. I guess like electricians here you could use wire nuts as well. They would have ensured a nice connection.
    @Greenman thank you :)
    For SketchUps easy to follow getting started video tutorials: http://www.sketchup.com/learn/videos?playlist=58&playlist=58
    These helped me get started by learning 1 tool a night :)

    For SketchUp and SketchUcam related tutorials: http://www.phlatforum.com/xenforo/forums/sketchup-tutorials/
     
  21. blindflight

    blindflight Well-Known
    Staff Member Builder Resident Builder

    Joined:
    Sep 19, 2013
    Messages:
    53
    Likes Received:
    56
    Really awesome video on the build , software & electronic !! Can't wait :)
     
    ewo and Mark Carew like this.
  22. Mark Carew

    Mark Carew OpenBuilds Team
    Staff Member Moderator Builder Resident Builder

    Joined:
    Jun 28, 2013
    Messages:
    2,762
    Likes Received:
    2,446
    Thanks brotherman :)
     
  23. ewo

    ewo New
    Builder

    Joined:
    Jan 25, 2014
    Messages:
    5
    Likes Received:
    1
    Im with you Bro ! I cant wait . Will the parts be available in the Phlatstore ?
     
  24. Mark Carew

    Mark Carew OpenBuilds Team
    Staff Member Moderator Builder Resident Builder

    Joined:
    Jun 28, 2013
    Messages:
    2,762
    Likes Received:
    2,446
    Hi Bruce! :) We have most of them to start out with and as we finish up the lead screw and nut blocks will be complete in a few weeks. The nema 23 steppers should be ready in about a week.
     
  25. Robert Hummel

    Robert Hummel Custom Builder
    Moderator

    Joined:
    Nov 14, 2013
    Messages:
    978
    Likes Received:
    715
    Thought I would share my latest score at my local surplus $5 :)
    image.jpg
    Not sure of its TPI yet but there is 6 inches of thread. I just need to get another 1602 bearing and I should be good to go
     
    Mark Carew likes this.
  26. Mark Carew

    Mark Carew OpenBuilds Team
    Staff Member Moderator Builder Resident Builder

    Joined:
    Jun 28, 2013
    Messages:
    2,762
    Likes Received:
    2,446
    Sweet find Robert!
     
  27. Mark Carew

    Mark Carew OpenBuilds Team
    Staff Member Moderator Builder Resident Builder

    Joined:
    Jun 28, 2013
    Messages:
    2,762
    Likes Received:
    2,446
    Just added a short 'quick & dirty' tool mount video for the OX under the build tab :)
     
  28. blindflight

    blindflight Well-Known
    Staff Member Builder Resident Builder

    Joined:
    Sep 19, 2013
    Messages:
    53
    Likes Received:
    56
    "Quick & Dirty too mount" was a great idea for mounting !! Two thumbs up Mark [​IMG]
     
  29. blindflight

    blindflight Well-Known
    Staff Member Builder Resident Builder

    Joined:
    Sep 19, 2013
    Messages:
    53
    Likes Received:
    56
    Hey guys, got to remember this is a "Open Build" project that you can configure any and what ever way "You" can conceive and run with it. You may not have the same router , its different and you need to make adjustments to fit. Give Mark a break , he has gone thru the pain staking efforts on the design...... my 2 cents :)
     
  30. Mark Carew

    Mark Carew OpenBuilds Team
    Staff Member Moderator Builder Resident Builder

    Joined:
    Jun 28, 2013
    Messages:
    2,762
    Likes Received:
    2,446
    Thanks guys, there are better ways to do this for sure but I was really anxious to get up and running :D
    Also one of the things I always try to do is use as many readily available parts as I can. This way if someone does not have a 3D printer for example, they could still build this machine. Plus its in my nature to take things apart and use them for a different purpose other then what they were designed for. If you can make a part a multi- functional part thats awesome and if you can do it even more then once for the same part thats even more awesome! :) The only part I wish I could have done this way were the plates but I figure the ROUTY will work with that or another cnc machine. Maybe we can get the plates done down the road but it may be a while as there is a lot to do here.
    Today I just picked up the 3/4" MDF from LOWES for the the table, it was about 30 bucks and they cut it down to size on their panel saw 17.5 x 29.5 I had 5 of them cut out of a 4'x8' sheet. I figure I will stack them 3 high for the table and that way with 1" bit sticking out I can still cut up to .750" thick with the router more inline with the wheels giving it much more strength. This is the way I recommend it be done, in the future I may do a mod to move the Y axis steppers to the bottom so that I can move the beam down like we talked about in the video but actually this works out well because it gives the machine some weight. Well see how it goes :)
     

Share This Page

  1. This site uses cookies to help personalise content, tailor your experience and to keep you logged in if you register.
    By continuing to use this site, you are consenting to our use of cookies.
    Dismiss Notice