Welcome to Our Community

Some features disabled for guests. Register Today.

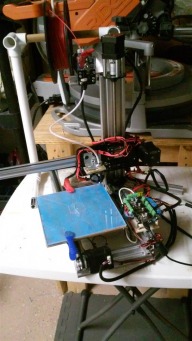
First 3d build

Discussion in '3D printers' started by jjcolletta, Oct 30, 2014.

  1. jjcolletta

    Builder

    Joined:
    Sep 13, 2014
    Messages:
    30
    Likes Received:
    10
    jjcolletta published a new build:

    Read more about this build...
     
  2. Mark Carew

    Mark Carew OpenBuilds Team
    Staff Member Moderator Builder Resident Builder

    Joined:
    Jun 28, 2013
    Messages:
    2,758
    Likes Received:
    2,440
    This is a great 3D printer build @jjcolletta It seems really easy to put together and will get the job done, thats what its all about.
    I recently purchased the E3D v6 hot end and will also be adding it to a build soon. I have heard good things about the E3D hot ends but like all 3D printers they are finicky and the settings have to be just right.
    Keep up the good work and I am sure you will have it dialed in soon.
    Would like to see the model and parts list if you get some time to post them.
    Thank you for sharing your build.
    Mark
     
  3. jjcolletta

    Builder

    Joined:
    Sep 13, 2014
    Messages:
    30
    Likes Received:
    10
    Well this sure has been a learning experience.
    1. The E3D hotends works fine if you follow the directions exactly. Take no shortcuts.
    2. The mechanics must be tight, aligned and repeatable.
      1. For this reason I am probably abandoning the cantilever arm. I just cannot keep it tight and square.
    3. I just sent back the Azteeg X5 controller board for review. I could never get it to home correctly.
      1. The M119 command would only return the switches being on if all 3 axis were home. I could not get just one axis to say it was on a switch.
      2. Other than this the board worked great, very easy to use, connections were solid, loved the text file to adjust settings and reset.
    Ah this is a journey, maybe for what I have spent so far I should have just bought a delta :)

    Edit 12/15/2014 == Received new Azteeg X5 Mini board and it worked great! Homing is not a problem anymore.
     
    #3 jjcolletta, Nov 16, 2014
    Last edited: Dec 16, 2014
  4. Holy1

    Holy1 New
    Builder

    Joined:
    Nov 7, 2014
    Messages:
    15
    Likes Received:
    2
    Hi, Just starting a build similar to yours. I was planning on using the 20 x 80 rail for the cantilevered arm attached to a 20x80 upright. Do you think this would have made a difference to yours? It's funny you said you should have bought a delta. I have 2 deltas and now I want to build a cartesian style.
     
  5. jjcolletta

    Builder

    Joined:
    Sep 13, 2014
    Messages:
    30
    Likes Received:
    10
    Holy1,

    I need to update my build notes on this. I kept the basic structure as shown but I had to hold the position of the linear screw at the bottom. Holding the linear screw in place allowed the three wheels to hold tight to the vertical 20x60.

    Depending the size of the print area you thinking about 20x80 is fine for the vertical but may by too large for the horizontal. If you are thinking about dual extruders or not using a bowden setup I would probably have used a 20x40.

    i will post new pictures soon

    Thanks for looking and asking.
     
    Mark Carew likes this.
  6. jjcolletta

    Builder

    Joined:
    Sep 13, 2014
    Messages:
    30
    Likes Received:
    10
    Holy1

    Here are a few more detailed photos of the final build. It is working great, I am now diving into slicer settings to get better prints. I am also getting prepared to add an additional fan for PLA cooling.
     

    Attached Files:

  7. Holy1

    Holy1 New
    Builder

    Joined:
    Nov 7, 2014
    Messages:
    15
    Likes Received:
    2
    Hey, that's great! very exciting stuff. It's a cool hobby for sure. I wondered what firmware you were using and where you downloaded it?
     
  8. jjcolletta

    Builder

    Joined:
    Sep 13, 2014
    Messages:
    30
    Likes Received:
    10
    I am using a board that utilizes Smoothieware firmware. You can find information about it at www.smoothware.org
     
  9. Holy1

    Holy1 New
    Builder

    Joined:
    Nov 7, 2014
    Messages:
    15
    Likes Received:
    2
    Thanks very much.
     
  10. stephen cia

    stephen cia Well-Known
    Builder

    Joined:
    Jan 6, 2016
    Messages:
    63
    Likes Received:
    74
    Hello,
    I have been thinking about building something like this and came across your build. it was almost exactly like what I pictured it in mind! do you have any video showing the printer in action?

    Thanks,
    Stephen
     
  11. Lorne Wilkins

    Builder

    Joined:
    May 9, 2014
    Messages:
    6
    Likes Received:
    4
    Hi. Congratulations on getting your printer going!

    I am also in the midst of constructing a 3D printer that was inspired by the Bukito and like you I have chosen to go with the E3D Bowden extruder, the Azteeg X5 Mini and of course all the good stuff from OpenBuildsPartStore (see the attached photos). I teach CNC programming and machining in a French-speaking trade school in Montreal, so I had no problem drawing the printer in 3D or machining all the parts.

    I have pretty well completed the mechanical assembly and now I am trying to get the controller hooked up but I 'm having a bit of trouble with all the parameters in the Config file. Would it be possible to send me a copy of your working Config file? I have gotten the printer to move in all 4 axes (X, Y, Z and the extruder) and it can do a Home in the 3 axes but I would swear it seems to be configured in inches instead of metric.

    Any help would be appreciated.

    Lorne Wilkins

    Bukito Progress Photos-2014-09-28 (5)-(Extruder)-(low res).jpg Bukito Progress Photos-2014-10-14 (Power Supply) (6)-(low res).jpg Bukito Progress Photos-2015-10-02-(1)-(3 Axes Layout)-(mod, low res).jpg Lorne's Bukito-Progress Photos-2015-10-03 (1)-(Azteeg X5 Mini)-(low res).jpg Lorne's Bukito-Progress Photos-2015-10-03 (2)-(Z Axis & Extruder)-(low res).jpg Lorne's Bukito-Progress Photos-2015-10-03 (3)-(Z Axis & Extruder)-(low res).jpg Lorne's Bukito-Progress Photos-2015-10-03 (4)-(Left-front ISO View)-(low res).jpg Lorne's Bukito-Progress Photos-2015-10-03 (5)-(Left-rear ISO View)-(low res).jpg Bukito Progress Photos-2014-09-28 (5)-(Extruder)-(low res).jpg
     
    Mark Carew likes this.
  12. Quoc Anh Le

    Builder

    Joined:
    Oct 15, 2015
    Messages:
    7
    Likes Received:
    0
    Can u share your design to me? Thanks
     
  13. Lorne Wilkins

    Builder

    Joined:
    May 9, 2014
    Messages:
    6
    Likes Received:
    4
    Hi, would it be possible to send me your Config file for the Azteeg X5 Mini. It would help me a lot. Thanks

    Lorne Wilkins
     
  14. jjcolletta

    Builder

    Joined:
    Sep 13, 2014
    Messages:
    30
    Likes Received:
    10
    Let me see if I still have it. I have taken that printer apart to build a new one and put the Azteeg on a laser engraver.
     
  15. Lorne Wilkins

    Builder

    Joined:
    May 9, 2014
    Messages:
    6
    Likes Received:
    4
    I hope you can find it - it would give me a real helping hand.

    Thanks.

    Lorne Wilkins
     
  16. jjcolletta

    Builder

    Joined:
    Sep 13, 2014
    Messages:
    30
    Likes Received:
    10
    this is a pretty old file, I hope it helps.
     

    Attached Files:

  17. Lorne Wilkins

    Builder

    Joined:
    May 9, 2014
    Messages:
    6
    Likes Received:
    4
    Thanks for taking the time to answer and to find the file. I'm sure it will help - at least it will give me something to compare to. I'll let you know how it goes.

    Lorne Wilkins
     

Share This Page

  1. This site uses cookies to help personalise content, tailor your experience and to keep you logged in if you register.
    By continuing to use this site, you are consenting to our use of cookies.
    Dismiss Notice