Welcome to Our Community

Some features disabled for guests. Register Today.

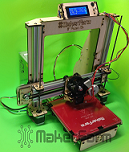
Bob's 3D Printer Kit Build

Discussion in '3D printers' started by bobt, Apr 4, 2014.

  1. bobt

    bobt Well-Known
    Builder

    Joined:
    Dec 4, 2013
    Messages:
    89
    Likes Received:
    38
    bobt published a new build:

    Read more about this build...
     
  2. Seul Kee

    Seul Kee New
    Builder

    Joined:
    Mar 10, 2014
    Messages:
    16
    Likes Received:
    1
    Bob,

    Thanks for the 3D printer info! How thick is the laser-cut plywood? 1/4"?
     
  3. Mark Carew

    Mark Carew OpenBuilds Team
    Staff Member Moderator Builder Resident Builder

    Joined:
    Jun 28, 2013
    Messages:
    2,758
    Likes Received:
    2,441
    Great looking machine very well thought out :thumbsup:
     
  4. Tweakie

    Tweakie OpenBuilds Team
    Moderator

    Joined:
    Jan 18, 2014
    Messages:
    784
    Likes Received:
    326
    Thanks for the info Bobt that is a very nice machine (just needs something at the top over those Z axis screws). :)

    Tweakie.
     
  5. Mark Carew

    Mark Carew OpenBuilds Team
    Staff Member Moderator Builder Resident Builder

    Joined:
    Jun 28, 2013
    Messages:
    2,758
    Likes Received:
    2,441
    Moving right along! looking great Bob
     
  6. bobt

    bobt Well-Known
    Builder

    Joined:
    Dec 4, 2013
    Messages:
    89
    Likes Received:
    38
    Suel Kee - Yes it is made from 1/4" / 6mm Baltic Burch. Laser cut parts. Everything fits just file, even the holes for the 3mm screws.

    Tweekie - The threaded rods are not very sharp but I guess if I put it on the floor and jumped off the sofa then it would hurt if I landed on it. Also would not do a lot for the printer either. When I get it running I think that I will print some plastic caps to cover the end of the rods. Or go get some from the garage from my closet mods.

    Kram242 - Thanks -- Sorry I was not able to work on it for about 5 hours yesterday but my 8 month old granddaughter came to visit. After playing some and having lunch. We took a short nap - short for me not for her. I then was able to go back to work on this project. I do have to remember priorities you know. I have added pictures of where I am at this time.

    Build time so far is about 12 hours.

    Bob
     
  7. Seul Kee

    Seul Kee New
    Builder

    Joined:
    Mar 10, 2014
    Messages:
    16
    Likes Received:
    1
    Bob,

    Thanks for answering my question. Could you also tell me why you chose 2 different extruders
    and what are those? Forgive me if I am bothering you too much. (I know almost nothing about
    3D printers.)
     
  8. Mark Carew

    Mark Carew OpenBuilds Team
    Staff Member Moderator Builder Resident Builder

    Joined:
    Jun 28, 2013
    Messages:
    2,758
    Likes Received:
    2,441
    Thanks Bob, also so true :D
     
  9. bobt

    bobt Well-Known
    Builder

    Joined:
    Dec 4, 2013
    Messages:
    89
    Likes Received:
    38
    The only selection when I purchased the machine for 1.75mm filament is .40mm Hexagon Nozzle for 1.75mm Filament(prints ABS, PLA and higher temp materials). I had also purchased a All-metal E3D (v5) Hotend because I want to use Nylon and other high temp materials for some builds. I also have the Filastruder and Winder so that I can make my own filaments and custom colors.

    Bob
     
  10. bobt

    bobt Well-Known
    Builder

    Joined:
    Dec 4, 2013
    Messages:
    89
    Likes Received:
    38
    Seul Kee - There are 4 different nozzle at 3mm and 1 at 1.75mm so that is why I chose that one.

    I just got to the point that I wanted to power up the power supply and test voltages. I disconnected the power cable from the RAMPS card which only left the fan on the extruder live. It must be powered up all the time. When I powered up the fan did not spin. SO went to the shop and got a meter to check voltages. UP 11.23v on the plug. So I disconnected the fan an ohmed it out. No ohm's so it appears that I have a bad fan and will have to wait for a replacement.

    Bob
     
  11. bobt

    bobt Well-Known
    Builder

    Joined:
    Dec 4, 2013
    Messages:
    89
    Likes Received:
    38
    I have completed the build and now I am in testing phase. After setting the printer bed to be level with the print head. I have started printing the test items to verify that the machine is calibrated correctly. Then I will print the replacement parts for the extruder. Then to print some nice things for me.

    Bob
     
  12. Seul Kee

    Seul Kee New
    Builder

    Joined:
    Mar 10, 2014
    Messages:
    16
    Likes Received:
    1
    Bob,

    Congratulations! I am glad that you assembled the Prusa 8" i3v kit successfully
    and it runs well!

    You made me seriously consider to buy an i3v!!!

    Many thanks,

    Tae


  13. bobt

    bobt Well-Known
    Builder

    Joined:
    Dec 4, 2013
    Messages:
    89
    Likes Received:
    38
    I have printed a bunch of parts for the replacements and now I am back on printing calibration cubes to make the unit a precise as I can.

    One of the things that I am going to do with the printer is make parts that can be used for aluminum casting. Take 1 part PLA plastic part at 103% size and mix in plaster/very fine sand for molding. Place unit into furnace and magic - the plastic disappears. Then heat aluminum to melting temp and fill mold. Yup precise parts and easier than just using any old CNC machine to make swarf. This is called the Lost-Plastic method of casting parts. I just love playing with fire in a bucket.

    Bob
     
    Darkfibre and Mark Carew like this.
  14. charles stevens

    Builder

    Joined:
    May 14, 2014
    Messages:
    1
    Likes Received:
    0
    I am looking to build my first 3d Printer and need a large envelop 16x16x16 and need a lot of help !
     
  15. Tweakie

    Tweakie OpenBuilds Team
    Moderator

    Joined:
    Jan 18, 2014
    Messages:
    784
    Likes Received:
    326
    Hi Charles,

    Welcome to the group :)

    You have come to the right place - here we have lots of build's information and many people only too willing to help you with any queries you may have.
    Brian's Ultimo is certainly man size http://www.openbuilds.com/threads/ultimo.454/

    Tweakie.
     
  16. bobt

    bobt Well-Known
    Builder

    Joined:
    Dec 4, 2013
    Messages:
    89
    Likes Received:
    38
    Charles - Tweakie is correct. The kit I purchased is a 8"x8"x8" printer. It has vslot mounted on 1/4" baltic birch plywood. It make no sense to expand this kit as you would have to make a completely new setup. But the other projects in this forum should be able to be expanded just fine. You will find that in most cases it is the extrusion and belt that are made longer. All the joints and electronics are exactly the same.

    Bob
     

Share This Page

  1. This site uses cookies to help personalise content, tailor your experience and to keep you logged in if you register.
    By continuing to use this site, you are consenting to our use of cookies.
    Dismiss Notice