Welcome to Our Community

Some features disabled for guests. Register Today.

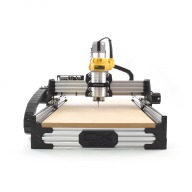
ooznest OX CNC Machine

Discussion in 'CNC Mills/Routers' started by Ryan Lock, Apr 28, 2015.

  1. Ryan Lock

    Ryan Lock Veteran
    Builder

    Joined:
    Oct 12, 2014
    Messages:
    530
    Likes Received:
    293
    @Alan Foster Good to hear it was was something simple :) If you go to page 7 of this thread, you will see what other customers have done. So you could put a piece of 20x60mm under each end, this would give you an additional 30mm of cut depth. You won't need to extend the Z-Axis.

    @Suzie as dddman said 14 or 16mm is fine.
     
  2. GrayUK

    GrayUK Openbuilds Team Elder
    Staff Member Moderator Builder

    Joined:
    May 5, 2014
    Messages:
    1,668
    Likes Received:
    627
    Alan, I'd be more inclined to lower the bed, than to start altering your plates.
    If you have, or can make the room, then use it.:thumbsup:
     
    Alan Foster likes this.
  3. Conehead

    Conehead New
    Builder

    Joined:
    Aug 30, 2016
    Messages:
    38
    Likes Received:
    5
    Hey guys! Maybe anyone can help me here with this ;)
    My Arduino Controller arrived today and I connected it.
    The motors itself work fine.
    But I got stuttering for the X-Axis and on the Y-Axis both motors do not move the same speed / at the same time.
    May this be due to the settings of the eccentric spacers?
    I tried to do it like the manual said, but somehow it seems it is not working too well right now.
    Everytime I read "There should be a small amount of friction." in the manual I get confused.
    Does that mean, that the wheels still should be able to rotate freely, without moving the X-Carriage?
    Rotate with friction, so that the X-Carriage does move with the wheel (but the wheel sometimes has a "burnout"?
    Or should it be so tight, that everytime I turn the wheel the X-Carriage HAS to move?

    I hope you know what I mean ;)

    Oh and I killed a screw within the Flexible Coupler :/
    Guess there will be some work to done.

    Thank you!
     
  4. Moag

    Moag Veteran
    Staff Member Builder Resident Builder

    Joined:
    Mar 16, 2016
    Messages:
    183
    Likes Received:
    295
    A little bit of "burnout" is a good starting point... ;)
     
  5. Giarc

    Giarc OpenBuilds Team
    Staff Member Moderator Builder Resident Builder

    Joined:
    Jan 24, 2015
    Messages:
    3,008
    Likes Received:
    1,676
    What motor drivers are you using? Are both Y motor drivers set to the same microstepping and steps per mm? Is the x axis getting enough current?
     
  6. Conehead

    Conehead New
    Builder

    Joined:
    Aug 30, 2016
    Messages:
    38
    Likes Received:
    5
    Nema 23, Power Supply 400 W 24V.
    Setup for Y-Axis is the same. Differences are tiny, but it is Not running smooth
     
  7. Ryan Lock

    Ryan Lock Veteran
    Builder

    Joined:
    Oct 12, 2014
    Messages:
    530
    Likes Received:
    293
    Could we get something more info on your controller?

    As long as when the carriage moves, all the wheels rotate consistently you are good to go.

    I would check the grub screws are tight on the motor shafts, and that one of them is on the flat portion of the shaft.

    We can send out a new coupler if you like.
     
  8. Conehead

    Conehead New
    Builder

    Joined:
    Aug 30, 2016
    Messages:
    38
    Likes Received:
    5
    Yes sure.
    I use an normal Arduino and installed the Protoneer CNC Shield.
    The Y-Axis is cloned and all motors are set to "Quarter step".
    Before it starts stuttering I can hear a little knocking on the left Y-Axis.
    If I leave the motor alone for a minute or so, it works better than before (like for one movement).
    Here I just created a small video. Hope you can see what I mean:

    And thanks Ryan, but I already ordered a new coupler and some more stuff from your shop :)
    Z-Axis has no priority at the moment.
     
  9. Giarc

    Giarc OpenBuilds Team
    Staff Member Moderator Builder Resident Builder

    Joined:
    Jan 24, 2015
    Messages:
    3,008
    Likes Received:
    1,676
    That is weird. Did you adjust the current on the individual drivers. When I used the Protoneer shield with DRV8825 drivers, if they were not adjusted right, they would make weird noise and not move properly. But, maybe you already have adjusted them.
     
    GrayUK likes this.
  10. Conehead

    Conehead New
    Builder

    Joined:
    Aug 30, 2016
    Messages:
    38
    Likes Received:
    5
    Didn't see that there was anything to adjust at all!
    I will buy an volt-meter today and give it a shot later or tomorrow.
    I will let you know, but thanks a lot already!
     
  11. dddman

    dddman Journeyman
    Builder

    Joined:
    Mar 2, 2014
    Messages:
    468
    Likes Received:
    187
    It might be your acceleleration curve too...
     
  12. Ryan Lock

    Ryan Lock Veteran
    Builder

    Joined:
    Oct 12, 2014
    Messages:
    530
    Likes Received:
    293
    Thanks for the vid. Yes definitely look at adjusting the drivers. Could be overheating, hence it cutting out.
     
  13. Giarc

    Giarc OpenBuilds Team
    Staff Member Moderator Builder Resident Builder

    Joined:
    Jan 24, 2015
    Messages:
    3,008
    Likes Received:
    1,676
    I had trouble with overheating. I put heat sinks on my drivers and they still would cut out when they heated up. I installed a computer fan to blow on them and all was well after that.
     
  14. Conehead

    Conehead New
    Builder

    Joined:
    Aug 30, 2016
    Messages:
    38
    Likes Received:
    5
    Thanks for all the info!
    Unfortunately I bought the wrong multimeter, so I was not able to test it.
    Ordered another one now. And I just bought the DRV8825 drivers, because they seem to be more powerful.
    Will let you know if it worked soon ;)
     
  15. Muxa

    Muxa New
    Builder

    Joined:
    Sep 9, 2016
    Messages:
    23
    Likes Received:
    12
    I have a question about wiring. I want to use a CAT5e (or CAT6) cable to connect physical controls and an emergency stop button to xPro. Will this is ok, or do i need a shielded cable?
     
  16. Ryan Lock

    Ryan Lock Veteran
    Builder

    Joined:
    Oct 12, 2014
    Messages:
    530
    Likes Received:
    293
    Shielded would be better for the endstops, but you CAT wire would be fine. For the emergency button, i think it is best to just have it in-between the PSU and controller, so you know for sure then it will cut out, no matter what is happening on the controller.
     
  17. tparsons

    tparsons New
    Builder

    Joined:
    Nov 13, 2016
    Messages:
    9
    Likes Received:
    0
    I am interested in building a 1500x1500 ooznest for furniture, mostly 1200 x 2400 plywood.

    Size; Could the sheet stick out the end to allow me to cut one end then cut the other end? Is it actually possible to source v-slot longer than 1500? Presumably joining two pieces makes it rather weak. Does the Ooznet mod with a plate on each side of the Y axis (though making x axis better, not allow for more racking on large beds, which would be made particularly bad by joining lengths to make a longer Y axis?

    Router; What sort of feed speed would the dewalt router manage, would getting a more powerful spindle be of benefit? Cutting 18mm birch ply with a 1/4inch bit in two or three passes, what speed can the machine handle- is it going to take hours per sheet? Additionally, I have read through the forum for a few hours and I understand its not really advisable to go large on the belt drive because of stretch, though I see some people have doubled up the belts. Presumably could ballscrews be retrofitted to an Ooznest... Could the same motors be used?

    About the z axis- Although the machine would be used mostly for 18mm sheet work, I might want to mill smaller deeper 2.5d things, such as 100mm thick foam for a mould? Keeping the plates are they are, could I cut between the beams into an area below the bed if the Z axis extrusions were longer? Say if I were to put the foam between the crossbeams.

    Thanks!
     
    #407 tparsons, Nov 14, 2016
    Last edited: Nov 14, 2016
  18. Ryan Lock

    Ryan Lock Veteran
    Builder

    Joined:
    Oct 12, 2014
    Messages:
    530
    Likes Received:
    293
    @tparsons Yes, you can have the sheets stick out each end. We don't stock extrusions longer than 1500mm, and this machine isn't suited for going any bigger either. If you was going to go longer, you would need to remove the inner plate, and support the extrusion along it's length. You would also need to do the double belt mod. Still though i wouldn't advise going larger than 1500mm. Modifying the machine to use ball screws isn't really an option.

    You could achieve around 1200mm/min, but this does depend on a lot of factors. Again the time per sheet depends how complex the job is, so impossible to say. If you download some CAM software, some give you a time estimate.

    Yes you could drop the foam in-between the extrusions. Depending how deep you want to cut into the foam, you may not need to mod the machine.
     
  19. Inaudable

    Inaudable New
    Builder

    Joined:
    Oct 15, 2016
    Messages:
    5
    Likes Received:
    0
    Hi all, got my ooznest up and running :) but I'm not sure if the noise is making is normal or not? Seeems to be fairly loud, especially on the y axis. Loosened the belts a bit, but that didn't make much difference. Perhaps a have the eccentric spacers to tight? It is this normal?

     
  20. Darathy

    Darathy New
    Builder

    Joined:
    Jul 12, 2016
    Messages:
    74
    Likes Received:
    21
    check for any loose screws ,my normal cbeam did make that sound when the screws on the end plates were loose
     
  21. tparsons

    tparsons New
    Builder

    Joined:
    Nov 13, 2016
    Messages:
    9
    Likes Received:
    0
    Hi Ryan
    Thanks for the reply, that is helpful.

    Do you recommend that on a 1500 machine you are best to do the double belt mod anyway? Can this have negative consequences too? Why wouldn't everyone do that on any machine?

    How deep could the machine go into the foam? Would that be the entire z travel of 69mm?

    If it were to be modified, what's the maximum it could sensibly achieve by swapping in a longer z axis v-slot and the leadscrew? (If these are the only bits that would need to change) Could it cut right through a 100mm piece for example?

    Thanks again.
     
  22. Inaudable

    Inaudable New
    Builder

    Joined:
    Oct 15, 2016
    Messages:
    5
    Likes Received:
    0
    Thanks darathy, will do. But i just listened back to that video and the audio on it is horrendous!

    I recorded another video, but first removed the belts and the noise seems to just be the nema motors. again this could be completely normal?? this time recorded with camera not phone :thumbsup:

     
  23. Ryan Lock

    Ryan Lock Veteran
    Builder

    Joined:
    Oct 12, 2014
    Messages:
    530
    Likes Received:
    293
    @Inaudable The noise can solved by putting the xPro into fast decay. On the back of the xPro there is a serial sticker, underneath this, there is some solder jumpers, which ones soldered will make the machine run smoother.

    @tparsons Customers have bought the belt to do it, but never found the need to complete it. The only negative, is that you will need an alternative method to clamp the top belt, as a t-nut will no longer fit.

    The max depth you could cut into the foam would be 69mm, if you raised the machine up, and placed the foam below the rails.

    We have extended the z-axis before for customers who wanted to cut into foam, so this shouldn't be an issue. But you will also have to raise the machine, because you will need 200mm of clearance.
     
  24. Darathy

    Darathy New
    Builder

    Joined:
    Jul 12, 2016
    Messages:
    74
    Likes Received:
    21
    Does seem like its the motors but cant really tell. You could also put a rubber sheet or a blanket under the CNC ,vibrations could be coming off the table from all the vibrations the machin is transfering.
     
  25. Conehead

    Conehead New
    Builder

    Joined:
    Aug 30, 2016
    Messages:
    38
    Likes Received:
    5
    Just to give you guys a little update.
    It was exactly this problem!
    I ordered an multimeter and checked the voltage.
    It was completely different for every single driver, ranging from 0,5V to 2,2V. Probably the 2,2V just immediately overheated the driver.
    I set them now all to around 1V for the A4988. But I already ordered the DRV8825 drivers as well and will set it to 1,2V, which should give the motors around 2,4 ampere each (DRV8825 supports up to 2,5 amps).

    Need to exchange the flexible coupler now, which will be a pain.

    What would be an easy way to "test" the cnc? Get an easy image and "engrave" it into the air?

    //edit:

    Oh and I created a video. X and Z seem to work fine. Y Axis still makes weird moves.
    Are the belts too tight / loose? What is the correct settings for the steps?


    Thank you!
     
    #415 Conehead, Nov 18, 2016
    Last edited: Nov 18, 2016
  26. Ryan Lock

    Ryan Lock Veteran
    Builder

    Joined:
    Oct 12, 2014
    Messages:
    530
    Likes Received:
    293
    Are you still using A4988's? Because they are a bit under powered for them motors. With the belts the tighter the better i usually find.

    Maybe try loosening you eccentrics. Also a pen and paper test it best.

    Settings we use on the xPro attached.
     

    Attached Files:

  27. Conehead

    Conehead New
    Builder

    Joined:
    Aug 30, 2016
    Messages:
    38
    Likes Received:
    5
    Thanks for the settings!
    Yes, currently I am still using the A4988's. The DRV8825 will arrive on Monday or Tuesday.
    I set the A4988's to 2A. Maximum of the DRV8825 is 2.5A if I'm right, so it should not be way more power.
    Somehow sometimes it sounds like something is loose. I already adjusted the eccentrics so that the wheels have a little bit of fraction, so that should usually not be the problem.
    But I will try the DRV8825 as soon as they arrive. The new Flexible Coupler arrived yesterday as well. Thanks!
    Although it was not exactly the same as the one that came with the Kit. :/
    Still seems to fit!
     
  28. dddman

    dddman Journeyman
    Builder

    Joined:
    Mar 2, 2014
    Messages:
    468
    Likes Received:
    187
  29. Giarc

    Giarc OpenBuilds Team
    Staff Member Moderator Builder Resident Builder

    Joined:
    Jan 24, 2015
    Messages:
    3,008
    Likes Received:
    1,676
    Here is a simple code for cutting this star. If you want to test it by drawing in on a piece of paper, edit the file in Notepad and change the negative z heights to zero and zero the pen on the paper.
    troubleshoot.JPG
     

    Attached Files:

  30. Conehead

    Conehead New
    Builder

    Joined:
    Aug 30, 2016
    Messages:
    38
    Likes Received:
    5
    Thank you for all your comments.
    Today the DRV8255 drivers arrived. I set them to 1/8 step and gave it a try with the settings Ryan posted here.
    Unfortunately the motors were really slow (maybe half a cm / sec) and they made a real high pitch sound.
    And in addition the drivers turned really really hot (which the A4899 did not).
    I set the potentiometer to 1,25V which should be 2,5 amps (max of the DRV8255).
    Any idea how the xPro Cnc is outputting?
    Thanks!
     

Share This Page

  1. This site uses cookies to help personalise content, tailor your experience and to keep you logged in if you register.
    By continuing to use this site, you are consenting to our use of cookies.
    Dismiss Notice