Welcome to Our Community

Some features disabled for guests. Register Today.

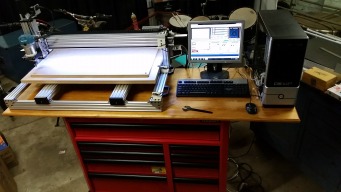
"The Moagie Mill" My C-Beam X Large

Discussion in 'CNC Mills/Routers' started by Glenn Weston, Aug 28, 2016.

  1. David the swarfer

    David the swarfer OpenBuilds Team
    Staff Member Moderator Builder Resident Builder

    Joined:
    Aug 6, 2013
    Messages:
    3,458
    Likes Received:
    1,915
    if you don't do the optimization, it won't work. a friend of mine does music composition using a lot of MIDI and having a 'fast enough' PC is critical. to this end he created a special install of XP that leaves off everything not actually needed for composing. It turns out that this cut down version of XP is also very good for running games on older hardware, and for running Mach3 (-: So far it runs very well in sim mode, I might even get around to testing hardware with it (-:
    yes indeed
    when you try this, install XP and deselect anything you can deselect during the install. also, do not install any antivirus, and do not let it try to update over the net.
     
  2. Glenn Weston

    Glenn Weston Journeyman
    Builder

    Joined:
    Aug 1, 2016
    Messages:
    91
    Likes Received:
    150
    Thankyou @David the swarfer for confirming the renaming of the extensions on the G-Code files.
    I thought that was the case as I could see they are noting more that a text file at the end of the day.

    Also thankyou for the G-Code Reference also, Looks like I need to start a G-Code coarse or at least start becoming familiar with the commands to understand it all a little better, Have never dealt with G-Code before this project.

    Cheers Glenn.
     
    #32 Glenn Weston, Nov 7, 2016
    Last edited: Nov 7, 2016
  3. Glenn Weston

    Glenn Weston Journeyman
    Builder

    Joined:
    Aug 1, 2016
    Messages:
    91
    Likes Received:
    150
    Points taken in regards to MACH3 @David the swarfer, Thankyou again.

    I will play around some more, I have been trying to get the build completed with the finer details of wiring and Limit sensors, I also need to re-locate the table to it's final operational position in the Garage.
    When I do, I will be getting stuck into G-Code and experimenting a lot more and hopefully get my head around it.

    Glenn
     
  4. David the swarfer

    David the swarfer OpenBuilds Team
    Staff Member Moderator Builder Resident Builder

    Joined:
    Aug 6, 2013
    Messages:
    3,458
    Likes Received:
    1,915
    G-code is very simple, having been invented to run on 4 bit computers fed by paper tape (-:
    at it's heart it is just a bunch of movement instructions, the most important....
    G00 - go somewhere fast (as fast as the machine can move)
    G01 - go somewhere at a defined feed rate (for cutting)
    G02- cut a clockwise arc
    G03 - cut an anticlockwise arc
    M3 - turn the spindle on
    M5 - turn the spindle off
    M30 - end of program
    G21 - set mm mode
    G20 - set inch mode
    G90 - set absolute mode
    G17 - select XY plane

    Those are the codes you will see in the output from SketchUcam, just the basics so it will work on any controller.
    'Fancy' controllers, Mach3 and LinuxCNC in our world, and Haas/Fadal/Siemens etc in the industrial world, support many more codes that make some things easier for the operator. But everything those fancy codes can do can be done with the basic codes (like RISC processing for the geeks) except threading on a lathe which needs a sync pulse from the spindle.

    For example the G83 drill cycle. You tell it various parameters and it drills a hole with retracts at defined spaces, up to a safe height you define, with a final depth you define. All of which can be done using G1 and G0 to drill down and retract up, at intervals. You can see this in SketchUcam output for a drilled hole
    Code:
    %
    (Generated by SketchUcam V1.4c-566efda)
    (Bit diameter: 3.0mm)
    (Feed rate: 2000.0mm/min)
    (Plunge Feed rate: 1000.0mm/min)
    (Material Thickness: 6.0mm)
    (Multipass enabled, Depth = 2.0mm)
    G90 G21 G49 G17 F1000
    M3 S30000           ;spindle on
    G00 Z5.000
    (Pass: 1)
    X10.000 Y10.000
    (plungeboredepth  DEPTH=6.000  DIAM=3.000)
    G00 Z0.500                  ; just above surface, the retract height
    G01 Z-2.000 F1000     ; drill down 2mm at 1000mm/min
    G00 Z0.500                 ; retract to clear chips
    G01 Z-4.000                ; drill down 4mm
    G00 Z0.500                ; retract
    G01 Z-6.000              ; final depth
    G00 Z0.500               ; retract to clear
    G00 Z5.000                 ; retract to safe height
    (plungebore end)
    G00 X0 Y0 (home)
    M05                      ; spindle off
    M30                     ; end program
    %
    
    simple , no? (-:
     
  5. Glenn Weston

    Glenn Weston Journeyman
    Builder

    Joined:
    Aug 1, 2016
    Messages:
    91
    Likes Received:
    150
    Thanks @David the swarfer , Yes that makes a lot of sense, I completely understand the analogy with reference to RISC. Well it isn't as big a deal as I thought, it is rather simple when broken down.
    Much Simpler than "C"..... LOL

    Cheers Glenn.
     
    David the swarfer likes this.
  6. Brandoneous

    Builder

    Joined:
    Aug 17, 2016
    Messages:
    48
    Likes Received:
    4
    Thanks!
     
  7. Glenn Weston

    Glenn Weston Journeyman
    Builder

    Joined:
    Aug 1, 2016
    Messages:
    91
    Likes Received:
    150
    No problem @Brandoneous, hopefully @Moag will see the question now.

    Cheers Glenn.
     
  8. Moag

    Moag Veteran
    Staff Member Builder Resident Builder

    Joined:
    Mar 16, 2016
    Messages:
    183
    Likes Received:
    295
    G"Day @Brandoneous, I'm not a engineer either mate, just a newbie a step further down the line and still bumbling along myself, So take your time there's a lot to learn, but you will get there.

    I assume your had a look here CNC Mill Guide - Smoothie Project, here Home · vlachoudis/bCNC Wiki · GitHub and here RPi possible? · Issue #12 · vlachoudis/bCNC · GitHub if not have a read. I've attached some pictures of my current setup to give you some hints.

    I wired it up using this guide (first one) CNC Mill Guide - Smoothie Project and used the manual for the stepper drive here http://www.openbuilds.com/uploadfiles/Manuals/DQ542MA English Manual.pdf.

    I've got the dip switches currently set to 1/16 micro steps (200 steps per revolution of stepper x 16 = 3200 on driver) so dip switch SW5 [on], SW6 [on], SW7 [off], and SW8 [on]. Standstill current setting SW4 [off]. Output Current Setting SW1 [on], SW2 [on] and SW3 [off] = 2.84A.

    One day I will make a full "how to", but to much on my plate just for the moment, sorry about that.;)
     

    Attached Files:

    #38 Moag, Nov 7, 2016
    Last edited: Nov 7, 2016
  9. Brandoneous

    Builder

    Joined:
    Aug 17, 2016
    Messages:
    48
    Likes Received:
    4
    Wow! Awesome! Thanks millions! I'll have another go and see if I can't get myself unstuck! I appreciate your informative and timely response more than you know!
     
  10. Moag

    Moag Veteran
    Staff Member Builder Resident Builder

    Joined:
    Mar 16, 2016
    Messages:
    183
    Likes Received:
    295
    Glen your updates keep getting better and better, I'm really liking where your taking this one. The Hall Effect sensors are so cool, through I think I like the mechanical end stops for the moment, as they kind of work as little panic buttons around the machine (mine are set up for homing and limit switches). The LED lights are so funky when you home the machine, liking it a lot. How was the anxiety levels when you pressed home for the first time? "The joy when it actually works!!"

    I'm with you in that you can't have enough tools to make the job easier and agree that you need a bootlace kit with all those screw terminals and something to crimp those itty bitty connecters... and heat shrink is just one of the best inventions out there.

    _X8A4230.jpg _X8A4231.jpg

    Can I ask you were you got your Dupont kit from, as I would really like to go through what I've already done to improve things a little.

    Cheers Mate.;)
     
  11. Glenn Weston

    Glenn Weston Journeyman
    Builder

    Joined:
    Aug 1, 2016
    Messages:
    91
    Likes Received:
    150
    Thanks @Moag , Yes I am very happy with the sensors, they are pretty reasonable cost wise too.
    I also setup the Hall Effect sensors as Home & limits, there is also the option of having separated home & limits too and it can be an added extra down the track, I have thought about putting micro switches at the extreme Axes travels on the end plates themselves just as a last safety resort but Maybe later, I really wanted to play with the Hall sensors first as I have never experimented with them, I have got them in a digital joystick that I own where they work really well, gone are the days of dirty/noisy potentiometer issues in Joysticks, that's about the only exposure I have ever had to them.

    Whilst I have given MACH3 some stick in prior posts I have to say the configurability/scalability of the software is fantastic and it is the reason I want to keep playing with it at this stage, I am growing to like it somewhat but I guess once I start cutting things out and seeing if it really lives up to expectations I will then decide if I am going to stick with it. As I mentioned I am also waiting for the release of this new OB super motion controller, that's going to be a bit of a decision maker for me too. At this stage I am happy to play around just to get a feel for things and learn.

    I know what you mean with the Anxiety, however it was not too bad, here is how I approached it.
    Firstly I assigned a set Hall sensors on one of the Axes only to Home & limit switches for that Axes.
    I then just did some movement Jogging tests in the middle of the table well away from the ends of travel and with a Magnet in my hand put it near the sensor & triggered a stop, once I knew they were responding correctly and I had MACH3 setup for the correct sensing I then moved the sensors closer to the end stops with a little more confidence, giving myself a couple of centimetres safety margin, I did that on all three Axes and then I carried out the homing sequence with my finger over the ESC key which is effectively an E-STOP button in MACH3.

    "The joy when it actually works!!" as you say, is fantastic and it really feels like your machine has some artificial intelligence now, although it's just a homing sequence I will admit I must have homed it like 20 times, It's like the feeling you get when you jog it for the first time. I had to take a Video of it just so I could tell somebody about it and posted it in the C-BEAM Machine XLarge thread.

    Looks like you have got all the right tools there Craig, As I said the Crimping onto Dupont connectors can be a little fiddly but well worth it, make sure you purchase plenty of pins because you will screw quite a few up before you get them right, it's like filing.... It just takes a little bit of practise.
    Here is what I do when crimping and it will depend a lot on wire thicknesses but for very thin wires:

    Strip the wire.
    Twist the strands.
    Fold the wire so it is laying back over the sheath.
    I then use a small pair of needle nose pliers to fold over the small set of crimp lugs, this gets the cable in position where you want it to be in the pin, I make sure the exposed wire is facing the bottom face of the pin.
    Then I use the crimping tool which folds the lugs to their final crimped position.

    With the smaller wires folding it back over the sheath gives the crimp some more meat to crimp/bite against if you know what I mean, otherwise a small tug on the wire can pull it back out of the pin. This is just my personal experience, I am probably using a smaller gauge wire than I should, it's not a perfect world and sometimes you need to crimp pins onto a wire that may not be the correct gauge for the pin, so that my little trick to get around it.

    I used old USB cables for the sensors and some of the cables had slightly different gauges of wire between the two power conductors and the two signal conductors.... Probably manufactured when the price of copper was ridiculous.

    In regards to Heat shrink.... I can remember around 35 odd years ago when I did my apprenticeship when the guys at work showed me heat shrink for the first time, I thought it was the best thing since sliced bread !!
    It is one item in the workshop that gives me panic attacks when I run out of It ... LOL.

    My Dupont connectors did not come in a kit when I purchased them, what I did was find a supplier on Ebay in China that carried all the various number of pin bodies from 1 Pin to 8 PIN and all number of PINS between, and ordered like a 100 of each size, At the same time I purchased like a roll of 200 Female and 200 Male PINS and put it all on one purchase. The Crimping Tool I just purchased separately. I can remember having a hard time identifying the connectors at first and it took quite a bit of googling to find their correct name, I only ever new them as servo connectors as they are commonly used and have been used for years on RC Aircraft by Futaba and other RC manufacturers to connect servo motors to their controllers/receivers, usually 3 PIN in the RC world.

    Looks like kits are readily available these days, pretty cheap too.
    I have had my connectors for quite a few years.
    Here is one doing a Ebay search on Dupont Connector Kit:

    620pcs Dupont Crimp Pin Connector Wire Jumper Pin Header and M/F Crimp Pins Kit | eBay

    Cheers Glenn.
     
    Moag likes this.
  12. Glenn Weston

    Glenn Weston Journeyman
    Builder

    Joined:
    Aug 1, 2016
    Messages:
    91
    Likes Received:
    150
    @David the swarfer, Thankyou for your Advice on the G61, you were spot on with your Analysis and my Pen Plotting troubles.

    I decided to go for broke last night and fit up the router with a V Bit and engrave the OB Logo into some MDF, the very first run was a bit of a Dogs breakfast when I got to any corners.

    Here is what I got without the G61 being issued, Here we can see the rounded corners on the Cog.
    I don't know what the hell MACH3 was trying to do with the corners on the Squares around the Cog, but it did multiple passes and took the exact same path each time. The Job didn't quite complete because I had loaded the file from a share across a WiFi Network, I learnt a lesson there, Always load the file from a local drive and maybe get rid of the WiFi Adaptor all together if running a BOB.

    20161127_001034.jpg


    And here is the Same Run again with G61 at the start of the GCode File.
    The only other difference was I backed the Z off +2mm as I was plunging too deep into the material.
    I noticed this time all the rounded moves were all little steps at a time including the circle in the centre of the Cog, but the Sharp Corners of the Cog were cut correctly. You can see on this run because the tool was holding on the rounded corners for so long I was getting some burning on the curved corners.
    20161127_001013.jpg
     
  13. David the swarfer

    David the swarfer OpenBuilds Team
    Staff Member Moderator Builder Resident Builder

    Joined:
    Aug 6, 2013
    Messages:
    3,458
    Likes Received:
    1,915
    'little steps in the corners' depends on many things.
    the drawing : was it a lot of little segments in the corners? unlikely you will get anything other than those small line segments in the Gcode.
    the Gcode : generated Gcode can interpret arcs as small line segments, or as several ( or one) arc segments.
    the controller: the controller can translate an arc segment into small line segments. GRBL does this, it has to because of math contraints (stuff like atan() takes a LOT of 8 bit processor cycles). Mach3 might be doing any number of schemes (-:
     
  14. Moag

    Moag Veteran
    Staff Member Builder Resident Builder

    Joined:
    Mar 16, 2016
    Messages:
    183
    Likes Received:
    295
    G'Day Glenn, liking how you're setting up your spoil-board matey...:thumbsup: Should work great, I think. Noticed you said you were going to make up some "Little Cams",... great minds think alike hey!

    I made up four experimental ones out of 8mm polycarbonate and they work a treat. No photos, as its a bit dark here at the moment, but I will attach a .dxf of the design and a quick render for inspiration;
    the spiral part of it was done in Inkscape and then imported into Fusion 360 as a guide to draw it up...;)

    Little_Cam01 v2.png
    keep up the good work Glenn...:thumbsup::thumbsup::thumbsup:

    Edit:... another quick render of setup.

    Cam Lever v6.png
     

    Attached Files:

    #44 Moag, Dec 19, 2016
    Last edited: Dec 19, 2016
    Mark Carew, Glenn Weston and GrayUK like this.
  15. Glenn Weston

    Glenn Weston Journeyman
    Builder

    Joined:
    Aug 1, 2016
    Messages:
    91
    Likes Received:
    150
    Cheers @Moag, Thankyou for that, That will be one of the next little jobs to turn out on the Mill.

    My plan is to setup all the little mods and improvements over the Christmas break that will make Milling simple, quick and easy.

    The Blind nut tie down setup was one of the most important ones so it got priority, this will now let me tackle some Aluminium cuts and experiment even more.
    Here is my To Do list.

    1) Fit some Aluminium Angle around the outside of the Table Base Board, Including a Flip of the Base Board similar to what I did with the Spoil board but Cutting Some Grooves in the Base where I can then insert and screw down more Aluminium angle along the X Plane, this should strengthen and Straighten the Base board up quite a bit.

    2) Once the Aluminium Angle is fitted up I want to run a Surfacing Bit across the Spoil Board which should make it perfectly level with the Cutter.

    3) Seal the MDF Board... It's like a sponge and if I play with Aluminium and use some lubricant, I don't want it leaving the boards all stained, they could even swell over time.
    MDF and fluid = HELL.

    4) Today I picked up a Dust Deputy Kit from Carbatec.... This will turn my shop Vac into a dust collection system, the few cuts that I have done points out to me that a dust collection system is critical, both for health reasons and to protect other items in the garage.

    5) Cut out a Dust Shoe and mount some strip brush.... I picked up some strip brush today, I just have to give this guy a plug here on the forum as he looked after me on the supply of the strip brush today, Lets just say I owe him a Slab of beer, which I most certainly will drop in to him !!
    Anyone in Sydney that is looking for strip brush for their dust shoes, these guys have what you need:
    Industrial Brushware, 237 Beaconsfield Street, Milperra, NSW 2214 (Ph: +61 2 9771 9790) Contact: Larry Fleming, really helpful.
    I think they have offices in other states too, but best of all you can walk in and talk to a real person.... Call me old fashioned but sometimes it is the best way.
    Their Web Site is Industrial Brushware

    6) I found a cool little USB Web Camera in my box of tricks here that I have never used, it's a sort of fat bullet style camera and I should easily be able to design a little mount for it on the side of the Z Gantry, I have tested already in MACH3 and it works like a charm, MACH3 fully supports a Camera with on screen cross hairs and offsets for visual X/Y Zeroing, this will be really handy when working on an existing part that requires modification allowing visual reference to the parts edges from overhead.

    7) Make a touch plate for Z Zeroing and wire it up, the Z Gantry is now earthed so this should be reasonably easy.

    8) I still need to move the PC under the mobile table/tool cabinet that it is sitting on as that will give me plenty of desk space on top, I also want to mount connectors on the PC case so I can put the covers back onto it.

    9) Emergency Stop Button, Why have I got this at the bottom of the List has got me beat, I do promise readers that I promote safe practices always, and always use goggles and all that stuff, Safety is important and this will get a higher priority for sure, you have my word.

    10) Fit Christmas in between all that somewhere.....Yes I will have a break and a Beer or two, mmmm Maybe even a Bourbon or three.

    Merry Christmas Craig, and also to all the Open Builders out there, hope Santa turns up with lotsa CNC related toys for all of you.

    Cheers Glenn.
     
    Mark Carew, Moag and GrayUK like this.
  16. Glenn Weston

    Glenn Weston Journeyman
    Builder

    Joined:
    Aug 1, 2016
    Messages:
    91
    Likes Received:
    150
    I am really loving the little Makita router, it runs pretty cool temperature wise and is rather quiet.... The Shop Vac is louder than the router.

    Anyhow I am going to stick with this for a while, have been thinking about a Relay to allow MACH3 to ENABLE/DISABLE the router as the job starts but we will see, many other little bits and pieces to do before that luxury.

    The 65mm PVC Water Pipe Adaptor ring for the OpenBuilds Mount works like a charm (See my Build Log)... I will mill up something that looks a little more professional eventually.

    Anyhow I purchased a full set of Collets... not cheap, worked out about $200 Australian, the cost of the router itself but this will allow me to use all sorts of router bits of different shank sizes, it worked out cheaper just to order the complete sets and I now have a spare 1/4" collet because that's what originally came with the router, but that's OK.

    One day I may upgrade to a proper spindle.

    These Collets are not made by Makita, they are produced by a third party "Elaire Corporation" in the US, the website is The Elaire Corporation - Precision USA made collets, holders, air tool components
    They look to be of very high quality.
    They can Also do custom sizes if required.

    Here is a link to the Makita RT0700 Collets for anyone else that might need to order a different size collet.

    Elaire Corporation

    Here is what they Look Like.

    20161222_000311.jpg

    20161222_000343.jpg

    20161222_000415.jpg

    20161222_000122.jpg

    20161222_000203.jpg

    20161222_000050.jpg
     
    GrayUK likes this.
  17. Moag

    Moag Veteran
    Staff Member Builder Resident Builder

    Joined:
    Mar 16, 2016
    Messages:
    183
    Likes Received:
    295
    Pro job on the web cam mount Glenn.:thumbsup::thumbsup::thumbsup:

    Have you tested it for parallax error? You will see it if present, if the cross hairs change position when you jog Z up and down. A little mirror on your flattened spoil board, directly under the web cam so it looks at itself (cross hairs centred on lens), will exaggerate it if present.;)
     
    GrayUK likes this.
  18. Glenn Weston

    Glenn Weston Journeyman
    Builder

    Joined:
    Aug 1, 2016
    Messages:
    91
    Likes Received:
    150
    Thanks @Moag,

    Well I did alignment using a ruler not a mirror and I have the drift on both X & Y less than 0.1mm for MAX/MIN Z Travel, However because there is no adjustment on the Camera mount itself that makes it independent of the Router Mount I have most likely put the tramming out, because I adjusted the router mount to achieve minimum drift on the camera.

    I might have to re-think the camera mount, it was more of an experiment and a Perspex cutting test more than anything and will probably do for the moment for most of the things I will be playing with. I have not done any Tramming alignment as yet but the Camera alignment is definitely going to have to be independent of the router mount alignment.

    Next to do is Stiffen up the table with some Aluminium Angle, then I will probably surface it..... Then I will tackle the tramming.... Then re-design the camera mount or modify it.

    Cheers Glenn.
     
    jamesdjadams and GrayUK like this.
  19. Glenn Weston

    Glenn Weston Journeyman
    Builder

    Joined:
    Aug 1, 2016
    Messages:
    91
    Likes Received:
    150
    Just a little update from me and maybe this might inspire others to make things they thought they couldn't with their CNC.

    Firstly I did my first test run with my Prototype Dust shoe... SUCCESS, NO Dust flying around now so I am very happy about that, I will now make a proper one with Magnets and all, I may even take a look at making a design similar to the SUCKIT Shoe that is independent of the cutter height but that is down the track.

    Here is a Video of it running, I cut MDF because it makes the most mess with fine dust and would be a good test.
    There does not seem to be enough suction to haul the dust from the cut slot but that may be because I have not emptied the VAC for a while, but the important thing is the dust is under control.

    https://drive.google.com/file/d/1f13wpMOqR-1GbGTA842DOnOGNpRyWBpSPQ/view?usp=sharing

    As I am still learning I am mainly playing with scrap and trying different ideas and looking for things to try.
    Here is one technique that I think may be interesting to a lot of you creative builders out there that might want to build an item with your CNC but if It is an odd shape and hard to dimension you feel it cannot be achieved or may be too difficult to tackle.

    I have a 2015 Mitsubishi Pajero 4WD, and like most of the modern 4 Wheel Drives there is ZERO room for any mounting of radios in the vehicle, I have my Ham Ticket so I always like to have radios fitted to my vehicle and Mitsubishi Engineers are not going to stop this little backyard engineer to fit one. So I have decided to build a Dash Pod that will mount on top of the Dash to house the Radio Control panels that I would like to install.

    The big problem is with modern dashboards they are never square and are all curvey, there is rarely anything square in a modern vehicle to get that space aged modern look. So how do you build a Dash Pod to fit a modern Car ??

    A Little Trick Called "PhotoGammetry"

    I also play around with Flight Simulators and PhotoGammetry is very common practise when trying to build an Instrument cluster of say a Modern Day F/A-18 Fighter Jet, A call to Boeing asking for the Instrument Panel plans and dimension will not get you very far..... So there is a little trick where we can take a photo of an instrument cluster and if we can then find something on the panel that we can get a Dimension of then we can get reasonably accurate measurements for the rest of the items on the panel including their relational mounting positions, pretty clever stuff.

    As many Instruments, even Military ones can be looked up on the internet to check there specifications including face and housing dimensions, this gives us a great way to dimension up a photo of a real cockpit. The Technique is known as PhotoGammetry and you can get pretty accurate results with it. PhotoGammetry is also used in crime scenes and road accident scenes for collection of evidence so it is handy thing to know about and you may even be able to use it to build your next project that might otherwise seem impossible to cut accurately.

    So what I did was take a photo of my Dash, Import it into Sketchup, Scaled the photo against some reasonably accurate measurements of the what I photographed and then trace the area I was interested in, I did not really take too much care as it was merely a proof of concept with some scrap wood at this stage but I think you will agree the result is not too bad for a first rough attempt for demonstration purposes, In fact this cut would probably be good enough by the time you used some foam padding and vinyl covering on the pod etc. I also took profile pictures from the left and right side of the dash as it also has a curve/arc from the face of the dash to the glass, so you can see the delima when trying to build something that you want to sit there snug.

    Here is the scaled photo in sketchup
    PhotoGammetry.jpg
    Here is the cut piece of material traced in sketchup and G-Coded with Sketchucam to see how it might fit on my dash board.....Not too bad for a roughie !!
    20170108_202246.jpg


    Anyhow, something I thought may be of interest to some builders out there and wanted to share.
    I will now carry out some more accurate measurements and take my time and do some careful sketchup tracing to get an even better fit and build this thing.

    Cheers Glenn.
     
    GrayUK and Moag like this.
  20. Moag

    Moag Veteran
    Staff Member Builder Resident Builder

    Joined:
    Mar 16, 2016
    Messages:
    183
    Likes Received:
    295
    Coool, new word for the day :) Funny but I did something similar but total different the other day that could be called PhotoGrammetry. My problem was the need to make an accurate model of a jig hook for a jig mould I'm designing in fusion 360. Kind of the same technique, take a square on photo with little ruler for a scale, import said photo as a canvas into fusion, scale it using their scale feature and ruler for a reference, trace the centre line of the hook, make a construction plane at right angles to the path (line), draw a centre point circle on the new construction plane, use sweep selecting the little circle, then the path of the traced hook and watch the magic as it make bendy wire.

    Cheers Glenn for the share. Making stuff is the coolest :thumbsup:
     
    Glenn Weston likes this.
  21. GrayUK

    GrayUK Openbuilds Team Elder
    Staff Member Moderator Builder

    Joined:
    May 5, 2014
    Messages:
    1,668
    Likes Received:
    627
    Glen
    Have you thought about one, or two, small air jets, to either side of the spindle, blowing directly into the groove formed by the spindle.
    Almost causing a small vortex inside the brush area, and allowing the vacuum to suck it all up. :rolleyes:
    Gray
     
    Glenn Weston likes this.
  22. Glenn Weston

    Glenn Weston Journeyman
    Builder

    Joined:
    Aug 1, 2016
    Messages:
    91
    Likes Received:
    150
    Yep Craig, thats PhotoGammetry, it really can be a handy thing to know about when faced with tricky situations when dimensional data or angle data simply is not available.

    With all of us carrying a high resolution camera in our pocket these days it means you can almost design anything to fit a wiered unknown shape at the drop of a hat and a little bit of software knowhow and an OpenBuilds Mill too LOL!!

    Glenn
     
  23. Glenn Weston

    Glenn Weston Journeyman
    Builder

    Joined:
    Aug 1, 2016
    Messages:
    91
    Likes Received:
    150
    Yes Gray, I certainly have and realize this will be problably esential when I get to Aluminium as it will be important to get the chips out of there fast.

    I was hoping the air stream from the cooling fan in the router would have helped but not so. I have an air compressor in the workshop so I will have to get a little flexy nozzle line and mount it to have a play, I reckon you are on the money though and that will do the trick for sure, it will also help keeping the bit cool when milling more difficult material, might look at adding cutting fluid misting with that option too.

    Although I think maybe a full aluminium bed would be a better option then but I certainly will setup a liitle air nozzle.

    Cheers Glenn.
     
    GrayUK likes this.
  24. Moag

    Moag Veteran
    Staff Member Builder Resident Builder

    Joined:
    Mar 16, 2016
    Messages:
    183
    Likes Received:
    295
    Yep, do that Glenn and give a good auz name like the Echidna ;)
     
    Glenn Weston likes this.
  25. GrayUK

    GrayUK Openbuilds Team Elder
    Staff Member Moderator Builder

    Joined:
    May 5, 2014
    Messages:
    1,668
    Likes Received:
    627
    It's got to be "Sheila" or "Bruce" mate! :ROFL::ROFL:
     
    Rick 2.0, Glenn Weston and Moag like this.
  26. Jestah

    Jestah Well-Known
    Builder

    Joined:
    Dec 4, 2013
    Messages:
    148
    Likes Received:
    84
    Having good directed compressed air is a HUGE help for ali. cutting. It will both keep the cutter much cooler if you direct the jet to hit the tool but also make sure to keep the cut site clean to save chip recutting. The air helps also keep the chip moving so any dust hood can also get it out to the area asap rather than just dumping it out of the way or into belts. Adding a tiny bit of lube via a mister is amazing but be careful about filling your shop breathing space with the coolant
     
    Glenn Weston and GrayUK like this.
  27. Glenn Weston

    Glenn Weston Journeyman
    Builder

    Joined:
    Aug 1, 2016
    Messages:
    91
    Likes Received:
    150
    Thanks for that info Jestah, I actually went to purchase a nozzle today, as I want to also grab a keyless chuck for my drill press, was going to buy a few different size endmills too but the engineering shop I went to was still closed for the Christmas break and not reopening till tomorrow.... just my luck.... will have to drop back in tomorrow.

    @Moag, not sure if you are in Sydney but McJing tools is a great shop to visit, prices are pretty good to, its like a toy shop in there !! Heaps of router bits and related stuff.

    They also have a web site McJING Tools Online although I doubt he has everything listed on his web site.

    Cheers Glenn
     
  28. Moag

    Moag Veteran
    Staff Member Builder Resident Builder

    Joined:
    Mar 16, 2016
    Messages:
    183
    Likes Received:
    295
    No, not Sydney Glenn, I,m in a country town in East Gippsland (Vic) called Bairnsdale, so probably very fortunate, as I think I would be like a little kid in a lolly store with a pocket full money, so it will be all online for this punter... but thanks for the link mate.;)
     
    Glenn Weston likes this.
  29. MuchoBurrito

    Builder

    Joined:
    May 31, 2017
    Messages:
    4
    Likes Received:
    6
    Glenn, Thank you for all the time you put into this. I ordered the XL kit on Black Friday and it arrives today. I had started gaining interest in CNC stuff a few months back and started a diy without a kit but when I got to the point of having to spend money beyond the parts I already had, it seemed way more efficient to just get an entire kit. Anyways, again, thank you for the massive detail you provided with your build. It will be very useful.
     
  30. Glenn Weston

    Glenn Weston Journeyman
    Builder

    Joined:
    Aug 1, 2016
    Messages:
    91
    Likes Received:
    150
    No Problems @MuchoBurrito, I tried to give plenty of detail..... I am very happy it inspired you.

    You will be very happy with that machine, I have been having a ball with it, learning so much as I go.
    It's my favourite tool in the shed now and I LOVE it to death, I would sleep with it if I could !!! LOL

    Here is a pic of a my latest product I have produced on it.
    This is a an Aircraft Simulator Control Panel and has been completely manufactured on my little mill and was the reason I built it.
    All Cutting and Engraving has been done on the Mill so that should give you a pretty good Idea as to how accurate and to what precision you can work to on this baby.
    This panel is made of Acrylic and Aluminium and has a Copper Clad/Fibre Glass Circuit board on the rear, All cut on the Mill as I said.
    You are only limited by your imagination with this machine.

    . 20171112_195218.jpg
     

Share This Page

  1. This site uses cookies to help personalise content, tailor your experience and to keep you logged in if you register.
    By continuing to use this site, you are consenting to our use of cookies.
    Dismiss Notice