Welcome to Our Community

Some features disabled for guests. Register Today.

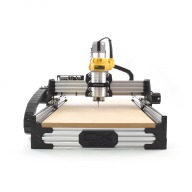
ooznest OX CNC Machine

Discussion in 'CNC Mills/Routers' started by Ryan Lock, Apr 28, 2015.

  1. Muxa

    Muxa New
    Builder

    Joined:
    Sep 9, 2016
    Messages:
    23
    Likes Received:
    12
    Today i've updated xPro v2 board to Grbl v1.1. Everything went smoothly.
    I was hoping to get a much improved jogging support, but UGCS 2 is not there yet in terms of utilising the jogging capabilities of Grbl 1.1 fully. I.e. what i expect is when i press a button and the axis moves, when i release a button it stops, but currently it still jogs for all the key repeats that were issued while i was keeping the button pressed. I'm sure this will get solved eventually...
     
    Ryan Lock and Chillimonster like this.
  2. Chillimonster

    Chillimonster Well-Known
    Builder

    Joined:
    May 6, 2015
    Messages:
    153
    Likes Received:
    81
    Gave the machine a good workout after its service at weekend (Inc the Fast decay mod).

    Lovely and smooth now - the noisiest thing is now the Kress 1050 spindle, so looking to change that to something a bit quieter.

    What would be the best alternative. I only ever cut wood (Mainly MDF, occaisionally Ply) with a 3mm bit with max depth of cut at 3mm per pass runing between 2000 & 3500 mm / minute

    Cheers guys :)

    Chris
     
  3. Ryan Lock

    Ryan Lock Veteran
    Builder

    Joined:
    Oct 12, 2014
    Messages:
    530
    Likes Received:
    293
    @Chillimonster Thats great news. A brushless spindle would probably be the quietest you are going to get it. I had a 400w which was quiet, but it did get nosier when it started cutting.
     
  4. Matt-Sparks

    Builder

    Joined:
    Mar 29, 2017
    Messages:
    10
    Likes Received:
    7
    Hi All,

    Ordered a full kit last night. Any pre build advice or tips would be much appreciated.
     
  5. Ryan Lock

    Ryan Lock Veteran
    Builder

    Joined:
    Oct 12, 2014
    Messages:
    530
    Likes Received:
    293
    @Matt-Sparks Thanks for the order! I always say building the machine is the easiest part, learning how to use it and the CAM Software effectively is the hardest part. So that is where i would look while you are waiting for it.
     
    Matt-Sparks likes this.
  6. Rhys Gerrard

    Builder

    Joined:
    Mar 3, 2017
    Messages:
    8
    Likes Received:
    0
    Hi All,

    Got my 750mm X 750mm CNC from @Ryan Lock and the people at Ooznest and I must say it was super easy to do so thank you Ryan for that, top instructions and everything labelled perfectly. I've got a couple of questions though. (Please be aware I am a total CNC novice and have only just got my head around vCarve Pro and the UGS)

    I've been doing some test cutting on glass laminated tufnol (we make jigs out of this material) using a 3mm end mill. The material thickness is 12mm and i needed to make 19mm X 40mm pockets around 2mm deep. I've found though that it's not running the cut "Square" It seems to curve inwards and then move back meaning it's probably 18.5mm at the top and around 17.9mm in the middle then back to 18.5mm. I would expect them to be parallel lines equidistant apart however the don't seem to be (pulling my hair out with it now o_Oo_O)

    I've ran a circle too which i programmed to be 50mm in diameter. It is coming out 43.30mm in diameter and also I programmed it to be 2mm deep yet it's coming out at 2.39mm. Is it something I am doing wrong or is it something silly?

    Also, the motors seem to be making a really weird noise and I'm wondering if it is correct? Obviously like I said, a total novice in this but hoping you guys will be able to point me in the right direction. I've uploaded a video here -

    Hopefully, you will be able to help me or point me in the right direction. It's greatly apprecaited!

    Thanks!

    Rhys
    Ooznest-1.jpg Ooznest-6.jpg Ooznest-5.jpg Ooznest-3.jpg Ooznest-7.jpg Ooznest-8.jpg
     
  7. Rhys Gerrard

    Builder

    Joined:
    Mar 3, 2017
    Messages:
    8
    Likes Received:
    0
    Here is a video of the Ox CNC routing out the circle too.


    Again, it's programmed for 50mm Diameter and 2mm deep. It's coming out at 43.30mm diameter and 2.39mm deep.

    Hope to hear from someone soon.

    Regards

    Rhys
     
  8. Giarc

    Giarc OpenBuilds Team
    Staff Member Moderator Builder Resident Builder

    Joined:
    Jan 24, 2015
    Messages:
    3,015
    Likes Received:
    1,680
    Have you calibrated it yet? If not, here is how I did mine. Lead Screw Driven Ox Derivative (850x1500) Also, see this to figure out your steps/mm RepRap Calculator - Prusa Printers

    Check to make sure all your screws are tight in your pulleys and couplers.
     
    #548 Giarc, Mar 29, 2017
    Last edited: Mar 29, 2017
    Mark Carew likes this.
  9. Rhys Gerrard

    Builder

    Joined:
    Mar 3, 2017
    Messages:
    8
    Likes Received:
    0
    Hey @Giarc,

    Thanks for the reply, not calibrated it yet but I certainly will do tomorrow when I get back in the office. Thanks for the message and the video, looks like it may solve things.

    Cheers,

    Rhys
     
  10. Ryan Lock

    Ryan Lock Veteran
    Builder

    Joined:
    Oct 12, 2014
    Messages:
    530
    Likes Received:
    293
    Me and @Rhys Gerrard Were diagnosing his issue directly over email. And i think we have solved it. So for reference to anyone else who many get a similar issue, what was causing it was running the machine to quick. I believe Rhys is now getting good results at 20mm/s.
     
  11. srod

    srod New
    Builder

    Joined:
    Mar 11, 2017
    Messages:
    11
    Likes Received:
    0
    I certainly had similar noises on one side of the machine when I ran it too fast. Slowing down seemed to cure it for me as well.
     
  12. ben tedder

    Builder

    Joined:
    Mar 31, 2017
    Messages:
    1
    Likes Received:
    0
    Hi there I have recently built a ox cnc machine 750x1000 and I can't get the machine to set the X and y axis any ideas
     
  13. Ryan Lock

    Ryan Lock Veteran
    Builder

    Joined:
    Oct 12, 2014
    Messages:
    530
    Likes Received:
    293
    Hi, do you mean you can't get it to move? Or set the settings? If the former, try $4 = 1
     
  14. lees76

    lees76 New
    Builder

    Joined:
    May 29, 2016
    Messages:
    15
    Likes Received:
    3
    Hi,

    I am look for some advice on the wiring of the OX,

    I will be using mach3, a suitable breakout board and M542 (from memory) drivers

    What gauge wire should I be using for the following
    • Power, to the drivers
    • Drivers to the Stepper motors
    • Signal cables from BOB to the Drivers
    • Probes and limit switches
    Any help would be appreciated.

    Thanks
     
  15. Ryan Lock

    Ryan Lock Veteran
    Builder

    Joined:
    Oct 12, 2014
    Messages:
    530
    Likes Received:
    293
    @less76 For power we use 1.5mm2 to the controller. On the motors, our motors come with 22AWG Cable. Signal cable, 22AWG wire would be ok for the signals.
     
    lees76 likes this.
  16. Muxa

    Muxa New
    Builder

    Joined:
    Sep 9, 2016
    Messages:
    23
    Likes Received:
    12
    I've noticed a peculiar problem with my OX with movement on X axis. When changing direction of movement there's approximately 0.25mm "lag", i.e. doing a G0 X1 after doing, say, G0 X-5 moves by 0.75mm instead of expected 1mm. However after a few more X1 moves it starts moving by 1mm.
    I've tested this using this setup:
    • The dial indicator (rotates will circle for 1mm movement in X direction, -X clockwise and +X counterclockwise)
    • Each movement is 1mm
    Here's a video that demonstrates this behaviour.

    I see the following possible causes of this:
    1. Loose belts. I don't think that's the case, the belts are very tight
    2. Pulley wheel rotates on the shaft a bit. The grub screw are pretty tight on the wheel, but in theory there's still a possibility of slight play, because the surface of the tip of the grub screw is quite small.
    3. The current settings for the motor is not correct. I don't think that's the case, it's in default "mid" position.
    4. There something wrong with the motor.
    Any help with solving this will be appreciated.
     
    #556 Muxa, Apr 7, 2017
    Last edited: Apr 7, 2017
  17. dddman

    dddman Journeyman
    Builder

    Joined:
    Mar 2, 2014
    Messages:
    468
    Likes Received:
    187
    Try to replace your pointy setscrew with a normal (flat bottomed) screw and see if the results are better
     
  18. PCModsCanada

    Builder

    Joined:
    Dec 19, 2016
    Messages:
    17
    Likes Received:
    9
    I'm in the process of building a controller box for my second hand OX and this is what I used for wiring:

    Plug to PSUs - 14GA
    PSU to Drivers/BoB (drivers/motors running at 2.8a) -16GA
    Motor Plugs (I/O ports on the box) to Drivers - 18GA shielded
    Signal/Limit/Probe - 22ga shielded
    BoB to Drivers - 22ga shielded

    Hope that helps
     

    Attached Files:

    • 12.jpg
      12.jpg
      File size:
      126.6 KB
      Views:
      19
    #558 PCModsCanada, Apr 7, 2017
    Last edited: Apr 7, 2017
    lees76 likes this.
  19. Muxa

    Muxa New
    Builder

    Joined:
    Sep 9, 2016
    Messages:
    23
    Likes Received:
    12
    @dddman, thanks for the suggestion. I've filed the tip of the grub screw so it's flat, but that did not have any noticeable improvement.
    I've ran the same test on the Y axis movement and had very similar results. Also took the same measurements off Y and Y gantry plates (to eliminate any play in the Z axis and the spindle mount) - same result. Also tried varying motor current - no change.
    Still getting between approx 0.25mm loss of travel when changing direction. Also noticed that when direction is changed (on X axis) and continuing moving for 4-5 more 1mm steps the "lag" builds up up to a maximum of 0.5mm. After that when continuing movement in the same direction the steps are consistently 1mm.
    I think it's either electronics or the shaft+pulley wheel joint. A 0.7 degree rotational play in that joint would translate to approx 0.25mm linear play. I'll try to reinforce that joint to see if it makes any difference.
     
    #559 Muxa, Apr 7, 2017
    Last edited: Apr 12, 2017
  20. PCModsCanada

    Builder

    Joined:
    Dec 19, 2016
    Messages:
    17
    Likes Received:
    9
    Well I have just completed my controller box for my Ooznest OX :). The OX will be setup on my homemade 4' 3" x 5' 3" table and the controller box is housed in a old Mac Pro case that I modified to fit/mount the hardware. The hardware included is an Ethernet Smooth Stepper, C62 Breakout Board, M524T Drivers and 5v/12v/24v/48c PSUs. It was tons of fun to mod the case and wire it all up and can't wait to assembe the machine itself.
     

    Attached Files:

    • 0.jpg
      0.jpg
      File size:
      95 KB
      Views:
      40
    • 2.jpg
      2.jpg
      File size:
      130.4 KB
      Views:
      40
    • 3.jpg
      3.jpg
      File size:
      86.8 KB
      Views:
      40
    • 5.jpg
      5.jpg
      File size:
      97.2 KB
      Views:
      41
    • 6.jpg
      6.jpg
      File size:
      102.4 KB
      Views:
      40
    • 7.jpg
      7.jpg
      File size:
      88.8 KB
      Views:
      42
    • 8.jpg
      8.jpg
      File size:
      142.1 KB
      Views:
      42
    • 9.jpg
      9.jpg
      File size:
      101.4 KB
      Views:
      43
    • 12.jpg
      12.jpg
      File size:
      126.6 KB
      Views:
      42
    lees76 and Ryan Lock like this.
  21. Nicolas P.

    Builder

    Joined:
    Nov 25, 2016
    Messages:
    4
    Likes Received:
    3
    Hello, I’ll try to summarize my experience with the OX CNC Ooznest full kit I received some months ago.

    Context
    I’m launching a startup which manufactures rubber band guns from hardwood and I needed a prototyping machine to make my first products. It has been about 3 months since I received my OX Ooznest CNC.

    Packaging
    As announced by Ooznest, I received my kit about 6 weeks after ordering it. The package was simply perfect with lots of protections and nothing was missing or damaged. The V-slots were drilled so take care of the residual aluminum chips whose can be sharps.

    [​IMG]

    Assembly
    Everything should go well as long as you follow the instructions. They are incredibly clear. Some minor issues I spotted:

    • Electrical step 5.3.E instead of changing your wiring, you would prefer using $3= 0 (invert nothing), 1 (invert x), 2 (invert y), 3 (invert x & y), 4 (invert z), 5 (invert x & z), 6 (invert y & z) and 7 (invert all).

    • Mechanical 2.7.1 some of my grub screws were not finished. The notch to put the screwdriver in was missing. Same for mechanical 2.3.3 with the anti-backlash screw. Not a big deal if you have pliers.

    • Electrical 5.3.C the ceramic screwdriver is useless since it has a cross head and the torque screws have flat heads…

    NEMA23-Stepper-Motor
    Those are wonderful. I have milled some pieces with a precision of 0.1mm without any problem.

    You can adjust the torque of the motors by turning screws on the CNC XPro Controller. If the resistance encountered is greater than the torque set, then the motors will stake by missing steps. This will ruin your job and maybe damage your motors. But hey, imagine too powerful motors pushing through your mechanical assembly with the carriage falling to the ground. With a little experience, the lack of limit switches will not be a problem.

    I mill hardwood with the following settings. On a scale from 0 (min torque) to 6 (max torque) : x axis 4/6, y & z axis 3/6.

    Overall mechanical structure
    Before choosing the Ox CNC OOznest, I spent a few weeks searching for what geometry makes a CNC router great. I searched for a belt and pulley driving instead of a lead screw one. Belt and pulley are cheaper, simpler, can move faster and are precise enough for my case. The fact that the Ox CNC use its as a rack and pinnion seduces me.

    The fact that the motors are located on the side of the machine pleased me too. I plot to automatize my production with a conveyor. Raw wood willl be loaded axially (y axis) and motors needed to be out of the way.

    When the router is working, chips will fly everywhere. Since the belt and pulley track is turned towards the inside, you will need to often clean it and maybe build a fence to protect it from the flying chips. Not a big deal with some PVC sheets (works great too if fixed around the router mount).

    Also many of the hobbyist CNC router out there comes from the US. I live in Europe and Ooznest is a British company. Less delays and no customs fees if bought it before the Brexit takes effect. Hehe.

    Router mount
    The 71mm router mount is plug&play with a Dewalt D26200 or with a Makita RT0700C. Be aware of the input voltage of your contry. Mine is 50Hz, 230V and I choose to work with a 43mm Kress 1050-FME-1. So I needed an adaptater to fasten it to the router mount. I made mine by folding and wraping paper around the Kress and by adjusting its verticality thanks to a guide made with a press drill. It worked long enough to make a beter adaptater from pine wood. Or you can just 3D print it.

    [​IMG] [​IMG]

    Customer relationship
    Do not forget to take extra Tee-Nuts to fasten your wasteboard to the V-slots spoiler board support. I forgot mine and I asked just before shipping if it was possible to adds some in the same package. Yep, no problem with Ooznest. They were quick and send me a paypal bill for me to pay my extra parts. The community on OpenBuilds seems very satisfied too.
     
    #561 Nicolas P., Apr 8, 2017
    Last edited: Apr 8, 2017
    Ryan Lock and GrayUK like this.
  22. Ryan Lock

    Ryan Lock Veteran
    Builder

    Joined:
    Oct 12, 2014
    Messages:
    530
    Likes Received:
    293
    @Muxa How did reinforcing the joint work out? Are you using the xPro controller?
     
  23. Muxa

    Muxa New
    Builder

    Joined:
    Sep 9, 2016
    Messages:
    23
    Likes Received:
    12
    @Ryan Lock I have not had time to try it yet. I am using xPro (v2) with fast decay mode.
     
  24. PCModsCanada

    Builder

    Joined:
    Dec 19, 2016
    Messages:
    17
    Likes Received:
    9
    If anyone is interested in belt tensioners I redesigned them so you can use them on the Y axis (since the used holes are different then OpenBuilds)

    ooznest OX - Belt Tensioner by qbvbsite

    Pretty much the same design except I extended it down and move the hole to the correct position. The original creator did a great job and can't wait to get them installed.

    --James
     
  25. Chillimonster

    Chillimonster Well-Known
    Builder

    Joined:
    May 6, 2015
    Messages:
    153
    Likes Received:
    81
    I currently have an Ox from yourself (1500 x 1000) and was going to move over to c beam and do a conversion, but in reality there is no need for what i do so am going to add a few mods to the existing build. Plus i like the fact that i can move the axis even when machine if isolated from the mains if i need the room in the workshop.

    One of the things i was going to do was to lower the bed by using lower profile v slot beams to give myself more 'Z'

    Whats the best way of doing this.

    I could turn the three existing support beams 90 degrees but they would lose their rigidity in supporting the bed so was thinking of maybe using a lower / wider profile.

    Anyone done something similar?
     
  26. PCModsCanada

    Builder

    Joined:
    Dec 19, 2016
    Messages:
    17
    Likes Received:
    9
    H
    Hey,
    There is a few ways you can do this:

    1) The way you mentioned
    2) replace your current support excursion with some 20x40 (this is what I have done). You many even add in an extra support.
    3) raise the machine by adding/replacing the excursion at the front and back and move the supports down.

    Hope that helps
    --James
     
  27. srod

    srod New
    Builder

    Joined:
    Mar 11, 2017
    Messages:
    11
    Likes Received:
    0
    Hi,

    I am finally getting my OX 1500x1500 to perform some cutting and as this is my first ever cnc, I have spent two days now fine tuning feed-rates and so on and am still searching for an optimum depth of cut and feed rate with the DeWalt router. Just looking for a bit of advice/clarity.

    I work with 12mm hardwood plywood and am experimenting with a solid carbide 2-flute straight cutter with a 6.35mm cutting diameter. As well as cutting through the 12mm ply, I also cut out grooves in each part before cutting them out.

    I have found that with a 'softer' grade of plywood (poplar core) I can work with a feedrate of 1600mm/min with a depth of 4mm per pass. This works pretty well and would allow me to complete the kind of work I do reasonably quickly. I may even be able to ramp the feedrate up to 2000mm/min with this particular ply, but I will not know for sure until tomorrow.

    However, when I switch to my regular hardwood ply (which is considerably harder than the poplar core rubbish) I am finding that 4mm depth per pass is probably too much. The machine (or the router) doesn't much like it. It does it, but with some complaints and I lose a couple of mm accuracy.

    If I reduce the depth per pass (thus increasing the number of passes) then this will slow me down considerably. Ditto if I reduce the feedrate.

    Is there a simple way to address this without unduly extending the amount of time taken for a particular job? Should I perhaps switch to a compression bit (I have one with a 3.18 cutting diameter - should have gone for the 6.35mm one - doh!)

    Any advice welcome from a complete cnc duffer!

    Thanks.
     
  28. Ryan Lock

    Ryan Lock Veteran
    Builder

    Joined:
    Oct 12, 2014
    Messages:
    530
    Likes Received:
    293
    Ok, that is what i was going to suggest trying fast decay. I was thinking maybe wheels being too tight could be cause?

    @Chillimonster Pretty much what you already mentioned. I don't turning the extrusions so they are flat would cause to much of an issue, as there would be multiple of them, with a MDF Sheet on top.

    @srod Have you thought about doing a roughing pass, then a fine pass to get the parts accurate?
     
  29. Chillimonster

    Chillimonster Well-Known
    Builder

    Joined:
    May 6, 2015
    Messages:
    153
    Likes Received:
    81
    I'll try turning the existing extrusions and using a nice big 25mm MDF sheet.

    I am also moving my controller from the Y Plate to a seperate box next to my workbench so need to extend all cabling - where can i buy suitably colour coded cable for the steppers.
     
  30. Muxa

    Muxa New
    Builder

    Joined:
    Sep 9, 2016
    Messages:
    23
    Likes Received:
    12
    @Chillimonster To lower the bed what i did was to swap the two 2040 extrusions of the base (shorter one going under the longer one) so it gave me 40mm of additional Z space. See attached photo.
    IMG_0047.JPG
     
    #570 Muxa, Apr 12, 2017
    Last edited: Apr 12, 2017
    GrayUK, Ryan Lock and Chillimonster like this.

Share This Page

  1. This site uses cookies to help personalise content, tailor your experience and to keep you logged in if you register.
    By continuing to use this site, you are consenting to our use of cookies.
    Dismiss Notice