Welcome to Our Community

Some features disabled for guests. Register Today.

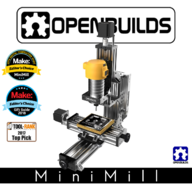
OpenBuilds MiniMill

Discussion in 'CNC Mills/Routers' started by Mark Carew, May 26, 2017.

  1. Anthony Bolgar

    Anthony Bolgar Journeyman
    Builder

    Joined:
    Jan 14, 2016
    Messages:
    354
    Likes Received:
    198
    I could not resist this build, with all the parts I have been slowly aquiring, all I needed to do was order about $208 in parts, and I have everything to build this great little mill, including all the electronics and spindle included. So I just had to get it :)
     
    #31 Anthony Bolgar, Jun 1, 2017
    Last edited: Jun 1, 2017
    MaryD likes this.
  2. Anthony Bolgar

    Anthony Bolgar Journeyman
    Builder

    Joined:
    Jan 14, 2016
    Messages:
    354
    Likes Received:
    198
    I was hoping to have a 10" X 10" work area. Is this going too big for this design, and if so, what would the largest feasible build area be?
     
  3. Rick 2.0

    Rick 2.0 OpenBuilds Team
    Staff Member Moderator Builder Resident Builder

    Joined:
    Dec 20, 2013
    Messages:
    2,894
    Likes Received:
    1,553
    The Y dimension is going to be limited to the effective throat depth which in this case is roughly 6". The X dimension can easily be increased to upwards of 10" with a 400mm beam. Beyond that you start getting diminishing returns due to the need to increase the gantry plate size to prevent excessive cantilevers.
     
    Sonny Lowe likes this.
  4. Anthony Bolgar

    Anthony Bolgar Journeyman
    Builder

    Joined:
    Jan 14, 2016
    Messages:
    354
    Likes Received:
    198
    Thanks for the info Rick.I will be happy with a 6" X 10" work area, it will do 95% of the stuff I had envisioned for it.
     
    Sonny Lowe likes this.
  5. Sonny Lowe

    Sonny Lowe Journeyman
    Staff Member Builder Resident Builder

    Joined:
    Nov 11, 2015
    Messages:
    143
    Likes Received:
    158
    Yes, that is a great spindle for the Mini Mill...
     
  6. mopar99

    mopar99 New
    Builder

    Joined:
    Dec 28, 2015
    Messages:
    10
    Likes Received:
    1
    Any word on the next video(electronics)? I'm curious to see how the board is mounted and where to put the limit switches. Almost done with the build, just waiting on some replacement parts to come in.

    Sup Sonny!! our paths have crossed again... :)
     
  7. Anthony Bolgar

    Anthony Bolgar Journeyman
    Builder

    Joined:
    Jan 14, 2016
    Messages:
    354
    Likes Received:
    198
    @Sonny Lowe @Mark Carew Is there any reason that I could not add another spacer Cbeam to increase the throat depth by 40mm? Or would it cantilever too much?
     
  8. Anthony Bolgar

    Anthony Bolgar Journeyman
    Builder

    Joined:
    Jan 14, 2016
    Messages:
    354
    Likes Received:
    198
  9. Sonny Lowe

    Sonny Lowe Journeyman
    Staff Member Builder Resident Builder

    Joined:
    Nov 11, 2015
    Messages:
    143
    Likes Received:
    158
    From what I've experienced I think it would be too much, but then again, it all depends on your expectations and use of the machine. If your cutting soft materials it may not matter at all, something hard and it's a whole other ball game!?!? Either way you could try it, the worse thing that could happen is you'd have to remove the spacer :)

    Hopefully Mark will kick in his thoughts as well, he has far more experience with the OB hardware than I do ;-)

    Sonny
     
  10. Sonny Lowe

    Sonny Lowe Journeyman
    Staff Member Builder Resident Builder

    Joined:
    Nov 11, 2015
    Messages:
    143
    Likes Received:
    158
  11. Sonny Lowe

    Sonny Lowe Journeyman
    Staff Member Builder Resident Builder

    Joined:
    Nov 11, 2015
    Messages:
    143
    Likes Received:
    158
    Hahaha, I knew that username as soon as I saw it...nice to see you make the trek over to the CNC world. As far as electronics I used a custom laser cut panel that attached to the back of the Z Main Rail, pretty simple setup. I'll try to find a good photo and post post it. It will really depend mostly on your controller of choice. Once you decide we can chat again about mounting options.

    Sonny
     
  12. dr unsped

    dr unsped New
    Builder

    Joined:
    Jan 14, 2014
    Messages:
    2
    Likes Received:
    0
    This would somewhat imply that the current setup is on the edge for things like aluminum as it is, any guesses how the rigidity of the z axis would compare to something like the cbeam machine that is constrained on two ends?
     
  13. Rick 2.0

    Rick 2.0 OpenBuilds Team
    Staff Member Moderator Builder Resident Builder

    Joined:
    Dec 20, 2013
    Messages:
    2,894
    Likes Received:
    1,553
    Not necessarily. Usability of the system is not defined by strength but by stiffness and stiffness doesn't work according to a finite limit (i.e. "an edge"). It merely determines how aggressively you can use the machine.

    Anthony, if you want to add extra spacers consider adding another 250mm C-beam vertical support adjacent to the existing one at the back and plate the two together creating a tube-like support to help reduce twist. Ultimately this was developed as a customizable system so mod as desired and then reinforce where necessary.

    BTW, I noticed an error in my numbers above. The throat is only about 142mm not the erroneous 153mm I got trying to take a measurement on a tablet which will come up noticeably shy of 6". Adding a 100mm piece of 20x80 to the stack will take you to 6" with room to spare though.
     
  14. mopar99

    mopar99 New
    Builder

    Joined:
    Dec 28, 2015
    Messages:
    10
    Likes Received:
    1
    @Sonny Lowe I've been in and out over here for a while. For some reason I just keep picking up parts for projects:)... I have the same controller as shown in the assemble video, CNC xPRO v3 controller.... just finish the build last night after a few snags with some of the parts. Here's a the mock up of where I'm at.(see attachment). Going to dig the router out tonight to see if it will fit, porter cable. Then show it off tomorrow in at my local maker space meetup :D

    so for the electronic:
    • limit switch on each axis? where does x get mounted? I think I figured out Y & Z limit switches based on video and some of the posted photos.
    • mounting plate, I have an ideal for this after reading you comment though photo would be great.
    • what size wire are you running from the power supply to the controller? 12g looks a little big for the terminal on the controller.
    • On the X wiring, is it wise to run the cable up through the frame or find some wire loom and t nuts to attach it on the outside of the frame? Wire seems a little short/tight if through the frame.
    • on the controller, is it plug and play? or is it like our printers with the ramps board where we have to download and config?
    I have to admit I'm a little jealous of your z motor & jog handles after assembling this. It's those little thing that really make things easy.
     

    Attached Files:

  15. dr unsped

    dr unsped New
    Builder

    Joined:
    Jan 14, 2014
    Messages:
    2
    Likes Received:
    0
    I almost would want to double up the other way, lose 40mm in y by adding another c beam section to the rear and slide forward the z stage giving you and 80mm connection between z and x.
     
  16. Sonny Lowe

    Sonny Lowe Journeyman
    Staff Member Builder Resident Builder

    Joined:
    Nov 11, 2015
    Messages:
    143
    Likes Received:
    158
    Man, your build looks great, you're going to love this little machine!!!

    Sorry, I can't help with this one, I do not run limit switches. I use Grbl Panel as my CNC Control Software and I don't honestly see the need for the limit switches. If you plan to run another software they might come in handy, you also need to consider the post processor and how it manages the G-Code. If it request a homing sequence prior to machining the limits will be needed. I use Fusion 360 and the Post Processor I'm using does not home the machine. So I simply set XYZ zeros and run it from there.

    Let me see if I can find a photo or the CAD model to show you what I did...

    I ran 14awg wire from the power supply to the board as the max current my power supply can put out is ~15amp (~360w). Even that size wire was a tight fit ;)

    I used a laser cut wire tie down and T-Nuts, it made for a really neat install and for easier access to the wiring if need be!?!?

    That is one great thing about that controller, it was absolutely plug and play!!! The only changes you need to make are a few parameters based on machining volume, you can also change rates as well. OB has all that info in the C-Beam build, just to the "files and Drawings" section to download that folder and you'll have all the info you need, and of course I'm always here to help, just ask away!!

    Thank you, I've have had a little time to play with this great machine and have made more than a few adjustments to my liking ;) I'll be posting a few new builds very soon, keep an eye out, I think you might like them :D

    OB Minimill Upgrades
    OB MiniMill Enclosure
    OB Minimill Tooling

    Can''t wait to see the finished project, I know the kids at your local maker space will love it!!!
     
    Mark Carew likes this.
  17. mopar99

    mopar99 New
    Builder

    Joined:
    Dec 28, 2015
    Messages:
    10
    Likes Received:
    1
    cool, i've been learn a lot in fusion 360 here lately!

    I found this: Spark Concepts xPro v2 Controller Board DIN Mount by Arctic_Ox the plate works, just need to print the mounts to see if they'll work.

    i just didn't want a repeat of the ramps board issue;)


    have a small work shop comes in handy there :)

    sweet! i'll go check on that.

    enclosure looks to be a must, for cleanup plus safety for the little ones. Cant wait to see what you have in store for upgrades & tooling.
     
    Sonny Lowe likes this.
  18. mopar99

    mopar99 New
    Builder

    Joined:
    Dec 28, 2015
    Messages:
    10
    Likes Received:
    1
    ok, one more question: bits? Where to source them since one shouldn't use wood router bit on metal stock:rolleyes:. that i figure there going to be a difference between what the big machines use verse the little machines:D.
     
  19. Anthony Bolgar

    Anthony Bolgar Journeyman
    Builder

    Joined:
    Jan 14, 2016
    Messages:
    354
    Likes Received:
    198
    For milling aluminum a single flute straight bit is a good one to use.
     
    Sonny Lowe likes this.
  20. Giarc

    Giarc OpenBuilds Team
    Staff Member Moderator Builder Resident Builder

    Joined:
    Jan 24, 2015
    Messages:
    3,017
    Likes Received:
    1,682
    Amazon has a variety of cheaper single flute end mills and so does ebay. They also sell Onsrud and other high quality end mills. Also, I bought several swift carb and HTC from here End Mill Discount - Carbide End Mills, Extra & Extra Extra Long Mills, Micro Tools, Thread Mills in both 1/8 and 1/4 inch shank. Fo cutting through 2 inch thick stuff, I got 1 of each - 1/4 and 1/8 inch- from Kodiak Cutting Tools Extra Extra Long Carbide End Mills, Solid Carbide End Mills Extra Extra Long Series.
     
  21. Anthony Bolgar

    Anthony Bolgar Journeyman
    Builder

    Joined:
    Jan 14, 2016
    Messages:
    354
    Likes Received:
    198
    Thanks for the links to the extra long bits @Giarc
     
  22. Giarc

    Giarc OpenBuilds Team
    Staff Member Moderator Builder Resident Builder

    Joined:
    Jan 24, 2015
    Messages:
    3,017
    Likes Received:
    1,682
    No problem. I am very happy with them.
     
  23. Sonny Lowe

    Sonny Lowe Journeyman
    Staff Member Builder Resident Builder

    Joined:
    Nov 11, 2015
    Messages:
    143
    Likes Received:
    158
    I second Kodiak (from experience), great stuff!!!
     
  24. Anthony Bolgar

    Anthony Bolgar Journeyman
    Builder

    Joined:
    Jan 14, 2016
    Messages:
    354
    Likes Received:
    198
    @Sonny Lowe I like your idea to add the 2nd vertical to create a tube like structure. I will build it like that with the extra spacer, and I think I will make a custom plate to hold it all together on both sides. Thanks for the idea.
     
  25. Sonny Lowe

    Sonny Lowe Journeyman
    Staff Member Builder Resident Builder

    Joined:
    Nov 11, 2015
    Messages:
    143
    Likes Received:
    158
    @Anthony Bolgar although I'd love to take the credit, it was actually Rick 2.0 who suggested that ;) However I must concur, it is a splendid idea :thumbsup:

     
  26. Anthony Bolgar

    Anthony Bolgar Journeyman
    Builder

    Joined:
    Jan 14, 2016
    Messages:
    354
    Likes Received:
    198
    My apologies to @Rick 2.0 for screwing up the credit ;)
     
    Sonny Lowe likes this.
  27. Sonny Lowe

    Sonny Lowe Journeyman
    Staff Member Builder Resident Builder

    Joined:
    Nov 11, 2015
    Messages:
    143
    Likes Received:
    158
    Just posted an enclosure for this little beauty :D

    Here's a LINK
     
    mopar99 and Anthony Bolgar like this.
  28. mopar99

    mopar99 New
    Builder

    Joined:
    Dec 28, 2015
    Messages:
    10
    Likes Received:
    1
    To anyone: This xPro board, is there anything special one has to do with for the panel software to work with it? I’m running a dell with win8, 64 bit os machine and when I push the connnect button it errors out & kills the program? The pc see the board on com5 and I left the baud rate alone.
     
  29. Sonny Lowe

    Sonny Lowe Journeyman
    Staff Member Builder Resident Builder

    Joined:
    Nov 11, 2015
    Messages:
    143
    Likes Received:
    158
    Try plugging the controllers USB cable into the PC prior to starting Grbl Panel. I just tried plugging it in while Grbl Panel was running and also got an error followed by the program shutting down. You could also try connecting the controller without external power powered on!?!?

    Sonny
     
  30. mopar99

    mopar99 New
    Builder

    Joined:
    Dec 28, 2015
    Messages:
    10
    Likes Received:
    1
    I think I figured it out but just to confirm, what version of Windows are you running 32 or 64bit?
     

Share This Page

  1. This site uses cookies to help personalise content, tailor your experience and to keep you logged in if you register.
    By continuing to use this site, you are consenting to our use of cookies.
    Dismiss Notice