Welcome to Our Community

Some features disabled for guests. Register Today.

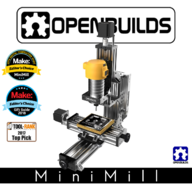
OpenBuilds MiniMill

Discussion in 'CNC Mills/Routers' started by Mark Carew, May 26, 2017.

  1. Spiffcow

    Spiffcow Well-Known
    Builder

    Joined:
    Dec 27, 2015
    Messages:
    214
    Likes Received:
    92
    I can't help but think this might make a good mill/printer combo. If you attach a print head to it you have no need for bed leveling, and 3 leadscrews would provide more accuracy than most of the printers around.. And then you could swap out for a spindle and cut aluminum when the need arises
     
  2. Julius

    Julius Well-Known
    Builder

    Joined:
    Nov 13, 2015
    Messages:
    193
    Likes Received:
    64
    Hey OB owners
    What is the max rapid and cutting speed you've been able to get in aluminum?
    Anyone experiment or use flood/mist coolant? Where did you get some bellows to protect the C beam?
    Still super tempted to get one of these, once I figure out a good spindle. A 600w, low RPM air cooled spindle would be perfect for this thing.
     
  3. dddman

    dddman Journeyman
    Builder

    Joined:
    Mar 2, 2014
    Messages:
    468
    Likes Received:
    187
    Here it is, mirror it for the other side
     

    Attached Files:

  4. Scotty Orr

    Scotty Orr Journeyman
    Builder

    Joined:
    May 21, 2015
    Messages:
    315
    Likes Received:
    178
    I've just completed my build of the MiniMill, and I'm digging into the software. I'm using the Gradus M1 Pro controller with Bigfoot BSD109A drivers and 269oz in. Nema 23s. I'm running everything at 36V. The Gradus has Grbl 0.9.

    The Bigfoots are currently set for 1/32 microstepping (no jumpers), and from what I've been reading, I probably don't want that. I do intend to eventually cut 1/8" 6061-T651 plate with this. So should I dial back my microstepping?

    Also, I've been watching the C-Beam video for configuration of Grbl-panel and noticed that there is not a folder similar to the "CBeam Machine Control Software" folder posted for the MiniMill. How much trouble will I get myself into if I use the info there?

    Great kit by the way - Thanks!
    Scotty
     
  5. Mark Carew

    Mark Carew OpenBuilds Team
    Staff Member Moderator Builder Resident Builder

    Joined:
    Jun 28, 2013
    Messages:
    2,763
    Likes Received:
    2,448
    Just updated the front page with the grbl setting I am using on the MiniMill
    OpenBuilds MiniMill
    Hope this helps Scotty
     
    Scotty Orr likes this.
  6. Scotty Orr

    Scotty Orr Journeyman
    Builder

    Joined:
    May 21, 2015
    Messages:
    315
    Likes Received:
    178
    Yes - Thanks Mark!
     
    Mark Carew likes this.
  7. Mark Carew

    Mark Carew OpenBuilds Team
    Staff Member Moderator Builder Resident Builder

    Joined:
    Jun 28, 2013
    Messages:
    2,763
    Likes Received:
    2,448
    Welcome, glad I could help :thumbsup:
    btw I am using 1/8th stepping
     
    Scotty Orr likes this.
  8. Scotty Orr

    Scotty Orr Journeyman
    Builder

    Joined:
    May 21, 2015
    Messages:
    315
    Likes Received:
    178
    So I see you've got ~200steps/mm. That means you are using 1/8 microstepping, correct?
     
  9. Mark Carew

    Mark Carew OpenBuilds Team
    Staff Member Moderator Builder Resident Builder

    Joined:
    Jun 28, 2013
    Messages:
    2,763
    Likes Received:
    2,448
    Right, and in real world for me it equals out to more like 199.1 but you need to try your machine out to dial that in
    You can try this axis calibration tool as well.
     
    Scotty Orr likes this.
  10. Scotty Orr

    Scotty Orr Journeyman
    Builder

    Joined:
    May 21, 2015
    Messages:
    315
    Likes Received:
    178
    I am attaching below my grbl "defaults.h" entry (for grbl 1.1f) for my new MiniMill. It's based partly on the grbl settings Mark posted in the Build tab, and partly on the OXCNC entry in defaults.h. You can copy and paste it into your defaults.h and then define DEFAULTS_MINIMILL in your configuration.h . Thanks for the settings Mark!
     

    Attached Files:

    Mark Carew likes this.
  11. Scotty Orr

    Scotty Orr Journeyman
    Builder

    Joined:
    May 21, 2015
    Messages:
    315
    Likes Received:
    178
    My MiniMill Y-actuator has a bit of side-to-side play of the lead screw in the bearing at the jog-knob end. It sometimes "clicks" during operation. (There is NO fore-aft play.)

    Is this normal, does it matter, or can it be adjusted out somehow?
     
    Nick Bedi likes this.
  12. Nick Bedi

    Nick Bedi New
    Builder

    Joined:
    Jun 6, 2017
    Messages:
    2
    Likes Received:
    1
    I just finished my mechanical build and I have the same issue on the same axis. I think maybe the threaded rod is slight smaller then the ID of the bearing.
     
    Scotty Orr likes this.
  13. Peter Van Der Walt

    Peter Van Der Walt OpenBuilds Team
    Staff Member Moderator Builder Resident Builder

    Joined:
    Mar 1, 2017
    Messages:
    15,301
    Likes Received:
    4,360
    Both correct, the leadscrew is slightly undersize fit inside the bearing. In this application we want to constrain motion axially, the minor movement in the radial direction is fine.

    cbeam wiggle.png
    If you're an old-hand at building with OpenBuilds parts you may remember years ago we used to have the leadscrew slightly oversized and then users had to tweak the fit with sandpaper (Throwback Tuesday video recommendation: at between 18min45s and 19min:45 on the C-Beam Machine build video linked below - you can still see instructions on sanding down the leadscrew... As expected we later improved it to rather a have a slight underfit for easier assembly (no sanding required) after making 100% sure that it didnt have any other negative effects). Much better now!

    sanding.PNG


    #103 Peter Van Der Walt, Sep 20, 2017
    Last edited: Sep 20, 2017
    Nick Bedi and Scotty Orr like this.
  14. Rick 2.0

    Rick 2.0 OpenBuilds Team
    Staff Member Moderator Builder Resident Builder

    Joined:
    Dec 20, 2013
    Messages:
    2,899
    Likes Received:
    1,556
    If the chatter is a problem some forum members have reported success in resolving it by wrapping the screw in Teflon tape to fill the gap.
     
  15. alvingm

    alvingm New
    Builder

    Joined:
    Sep 8, 2016
    Messages:
    5
    Likes Received:
    1
    I just finished building my OB MiniMill as well. I just ordered a Gradius M1 Pro with the Bigfoot drivers but for the time being, I have an SBase v1.3 lying around to at least test/calibrate. Doing basic calibration and try to do a circle it actually looks crooked. I reassembled my X (at least from what it looks a problem with the X axis) but still getting the same shape circle. Any pointers on where to look for next?

    thanks!
    IMG_9881.jpg IMG_9880.jpg
     
  16. Peter Van Der Walt

    Peter Van Der Walt OpenBuilds Team
    Staff Member Moderator Builder Resident Builder

    Joined:
    Mar 1, 2017
    Messages:
    15,301
    Likes Received:
    4,360
    wiggle moving bits by hand, feel for "looseness".
    Include wiggling your router by holding it by the endmill (router unplugged of course - not running hehe) as your play could come from either the XY table, or from the Z (router mount, z plate, etc) or from the frame (Z attached to XY properly)
     
  17. alvingm

    alvingm New
    Builder

    Joined:
    Sep 8, 2016
    Messages:
    5
    Likes Received:
    1
    92BB4C22-518A-4ACE-B776-1DE5ACD0FF51.jpeg

    thanks Peter. I think I solved it but not 100%. I can wiggle the connection between x and y just a tad bit, tightened that and it looks like it worked (at least more circle-ly than the other 2 ☺️)

    Probably need to start building my enclosure and permanently screw this on a platform.
     
  18. Peter Van Der Walt

    Peter Van Der Walt OpenBuilds Team
    Staff Member Moderator Builder Resident Builder

    Joined:
    Mar 1, 2017
    Messages:
    15,301
    Likes Received:
    4,360
    closer, but could still be better (;
    something is still not properly tight as it should be (;

    check my last circles on a MiniMill at the 1min58 mark onward in the video below - thats how round they should be (;
     
  19. Peter Van Der Walt

    Peter Van Der Walt OpenBuilds Team
    Staff Member Moderator Builder Resident Builder

    Joined:
    Mar 1, 2017
    Messages:
    15,301
    Likes Received:
    4,360
    Speaking of, how do you hold your stock down? Its not that the stock is shifting on you?
     
  20. alvingm

    alvingm New
    Builder

    Joined:
    Sep 8, 2016
    Messages:
    5
    Likes Received:
    1
    I just screwed it temporarily on a piece of plywood. As far as I know, it's not shifting. Might need to double check the wheels on both x and y. My question about the wheels, right now, I think I maxed out my eccentric nuts (no more space to tighten them up). My wheels are not moving when I try to roll them manually with my fingers but the carriage is moving when using the knobs. When I'm building the carriages, I know I can slide them just fine prior to installing the motors
     
    #110 alvingm, Oct 5, 2017
    Last edited: Oct 5, 2017
  21. Rick 2.0

    Rick 2.0 OpenBuilds Team
    Staff Member Moderator Builder Resident Builder

    Joined:
    Dec 20, 2013
    Messages:
    2,899
    Likes Received:
    1,556
    You might check to see that the screws holding the anti-backlash nuts are tight and that the lock collars on the lead screws are snug tight against both ends inside the C-Beams.
     
  22. Lofton Harris

    Builder

    Joined:
    May 27, 2017
    Messages:
    8
    Likes Received:
    2
    I really like the vise and want to make one. However, i don’t have a source for reasonably priced aluminum bar stock. Can anyone here suggest some sellers or strategies for locating sources?
     
  23. Rick 2.0

    Rick 2.0 OpenBuilds Team
    Staff Member Moderator Builder Resident Builder

    Joined:
    Dec 20, 2013
    Messages:
    2,899
    Likes Received:
    1,556
    Reasonably priced bar stock is everywhere. It's the shipping that generally kills the deal. For small quantities I use onlinemetals. If it fits in a priority mail envelope (3 pieces, 12" or less) it ships for $6.95. And if you move around the website enough or leave items in your cart long enough, they will generally offer you a $5 discount code on the shipping.
     
    GrayUK likes this.
  24. Lofton Harris

    Builder

    Joined:
    May 27, 2017
    Messages:
    8
    Likes Received:
    2
    Thanks, Rick. I’ll check it out.
     
  25. MaryD

    MaryD OpenBuilds Team

    Joined:
    Apr 13, 2016
    Messages:
    649
    Likes Received:
    639
  26. Giarc

    Giarc OpenBuilds Team
    Staff Member Moderator Builder Resident Builder

    Joined:
    Jan 24, 2015
    Messages:
    3,035
    Likes Received:
    1,695
    I don't know where you are since it isn't in your profile, but there should be local metal yards you can find.

    I get aluminum for $3.50 per pound. It is cheaper to mill stuff from aluminum than 3d print it where I am at. ;)
     
  27. Michael Dwyer

    Builder

    Joined:
    Sep 26, 2017
    Messages:
    43
    Likes Received:
    10
    I completed my MiniMill build this past weekend (see My MiniMill is just the start). Something I noticed while building it was when installing the end plates on my X and Y axis rails, I had to push the lead screw down about 1 mm on each end for the bearings to slide into the holes of the end brackets. I followed the build video to the tee, so I'm concerned about this. The problem with the lead screws manifested itself when operating my mill for the first time. The motors seemed to slip and there was a lot of friction type noise coming from the lead screw and lead screw nut when approaching the maximum end of travel. I did not need to tighten down on the anti-backlash set screw any at all during the build and tightened down on the end plate screws after getting the bearings in place. I have to keep my lead screws well lubricated to prevent the motor slipping and noise. It appears an extra 1 mm shim (in addition to the 3 mm shims) between the bottom of the gantry plate and lead screw nut would solve the problem. I will let you know if works.

    Thanks,
    Michael
     
  28. Rick 2.0

    Rick 2.0 OpenBuilds Team
    Staff Member Moderator Builder Resident Builder

    Joined:
    Dec 20, 2013
    Messages:
    2,899
    Likes Received:
    1,556
    Did you put the shim between the wheel and the 6mm spacer when you mounted the wheels? That's often where the problem lies. So either take the shim off the wheel or add an extra shim to the lead screw nut assembly.
     
  29. evgeny156

    evgeny156 New
    Builder

    Joined:
    Mar 14, 2017
    Messages:
    5
    Likes Received:
    8
    Hello.

    Could someone help me. I'm building MiniMill. How tight wheels should slide over the C Beam profile? Plate should slide easily over the profile, or it must require force to move by hand?
     
  30. Scotty Orr

    Scotty Orr Journeyman
    Builder

    Joined:
    May 21, 2015
    Messages:
    315
    Likes Received:
    178
    Rick, this makes me curious about the "clicking" I get near the end of my travel on X and Y. The video does show putting a shim between the wheel and the spacer. Now I wonder if this is why I get the clicking. What is the correct way - with or without the shims?
     

Share This Page

  1. This site uses cookies to help personalise content, tailor your experience and to keep you logged in if you register.
    By continuing to use this site, you are consenting to our use of cookies.
    Dismiss Notice