Welcome to Our Community

Some features disabled for guests. Register Today.

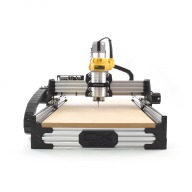
ooznest OX CNC Machine

Discussion in 'CNC Mills/Routers' started by Ryan Lock, Apr 28, 2015.

  1. Marcus1

    Marcus1 New
    Builder

    Joined:
    Jan 13, 2017
    Messages:
    65
    Likes Received:
    13
  2. lees76

    lees76 New
    Builder

    Joined:
    May 29, 2016
    Messages:
    15
    Likes Received:
    3
    Thanks for your advise, I bought it... 2.2kW version

    The BOB i have is

    http://www.hallroad.org/3518/mach3-...cal-coupler-for-mach3-stepper-motor-drive.jpg

    If this is no good, i'll upgrade it eventually
     
  3. Marcus1

    Marcus1 New
    Builder

    Joined:
    Jan 13, 2017
    Messages:
    65
    Likes Received:
    13
    That board looks identical.

    When you get the spindle and BOB let me know what you need
     
  4. graycbr

    graycbr New
    Builder

    Joined:
    Nov 13, 2017
    Messages:
    8
    Likes Received:
    0
    newbie warning
    Ive got these routers Makita RT0700C & a Dewalt D26200 will this be ok to start off with ,which one should I install ?
    Or should I buy another ?
    Starting to plan a setup so any views or pointers will be a great help
     
    #874 graycbr, Nov 13, 2017
    Last edited: Nov 13, 2017
  5. NeoMorph

    NeoMorph New
    Builder

    Joined:
    Jul 1, 2017
    Messages:
    68
    Likes Received:
    20
    I’ve got the D262000 installed in my OX. It’s the same as the American DWP 611.
     
  6. graycbr

    graycbr New
    Builder

    Joined:
    Nov 13, 2017
    Messages:
    8
    Likes Received:
    0
    what will this cut with no problems ?
    noise ?
    Any other makes or model should I be looking at ?
     
  7. Giarc

    Giarc OpenBuilds Team
    Staff Member Moderator Builder Resident Builder

    Joined:
    Jan 24, 2015
    Messages:
    3,035
    Likes Received:
    1,695
    I have the Makita, and I cut wood, acrylic, other plastics, foam, and aluminum with it. It us also fairly quiet, especially at 10,000 rpms. The actual cutting of the material is what makes the noise.
     
  8. NeoMorph

    NeoMorph New
    Builder

    Joined:
    Jul 1, 2017
    Messages:
    68
    Likes Received:
    20
    You have to realise there is a trade off in everything. Use too powerful a spindle and it will be too heavy requiring upgraded Stepper motors. If you upgrade the motors you will need a higher capacity driver. Use a higher capacity motor/driver you will need a higher voltage power supply. Install all that and there is a probability that the frame is going to flex.

    Which all comes back to why they used a trim router in the first place.
     
    Rick 2.0 likes this.
  9. NeoMorph

    NeoMorph New
    Builder

    Joined:
    Jul 1, 2017
    Messages:
    68
    Likes Received:
    20
    Oh and the materials that hobby machines are used for is wood, plastics, and aluminium (although slowly due to depth of cut being small). The biggest problem isn’t motor power but frame stiffness (or lack of it) leading to parts that will be out of spec if you try to push the machine too hard.

    If you want to do stronger material you are going to need something like A Tormach 440 or similar.
     
  10. graycbr

    graycbr New
    Builder

    Joined:
    Nov 13, 2017
    Messages:
    8
    Likes Received:
    0
    so what motors & driver , plus power supply are you using with the Makita ?
    Same question to the Dewalt users plz :)
     
  11. Giarc

    Giarc OpenBuilds Team
    Staff Member Moderator Builder Resident Builder

    Joined:
    Jan 24, 2015
    Messages:
    3,035
    Likes Received:
    1,695
    MAKITA:

    I use DQ542MA drivers (1 per ea of the 4 motors). I control them with an arduino. I have 269 oz. 2.8 amp Motors for X and Y and a 170 oz (IIRC) 2.8 amp motor for the Z. I use a 36 volt 11 amp power supply.
     
  12. NeoMorph

    NeoMorph New
    Builder

    Joined:
    Jul 1, 2017
    Messages:
    68
    Likes Received:
    20
    24v PSU with the CNC XPro v3. Also am using a SuperPID v2 to be able to control the Dewalt just like a spindle which enables me to run it from 5,000rpm to 30,000rpm.

    I’m impressed with the SuperPID but G-Wizard is repeatedly asking for lower rpm for plastics due to the rigidity of the system being lacking. Tool deflection is another big worry that means that I’m going to switch to mostly stubby endmills to help reduce it.
     
  13. Conehead

    Conehead New
    Builder

    Joined:
    Aug 30, 2016
    Messages:
    38
    Likes Received:
    5
    Got this machine for roughly a year now and I am so happy.
    I was just wondering if there is any way to upgrade the z-height.
    Are there plates available? Or some tutorials? It's just really hard to search for "z" on the forums ;)
     
  14. NeoMorph

    NeoMorph New
    Builder

    Joined:
    Jul 1, 2017
    Messages:
    68
    Likes Received:
    20
    I needed some extra Z height in my Ox and pulled out the spoiler boards and the. I took out the 20x60 spoiler supports, rotated them 90 degrees, and used corner blocks to attach them to the V-slot... so they are now only 20mm high and when I put the spoiler boards back it means I gained 40mm clearance. I did a skim cut on the spoiler boards to make sure it was flat again and I was happy.

    Makes me wonder if anyone has made an electric height adjuster for bed/gantry CNC routers... a bit like power on the knee in a Bridgeport mill. Maybe use 6x steppers vertically under the bed of the machine. with a short piece of threaded rod heh. Would probably be too flimsy, but maybe for a small/tiny machine it would be interesting. After all 3D printers do it.
     
    Conehead and GrayUK like this.
  15. Conehead

    Conehead New
    Builder

    Joined:
    Aug 30, 2016
    Messages:
    38
    Likes Received:
    5
    That sounds like a great idea.
    Already thought about something similar. Was just wondering if it would loose too much rigidity.
    How large is your machine? Mine is 1000x1000. But I mostly cut hard/soft wood
     
  16. NeoMorph

    NeoMorph New
    Builder

    Joined:
    Jul 1, 2017
    Messages:
    68
    Likes Received:
    20
    Mine is a 1000x750. I’ve cut wood and plastics up to now. Just doing some mods to help increase the rigidity factor so I can cut brass and aluminium. I think some of my problem was the router mains wire and the vacuum hose dragging plus me being stingy on the Stepper current which meant I was losing some accuracy.
     
  17. graycbr

    graycbr New
    Builder

    Joined:
    Nov 13, 2017
    Messages:
    8
    Likes Received:
    0
    Could I have more info on the arduino setup plz ??
     
  18. Giarc

    Giarc OpenBuilds Team
    Staff Member Moderator Builder Resident Builder

    Joined:
    Jan 24, 2015
    Messages:
    3,035
    Likes Received:
    1,695
  19. Ryan Turner

    Builder

    Joined:
    Mar 1, 2016
    Messages:
    68
    Likes Received:
    13

    I have g wizard too.

    I’ve found it can be way off the right feed rate for plastics and ended up with plastic binding around the bit. So for plastics I just use www.cutter-shop.co.uk feeds and speeds calculator and if I want a good quality cut stick to their slower speed and a nice shallow cut
     
    NeoMorph likes this.
  20. Ryan Turner

    Builder

    Joined:
    Mar 1, 2016
    Messages:
    68
    Likes Received:
    13

    I originally went with 15mm mdf and surfaced it. That took it down to something like 12mm.

    Then I foolishly whilst moving my workshop around put a small pillar drill on the bed. Guess what? Warped bed.

    So this time I went with a 18mm bed which is rock solid and bomb proof. I haven’t surfaced it. It’s just attached by counter sunk drop in t nuts with the low profile bolts. Then once attached I used the cnc to cut out 10mm holes then put in threaded inserts.

    It’s generally flat enough for most jobs as if you don’t store the mdf on its end before attaching, it won’t warp and being that thick isn’t too susceptible to humidity.

    If I need a huge amount of accuracy i’d put a spoilboard on top of the bed, put holes on it to line up with the threaded inserts and then surface that. That way I don’t have to change the bed ever.
     
    #890 Ryan Turner, Nov 20, 2017
    Last edited: Nov 20, 2017
  21. NeoMorph

    NeoMorph New
    Builder

    Joined:
    Jul 1, 2017
    Messages:
    68
    Likes Received:
    20

    I went into overboard with my spoilboard... to keep it as flat as possible I used 2x18mm boards as the base and a 6mm thick island on top that is the exact size of the cutting area. I eventually went with flipping the spoilboard supports sidewards and attatching them using corner blocks. Then bolted the spoilboard to the supports using 5mm nylon bolts.

    But that wasn’t all... I have several 8mm nylon bolts going through the spoilboard and into the unit. I had to stop myself overtightening the bolts or it could cause warping so to reduce it I had them right next to the 20x60 v-slot spoilboard supports. To stop the frame sliding I’ve bolted it to the table with angle brackets.

    So yeah, overdid it there.

    Actually got it apart again at the moment to include a vertical clamping system for making dovetails of all types. Actually got the idea from a video by Dan at Maker Geek. Well, not the idea but the execution. I do need to make some changes because I don’t weld.
     
    GrayUK likes this.
  22. Ryan Turner

    Builder

    Joined:
    Mar 1, 2016
    Messages:
    68
    Likes Received:
    13
    Belt and braces is always better than too little!
     
  23. NeoMorph

    NeoMorph New
    Builder

    Joined:
    Jul 1, 2017
    Messages:
    68
    Likes Received:
    20
    I still think I need another support v-slot... or two. I have a minor OCD about things like this. I also am going to be doing a simulation instrument project where tolerances are going to be pretty tight. I think I’m going to put a second bracket on the router as well as the support for the dust shoe is adding forces to the ‘nod’ of the gantry.
     
  24. NeoMorph

    NeoMorph New
    Builder

    Joined:
    Jul 1, 2017
    Messages:
    68
    Likes Received:
    20
    Is that a wrong url? It’s a holding page for the ISP.
     
  25. Rick 2.0

    Rick 2.0 OpenBuilds Team
    Staff Member Moderator Builder Resident Builder

    Joined:
    Dec 20, 2013
    Messages:
    2,899
    Likes Received:
    1,556
    NeoMorph likes this.
  26. GrayUK

    GrayUK Openbuilds Team Elder
    Staff Member Moderator Builder

    Joined:
    May 5, 2014
    Messages:
    1,668
    Likes Received:
    627
    Great addition to any CNC. Good job.
    What reference do you use for the Zero point?
    Gray
     
  27. NeoMorph

    NeoMorph New
    Builder

    Joined:
    Jul 1, 2017
    Messages:
    68
    Likes Received:
    20
  28. Medman

    Medman New
    Builder

    Joined:
    Feb 27, 2017
    Messages:
    9
    Likes Received:
    0
    Hi. I built this wonderful machine, and configured it with arduino and 4x THB6064AH stepper drivers. I also put dual belts in the x axis for stiffening, and indeed it is. I am using a 500w spindle with 12000 max RPM.
    I calibrated the machine and all configuration is right. I mounted a pen and it is well calibrated with exact distances on jogging
    I am trying to cut a 10mm acrylic, by fusion 360 and GRBL post processing, and it is as intended in the senders, but always, i am getting smaller and irregular circles and squares. is this caused by a fault in feeds and speeds, (I am using 0.1 chip load and 1000mm/min feed), low RPM or what?


    thanks a lot for help
     
  29. NeoMorph

    NeoMorph New
    Builder

    Joined:
    Jul 1, 2017
    Messages:
    68
    Likes Received:
    20
    What depth of cut are you using, what RPM, how many flutes, what size is your bit and how far out is it sticking from your collet.

    I’m a real beginner too and learning there are a lot of parameters to success or failure in this. I never even realised tool deflection and machine rigidity were a big problem for hobby machines.

    Also have you tried upping the current to your motors as too low of a current can cause problems. On my long axis (dual) I was getting a real horrible noise. Turned out one side was slipping its grub screws while the other side had too low a current so was hiccuping along.

    I’m definitely looking at CNC with new eyes since getting my machine... and yeah, I’m getting as many failures as successes. Definitely learning though.
     
  30. Medman

    Medman New
    Builder

    Joined:
    Feb 27, 2017
    Messages:
    9
    Likes Received:
    0
    thanks for your reply. the bit is a single O Flute up cut 3.175mm shaft and Cut Diameter 50mm overall length, and 25 flute length and 30 mm sticking out of the collet. the motors are 1.5A and they look good when moving and accelerating, I bought 3A motors but waiting for their respective couplers to arrive
     

Share This Page

  1. This site uses cookies to help personalise content, tailor your experience and to keep you logged in if you register.
    By continuing to use this site, you are consenting to our use of cookies.
    Dismiss Notice