Welcome to Our Community

Some features disabled for guests. Register Today.

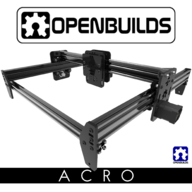
OpenBuilds ACRO Laser System

Discussion in 'Laser Cutters' started by Mark Carew, Sep 12, 2017.

  1. WayTooManyHobbies

    Builder

    Joined:
    Aug 10, 2016
    Messages:
    16
    Likes Received:
    8
  2. Rick 2.0

    Rick 2.0 OpenBuilds Team
    Staff Member Moderator Builder Resident Builder

    Joined:
    Dec 20, 2013
    Messages:
    2,892
    Likes Received:
    1,551
    A constant force spring is also a suggestion. Example - Source - Another Source

    But we digress as this is a subject for another thread. Please try to keep the ACRO thread focused on question/comments about the ACRO system.
     
    Mark Carew likes this.
  3. WayTooManyHobbies

    Builder

    Joined:
    Aug 10, 2016
    Messages:
    16
    Likes Received:
    8
    Wow, quiet on the thread.
    I've finished my Acro build, and things are now running. I have the 20" square model, and am using an Arduino/Protoneer CNC setup with GRBL v1.1f, a 2.3W Sanwu laser module (often marketed as Eleksmaker, but apparently someone just "borrows" Eleksmaker's name), along with LaserGRBL and Laserweb.

    So far, I've been pretty pleased. The Acro system was easy to assemble, and the build instruction video is quite good. The Protoneer board is very nice, much better than the cheap clones available on Amazon. The laser seems to have plenty of power to engrave wood and paper, and will also cut 1/16" wood in one pass. That's the extent of my experience so far, since time during the week is very scarce.
     
    GrayUK, Mark Carew and Scotty Orr like this.
  4. WayTooManyHobbies

    Builder

    Joined:
    Aug 10, 2016
    Messages:
    16
    Likes Received:
    8
    Obligatory laser death ray video - the loud background noise is the combination of the power supply fan and the laser fan.
    Wow - can't really see anything in that video file. I bet you can guess the wavelength of my laser, though!
    Also, the laser glasses that came with my module are frightening - they seem to amplify a green laser pointer beam, so I didn't even try them. I ordered alternate glasses made by Eagle Pair, and they block everything. Since I can still see, that's probably the best bet.
     

    Attached Files:

    MaryD and GrayUK like this.
  5. Mark Carew

    Mark Carew OpenBuilds Team
    Staff Member Moderator Builder Resident Builder

    Joined:
    Jun 28, 2013
    Messages:
    2,758
    Likes Received:
    2,440
    Cool man good to see you having fun with it and staying safe! Looking forward to see the Projects you make on your ACRO! :thumbsup:
    If you have a link to the Eagle glasses your using could you please share? Thanks
    Mark
     
  6. WayTooManyHobbies

    Builder

    Joined:
    Aug 10, 2016
    Messages:
    16
    Likes Received:
    8
    The glasses I'm using are from Survival Laser - you can see all of their glasses at Safety Goggles. Make sure to select the correct ones for your laser death ray wavelength!

    Also, I've seen quite a few glasses with deceptive names to try and "borrow" Eagle Pair's reputation. Caveat Emptor!
     
  7. WayTooManyHobbies

    Builder

    Joined:
    Aug 10, 2016
    Messages:
    16
    Likes Received:
    8
  8. Peter Van Der Walt

    Peter Van Der Walt OpenBuilds Team
    Staff Member Moderator Builder Resident Builder

    Joined:
    Mar 1, 2017
    Messages:
    15,051
    Likes Received:
    4,313
    Thingiverse? (;

    download.jpg


    Attached Files:

    MaryD, Kyo, Mark Carew and 2 others like this.
  9. Rendermandan

    Rendermandan Well-Known
    Builder

    Joined:
    Dec 4, 2015
    Messages:
    107
    Likes Received:
    53
    Just wanted to say, my Acro system is working fantastic!
    794FAE71-140B-4B79-844C-F550C5F23F4D.jpeg
     
  10. vector29

    vector29 New
    Builder

    Joined:
    Jun 23, 2015
    Messages:
    1
    Likes Received:
    0
    I am near the end of my build of the OpenBuilds 20x20 ACRO (bundle kit) with OptLasers PLH3D-6W-XF laser head, along with the CNC xPro V3 controller. I have the frame assembled and wired up. The X and Y axes are moving under GRBL control. I still need to tune the motor current pots and get the laser hooked up to power. This is my first CNC build and it went together refreshingly easy, other than some missing M5 screws.

    I do have a question about the stepping jumper settings on the xPro. The instructions on OpenBuilds say to use 1/16 stepping but there are comments in this forum that mention using 1/32 stepping. Is 1/32 stepping preferred if using the xPro v3, or should I stick with 1/16?

    --thanks, Ed
     
  11. Rendermandan

    Rendermandan Well-Known
    Builder

    Joined:
    Dec 4, 2015
    Messages:
    107
    Likes Received:
    53
    I am using an XproV3. I set mine at 1/16 and get great resolution. And I believe 1/16 is the recommended setting. I do wish there was something in the instructions about setting the jumpers though. My V3 came set at 1/8. So my first etch was twice as large as it was supposed to be. Haha
     
    vector29 likes this.
  12. Able224

    Able224 New
    Builder

    Joined:
    Nov 3, 2017
    Messages:
    3
    Likes Received:
    0
    I recieved and installed my acro 1m x 1,5m. And did some succesful test runs with the grbl software. Thanks to @WildBill for the tip for the z-axis mechanism (is it possible to attach a limit switch to this?). Did anybody install a cable chain or limit switches to there system X-Y axis? Also at what voltage do you run your system? I have the cnc shield on a arduino uno for controlling the system. Thanks :)
     

    Attached Files:

  13. 3boysdad

    3boysdad New
    Builder

    Joined:
    May 27, 2017
    Messages:
    27
    Likes Received:
    14
    ACRO Laser Cable Chains by 3boysdad

    I've put this one together for my cable management. Requires two small drill holes in one of the y-axis plates, but otherwise uses existing holes on the plates.
     
    Scotty Orr and WayTooManyHobbies like this.
  14. WayTooManyHobbies

    Builder

    Joined:
    Aug 10, 2016
    Messages:
    16
    Likes Received:
    8
    I did something similar with mine, but used one of the enclosed 90 degree brackets and existing holes. I'm now in the process of installing a larger chain for the other axis. I plan to use V-Rail Power Supply Mount by jwellman to mount the power supply to the back rail.
     

    Attached Files:

  15. Rich C

    Rich C New
    Builder

    Joined:
    Aug 4, 2014
    Messages:
    66
    Likes Received:
    11
    finally building my 40x40 Acro....just waiting on a missing belt. I'm using an Arduino Uno with CNC shield. Haven't bought my laser module yet as I'm still torn between which one I want. On the fence between a 6W, 10W, and 15W (but leaning towards a 6W since I've noticed that is the normal constant wattage even for the more powerful ones). I'm hoping to be able to cut 1/8" ply and 1/4" acrylic as well as etching.

    I am planning on running mine at 1/32 step which is what I have set the shield jumpers to.

    My questions:
    1 - If anyone is running the same setup, can you post your GRBL settings please?

    2 - Those are running 6W or better lasers (other than the two listed by openbuilds), can you post a pic and where you bought/cost? Definitely want a 3-wire laser (TTL/PWM)

    3 - How about posting your completed laser - pics (I figure 3 pics: 1 of the whole system, 1 of the laser, and 1 of the electronics).
     
  16. Rendermandan

    Rendermandan Well-Known
    Builder

    Joined:
    Dec 4, 2015
    Messages:
    107
    Likes Received:
    53
    I purchased a relatively cheap 14 watt laser from eBay. Shipped from China. I don’t have anything to compare laser power to or measure it in any way. The seller claimed it should etch stone and stainless steel. Infact, they included a sample stainless dog tag to play with. I was able to etch a VERY small logo in the stainless, with very very slow speeds. 1 mm/min. however I could only see it under direct bright light. To the naked eye, it was hardly visible... I would assume they are exaggerating it’s capabilities and power level. Like I said, I don’t have anything to compare it to.

    It does etch wood very well, and using slower speeds, I have been able to cut through 1/8” black acrylic and 1/4” pine with a three passes (no change to z height). So, for what I paid for it, I am satisfied with I have. For now.... :)
     
    GrayUK likes this.
  17. WayTooManyHobbies

    Builder

    Joined:
    Aug 10, 2016
    Messages:
    16
    Likes Received:
    8
    I'm running the same electronics that you are using, and it works nicely. My laser is only 2.3W, though - good for etching wood, cuts thin wood and paper readily, but probably not much more than that. Here's a picture of the entire setup, and a closer shot of the laser. I'll post the GRBL setup later, since I'm running something now. IMG_20180101_161222823.jpg IMG_20180101_161217575.jpg
     
  18. Rich C

    Rich C New
    Builder

    Joined:
    Aug 4, 2014
    Messages:
    66
    Likes Received:
    11
    Thanks for your posts. I've been looking at a 17W with TTL/PWM. (8W constant). I figure, if I'm gonna buy, might as well just buy once heheh.

    ACRO all built up. Now, will just wait on receiving the laser module (and the one missing belt). I'll post a pic once I get the laser mtd. figure it may be a week or two (or three)...

    WayTooManyHobbies, yes please post your GRBL settings...no rush tho :) Thank you
     
  19. WayTooManyHobbies

    Builder

    Joined:
    Aug 10, 2016
    Messages:
    16
    Likes Received:
    8
    Here's my GRBL config - sorry for the delay, I forgot!
     

    Attached Files:

  20. Rich C

    Rich C New
    Builder

    Joined:
    Aug 4, 2014
    Messages:
    66
    Likes Received:
    11
    WayTooManyHobbies, can you post your Arduino file as well plz?
     
  21. WayTooManyHobbies

    Builder

    Joined:
    Aug 10, 2016
    Messages:
    16
    Likes Received:
    8
    Sorry, I don't understand. The only Arduino file besides the GRBL configuration parameters is the hex file that I flashed for GRBL 1.1f. That was downloaded from the GRBL github site. I've compiled it in the past, but in this case it was easier to just grab the pre-compiled version.
     
  22. Rich C

    Rich C New
    Builder

    Joined:
    Aug 4, 2014
    Messages:
    66
    Likes Received:
    11
    Yeah, sorry....so use to having to set/change Arduino setting for drones.... I just realized that Arduino works with the GRBL coding lol
     
    WayTooManyHobbies likes this.
  23. jeffmorris

    jeffmorris Journeyman
    Builder

    Joined:
    Nov 6, 2017
    Messages:
    496
    Likes Received:
    115
    I ordered the ACRO system with CNC xPro board. I am planning to build a two-in-one machine - a 3D printer and an engraver. I'll use the stepper motors, PSU, and extruders from a 3D printer that broke down. The PSU outputs 24VDC. I'll use the engraving head from a CNC engraving machine that is too small. The engraving head has 12VDC motor. I'll use the parts from the CNC engraving machine to make Z-Axis motion actuator.

    The 3D printer is this: Micro Center - Computers and Electronics

    The CNC engraving machine is this: Micro Center - Computers and Electronics.

    I am worried about the plastic parts used in the ACRO system because they may not be strong enough. Any suggestions?
     
  24. dragonfire81m

    Builder

    Joined:
    Jan 17, 2017
    Messages:
    15
    Likes Received:
    4
    3d printer u should be ok . does the cnc pro have inouts for the heater on the hot end ? the engraver not to sure about i have a few parts in thingiverse that could help. im about to load two more parts to the acro system group or just search my screen name
     
  25. jeffmorris

    jeffmorris Journeyman
    Builder

    Joined:
    Nov 6, 2017
    Messages:
    496
    Likes Received:
    115
    I took the broken 3D printer apart and took the stepper motors and cables from it for use on the ACRO machine. I think that the CNC xPro board is not suitable for 3D printer. I can't find out if the engraving motor is 12VDC or 24VDC. The engraving motor is about the same diameter as the stepper motor and about two times longer than the stepper motor. There's no markings or labels on the engraving motor. Are there boards suitable for both 3D printers and CNC routers?
     
  26. WayTooManyHobbies

    Builder

    Joined:
    Aug 10, 2016
    Messages:
    16
    Likes Received:
    8
    Smoothieboard will run either a printer or a CNC router.
     
  27. dragonfire81m

    Builder

    Joined:
    Jan 17, 2017
    Messages:
    15
    Likes Received:
    4
    as far as the engraver motor i would look at the power supply that would tell u the voltage
     
  28. jeffmorris

    jeffmorris Journeyman
    Builder

    Joined:
    Nov 6, 2017
    Messages:
    496
    Likes Received:
    115
    I thought that the engraving machine has a 12V external power supply similar to what notebook computers use but I just found out that the power supply is 24VDC. I'm not sure if I want to order the Smoothieboard now or wait until after I build the new machine and use the CNC xPro board. On Amazon website, there are SmoothieWare boards but they get poor reviews.
     
  29. WayTooManyHobbies

    Builder

    Joined:
    Aug 10, 2016
    Messages:
    16
    Likes Received:
    8
    It looks like the OpenBuilds store is out of stock, but you can get the Smoothie board at Uberclock (Smoothieboard 4x – Uberclock). Panucatt (Controllers) is another alternative for Smoothieware-compatible boards - just make sure the specs match what you are looking for.
     
  30. samsagaz

    samsagaz New
    Builder

    Joined:
    Jan 24, 2017
    Messages:
    4
    Likes Received:
    0
    all the sizes use the same profiles? 2020 and 2040?
     

Share This Page

  1. This site uses cookies to help personalise content, tailor your experience and to keep you logged in if you register.
    By continuing to use this site, you are consenting to our use of cookies.
    Dismiss Notice