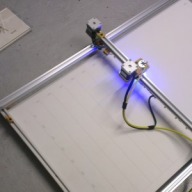
Well done! love the way this turned out and how precise the cuts come out. I have to build one thank you for sharing.
Looks really clean, good job! Wondering what power the laser diode has? Engraving aluminium and glass is possible is see (or plexiglass?)
Thank you for your comments @winand no glass or aluminum, just engraving wood, pvc, plexiglass and cutting paper, stickers and tinkers materials. The diode is a "2W 445nm Blue laser module" from ebay. I just ordered a 3W diode to test. After a few hours of use, I recommend for more than 1W diode, active cooling of the laser module to avoid distorting the x-carriage.
Just a note regarding personal safety here... Unless adequate precautions are taken (and they are quit extensive) laser engraving / cutting PVC, or any products containing PVC, can be extremely dangerous to our health (it does not do the machine any good either). Basically the laser beam will vaporise the PVC liberating Chlorine gas which will combine with the natural moisture in the air to produce a form of Hydrochloric Acid. The use of an adequate fume extraction system is always recommended when using lasers but please remember that unless specialist in-line filters are used you could be poisoning Bambi outdoors. Tweakie.
Thank you @Tweakie for the reminder. Safety is the priority and not only for himself... As mentioned on my G+, I added a fume extractor. But it is true that I have not thought about Bambi is that a charcoal filter enough?
Quite honestly, I do not know the answer to that question - I just avoid lasering anything containing PVC. (I currently use an 'activated charcoal filter' in my extractor which removes the smell of acrylic cutting very well - I did have a HEPA filter in-line as well but they are expensive to maintain (replace) so I am back to just using the charcoal now). Tweakie.
Can I have some recommendations for what filter to get? Also, are the fume extractors simply tubes available from Home Depot? I notice that you have a bunch of 3d printed parts. Is the belt clamp in the skp file?
I do not have more information on this subject for the moment. But I think it depends on the type of material. All that you need is in DIY store. Yes, all parts are in the SKP.
Quick question for you guys before I jump into building one of these. How does one determine the height of the diode from the cutting surface to get the best possible focus or at least to know that you are within the range of the focus for the diode? Thanks in advance Mark
Hi Mark, I have not make accurate test, but between 3 and 7 cm is ok with my diod. Probably a little more or a little less is ok too.
Agreed and the three axis board should be done soon, I will send one your way Bin under the weather but bouncing back
Hi I need to cool the laser diode 2 W. Can you help me how to do it. Any ideas how to do it. Peltier, head sink?
A fan assisted heat-sink seems to be the preferred method by others currently using diode lasers. Tweakie.
Love the build. I am planning one myself, and this has been a great inspiration. Did you have to fabricate all of the brackets yourself? Or were you able to locate them somewhere?
Thank you Yes. All parts are 3d printed on my Lautr3k I am sure you will easily find a person to print them for you.
Yeah, I may have someone I can get to print the parts. I will have to play with the design some and see what I can come up with. Thanks.
Excellent build. Very good. Can you attach your STL files for the 3D printer? And a BOM? Thanks in advance
You can download Skechup. Open file the next tab in the browser windowe and find export file dxf or stl. In the second window that pops up you select stl and done.If the friend does not overtake me this evening I can add files. Sorry for my gramma.
FYI, I know someone that has 2 3d printers... I would need to see the stl or skp files to see what exactly is involved with the prints. Were the originals printed in ABS or PLA?
Hello, printed in PLA (I hate the abs) but both are doing very well. The skp file is in the file list: http://openbuilds.com/builds/much4-laserv-printed-version.937/#openbuilds_files
Beautiful design !, how do you attach the end pieces to the 20x20 V Slot rail. I am new to the 3D printer technique are you able to print the corner pieces with all holes or do you drill some of them afterwards ?
Tanks you @Allan Koch, but the main design is from @Robert Hummel. Yes all part is printed with all holes in place 3D print is magic
@skarab, interesting! you didn't answer my question, how the plastic end piece is attached in the middle of the 20x20 V slot rail, how do you fill up the big hole and make a thread in it ?
Sorry but I have not understand the question ... A photo will be easier to understand, I callback that I do not speak good English, sorry.