Welcome to Our Community

Some features disabled for guests. Register Today.

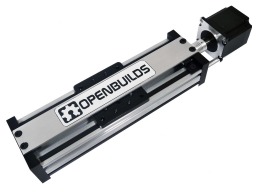
C-Beam Actuator Example Builds

Discussion in 'Other Builds' started by Mark Carew, Mar 30, 2015.

  1. Mark Carew

    Mark Carew OpenBuilds Team
    Staff Member Moderator Builder Resident Builder

    Joined:
    Jun 28, 2013
    Messages:
    2,758
    Likes Received:
    2,441
    @Imagineer1948 , please see the OpenBuilds Parts Resource section here: http://www.openbuilds.com/resources/categories/openbuilds-parts.5/
    For the parts in Solid Work format. We have not completed the assemblies as of yet but do plan to have them soon. (No ETA yet)
    You can also look through user generated parts up to this point to see if there is anything that can help you there. (I see a C-Beam gantry plate assembly has been done by PEERLESS3D that could be helpful)
    http://www.openbuilds.com/resources/categories/parts.1/
    Again we hope to have these done soon.
    Hope this helps
    Mark
     
    #61 Mark Carew, Aug 6, 2015
    Last edited: Aug 6, 2015
  2. Fryguy

    Fryguy New
    Builder

    Joined:
    Apr 7, 2015
    Messages:
    2
    Likes Received:
    0
    What's the load capacity on one of these running the nema 23? I'm just looking for a ballpark number. If I'm using the calculator over at daycounter correctly, they can easily do a couple hundred lbs?
     
  3. esloch

    esloch New
    Builder

    Joined:
    Aug 22, 2015
    Messages:
    4
    Likes Received:
    0
    Hi

    I think will use this type of linear actuator to build my CNC, I just think change some parts :
    - change the "Nut Block for 8mm Metric Acme Lead Screw" with "Anti-Backlash Nut Block for 8mm Metric Acme Lead Screw"
    - change the "1/4" x 8mm Flexible Coupling" with "5mm * 8mm Flexible Coupling"
    - change one of the "C-Beam™ End Mount" with "Threaded Rod Plate™ for Nema 23 Stepper Motor"
    do you think, like me, it's going to improve performance ?

    Thanks for answers
     
  4. Rick 2.0

    Rick 2.0 OpenBuilds Team
    Staff Member Moderator Builder Resident Builder

    Joined:
    Dec 20, 2013
    Messages:
    2,893
    Likes Received:
    1,552
    I don't quite follow the reasoning behind these two. Do you have a Nema 23 with a 5mm shaft? And what is the purpose of changing out one Nema 23 mount for another Nema 23 mount?
     
  5. esloch

    esloch New
    Builder

    Joined:
    Aug 22, 2015
    Messages:
    4
    Likes Received:
    0
    Thanks for replay :)
    OK, I haven't yet buy nema motors, I referred to this GREAT project for using 5mm* 8mm flexible.
    I want ask about the best solution. (edit : BIG mistake ... the referred project use nema17 for Z axis .. sorry :oops:)
    Now, when I see the picture below I think reback for using 1/4"*8mm flexible :confused:
    just ask about best solution. (edit : 1/4" * 8mm flexible :thumbsup:)

    [​IMG]

    About the second, using "Threaded Rod Plate™ for Nema 23 Stepper Motor" imply using 3 screws to attach nema23 motor, this imply best performance ... no ?
    ask about best solution here too

    Thanks :)
     
    #65 esloch, Oct 13, 2015
    Last edited: Oct 13, 2015
  6. Rick 2.0

    Rick 2.0 OpenBuilds Team
    Staff Member Moderator Builder Resident Builder

    Joined:
    Dec 20, 2013
    Messages:
    2,893
    Likes Received:
    1,552
    The existing plate is fine. The shaft doesn't actually pull on the motor so having two supports is sufficient.
     
    Mark Carew likes this.
  7. esloch

    esloch New
    Builder

    Joined:
    Aug 22, 2015
    Messages:
    4
    Likes Received:
    0
    OK, I keep only the first change
    Thanks
    :thumbsup:
     
  8. wildpalms

    wildpalms New
    Builder

    Joined:
    Nov 12, 2015
    Messages:
    1
    Likes Received:
    0
    Just assembling a CBeam actuator which actually came with the anti backlash nut rather than the one in the video. Having some slight difficulty with fitting it to the gantry plate though. The spacers in the kit are 9.6mm OD and 4.15mm thick. The anti backlash nut has pockets milled which are 9.8mm diameter. The spacers obviously don't fit in the pockets but then they don't fit outside them either as not enough material.

    Have I got the wrong spacers? Frustrated if I have as only just got going on the build as I had to wait for other incorrect part to arrive.
     
  9. Ronald4418

    Ronald4418 Well-Known
    Builder

    Joined:
    Nov 4, 2015
    Messages:
    218
    Likes Received:
    33
    With Standard End Plates, is there enough in the way of clearances to allow me to modify them so that I can run 16mm Ballscrews?
    A CAD file would also be very helpful as I haven't yet figured out how to open them in Sketchup.
     
  10. betteraudio

    Builder

    Joined:
    Apr 1, 2016
    Messages:
    1
    Likes Received:
    0
    New to the site and a bit late to the party, obviously, but for anyone who's still looking for CAD files, here's a DWG export of the SU model for the 250. I'm also including my cross-section region for the the C Beam profile (sized in inches, so scale by 25.4 if you're working in metric), from which you can extrude your own custom length. And I'm throwing in my drawing of all 4 V-Slot profiles (metric) for good measure.

    It should be noted that I created all the additional profiles by taking the 2020 V-Slot DXF I found and doing a bit of editing, eyeballing the differences in internal structure, so they may not be exactly perfect, but they do seem to be close enough, certainly at least for concept modelling. Hopefully they'll help someone get started!
     

    Attached Files:

  11. Green Apple

    Builder

    Joined:
    Oct 15, 2015
    Messages:
    1
    Likes Received:
    0
    Wonder if it is possible to replace X-axis of my OX-CNC with a C-Beam, if so, can you guys point me where i can order the needed parts?
     
  12. Jacques D

    Jacques D New
    Builder

    Joined:
    Oct 9, 2016
    Messages:
    49
    Likes Received:
    13
    Hello,

    Has anyone ever tried to change the Acme 8mm leadscrew for a bigger one ? A 10mm or 1/2" one ? If so, can you describe how you did it ?

    Thank you!
     
  13. Ronald4418

    Ronald4418 Well-Known
    Builder

    Joined:
    Nov 4, 2015
    Messages:
    218
    Likes Received:
    33
    I investigated switching to a 10 mm Ballscrew for a Z-Axis and it would've involved having the Ballscrew machined down on the Ends to 8 mm. The problem with this though is that I couldn't find a Ballscrew Nut that would fit within the confines of the C-Beam Extrusions.
     
  14. Jacques D

    Jacques D New
    Builder

    Joined:
    Oct 9, 2016
    Messages:
    49
    Likes Received:
    13
    Okay, too bad. Thank you for your reply !
     
  15. JWhitten

    JWhitten Well-Known
    Builder

    Joined:
    Sep 16, 2014
    Messages:
    62
    Likes Received:
    25
    Why not just use a 10x16x5 ball bearing instead?

    10x16 Bearing 10x16x5 Open

    As for the Ballscrew Nut, why wouldn't something like this work?

    High Reliablity 10mm Ballscrew With Single Nut - Buy 10mm Ballscrew,High Reliablity 10mm Ballscrew,10mm Ballscrew With Single Nut Product on Alibaba.com
     
    GrayUK likes this.
  16. Rodrigo Alvarez

    Builder

    Joined:
    Sep 29, 2018
    Messages:
    2
    Likes Received:
    0
    Hi,

    We just built one of these C-beam 500mm linear actuators and noticed that the Anti-Backlash Nut was surprisingly tight over the lead screw. The Anti-Backlash Nut feels tighter than expected even when we tested screwing it into the lead screw as a stand-alone pair--just the screw and the nut. Our fingers hurt and it seems way tighter than what can be perceived in the assembly video. We checked the grub screw and it was not engaged.

    Is this normal with the new nuts? I worry it is not and it will overstress and overheat the motor and ultimately sink some of the torque that would otherwise become a force in the actuator. If it is not normal, can we get a replacement shipped?
     
  17. Rick 2.0

    Rick 2.0 OpenBuilds Team
    Staff Member Moderator Builder Resident Builder

    Joined:
    Dec 20, 2013
    Messages:
    2,893
    Likes Received:
    1,552
    Add some lubricant. I use a dry silicone spray, others use a PTFE (teflon) spray. Just don't use oil or any other lubricant that stays wet as floating dust particles stick to it and will eventually cause problems. Once you get it lubricated though you should be able to push the carriage with two fingers, spinning the screw as it goes.
     
  18. Alex Chambers

    Alex Chambers Master
    Moderator Builder

    Joined:
    Nov 1, 2018
    Messages:
    2,785
    Likes Received:
    1,366
    What @Rick 2.0 said + if it's still stiff clamp it in the chuck of a battery drill and run it back and forth a few times. New nuts are often/usually stiff.
    Alex.
     
    Rodrigo Alvarez likes this.
  19. Rodrigo Alvarez

    Builder

    Joined:
    Sep 29, 2018
    Messages:
    2
    Likes Received:
    0
  20. Lukaswalden

    Builder

    Joined:
    Nov 1, 2023
    Messages:
    1
    Likes Received:
    0
    How much does this weigh?
     

Share This Page

  1. This site uses cookies to help personalise content, tailor your experience and to keep you logged in if you register.
    By continuing to use this site, you are consenting to our use of cookies.
    Dismiss Notice