Welcome to Our Community

Some features disabled for guests. Register Today.

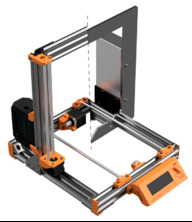
Prusa i3 Bear Upgrade V2

Discussion in '3D printers' started by pek, Feb 8, 2018.

  1. pek

    pek Journeyman
    Builder

    Joined:
    Apr 17, 2017
    Messages:
    196
    Likes Received:
    130
  2. jay3D

    jay3D New
    Builder

    Joined:
    Feb 21, 2018
    Messages:
    36
    Likes Received:
    3
    21.5 hours, 78% done. Filament level looks good. Extrusion is arriving tomorrow. Very excited.
    Assembly has to wait until next week though. :cry:
     
  3. jay3D

    jay3D New
    Builder

    Joined:
    Feb 21, 2018
    Messages:
    36
    Likes Received:
    3
    Status Update:
    • Extrusion: :thumbsup: (arrived)
    • Hardware: :thumbsup: (arrived)
    • Printed parts: :rolleyes: (90% done, I think I forgot two parts :banghead:)
    Extrusion:
    • For the z axis I orderd 370 mm instead of 359 mm or 360 mm. There are multiple reasons for this:
      • I still want to add anti-vibration dampers to the stepper motors. They require an extra 5-6 mm. And I might compensate that later on by replacing the steppers / lead screws with longer ones in the future
      • It gives a little bit more room for standard length linear rails for later, I hope. Saves time and money later for the cuts. So I hope.
      • If the y-axis will be changed to linear rails then there might be a height difference compared to linear rods as well. So this gives a little bit more room to play with later on.
      • also it reduces the number of different extrusions from 4 to 3 and makes assembly easier :cool: (I hated the MK3 assembly when you have to select the right rods... they differed in 2 mm length...)
    Printed Parts:
    • All in all I am clocking around 36 hours of printing for everything
    • I know there is a guide on the print settings, but here is what I used instead:
      • PETG orange from DasFilament.de
      • 0.15 mm layer hight for everything (optics matter! it's called "woman acceptance factor" :cool:)
      • 40 % infill, 3D honeycomb
      • 5 top/lower layers
      • 3 perimeters
    • Problems I got
      • bridging on the end caps. Not sure why. Might be some fine tuning required for this material.
    • Part list
      • I wonder if there are 2 end caps missing for the z-axis? And if so then there are 2 set screws missing in my order... o_O

    Printed Parts.jpg Print Time.jpg

    Mods to come:
    • The optional part is for an Igus RJ4JP-01-08 bearing. I modified it to fit the RJZM-01-08
      • CAD: :thumbsup: (done)
        • Big thanks to pek for using parameters. Made it really easy to modify. I am new to Fusion and didn't know about this feature. :thumbsup:
      • Print: :thumbsup: (done)
      • Upload: :zipit: (pending)
    • Tennis ball dampers for 20x0 V-Slot
      • CAD: :thumbsup: (done)
      • Print: :zipit: (pending)
      • Upload: :zipit: (pending)
    • Cable Chains for Bear Upgrade... I printed those parts already. However, I have to see if the thicker extrusion now requires a little modification to the x-axis part. Shouldn't be a problem.
      • CAD: :confused: (not sure, if required)
      • Print: :thumbsup: (done)
      • Upload: :confused: (let's see about it)
     
    #93 jay3D, Feb 28, 2018
    Last edited: Feb 28, 2018
  4. pek

    pek Journeyman
    Builder

    Joined:
    Apr 17, 2017
    Messages:
    196
    Likes Received:
    130
    Jay3D found an issue with y_motor_mount and y_idler on full upgrade MK3. This was due to a bad export, it is now fixed everywhere (github, here and thingiverse). Thanks a lot Jay3D for the help :)
     
  5. pek

    pek Journeyman
    Builder

    Joined:
    Apr 17, 2017
    Messages:
    196
    Likes Received:
    130
    Well you can add y_idler and y_motor_mount :blackeye:
    Looking forward for pics and feedbacks about your dampers!

    I totally agree with your 370mm on Z axis, good choice.

    Be careful during self test and calibration as you will have more Z height, check that your printer can find the circle on the heated bed.

    Awesome pic! I did not try to print everything at once because I was developing pieces by pieces...

    For bridging on end caps, maybe your Z height was just a bit too low. Do you have a photo?

    Are you currently using RJZM-01-08 on the original MK3? I used them in the past on original rods. But I found they were having to much play. Then I switched to RJ4JP-01-08 with alu rods from Igus, but still too much play (and rod are not strong enough). I am thinking to switching back to ball bearing (never tried them on the Half and Full upgrade). Note that it is important to use rods from Igus when using these type of bearing. The bearing will self-lubricate the rod and if the rod is too smooth (like a rod for ball bearing) then the particles coming from the self-lubrication will not stick to the rod. This results in a premature wear and so more play.

    Fusion is very easy to learn and use ;)
     
  6. jay3D

    jay3D New
    Builder

    Joined:
    Feb 21, 2018
    Messages:
    36
    Likes Received:
    3
    Already done. Printing a damper right now to test my design.

    No, not at the moment. I bought them for the upgrade since I have to dismantle everything anyway.
    Here is the thing though: I will just try them out. If I don't like them then I can always switch back to the LM8UU. If they are running ok then I don't care about the rods since I eventually will replace those by linear rails anyway.
     
  7. dukemagus

    dukemagus New
    Builder

    Joined:
    Feb 25, 2018
    Messages:
    3
    Likes Received:
    0
    Found a supplier of openbuild rods in Brazil (go me!) now I just need to wait until April, so both yours and mine mk2s upgrade kit arrives and anything in the build guide that needs to be corrected will already be so.
     
  8. kabar03

    kabar03 New
    Builder

    Joined:
    Jul 12, 2016
    Messages:
    22
    Likes Received:
    1
    Great design Pek, already printing the parts. Although I have a Prusa MKs2 I'm keeping it stock and building a clone prusa on your frame, one area I am deviating due to cost are the Z axis motors and screws, couplers. versus integrated screws/low profile motors. I have already modded the Z axis printed parts (X axis rod holders) to accept the coupler on the bottom of the Z/X axis holders, I do see I may have to raise the Y and bed in your design. (Due to couplers and regular height motors) No problem there I think, I can add height to the Y axis parts (rod holders, Ymotor bracket and idler).. to raise them from the frame. Do see any other problems I may run into?
     
  9. kabar03

    kabar03 New
    Builder

    Joined:
    Jul 12, 2016
    Messages:
    22
    Likes Received:
    1
    After a little more thought, may I solve the problems above by just adding longer Z axis profile to compensate for the standard motors and screw couplers?
     
  10. pek

    pek Journeyman
    Builder

    Joined:
    Apr 17, 2017
    Messages:
    196
    Likes Received:
    130
    I do not know when I will have time to start developing the linear rail for my upgrade but I really want them! If you come to a solution before me, please share :)

    Would you be kind to share the supplier link? I could add it to the store list here : prusa_i3_bear_upgrade/openbuilds_stores_list.md at master · gregsaun/prusa_i3_bear_upgrade · GitHub

    I think you were speaking about MK2.5 upgrade kit no (you wrote MK2s)? Can't wait to get mine!

    I am happy you like it and would like to build one. I did some measurements to help you (maybe you do not need to change anything) :

    couplers_measures.jpg

    Note that the 21mm takes end stop screws into account. Maybe you could try a MK3 clone instead, you will not have this end stop then...

    Also, top plate of Z motor mounts is 7mm thick (so 21mm becomes 28mm)

    If you are in blocked somewhere to update the Fusion 360 files do not hesitate to ask me ;)
     
  11. Stam

    Stam New
    Builder

    Joined:
    Dec 6, 2017
    Messages:
    3
    Likes Received:
    0
    @pek What hot end do you have there?
     
  12. pek

    pek Journeyman
    Builder

    Joined:
    Apr 17, 2017
    Messages:
    196
    Likes Received:
    130
    Original Prusa i3 MK2s
     
  13. kabar03

    kabar03 New
    Builder

    Joined:
    Jul 12, 2016
    Messages:
    22
    Likes Received:
    1
    Thanks Pek, no MK3 here, already have a mini rambo from another project to move to this.. so no added expense for the new board. Thanks for the measurements, looks like the problems will be minimal. I can move the endstop up to the top of the X axis no problem there. Think I have everything ordered for this build, now to wait for arrival.


  14. xequtor

    xequtor New
    Builder

    Joined:
    Jan 23, 2018
    Messages:
    44
    Likes Received:
    1
    got quote for the V-Slots from Watterott, 63 EUR incl cut.

    Now don't know what to do or buy, the original parts I need to make the Bear MK3 will cost me about 400 EUR, (motors, Einsy, frame, MK52 and rest of the stuff)
    My other (or additional) idea was to buy the MK2.5 upgrade (130 EUR) and enhance my Alu Ultimaker, maybe add Einsy and make Prusa Ultimaker Alu.
     
  15. pek

    pek Journeyman
    Builder

    Joined:
    Apr 17, 2017
    Messages:
    196
    Likes Received:
    130
  16. xequtor

    xequtor New
    Builder

    Joined:
    Jan 23, 2018
    Messages:
    44
    Likes Received:
    1
    yes, that's the one, build it last year, was running and printing last year the I got MK2S which I sold and now MK3.

    from the MK2S upgrade I can use only the motors and partial (if at all, it is just MK42 and I want MK52) the bad, so it's not a good deal, better off to buy the parts I need from Prusa, and will cost me on the end more if I buy the MK2S upgrade kit
    BOM:
    MK2.5 upgrade with MK52 bed - 160 EUR
    Einsy - 98 EUR
    Motors - 75 EUR (3xX,1xY,1x E, instead Z with integrated lead screw I get 2 X or Y motors, Prusa wants 100 EUR for one Z motor, 15 for X or Y )
    Frame - 63
    MK52 carriage - 28
    Small Parts, screws, brackets - 20-40 EUR
    already got original MK3 rods and bearing
    Got 300W 24V PSU
    Ordered 10 PCB's for $2 to make Power Panic circuit

    Total about 450 EUR, but for that this will be better than original MK3

    Besides all that, I'm waiting for 2 Kodama Obsidian Deluxe
     
    #106 xequtor, Mar 2, 2018
    Last edited: Mar 2, 2018
  17. xequtor

    xequtor New
    Builder

    Joined:
    Jan 23, 2018
    Messages:
    44
    Likes Received:
    1
    #107 xequtor, Mar 2, 2018
    Last edited: Mar 2, 2018
  18. pek

    pek Journeyman
    Builder

    Joined:
    Apr 17, 2017
    Messages:
    196
    Likes Received:
    130
    You will need to increase a bit the position of Z motor mounts because the X/Y motors are a thicker. This is not really a problem, just be careful to align them correctly. Bonus, you will win few mm in Z axis as well.

    Otherwise do you know those packs?
    Stepper motor with integrated lead screw - Zaribo Research & Development
    Stepper Motor Kit for Zaribo 320 - Zaribo Research & Development
    Reprap Prusa i3 MK2 MK2S 3d printer 42 stepper motor, 320m L Z Motor with Trapezoidal Lead Screw compatiable with mini Rambo-in 3D Printer Parts & Accessories from Computer & Office on Aliexpress.com | Alibaba Group
    Do not about the quality, and seems to be a bit more expensive than what you plan to do. But better to give you the info...

    I heard about this, thanks for the link and details!
     
  19. xequtor

    xequtor New
    Builder

    Joined:
    Jan 23, 2018
    Messages:
    44
    Likes Received:
    1
    the Zaribo kit is good alternative or 3 Original Prusa motors and 2x Z stepper motor with integrated lead screw.
    Thanks for the links, did not know this one yet.
     
  20. pek

    pek Journeyman
    Builder

    Joined:
    Apr 17, 2017
    Messages:
    196
    Likes Received:
    130
    Happy I could help you. I think this question will come more and more when people will start receving the MK2.5 upgrade. In a similar idea, I sent an email to Prusa few weeks ago to ask for the MK2s to MK3 upgrade but without the frame, it was not possible. However I am pretty sure that you can re-sell the frame alone quickly and for a good price.
     
  21. kabar03

    kabar03 New
    Builder

    Joined:
    Jul 12, 2016
    Messages:
    22
    Likes Received:
    1
    Pek, is there a Solidworks file available for the PS mount (Lower)? I need to adapt it for a PS I bought on Amazon which is slightly larger.
    Have you thought about a FB group for the Bear?
     
  22. kabar03

    kabar03 New
    Builder

    Joined:
    Jul 12, 2016
    Messages:
    22
    Likes Received:
    1
  23. pek

    pek Journeyman
    Builder

    Joined:
    Apr 17, 2017
    Messages:
    196
    Likes Received:
    130
    Sorry, what PS is meaning?

    Nope I do not have facebook account, but regularly read the Prusa Owners Group. That would be awesome if someone could drop a message about my upgrade over there. I do not want to force anybody here, please do it only if you think it deserve it!

    Why not for the group, if you think it is a good way to chat about it, then I will create an account. Otherwise, what about reddit?

    EDIT: I didn't catch you were talking about a group!
     
    #113 pek, Mar 2, 2018
    Last edited: Mar 2, 2018
  24. pek

    pek Journeyman
    Builder

    Joined:
    Apr 17, 2017
    Messages:
    196
    Likes Received:
    130
    Nice! Just be careful, my Z motors are at the same position as the MK3, which is 1.8mm higher than MK2(s). This reduce the place for the coupler by 1.8mm. I do not know at which height the Z motors are on the Haribo/Zaribo.

    Let me know if you need some measurements on my upgrade and/or original MK2s/MK3
     
  25. xequtor

    xequtor New
    Builder

    Joined:
    Jan 23, 2018
    Messages:
    44
    Likes Received:
    1
  26. kabar03

    kabar03 New
    Builder

    Joined:
    Jul 12, 2016
    Messages:
    22
    Likes Received:
    1
    Understood. These help with those that are sourcing parts for the build versus moving their parts over from an original. Clearance for the couplers on full size motors for Z.

     
  27. kabar03

    kabar03 New
    Builder

    Joined:
    Jul 12, 2016
    Messages:
    22
    Likes Received:
    1
    PS= power supply., sorry

    I like FB groups for the discussions and also the visuals. Easy to upload content or questions on the fly I suppose. Openbuilds has a FB group, you could post your project on there also.
    Also, once your project has a group, it is easy to share it among other 3d printing groups.

    I've printed almost all of the parts, very nice work on the parts design. Fit, finish and strength are great!

     
  28. kabar03

    kabar03 New
    Builder

    Joined:
    Jul 12, 2016
    Messages:
    22
    Likes Received:
    1
    Once the few extrusions arrive that I need I can start building. At that point I can test some placement of the full size Z motors with couplers. I have a few ideas if there are any snags in fitting.
     
  29. pek

    pek Journeyman
    Builder

    Joined:
    Apr 17, 2017
    Messages:
    196
    Likes Received:
    130
    Not all new parts are listed in this topic, other parts have also been modified like the Z motor mount and Y belt holder. You can see all modifications here : Commits · prusa3d/Original-Prusa-i3 · GitHub . They are more than a week old ;) . My upgrade takes all these new parts into account ;) .

    Below are the PSU covers I am using for my build (in STEP format). For MK2s there are two versions : molded and 3D printed. They do not deliver any STL/SCAD file for the molded one so I tried to measure mine as close as possible. Same problem with MK3, no STL/SCAD available, check my issue here : MK3 PSU dimensions · Issue #11 · gregsaun/prusa_i3_bear_upgrade · GitHub . To be sure, take some margins with those covers.

    Thanks, I will think about creating a FB group then. I prefer forums because it is better organized but I understand the importance and easy access of FB.

    Keep us in touch with this, will be useful for others (and for me after receiving my MK2.5)
     

    Attached Files:

    kabar03 likes this.
  30. pek

    pek Journeyman
    Builder

    Joined:
    Apr 17, 2017
    Messages:
    196
    Likes Received:
    130
    BTW, have you read this?

    Original Prusa i3 MK3 after 3 months and MMU 2.0 - Prusa Printers

    • Powder coated steel sheets -> they still have some issues
    • MK2.5 starts shipping on Monday! But they expect to ship them all by the end of May
    • "Upcoming firmware 3.2.0 RC1 approx. in the second week of March will reintroduce Linear Advance and it will also bring linearity correction for the MK3 extruder. The idea behind it is that stepper motor with micro stepping doesn’t always move linearly but pulsates as it moves between the steps. This can create sort of moire effect on the object surface. New Trinamic drivers we use on the MK3 can be adjusted to compensate this effect." -> those drivers become more and more interesting
    • Complete new design for MMU (I have to think about this for my upgrade)
    • "We are also finishing a rewrite of the MMU smart wipe tower which will enable using the waste material as an infill" -> very clever
     

Share This Page

  1. This site uses cookies to help personalise content, tailor your experience and to keep you logged in if you register.
    By continuing to use this site, you are consenting to our use of cookies.
    Dismiss Notice