Welcome to Our Community

Some features disabled for guests. Register Today.

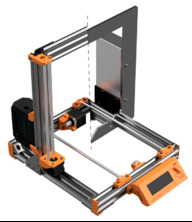
Prusa i3 Bear Upgrade V2

Discussion in '3D printers' started by pek, Feb 8, 2018.

  1. xequtor

    xequtor New
    Builder

    Joined:
    Jan 23, 2018
    Messages:
    44
    Likes Received:
    1
    yeah, I'm also getting the $10 voucher for powder coated for my MK3.

    Still don't know what to build, for now my idea is to get the MK2.5 upgrade and upgrade my Ultimaker Alu
     
  2. pek

    pek Journeyman
    Builder

    Joined:
    Apr 17, 2017
    Messages:
    196
    Likes Received:
    130
    I think you should then go step by step, start with one upgrade, use it a bit and then start with another one if still needed.
     
  3. pek

    pek Journeyman
    Builder

    Joined:
    Apr 17, 2017
    Messages:
    196
    Likes Received:
    130
    #153 pek, Mar 9, 2018
    Last edited: Mar 10, 2018
    Olichop likes this.
  4. kabar03

    kabar03 New
    Builder

    Joined:
    Jul 12, 2016
    Messages:
    22
    Likes Received:
    1
    Nice! Just voted. Everyone please vote, takes a second.
     
    pek likes this.
  5. pek

    pek Journeyman
    Builder

    Joined:
    Apr 17, 2017
    Messages:
    196
    Likes Received:
    130
    Thanks kabar!

    EDIT: btw, I have added a special thanks on the main page (github, here and thingiverse) to the most active member here. Let me know if you prefer to not have your username visible to others.
     
    #155 pek, Mar 10, 2018
    Last edited: Mar 10, 2018
  6. kabar03

    kabar03 New
    Builder

    Joined:
    Jul 12, 2016
    Messages:
    22
    Likes Received:
    1
    Parts are slowly arriving in for my Bear scratch build....parts all printed... Mitsumi bearings arrived and nice hardened and very straight rods arrived from McMaster Carr....waiting
     
  7. pek

    pek Journeyman
    Builder

    Joined:
    Apr 17, 2017
    Messages:
    196
    Likes Received:
    130
    Looking forward to see your "Frankenstein" Bear Upgrade printing :D
     
  8. jay3D

    jay3D New
    Builder

    Joined:
    Feb 21, 2018
    Messages:
    36
    Likes Received:
    3
    pek likes this.
  9. jay3D

    jay3D New
    Builder

    Joined:
    Feb 21, 2018
    Messages:
    36
    Likes Received:
    3
    I started my build over the weekend. Still waiting for some parts so I haven't finished it yet.

    I am struggleing to decide:
    Option a) I go with the tennis ball dampers I printed. Looks cool, but might only result in a vibration decoupeling and not a vibration decrease
    Option b) I take L-brackets to anchor the whole thing down to my 30 kg cement plate and isolate that with the rubber matts I am using already. Mass should reduce the vibration in the first place and stiffen the whole construction in addition to the extrusion.
     
    pek likes this.
  10. jay3D

    jay3D New
    Builder

    Joined:
    Feb 21, 2018
    Messages:
    36
    Likes Received:
    3
    I'll make some pictures today on my progress.
     
    pek likes this.
  11. pek

    pek Journeyman
    Builder

    Joined:
    Apr 17, 2017
    Messages:
    196
    Likes Received:
    130
    Option b sounds much better to me :)
    Thank you very much ;)
     
  12. pek

    pek Journeyman
    Builder

    Joined:
    Apr 17, 2017
    Messages:
    196
    Likes Received:
    130
    JustinTime likes this.
  13. pek

    pek Journeyman
    Builder

    Joined:
    Apr 17, 2017
    Messages:
    196
    Likes Received:
    130
    Thank you. Yes it is a very clean build and well detailed. However, I suspect it will not strong enough for aluminum cutting. I prefer The Beeline CNC by blterry1 which looks very strong.

    Still not see an idea I have in my head since several month to make a very strong and compact frame, maybe it is a bad idea, I didn't do any drawing yet :D
     
  14. jay3D

    jay3D New
    Builder

    Joined:
    Feb 21, 2018
    Messages:
    36
    Likes Received:
    3
    My motto is usually "overkill is underrated". However, even for me there is too much extrusion on the Beeline. I think you can get the same rigid frame with much cheaper materials.
     
  15. kabar03

    kabar03 New
    Builder

    Joined:
    Jul 12, 2016
    Messages:
    22
    Likes Received:
    1
    Nice!

     
  16. kabar03

    kabar03 New
    Builder

    Joined:
    Jul 12, 2016
    Messages:
    22
    Likes Received:
    1
    Not a fan of openbuilds wheel bearings for CNC. I have a homebuilt CNC and used linear rails. I can see a problem with swarf and dust collecting very rapidly on the wheels/bearings and becoming a problem. My machine has run daily for over 10 years problem free with linear rails ( Aluminum, wood and acrylic), the bearing blocks have built in wipers that keep the rail surfaces clean.

     
  17. pek

    pek Journeyman
    Builder

    Joined:
    Apr 17, 2017
    Messages:
    196
    Likes Received:
    130
    Yes all the extrusion for the workplate is too much for me too (but offer way to bolt parts). I was more talking about the other parts :)

    I never tried v-slot motion yet but what I can read is that they are very capable (some are cutting metal, not only aluminum). Swarf and dust is clearly the downside but can be solved with "accordion protections" (do not know it is called).

    Let me know when I can come to your place to steal your CNC :ROFL:
     
  18. kabar03

    kabar03 New
    Builder

    Joined:
    Jul 12, 2016
    Messages:
    22
    Likes Received:
    1
    Ways Covers :) I'll post a few pics once I clean it off today, been a work table but I need to cut some alum sheet.
     
  19. kabar03

    kabar03 New
    Builder

    Joined:
    Jul 12, 2016
    Messages:
    22
    Likes Received:
    1
    Pek, is there any reason the new Y bearing holder won't work on the stock MKS2?
     
  20. pek

    pek Journeyman
    Builder

    Joined:
    Apr 17, 2017
    Messages:
    196
    Likes Received:
    130
    Because if this part : Original-Prusa-i3/y-corners.stl at MK2S · prusa3d/Original-Prusa-i3 · GitHub . As we have more place on the Bear upgrade I decided to cover almost all the bearing in order to have the best fit and fixture possible (similar to a SC8UU carriage).

    The other problem is the alu frame plate, the bearing needs a "V" shape to pass through it. I do not test it but it might be possible that bearing for half upgrade works with original MK3.

    If you are interested in getting this bearing holder for original MK2 then I can try to design it for you ;)
     
  21. pek

    pek Journeyman
    Builder

    Joined:
    Apr 17, 2017
    Messages:
    196
    Likes Received:
    130
    Interested in few pics, thanks :)
     
  22. pek

    pek Journeyman
    Builder

    Joined:
    Apr 17, 2017
    Messages:
    196
    Likes Received:
    130
  23. kabar03

    kabar03 New
    Builder

    Joined:
    Jul 12, 2016
    Messages:
    22
    Likes Received:
    1
    No reason to design for the original. I have just seen many posting problems overtightening the stock U bolts and thought yours could be a good solution for them (stock builders). Printed yours and they fit perfect for the misumi bearings. Thanks
     
  24. pek

    pek Journeyman
    Builder

    Joined:
    Apr 17, 2017
    Messages:
    196
    Likes Received:
    130
    Are you using the Half version on the original MK2?
     
    #174 pek, Mar 13, 2018
    Last edited: Mar 13, 2018
  25. nixda

    nixda New
    Builder

    Joined:
    Oct 17, 2016
    Messages:
    3
    Likes Received:
    0
    Hello, is it possible to use normal aluminium extrusions instead of the special openbuild ones?
     
  26. pek

    pek Journeyman
    Builder

    Joined:
    Apr 17, 2017
    Messages:
    196
    Likes Received:
    130
    No and yes :D

    I cannot manage several type of extrusions for this project, it is already quite hard to manage all printers :D . However, as this question comes back regularly, if you open the Fusion 360 project, you will find on each parts two parameters : rail_profile_width and rail_profile_height. You can change those parameters to make them compatible to other extrusions. I will write a help on how to do this.

    However, you will not be able to change the angles of the rail profiles (by a parameter). This is made on purpose as some parts are printed vertically. If you do a 90° angle for vertical part then you will need a support and the accuracy will be quite bad. If you put my parts on a V-Slot you will see how well and easy they are aligning. I do not really see a problem to use parts with an angled rail profile on T-Slot extrusions, you just need to be careful to align/square the part during the build (but this is quite common with T-Slot parts in general).
     
  27. nixda

    nixda New
    Builder

    Joined:
    Oct 17, 2016
    Messages:
    3
    Likes Received:
    0
    Thanks for the quick answer. I guess then I will go with the more expensive v-slot extrusions. :)
     
    #177 nixda, Mar 13, 2018
    Last edited: Mar 13, 2018
  28. kabar03

    kabar03 New
    Builder

    Joined:
    Jul 12, 2016
    Messages:
    22
    Likes Received:
    1
    half version?
     
  29. pek

    pek Journeyman
    Builder

    Joined:
    Apr 17, 2017
    Messages:
    196
    Likes Received:
    130
    Maybe I will also use later openbuilds linear rails (using v-slot) ;)

    I think I did not understand something :ROFL: . There are 3 versions of my bearing holder, one for Half Upgrade, one for Full MK2(s) and MK2.5 and one for MK3 : Prusa i3 Bear Bearing Holders by pekcitron. Are you using my bearing holders or the stock one?
     
  30. kabar03

    kabar03 New
    Builder

    Joined:
    Jul 12, 2016
    Messages:
    22
    Likes Received:
    1
    yes, yours for full MK2 upgrade
     

Share This Page

  1. This site uses cookies to help personalise content, tailor your experience and to keep you logged in if you register.
    By continuing to use this site, you are consenting to our use of cookies.
    Dismiss Notice