Welcome to Our Community

Some features disabled for guests. Register Today.

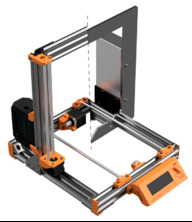
Prusa i3 Bear Upgrade V2

Discussion in '3D printers' started by pek, Feb 8, 2018.

  1. pek

    pek Journeyman
    Builder

    Joined:
    Apr 17, 2017
    Messages:
    196
    Likes Received:
    130
    I do not recommend to integrate it to Z top. Z top is 0.2mm lower than top of v-slot for tolerances. And depending how you cut the v-slot and/or how you tight them, then you might twist the X axis a bit.
     
  2. pek

    pek Journeyman
    Builder

    Joined:
    Apr 17, 2017
    Messages:
    196
    Likes Received:
    130
    GrayUK and Kyo like this.
  3. xequtor

    xequtor New
    Builder

    Joined:
    Jan 23, 2018
    Messages:
    44
    Likes Received:
    1
    congrats, I was hoping you will win as this is the Bear Upgrade is a great build, I advertised your build also on last Live YouTube stream of CNC Kitchen as I'm admin on his stream (only admins can post links)

    and also I feel sorry for you :) with the PowerPack you will have to spend your free time designing and build stuff, I wanted years ago also build a desktop CNC but then 3D printing got better and cheaper.
     
    #213 xequtor, Mar 27, 2018
    Last edited: Mar 27, 2018
  4. pek

    pek Journeyman
    Builder

    Joined:
    Apr 17, 2017
    Messages:
    196
    Likes Received:
    130

    Attached Files:

    kabar03 and Kyo like this.
  5. Michael.M

    Michael.M Veteran
    Staff Member Builder Resident Builder

    Joined:
    Jan 21, 2017
    Messages:
    432
    Likes Received:
    266
    Congratulations Pek! Now your going to build a Sphinx CNC router right? Haha
     
    Kyo likes this.
  6. pek

    pek Journeyman
    Builder

    Joined:
    Apr 17, 2017
    Messages:
    196
    Likes Received:
    130
    Haha I was so many time close to buy everything for a Sphinx build (last time I was in contact with someone that could cut the plates for me) ! I love you design Kyo, simple and efficient!

    However, I have some idea in my head that I would like to give a try, something that I never seen here (maybe for a reason :D )
     
    Kyo likes this.
  7. kabar03

    kabar03 New
    Builder

    Joined:
    Jul 12, 2016
    Messages:
    22
    Likes Received:
    1
    Pek, a feature request if you have some time. Z motor mounts extended from frame to accommodate mgn12 rails? Also, X axis carriage with mgn12 rail mount on rear? I understand this could be a low priority for you. The step files do not import into Solidworks well. Is there an option to export on your end to a more friendly Solidworks file? I could possibly edit the parts myself then. I've not used Fusion 360 to be proficient in it. Thanks for any consideration.
     
  8. pek

    pek Journeyman
    Builder

    Joined:
    Apr 17, 2017
    Messages:
    196
    Likes Received:
    130
    This is definitely something I would like to work on it! I just do not want to make it quick and dirty, I like to take my time to develop things. I am currently getting more and more familiar with the X axis end extruder. Next feature will be improved X-ends (based on MK3 R2 design) and improved MK2.5/3 extruder which will also solve this issue : Filament path is not straight through Bondtech wheels · Issue #51 · prusa3d/Original-Prusa-i3

    The big next things will be an open source filtered case and a CNC !
     
    kabar03 likes this.
  9. xequtor

    xequtor New
    Builder

    Joined:
    Jan 23, 2018
    Messages:
    44
    Likes Received:
    1
    @pek
    the Y axis bearings holders, do they have advantage over the U shaped screws from Prusa or just for people who do upgrade and use zip ties?
    I don't know if I should order them or use one you designed
     
  10. pek

    pek Journeyman
    Builder

    Joined:
    Apr 17, 2017
    Messages:
    196
    Likes Received:
    130
    I ahve not done any scientific comparison but too me they are better :
    • You have less chance to break the bearing compared to U bolt
    • Better repartition of the forces
    • If you take the time to perfectly align smooth rods, then you can screw them stronger (be careful to not exaggerate as the holes in aluminum carriage have sharp angles)
    • Less slop
     
  11. xequtor

    xequtor New
    Builder

    Joined:
    Jan 23, 2018
    Messages:
    44
    Likes Received:
    1
    DO NOT order the cut V-Slot from Watterott, very bad cut quality and not precise cut +/- 1mm, now I regret I started with V-Slot and not ordered from Misumi
     
  12. pek

    pek Journeyman
    Builder

    Joined:
    Apr 17, 2017
    Messages:
    196
    Likes Received:
    130
    I'll mention this into my openbuilds distributor list

    I am sorry to hear this, I am working with Openbuilds distributors to get my kit easily and accurately cut, hope I will have more news to share soon
     
  13. pek

    pek Journeyman
    Builder

    Joined:
    Apr 17, 2017
    Messages:
    196
    Likes Received:
    130
    First of ll I am sorry to not be active a lot here. The FB group gives me lots of work (and this is a very very good news) and so I had to make some choices. If I would like to be active on openbuilds, thinginverse, patreon, facebook, prusa forum as well as talking with distributors (and planing future projects) then I will do quick and dirty work with the community and I will not have time to create new parts/builds. I like to take my time to build something good (this includes community!), there is already plenty of quick and dirty things out there!

    Talking about new parts, I have a new X axis and extruder coming soon. Some features (for now) :
    1. Extruder motor closer by 2.5mm to X rods to avoid vibration
    2. Extruder is lighter
    3. I found the perfect filament path (original one is wrong)
    4. Solve lots of mechanical bugs form Prusa design
    5. Ventilation of hotend sink as been improved a lot (will better cool down PINDA probe as well)
    6. Perfect belt alignment
    7. X ends have been beefed up
    8. X motor is closer to rods to reduce vibration
    9. Overall rigidity as been increased
    10. New tensioning system that keeps the belt perfectly aligned
    11. Easier to remove extruder for maintenance (changing the PTFE tube for example)
    Some features I am working on :
    - I will be able to make Extruder motor even closer to smooth rods by reducing the x carriage thickness
    - Use only one screw for extruder idler (this is what Bondtech is doing and all feedback I get are very promising)
    - Try to move extruder motor even closer to rods
    - Rework x-carriage-cover to make it easier to use during maintenance
    - Currently it is build for MK2.5, but will be then released for MK3 and MK2s
    - Use a shorter PTFE tube to improve flexible filament extrusion

    Some pics :

    bear_x_axis_01.jpg


    bear_x_axis_02.jpg


    bear_x_axis_03.jpg
     
  14. dukemagus

    dukemagus New
    Builder

    Joined:
    Feb 25, 2018
    Messages:
    3
    Likes Received:
    0
    Please tell me this won't require more profile cuts. I just ordered the upgrade for ratrig It's a WHOLE OCEAN away from where I live, if I need to ship it back for either warranty or part changes, I'm ruined.
     
  15. pek

    pek Journeyman
    Builder

    Joined:
    Apr 17, 2017
    Messages:
    196
    Likes Received:
    130
    No worry, no change on the frame side. It is even compatible with original MK2 or MK3 frame.

    You will only need to get some hardware like GT2 16T idler and print extruder parts, x end idler and x end motor. Hardware is easy to source and cheap
     
  16. wastelandfab

    Builder

    Joined:
    Sep 8, 2016
    Messages:
    42
    Likes Received:
    15
    I built your frame, love it. I will support you on patron, what else do you have planned? One problem I had is when taking the machine apart to add a nocturnal fan the Rambo case cover s screws pulled out. Do you have any updates to the Rambo case? Great work btw. I have a new mk2s.
     
    pek likes this.
  17. justageek

    justageek New
    Builder

    Joined:
    Mar 22, 2018
    Messages:
    1
    Likes Received:
    0
    Come hang out on the Facebook page. I think you'll find what you need.
    Log into Facebook | Facebook
     
  18. pek

    pek Journeyman
    Builder

    Joined:
    Apr 17, 2017
    Messages:
    196
    Likes Received:
    130
    I am happy you are happy with your new frame !!! :D

    Thank you for the support on Patreon, this is very useful for me to continue what is just starting with the Bear upgrade. I really want to push forward lots of tools (3d printer but also others like CNC)

    The next thing is the extruder and x axis rework (will be compatible from MK2 to MK3). Then, I am not 100% but maybe an open source filtered enclosure (I really need one). And the next "big" thing will be linear rails for the Bear upgrade (I am already doing some small tests).

    The actual RAMBo cover is a pretty bad design from Prusa. I have no replacement to propose yet but I know the community around the Bear upgrade is working on it. Once a new RAMBo cover will be available (and if I like it) I will add it to this page : gregsaun/prusa_i3_bear_upgrade . Could you point me which screw pulled out from this drawings : gregsaun/prusa_i3_bear_upgrade
     
    wastelandfab likes this.
  19. ufoDziner

    ufoDziner New
    Builder

    Joined:
    Jul 30, 2018
    Messages:
    4
    Likes Received:
    1
    Hello,
    I'm interested in building a MK3 version. I don't have a donor MK3 at the moment, so I'm considering doing a complete build from scratch. I was planning on getting the kit from all3dmakers, but am unsure where to source the rest of the parts. When I do this, I'd like to use good parts from the start. Something like Moons' motors, ruby nozzle, harder shafts, etc... This leads me to my questions:

    Would it make sense to do it this way, or would a donor be more cost effective?
    Is there a list somewhere of the upgrade parts such as the Moons' motors?

    Thanks in advance. I'm really looking forward to getting the build started!
     
  20. pek

    pek Journeyman
    Builder

    Joined:
    Apr 17, 2017
    Messages:
    196
    Likes Received:
    130
    @ufoDziner Honestly do not go this way, you will pay more for a lower quality and without guarantee. Heated bed are not easy to make, kind of chance to make them flat and magnets are hard to source even for Chinese manufacturers. The failure rate is quite high even for Prusa! Filament sensor is a problem because it is very hard to get them, you need to get them in huge quantities and there is no replacement. So "black" market does exists for them and Prusa will not selling one for you if you did not get a kit from them.

    Moons motor are not necessary, yes today they are running quieter and colder but it is not because they are better manufactured (they are made close to Prusa motor, in china too). One of the guy from community born with inconsistent extrusion is running dead silent and cold Prusa motor on RAMPs board. Investigation is still on going and need more tests but the biggest problem seems to be the driver configuration. He is working hard on this and hope he will publish something interesting soon. Moons are running better mainly because they better match the bad Prusa configuration of the drivers.

    I heard lots of mixed review for the Olsson Ruby nozzle, be careful with it. Someone else is doing one but I do not remember who, might be good to compare.

    Latest Prusa shaft and bearing are good. Rods are hardened and very strong, bearing is just okay, but you will not get something better with this type of axis. Which is why I will add linear rails to the Bear. Add tons of grease inside the bearing and get some spare. Honestly you will not get something very much better from Misumi either. SKF would be a good alternative but very expensive and very hard to align (you will need special measuring tool and some tricks to align the rods). Also X axis cannot really be better due to its design, whatever you are going to put on it, you will still have a not strong enough axis and hard to maintain.

    I would say that the best upgrade after the Bear frame you can do on the MK3 is the extruder. This week I will publish an update of the Bear extruder with lots of very nice features but you can also have a look to the Skelestruder from JLTX.
     
  21. ufoDziner

    ufoDziner New
    Builder

    Joined:
    Jul 30, 2018
    Messages:
    4
    Likes Received:
    1
    @pek Thanks for the thorough response. I wasn't planning on building the head bed from scratch, but buying the Prusa one. The thought was that I could get a Bear V2.0 to build for a similar cost as just buying the Prusa i3 MK3 kit. It appears that's not the case. No problem, I'll order the Prusa.

    I'm interested to see what you've got coming for an extruder. It appears that Prusa has another revision today as well. Funny enough, I was considering the extruder designed by jltx to go on my build. It's very interesting for sure.

    BTW, does the Bear upgrade have a Y-axis stop built into the rear motor mount rather than using the bearing? On a similar note, is there a central stop for the Y-axis on the front as well (seems that the MK3 uses the bearing as a stop on the front too).

    Thanks!
     
  22. pek

    pek Journeyman
    Builder

    Joined:
    Apr 17, 2017
    Messages:
    196
    Likes Received:
    130
    @ufoDziner this what I could see from people trying to built from scratch, they end up with something more expensive. However, I recommend to use Sunon MF40100V1-1000U-G99 instead of the Noctua. Noctua is unable to cool down the hotend correctly. Also replace the second Bondtech gear by a bearing (will be proposed as an option on my extruder). Bondtech gears are not meshing correctly and will introduce inconsistent extrusion (other factors are going in this issue but this is the biggest one).


    Bellow some pics of my extruder/x-axis and you can get some details here but (more will come) : gregsaun/bear_extruder_and_x_axis

    bear_xaxis_2.jpg

    bear_xaxis_1.jpg

    Almost all details from the new Prusa revision are in my extruder since a long time now and they are better (as well as other important features). The air multiplier hole (Dyson effect) has been tested and it does not work, air can even go out instead of in which will increase hotend temperature! Same result with a more powerful fan (you need turbine to make it work)! The new nozzle shroud with angled fan has not been tested by myself but it is fully compatible with my extruder.

    No Y axis stop yet but it is planned to make it soon (just want to finish the extruder). Here are a list of some improvements coming :
    gregsaun/prusa_i3_bear_upgrade

    However, you can use my bearing holder which will avoid the bearing to move : Prusa i3 Bear Bearing Holders by pekcitron
     
  23. ufoDziner

    ufoDziner New
    Builder

    Joined:
    Jul 30, 2018
    Messages:
    4
    Likes Received:
    1
    @pek Thanks for the prompt and thorough reply! I ordered an MK3 a couple of days ago, and also the Prusa i3 Bear Full Upgrade from makerparts.ca (they say it's about a week to ship). Hopefully, I can start printing the parts next week when the filament arrives. I'm super excited to get this going.

    Thanks for the tip on the fan. I ordered one today.

    Can you give me some guidance as to which parts I should start printing first as to avoid an immediate reprint due to an upcoming revision?
     
    aaronsorris likes this.
  24. ufoDziner

    ufoDziner New
    Builder

    Joined:
    Jul 30, 2018
    Messages:
    4
    Likes Received:
    1
    It seems like this forum is not that active (I thought it was initially because of @pek 's timely response). Is there another forum that I should be perusing for the latest information? Thanks in advance.
     
  25. pek

    pek Journeyman
    Builder

    Joined:
    Apr 17, 2017
    Messages:
    196
    Likes Received:
    130
    @ufoDziner sorry for my late answer, it is hard for me to be active everywhere (if I do this I have no time for CAD and printing :-D ).

    All the guidance and instruction are available on GitHub here :
    gregsaun/prusa_i3_bear_upgrade
    Do not forget to take a look at the "preflight check and disassembly" section as well

    I am more active in the FB group dedicated :
    Prusa i3 Bear Upgrade

    And in the Discord server here :
    Discord - Free voice and text chat for gamers

    But I am always looking here because Openbuilds community is very nice, full of very interesting idea and build. But slower to respond ;-)

    Hope you understand...
     
    GrayUK likes this.
  26. SteienrSE

    SteienrSE New
    Builder

    Joined:
    Jan 1, 2019
    Messages:
    1
    Likes Received:
    0
    Absolutely love the look and idea of this mod and will definitely do it when I get my Mk3 this spring (currently have an Ender 3). Will likely also do it with the new Bondtech extruder for Mk3 (they stated it is/will be compatible with the Bear upgrade).
    The only thing missing that I would wish for is the option to go with Mgn12 linear rails rather than rods. For the y-axis I think this could be a simple drop in option for the basic if the holes where pre tapped? (2 extra extrusions to mount in the fram and the rails on top of them, then some printed parts (I guess) to mount the plate on top instead of the ones mounting to the rods).
    If linear rails could be used for x and z as well, all the better, but I think that would be a much bigger change.
     
  27. nixda

    nixda New
    Builder

    Joined:
    Oct 17, 2016
    Messages:
    3
    Likes Received:
    0
    Hello, I have an already assembled frame and printed parts for the Bear mk3 full upgrade but no time to finish the project. Anyone interested to buy the frame and parts? Send me a PM.

    plk%kBp4R%GWsLHjwYZi8Q.jpg xckV1cUFQAikqKq+5a1Lsw.jpg
     
  28. Diver433

    Diver433 New
    Builder

    Joined:
    Jun 27, 2019
    Messages:
    1
    Likes Received:
    0
    Thanks for all your work. So if I understand this correctly, GITHUB is the best place to get all the files I need for a full upgrade of a MK3 correct? Noob question - wouldn't using 100% infill make the part even stronger than 30% infill? I am just starting so excuse my questions if they seem stupid. Thanks.
     
  29. pek

    pek Journeyman
    Builder

    Joined:
    Apr 17, 2017
    Messages:
    196
    Likes Received:
    130
    GitHub is the best place but not very easy to use. In case of you can get it from thingiverse as well:
    Prusa i3 Bear Upgrade v2.0 by pekcitron

    I recommend to follow the print settings but if you want to make them stronger it would be better to increase number of perimeters.

    Enjoy the build
     
  30. Cagey

    Cagey New
    Builder

    Joined:
    Aug 5, 2019
    Messages:
    1
    Likes Received:
    0
    I am new to this forum and very interested in the Bear Upgrade. I have just upgraded my MK3 to MK3s. My question is is the full Bear Upgrade for the MK3 compatible for an MK3s and if are there any issues I should be aware of? I am thinking of buying the upgrade kit from you approved vendors but want to confirm the it will work for the MK3s?
     

Share This Page

  1. This site uses cookies to help personalise content, tailor your experience and to keep you logged in if you register.
    By continuing to use this site, you are consenting to our use of cookies.
    Dismiss Notice