Welcome to Our Community

Some features disabled for guests. Register Today.

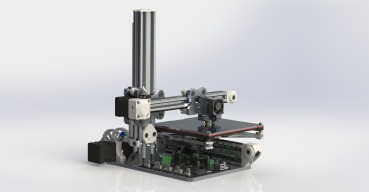
IndieLC

Discussion in '3D printers' started by Indieflow, Apr 11, 2015.

  1. Indieflow

    Indieflow Journeyman
    Builder

    Joined:
    Mar 28, 2014
    Messages:
    127
    Likes Received:
    135
    Firstly thank you very much for sharing your build with the community :), great to see a larger format version!

    When looking at Stepper Motors you are better off comparing them by their holding torque when working with 3D Printers. Steppers are one of the main components of a 3D Printer you don't want to go cheap on! I have purchased numerous quality/cost Nema 14's from various sources and have found those I linked in the Parts section (SY35ST36-1004A High Torque Hybrid Stepper Motors from Zapp Automation) to be far superior. According to the RepRap Stepper Motor page a minimum torque of 13.7N.cm is required for axis motion (the SY35ST36-1004A have a holding torque of 14N.cm) so I would look at this rather than the current they draw when purchasing Steppers! Cooling unfortunately won't help that much if the Stepper can't produce that level of holding torque!

    Ooops :banghead:! I just realised I haven't uploaded the Nema Spacer dxf file! With kits I supply and use 3mm MDF spacers to isolate the heat of the Stepper Motor from the printed extruder and to avoid the mentioned lip.

    Your welcome :duh:, keep up the good work and please keep the updates coming :thumbsup:

    I'm interested in finding out how you are getting on with bed levelling and Y-axis stability on your build! If it helps I think I may have used a C-Beam or dual Y-Axis rail with your larger bed size for stability.
     

    Attached Files:

    dieideeistgut likes this.
  2. Connor Bracegirdle

    Builder

    Joined:
    Sep 12, 2016
    Messages:
    2
    Likes Received:
    0
    Hi Indieflow,

    Great build, this simple design has enspired me to build one of my first 3D printer, but slightly modify the aluminium plates for maximum support, luckily I have disposal to a cnc machine at work so can manufacture most of the stuff there other than the 3D printer.. though I'm going to model up a design spec first..

    I'm currently using Catia V5 but the STL files aren't the best format as they come with dodgy surfaces as some of you may be aware.. is there any chance you could upload the STL files as STEP so I can model and adapt where I see fit? Additionally would it be possible to have the complete assembly in STEP of your current indie so I can use it as reference as I'm obviously new to this

    Thanks and keep up the good work! I'll be lurking around asking questions as I'm a noob in this department (mainly all the electrical side and printer head)

    Connor
     
    #242 Connor Bracegirdle, Jan 24, 2017
    Last edited: Jan 24, 2017
  3. Indieflow

    Indieflow Journeyman
    Builder

    Joined:
    Mar 28, 2014
    Messages:
    127
    Likes Received:
    135
    If you are after re-designing the Ali plates you should be able to import and extrude the DXF files in any design software and then modify!

    Unfortunately I don't currently have the time to go back through the design to tidy it up and export it in the STEP format (mainly as I've moved away from using SolidWorks where the printer was originally designed). I will however endeavour to look into this for you in the future. I suggest you use the STL files to model from if you can't modify them directly. Obviously the idea of releasing STL files are for others to print easily, not modify directly.
     
  4. Connor Bracegirdle

    Builder

    Joined:
    Sep 12, 2016
    Messages:
    2
    Likes Received:
    0
    Thanks for the reply, no problem don't expect anyone to bend over backwards for me, I'm a design engineer anyway so I can remodel stuff up as and if I need them anyway, just thought if you already had the files itd save me doing so..

    I've found all the openbuild models etc on the resource section which I have downloaded but what gets me is where do people get all the electronic models from for their design without actually buying the electronics first? As I'd like to make all the wires tidy obviously and brackets casings etc for it all to be housed in.

    Thanks
    Connor
     
  5. Indieflow

    Indieflow Journeyman
    Builder

    Joined:
    Mar 28, 2014
    Messages:
    127
    Likes Received:
    135
    As you mention some companies like OpenBuilds offer CAD designs of their products. Also places like Thingiverse are a great place to look for models of electronics or cases others have designed! Must admit I normally model the components once I've bought them to keep accurate!

    One major benefit to owning a 3D Printer is the ability to design and modify bits to suite your needs, I'd suggest you get a basic printer design going and then modify it to your needs once built as it will allow you to get going in the world of 3D printing and help you decide what you want! Hence why this is now the Indiei2 - I made modifications to my original design after seeing its capabilities.
     
    dieideeistgut likes this.
  6. dieideeistgut

    Builder

    Joined:
    Aug 29, 2016
    Messages:
    3
    Likes Received:
    4
    Hello dear geeks, freaks and printerfriends (ツ)!
    Today i'm updating the status on my mod-build here.

    [​IMG]
    [​IMG]

    Let's dive right in and start with some of the old issues i had:

    ★ Heated bed carriage / Y-carriage

    Luckily and with loads of test prints it seems like i found the sweet spot when it comes to acceleration and max speeds. Mainly due the "heavy" bed i had to decrease the acceleration values in general, jumping from 3000 to 2000:

    Code:
    M204 S2000.00000 Z500.00000

    ★ Also related: Motors

    I also was messing with junction and co - but matching the acceleration seemed to fix it completely. I also tuned down the motor currents as much as i could. Somehow they all ended up equal:

    Code:
    M907 X0.67500 Y0.67500 Z0.67500 E0.67500
    I tried different extruders. Had some Wades with a Nema14 and even a direct one in testing. But i really really like the design Simon came up with so i wanted to make this work. Keeping the Motor running with the currents stated above seemed to create a small heat problem, Extruder started skipping therefore. The solution now for me is pretty simple: Another Fan. I'll add the STL to the git-repo while listing all new links on the bottom of this post. Oh, yes - the Fan looks like:

    [​IMG]

    ★ Probing via BLTouch - or such...

    Well, i got my hands on a BLTouch (think its a clone :() which i wanted to implement. It turned out to be much easier than i thought - once i had a plan - and it delivers nice results for most of my cases. Let's set the target first here: I don't want my printer to be Z-leveled via BLTouch. I wanted to use it in combination of smoothieware's z-probing to create a printing-plane to fix small leveling problems. Therefore i wanted to keep the hall-o as my Z-endstop and to level out completely (also i trust the hall-o more than the BLTouch). This should keep the ability of manually leveling out Z0 on material-changes. This worked out great. I wrote a small G-Code-Scriptset which i can run to probe, level-out an Z0'ing. I may upload uploaded a (shabby, sorry!) video to demonstrate.


    Lastly we need to mount the BLTouch. I created a small mount which i dovetailed together from 2 sub-pieces to get a proper 90° connection (dovetailing worked, the 90° not really...). STLs will be on github. There are some pictures of course:

    [​IMG]

    If anyone is interrested in detailed configs i'm happy to share octoprint-customizations i made, start- &end-gcodes or anything else. just let me know - i don't want to spam.

    ★ Github Changes

    BLTouchMount_indiei2.stl
    Nema14Fanadapter-v3.stl

    If anyone needs the SketchUP-Files they're here as well.

    Let there be rock!
     
    #246 dieideeistgut, Feb 9, 2017
    Last edited: Feb 9, 2017
    Durk likes this.
  7. goseca

    goseca New
    Builder

    Joined:
    Mar 5, 2017
    Messages:
    2
    Likes Received:
    0
    very nice design I want to go after him build,
    the DFX files. anyone here has Gcode for or STL
     
  8. Indieflow

    Indieflow Journeyman
    Builder

    Joined:
    Mar 28, 2014
    Messages:
    127
    Likes Received:
    135
    All the DXF and STL can be found under the File tab
     
  9. goseca

    goseca New
    Builder

    Joined:
    Mar 5, 2017
    Messages:
    2
    Likes Received:
    0
    the stl ant the gcode the gcode for 3mm tool
     

    Attached Files:

  10. Garrett Groll

    Builder

    Joined:
    Aug 14, 2014
    Messages:
    54
    Likes Received:
    7
    Did you ever find a way to make a quick release?
     
  11. Usuário

    Usuário New
    Builder

    Joined:
    Jul 7, 2017
    Messages:
    1
    Likes Received:
    0
    What metal model (or rail) are you using in construction?
     
  12. Indieflow

    Indieflow Journeyman
    Builder

    Joined:
    Mar 28, 2014
    Messages:
    127
    Likes Received:
    135
    V-slot 20x20 and 20x 40 Linear Rail
     
  13. McWeird

    McWeird New
    Builder

    Joined:
    Apr 1, 2017
    Messages:
    2
    Likes Received:
    0
    I'm starting with this build as a summer project for my first ever experience with a fdm printer.

    I already got my 3d printed parts produced by a friend of mine and I'm facing the decision on where to source the Alu plates from. I wanted to see if I could find something locally but it looks like I'll be ordering the parts straight from you, because even with shipping to Spain the price is under the quotes I've been getting from local fabrication shops. I wanted to enlarge the printing area a bit but seeing as how I'm gonna be tackling this project away from my main computer rig and I've only got my phone and a netbook to mess around I feel like sticking with your current design is gonna be much easier for me, and I can always build something bigger and different in the future. Something of a more stationary nature perhaps...

    Been taking a look at this project for a while now and with the break on the studies season i'm excited for the chance of getting a go on this.

    Thanks for sharing your work!
     
  14. Indieflow

    Indieflow Journeyman
    Builder

    Joined:
    Mar 28, 2014
    Messages:
    127
    Likes Received:
    135
    I've heard this from quite a few people actually! I had hoped to sell them even cheaper (I actually charge £5 less direct on here versus the eBay listing price!) though they take me around 10 hours to produce a set of plates on my own machine!

    No problem at all :thumbsup:
     
  15. stephen cia

    stephen cia Well-Known
    Builder

    Joined:
    Jan 6, 2016
    Messages:
    63
    Likes Received:
    74
    Indieflow,

    Just wanted to say hi! I took some inspiration from your printer and make my own. I did have to modify some of your STLs thx.

    ZideX
     
  16. Indieflow

    Indieflow Journeyman
    Builder

    Joined:
    Mar 28, 2014
    Messages:
    127
    Likes Received:
    135
    I have been watching your build page after noticing the few similarities :thumbsup: amazing looking renders! Makes me want to make a start on a new design!
     
  17. stephen cia

    stephen cia Well-Known
    Builder

    Joined:
    Jan 6, 2016
    Messages:
    63
    Likes Received:
    74
    well your rendering itself is exemplary and got me into learning how to do one :)
     
  18. richw

    richw New
    Builder

    Joined:
    Oct 6, 2015
    Messages:
    2
    Likes Received:
    0
    #258 richw, Aug 31, 2017
    Last edited: Sep 2, 2017
  19. MaherGBR

    MaherGBR New
    Builder

    Joined:
    Sep 25, 2017
    Messages:
    7
    Likes Received:
    2
    with regards the Indie-i2...

    am I being really blind: are there any drawings (with parts lists) for the X and Z axis?
     
  20. McWeird

    McWeird New
    Builder

    Joined:
    Apr 1, 2017
    Messages:
    2
    Likes Received:
    0
    Super late reply but I'm working on this at a very slow pace myself, there are no exploded diagrams for those parts but thanks to some of the photos of the build posted by bad sequel and indie himself I think i have those parts, or at least the one that shouldn't be obvious enough from the 360 assembled. Attached at the end are a couple pics showing the assembly itself.

    For the z gantry plates you want to use the 40mm M5 screws and do: spacer/eccentric spacer, shim, wheel (with a shim inside) a shim and 6mm spacer/eccentric nut again, secured by a m5 nylock nut. That assembly in turn has the 20x20 vslot attached by three tnuts and the 10 mm M5 screws, the other 2 holes left on that assembly are for the nut block.

    For the x gantry, you'll want to do exactly the same you did for the bed one, use the 25mm M5 screws and the top wheels will just use a 6mm spacer, shim, wheel (again with a shim in the middle of it's bearings) and the nylock M5 nut, the bottom one is exactly the same but with an eccentric spacer instead of the normal 6mm one. I tried to fit a second shim in there between the wheel and the nylock nut but doing so makes the assembly too long and it will hit the z axis gantry.

    Now this might not be the correct way to do these but that's how I've done em.
     

    Attached Files:

    #260 McWeird, Nov 15, 2017
    Last edited: Nov 16, 2017
  21. daisosasen01

    Builder

    Joined:
    Sep 24, 2016
    Messages:
    58
    Likes Received:
    2
    Congrats on finishing your model. Are you able to share your raspberry pi modifications and software to use the BLTouch? I have one and am trying to make it work on octoprint. I just don't know what pins or what software to use/write. Any help will be much appreciated. You can send files to [email protected]

    Thanks!
     
  22. Andrew Burgess

    Builder

    Joined:
    Jan 27, 2018
    Messages:
    20
    Likes Received:
    1
    Thanks Indieflow. A great looking printer. I am a college student (Camosun College) taking the Graphics Tech course. For our final project we need to take a set of drawings and, using SolidWorks, create parts and assemblies along with a BOM. do you have any way to export these drawings to a compatible .SAT or .DRW format?? Even a PDF would make things a bit easier if all the measurements are in it. Please? I have 7 weeks to get this done and it's 80% of my mark.
     
  23. Rogercw1

    Rogercw1 New
    Builder

    Joined:
    Jul 14, 2017
    Messages:
    1
    Likes Received:
    0
    @Indieflow - are you still doing parts for your indie i2?, the other thing I'm trying to do is work out roughly what the total cost is likely to be - it looks like somewhere in the region of £400? the big bits being the heated head, the controller - I've been looking at building something that could be packed away and haven't seen anything I like more than your design.
     
  24. JustinTime

    JustinTime Veteran
    Builder

    Joined:
    Dec 18, 2013
    Messages:
    780
    Likes Received:
    257
    You could start by buying a 3d printer on Aliexpress for way less than $200 shipped. Something like this for example. The electronics and many other parts work just fine with the Indie than all you have to buy is a few specific parts and they should not cost more than £100 and there you have a printer for just above £200. :D
     
  25. Indieflow

    Indieflow Journeyman
    Builder

    Joined:
    Mar 28, 2014
    Messages:
    127
    Likes Received:
    135
    Yes I can still kick out the aluminium plates for you if needed. I’m currently abroad with work so I’m afraid the lead time would be quite a few weeks! Message me if you want any further info :thumbsup:
     
  26. pek

    pek Journeyman
    Builder

    Joined:
    Apr 17, 2017
    Messages:
    196
    Likes Received:
    130
  27. Igor Pitta

    Builder

    Joined:
    Dec 7, 2016
    Messages:
    2
    Likes Received:
    0
    Did you have to machine the Hobbit screw extruder or bought ready? How did you get the Hobbit bolt? Can you tell me about his measurements of him?
     
  28. Indieflow

    Indieflow Journeyman
    Builder

    Joined:
    Mar 28, 2014
    Messages:
    127
    Likes Received:
    135
    I purchased the Hobbed bolts and still have some available if you wish to purchase some for your own build, drop me a message :thumbsup:
     
    Igor Pitta likes this.
  29. Igor Pitta

    Builder

    Joined:
    Dec 7, 2016
    Messages:
    2
    Likes Received:
    0
    Yes! I need 2. Can you show me a picture of them?
     
  30. jlipavsky79

    Builder

    Joined:
    Jan 9, 2016
    Messages:
    4
    Likes Received:
    1
    any chance of it having nema17 motor instead, I've got a bunch of them laying around
     

Share This Page

  1. This site uses cookies to help personalise content, tailor your experience and to keep you logged in if you register.
    By continuing to use this site, you are consenting to our use of cookies.
    Dismiss Notice