Welcome to Our Community

Some features disabled for guests. Register Today.

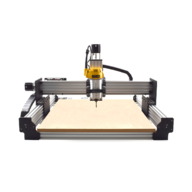
WorkBee CNC Machine

Discussion in 'CNC Mills/Routers' started by Ryan Lock, Sep 21, 2017.

  1. Metalguru

    Metalguru Veteran
    Builder

    Joined:
    Dec 29, 2015
    Messages:
    752
    Likes Received:
    548
    length and width would both be the same at 750+6+6+40+56=858mm roughly

    Note that the X motor is only on one side so the width is off center

    height max would be 508mm with low base

    This is for screw drive.

    MG
     
  2. Metalguru

    Metalguru Veteran
    Builder

    Joined:
    Dec 29, 2015
    Messages:
    752
    Likes Received:
    548
    858x858x508mm

    MG
     
  3. Valentin Dimitrov

    Builder

    Joined:
    Sep 16, 2018
    Messages:
    3
    Likes Received:
    0
  4. Ryan Lock

    Ryan Lock Veteran
    Builder

    Joined:
    Oct 12, 2014
    Messages:
    530
    Likes Received:
    293
  5. arcrunner

    arcrunner Well-Known
    Builder

    Joined:
    Jul 19, 2018
    Messages:
    48
    Likes Received:
    37

    That looks quite awesome! I have been thinking of a way to add more support to the y Cbeam and tie them together with more than just the 2040, looks like this may be the answer! Any drawbacks to loosing the extra wheels under the c beam y axis? Thanks for sharing the dxf!
     
  6. Ryan Lock

    Ryan Lock Veteran
    Builder

    Joined:
    Oct 12, 2014
    Messages:
    530
    Likes Received:
    293
    Hi, to support things, you can remove the y-plate inner, and have L Brackets securing it to the table along the inside. This way you keep the wheels underneath.

    Ryan
     
  7. Metalguru

    Metalguru Veteran
    Builder

    Joined:
    Dec 29, 2015
    Messages:
    752
    Likes Received:
    548
    Ryan:

    Not sure I follow this. Can you elaborate (with pix?)

    MG
     
  8. Ryan Lock

    Ryan Lock Veteran
    Builder

    Joined:
    Oct 12, 2014
    Messages:
    530
    Likes Received:
    293
    @Metalguru I think in @arcrunner may be meaning the X-Axis in his comment, which is my reply doesn't make sense. My applies to the Y-Axis. If you want a supported extrusion, you can remove the Y-Plate inner, loose a set of wheels, and add support underneath. Similar to how the Sphinx is done i think.
     
  9. John Mayer

    Builder

    Joined:
    Aug 17, 2018
    Messages:
    24
    Likes Received:
    8
    Hi!

    With all the help I received I was finally able to finished assembling my Workbee, I have not test it with an actual cut yet. I did run the Hello world Gcode and it's moving with no issues. I have noticed some movements on the Z axis, like if it was loose. (Wiggling) I made sure that everything is tight but it didn't seems it was the issue. Does anyone know how to fix this or it's a regular flaw with the workbee design?
     
    #459 John Mayer, Nov 1, 2018
    Last edited: Nov 1, 2018
  10. GrayUK

    GrayUK Openbuilds Team Elder
    Staff Member Moderator Builder

    Joined:
    May 5, 2014
    Messages:
    1,668
    Likes Received:
    627
    John Mayer. It seriously looks like you haven't tightened up your wheels correctly!
    Have you put your Eccentric Spacers in the right places?
    Can you confirm the other plates with eccentrics are solid and stable?
     
  11. Metalguru

    Metalguru Veteran
    Builder

    Joined:
    Dec 29, 2015
    Messages:
    752
    Likes Received:
    548
    Yeah, that looks bad. Looks like a problem with the eccentrics. Side to side motion like that is usually due to wheels improperly tightened.

    Make sure the eccentrics are adjusted to take up any slack in the wheels so nothing can move. The biggest rookie mistake I see is that people over-tighten the wheels, thinking that makes it better. All this will do is destroy your wheels in short order. Snug the eccentric up so the wheel becomes just difficult to turn with your fingers. You should feel some drag, but not too much. If you can't turn the wheel with your fingers, it's too tight, and if it spins freely, it's too loose.

    After tightening the wheels, run the axis back and forth a few times to let everything settle in, and check them again. With the Workbee, the wheels on each row have a bit of an effect on the opposite wheel as well, so you have to alternate the front and rear wheel adjustments until you get it right. These adjustments are interactive, so it takes a bit of tweaking to get it right.

    For up and down motion, it could be the locking collars or the anti-backlash nut. If you can see the flex coupling move up and down, it is likely lock collars loose. It is fairly easy with this machine to run into the end stops and break loose one of the collars. Regularly check the machine for play before use.

    If the play is in the X or Y axis, it could also be the lead nuts improperly adjusted. Tighten the screws up on one of the lead nuts, and back them off a bit on the other. Place your fingers on the loose one, and push it towards the other one while tightening up the screws. If the axis moves, but you can't see any movement on the motor flex coupling or the screw, it's probably the lead nuts.

    Also, with the Workbee, manufacturing tolerances may make it impossible to get all the wheels adjusted perfectly. Don't worry, this should resolve itself under load. Finally, your machine will loosen up a bit after it breaks in. Check all of the above every few hours of use.

    MG
     
    #461 Metalguru, Nov 1, 2018
    Last edited: Nov 1, 2018
    Ryan Lock and sharmstr like this.
  12. Jacob123

    Jacob123 New
    Builder

    Joined:
    Jun 15, 2018
    Messages:
    33
    Likes Received:
    3
    Can anyone point me in the direction of a guide on how to change the workbee from a moving z axis to just the spindle that moves?
     
  13. Metalguru

    Metalguru Veteran
    Builder

    Joined:
    Dec 29, 2015
    Messages:
    752
    Likes Received:
    548
    Not clear what you mean here... The spindle cannot move independently from the Z axis...

    MG
     
  14. sharmstr

    sharmstr OpenBuilds Team
    Staff Member Moderator Builder Resident Builder

    Joined:
    Mar 23, 2018
    Messages:
    2,059
    Likes Received:
    1,448
    Rick 2.0 likes this.
  15. Jacob123

    Jacob123 New
    Builder

    Joined:
    Jun 15, 2018
    Messages:
    33
    Likes Received:
    3
    #465 Jacob123, Nov 2, 2018
    Last edited: Nov 3, 2018
  16. John Mayer

    Builder

    Joined:
    Aug 17, 2018
    Messages:
    24
    Likes Received:
    8
    Thank you so much for taking the time to answer my question. I needed every single tip. Your information is very clear and easy to follow. After tweaking with thr workbee I found that the eccentrics were too loose. I made sure to re-adjust them on all 3 axis. I will keep checking them every so many hours.
    God bless you!
     
    GrayUK and sharmstr like this.
  17. Kyle Barrett

    Builder

    Joined:
    Dec 5, 2017
    Messages:
    28
    Likes Received:
    10
    Hi guys, I've been away a while playing with the Workbee. Mine is the 1500x1500 belt drive. As I'm getting more busy with projects on it there is something I'd like some options on going forward and if you can lend a hand shout it out loud. I've attached a picture. Seems as though it might be an X axis issue not sure,

    I've made sure the table is level and square, adjusted belts, switched from normal decay to fast decay, changed steps with the jumpers, tried fast and slow feedrates, adjusted wheels. Just can't avoid getting jagged edges,

    Kinda at a loss now but I wonder if the x-axis C-beam might be bent? Am I missing something.
     

    Attached Files:

  18. Metalguru

    Metalguru Veteran
    Builder

    Joined:
    Dec 29, 2015
    Messages:
    752
    Likes Received:
    548
    Kyle:

    Impossible to tell from your picture what is happening. You need to send a picture with some recognizable shapes so we have something to compare it to.

    Highly unlikely that the C-beam is bent. I am of the opinion that the 1500x1500 machines will never work properly because they are too flexible. That, combined with belt stretch, makes for a machine with poor performance.

    I was going to suggest loose wheels, but you said you had checked them. Grab the Z axis and push and pull it left and right, up and down, and front and back. If you feel any play at all or a clicking sound, there is something loose in your wheels.

    Try to run a g-code file with some circles and squares of various sizes and post a pic of that. If there is an axis problem, there are usually discontinuities at the corners of squares and the quadrant divisions of circles.

    Put in a bit with a sharp point, set the position to extreme front left, and use the Z to lower the point until it makes a mark on the bed. Raise the Z back up and run the machine to the extreme right rear corner. Then go back to your first position at max speed. Repeat this back and forth 10 times or so, and end up front left. Check the bit position relative to the mark you made in the table, it should be in exactly the same place. If it's not, you are losing steps somewhere. If you are using GRBL Panel, Special position 1 and Special Position 2 buttons are handy for this.

    One thing I have seen, the setscrews on the belt pulleys sometimes loosen up and cause the pulley to have slop in it. This will cause problems.

    MG
     
  19. Kyle Barrett

    Builder

    Joined:
    Dec 5, 2017
    Messages:
    28
    Likes Received:
    10
    Here is a quick circle cut from alupanel. 1/4" end mill speed about 50 IPM.

    1 pass.

    No rocking in the z axis. I'll keep looking for solutions.

    I've attached pictures of my resukts. It is a 4 inch circle.
     

    Attached Files:

  20. Giarc

    Giarc OpenBuilds Team
    Staff Member Moderator Builder Resident Builder

    Joined:
    Jan 24, 2015
    Messages:
    3,017
    Likes Received:
    1,682
    It is hard to tell from those pictures. Cut a square and circle out of some scrap, but leave them lying flat on your work surface then try to take a picture as perpendicular to the objects as possible.
     
  21. Metalguru

    Metalguru Veteran
    Builder

    Joined:
    Dec 29, 2015
    Messages:
    752
    Likes Received:
    548
    Kyle:

    What do you have your stepper motor microstepping set to? With a belt drive, you need at least 1/8 microsteps to get smooth movement. Your x and y axis steps/mm should be in the low 50's. Have you checked the calibration? IE when you command it to move 300mm, does it move exactly 300?

    As Giarc said, we need to see the squares and circles from directly above. Don't cut out the square/circle, just engrave it on the surface with a pointed bit... The smaller the point the better.

    You mentioned earlier setting the decay settings, all this does is make the motor louder or quieter. Set the decay for quietest motor running.

    MG
     
  22. Ryan Lock

    Ryan Lock Veteran
    Builder

    Joined:
    Oct 12, 2014
    Messages:
    530
    Likes Received:
    293
    @Kyle Barrett Does the circle re-join itself perfectly? Further to this (Apart from the jaggedness), does it look circular or is it lop sided?
     
  23. Kyle Barrett

    Builder

    Joined:
    Dec 5, 2017
    Messages:
    28
    Likes Received:
    10
    The motors are set to the default 1/8th step.

    The circles and squares are cutting and joining perfectly,

    So I've tried two things, I believe it helped a bit. I got a new spoiler board and raised the surface up to 18mm higher and didn't cut all the way through. I can see how this puts less stress on the bit. But the problem still remains. I've taken some pics. There is a photo showing how my router is mounted. Should it be highter? Lower? I'm just wondering if there is an issue judging by the photos or if there is room to make it a bit more smooth. The view of the circle edge top down represents kinda a weird dimple I noticed on the right side. Also my end mill might have taken a slam on another test and may have lost its edge. If its dull can that cause symptoms like the rough edge?

    Any Ideal feed rate for a 1/4" end mill single flute. Thats my go to tool.
     

    Attached Files:

  24. Giarc

    Giarc OpenBuilds Team
    Staff Member Moderator Builder Resident Builder

    Joined:
    Jan 24, 2015
    Messages:
    3,017
    Likes Received:
    1,682
    I have never cut alupanel so I do not know what a good feed rate is for it. I cut aluminum at about 900 mm/min with a single flute 1/4 endmill. But I take many shallow cuts. You said you are cutting in one pass. When I cut softer materials like 6 mm HDPE I cut it in two passes 3 mm deep each at 2500 mm/min. Same with wood. I think you should try cutting that material in 3 or four shallower passes. You can even leave 0.2 mm and do one finishing pass at full depth. By looking at your cuts, it looks like it is trying too hard to "plow" through and the bit is maybe bending.
     
  25. Metalguru

    Metalguru Veteran
    Builder

    Joined:
    Dec 29, 2015
    Messages:
    752
    Likes Received:
    548
    Yeah, I agree with Giarc. Looks like your router is chattering because of the lack of rigidity in the X axis. Rule of thumb is to never cut deeper than the diameter of the bit in one pass, but that is for wood. For aluminum, I wouldn't cut more than a millimeter or so in a pass. For Alupanel (I assume that is the plastic panel faced with aluminum on both sides), perhaps around 2mm per pass. Also, you could use a lubricant. Just a spritzer bottle with water or half methanol and water works good. Make sure you have a sharp carbide bit, not HSS.

    Because your machine is so un-rigid ( for lack of a better word), you need to take much lighter cuts than a stiffer machine would to avoid chattering.

    Take a look at some of the online feeds and speeds calculators (just google it) to get a ballpark, but I would reduce the recommended feed speed and depth of cut by half for your machine.

    MG
     
  26. Ryan Lock

    Ryan Lock Veteran
    Builder

    Joined:
    Oct 12, 2014
    Messages:
    530
    Likes Received:
    293
    @Kyle Barrett If everything is lining up and joining perfectly, then i think nothing is mechanically slipping as objects would look deformed and not line up.

    I think its either a controller issue or cutting to deep. Have you got a more common material you can try? Like MDF i can give you speeds and feeds for that?
     
  27. Kyle Barrett

    Builder

    Joined:
    Dec 5, 2017
    Messages:
    28
    Likes Received:
    10
    Sure I can try in MDF or if I use alupanel again try some sort of light oil.

    What would you recommend for MDF Ryan.

    Glad it sounds like only on my end. I've been using commercial machines and I guess I'm just used to faster feedrates.

    You mentioned controller issue. Is there anything I need to check in my CNC xpro. Also what benefits would I see from using the new duet controller?
     
  28. Ryan Lock

    Ryan Lock Veteran
    Builder

    Joined:
    Oct 12, 2014
    Messages:
    530
    Likes Received:
    293
    Hi Kyle,

    Ok great. So with your 1/4" end mill. Cut a 3mm pass depth, 18.5k RPM, 1700mm/min feed, 850mm/min plunge, these are nice and conservative speeds.

    Let me know the results.

    The main thing in your case is that the Duet has better drivers, this makes the motors run really smooth :)

    Best Regards

    Ryan Lock
     
  29. Kyle Barrett

    Builder

    Joined:
    Dec 5, 2017
    Messages:
    28
    Likes Received:
    10

    Thanks Ryan,

    I'll try a few more feedrate tests and load a fresh bit and see what comes of it, I just loaded a new spoiler board so I have to mill that flat before continuing my tests. I will surely look into the Duet controller because I feel like a smoother running motor would yield better results.
     
    Ryan Lock likes this.
  30. Ryan Lock

    Ryan Lock Veteran
    Builder

    Joined:
    Oct 12, 2014
    Messages:
    530
    Likes Received:
    293
    Hi Kyle,

    Ok great, let me know how you get on.

    Best Regards

    Ryan Lock
     

Share This Page

  1. This site uses cookies to help personalise content, tailor your experience and to keep you logged in if you register.
    By continuing to use this site, you are consenting to our use of cookies.
    Dismiss Notice