Welcome to Our Community

Some features disabled for guests. Register Today.

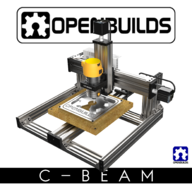
C-Beam™ Machine - Plate Maker

Discussion in 'CNC Mills/Routers' started by Mark Carew, Jul 16, 2015.

  1. Mark Carew

    Mark Carew OpenBuilds Team
    Staff Member Moderator Builder Resident Builder

    Joined:
    Jun 28, 2013
    Messages:
    2,763
    Likes Received:
    2,448
    Hello @DarkAlchemist
    I have not seen one that is able to do this as steel very hard and requires a lower rpm high torque spindle as well as a very ridge (usually cast steel) frame and high end TiAlN coated endmills. This machine is not that machine for the job of cutting steel plate.
    I would say always protect any bearings from any water. They are sealed but they are also steel so I would cover them if possible
    You would only need to make the side columns taller and use longer bits. But remember the farther you move the spindle away from the framing less rigid it becomes. This machine was built as low profile as possible (1" max material height) to keep the center of gravity low to help in handling cutting materials like aluminum and stay stout.
    If you are only looking to get a few parts made I would suggest a water cutting service for steel.
     
  2. Richard/RMW

    Builder

    Joined:
    Apr 3, 2015
    Messages:
    4
    Likes Received:
    8
    First time poster here but I have been following openbuilds ever since I backed the OpenRail Kickstarter. When I received the announcement for the C-Beam "plate maker" it was spot-on what I had been looking for, i.e. an easy way to be able to make custom plates for other projects. That was a hurdle I was struggling with and exactly why I ordered the kit the minute I received the email.

    My goal is to be able to make small aluminum plates and brackets yet my shop space is limited to a 10' by 12' area that is already fairly packed. In the shop is a cold-cut metal chop saw, 12" **** sander, small drill press, manual mini-mill and tons of metal and woodworking tools gathered over the past 30 years. I am not limited in what I can do but more in what I have time to do, plus the mechanical is easy for me but the electronics I struggle with. The build video gave me the confidence that I would not run into a show stopper with the electronics.

    I watched the build video straight thru prior to receiving my kit, & then skipped thru it during the actual build. No issues whatsoever.

    Also have to say “Great Job”, the kit went together easily and I am hugely impressed by the pre-packaged components.. I did not have one missing screw (once I figured things out..) nor an extra one, really an awesome job putting the kit together.

    I have been sneaking up on a project like this for some time & had gathered up lots of electronics and components over time, when I got to digging around in the parts drawer it turned out I had everything necessary to bring the machine to life. I wired up an old grblshield 2.0 I purchased several years ago but never used, downloaded Universal G-Code Sender and in minutes I was moving all 3 axis.

    Couple of points of feedback, intended to be constructive:

    1. The 500mm extrusions I received were inconsistent, ranging from 498 to 504mm. Not a big deal for me as I have the metal chop saw and 12” disk grinder but it may be an issue for others.
    2. I was puzzled by needing to cut the 500mm extrusion in half for the 250mm x-axis posts, since the 250mm lengths of extrusion are available in the parts store. Again, not an issue for me but may be for others. It was also the only part of the kit that was not plug & play ready.
    3. I ended up grinding the 2 little tabs off the cast L-brackets so they sat flush on the extrusions. Would recommend this to others, simple to do & I think it provides a lot more bearing surface on the extrusions.
    Again, an awesome job on your part and the availability of the kit and the build video meant I could get a working unit in 5-6 hours with minimal hiccups – I’m very excited to put this to work.

    Here are a couple photos of the build so far, I have to add the waste board and tidy up the wiring but for all practical purposes the machine is functional.

    20150731_150036914_iOS.jpg 20150731_150022131_iOS.jpg
     
  3. Mark Carew

    Mark Carew OpenBuilds Team
    Staff Member Moderator Builder Resident Builder

    Joined:
    Jun 28, 2013
    Messages:
    2,763
    Likes Received:
    2,448
    Hello @Richard/RMW Glad to hear your Build has gone smoothly! Looks great so far. Thank you for the feedback and for the kind words. :thumbsup:
    Mark
     
  4. charliex

    charliex New
    Builder

    Joined:
    Jan 19, 2015
    Messages:
    30
    Likes Received:
    15
    @Richard, yeah same thing with mine the beams weren't 500 mm so had to cut them and I also noted the thing about the 90 casts having the nubs removed, the ones on the spindle mount are much nicer. I've also been thinking about removing the 250 mm columns and using a single piece column instead.

    I've got a 1/4" 12x12" tool plate to use as a work plate instead of the 1/2" MDF since the Z clearance is a lot more limited than i thought, not sure how it'll work out though.

    here's my build
    https://hackaday.io/project/6921-openbuilds-c-beam-machine-build
     
  5. DarkAlchemist

    DarkAlchemist Well-Known
    Builder

    Joined:
    Aug 2, 2014
    Messages:
    401
    Likes Received:
    22
    Thanks for the info Mark.
     
    Mark Carew likes this.
  6. Mark Carew

    Mark Carew OpenBuilds Team
    Staff Member Moderator Builder Resident Builder

    Joined:
    Jun 28, 2013
    Messages:
    2,763
    Likes Received:
    2,448
    Great post on Hackaday @charliex !
    We are now cutting the 500mm in half to help Builder that may not access to a saw.
     
  7. DarkAlchemist

    DarkAlchemist Well-Known
    Builder

    Joined:
    Aug 2, 2014
    Messages:
    401
    Likes Received:
    22
    What size spindle does one need to fit this since it looks like it was made for a very loud Bosch Colt?
     
  8. charliex

    charliex New
    Builder

    Joined:
    Jan 19, 2015
    Messages:
    30
    Likes Received:
    15
    I'm using the DeWalt 611 which i'm basing that choice on on precise bits page about about the low quality of the bosch. It needs a small shim on the left/right sides , front to back it mates.
     
  9. DarkAlchemist

    DarkAlchemist Well-Known
    Builder

    Joined:
    Aug 2, 2014
    Messages:
    401
    Likes Received:
    22
    Not into routers as they are far too loud for me so trying to find out what size Spindle would this accept. I see some are 65mm and some are 80mm.
     
  10. charliex

    charliex New
    Builder

    Joined:
    Jan 19, 2015
    Messages:
    30
    Likes Received:
    15
    the dewalt is 68 mm, i made a 55 mm mount for my "400w" quiet spindle, those are nice and quiet.
     
    Laurence Carroll likes this.
  11. DarkAlchemist

    DarkAlchemist Well-Known
    Builder

    Joined:
    Aug 2, 2014
    Messages:
    401
    Likes Received:
    22
    Very good but how did you make it or did you already have the dewalt (I have no router)? I see an 800W spindle on eBay is 65mm :/
     
  12. charliex

    charliex New
    Builder

    Joined:
    Jan 19, 2015
    Messages:
    30
    Likes Received:
    15
  13. DarkAlchemist

    DarkAlchemist Well-Known
    Builder

    Joined:
    Aug 2, 2014
    Messages:
    401
    Likes Received:
    22
    Gotcha. If I had a working 3d printer anymore I would print one and it would hold long enough to cut one. Use 70% infill and it would work (90-99% if ABS). I gotta get this 3d printer up and running but I spent so many hours and so much money on it I hate to even look at it. Nothing but issues and very little printing. Ahhh, well that is a different story for another time.

    Thanks for the info.
     
  14. charliex

    charliex New
    Builder

    Joined:
    Jan 19, 2015
    Messages:
    30
    Likes Received:
    15
    np, I didn't try the 3d printed one , just for fitment i found it on thingiverse. it was pla it'd probably hold up for it, but i just went for it with the bandsaw/holesaw, then i'll machine one.
     
  15. Mark Carew

    Mark Carew OpenBuilds Team
    Staff Member Moderator Builder Resident Builder

    Joined:
    Jun 28, 2013
    Messages:
    2,763
    Likes Received:
    2,448
    The other day I was in the store and they had a TV box with a sample pattern on it that caught my eye and I thought it was pretty neat. So I did a quick test to see if I could make it out of wood using the C-Beam machine and SketchUcam.
    I did not get it right the first time (of course :) ), but it still looks pretty cool so I thought I would share it and maybe someone else would want to play around with it.
    Looks like the openscam preview did not show the proper bit size and maybe with a .0625"bit it would work or even scaling the size by half in SketchUp.

    20150715_195240.jpg

    texture cut example.jpg
    texture cut example_3.JPG
    20150731_144717.jpg
    20150731_144757.jpg


    Zip file of the pattern is attached
     

    Attached Files:

  16. Rick 2.0

    Rick 2.0 OpenBuilds Team
    Staff Member Moderator Builder Resident Builder

    Joined:
    Dec 20, 2013
    Messages:
    2,899
    Likes Received:
    1,556
    The mount is 71mm inside so shimming it down to 65 should not be a major issue.
     
    DarkAlchemist likes this.
  17. charliex

    charliex New
    Builder

    Joined:
    Jan 19, 2015
    Messages:
    30
    Likes Received:
    15
    i replaced the two 250mm 1x3's with some 30x30 profile. haven't finished bracketing it up yet.
    [​IMG]
     
    Joe Santarsiero and Mark Carew like this.
  18. Stephen Hall

    Builder

    Joined:
    Feb 14, 2014
    Messages:
    3
    Likes Received:
    5
    With that setup I would think you could move the Y gantry up and down if you needed more height. maybe have fixed platforms so you know it is level.
     
  19. Stephen Hall

    Builder

    Joined:
    Feb 14, 2014
    Messages:
    3
    Likes Received:
    5
    Would it be possible to mark the parts in the list that would need upgrading to change the x y sizes?
    I am thinking 4 of the 6 500mm v-slot, the lead screws and the 500mm c-beam.
     
  20. Rick 2.0

    Rick 2.0 OpenBuilds Team
    Staff Member Moderator Builder Resident Builder

    Joined:
    Dec 20, 2013
    Messages:
    2,899
    Likes Received:
    1,556
    Just add 2 more of the 500mm 20x60 V-slot and make a note in the comment section NOT to cut the 2 they are already sending precut into (4) 250mm pieces because you need all lengths to be 500mm. You will also need to order about 6 more of the cast corner brackets.
     
    Mark Carew likes this.
  21. charliex

    charliex New
    Builder

    Joined:
    Jan 19, 2015
    Messages:
    30
    Likes Received:
    15
    the bottom of the Z limits the cutting area at the moment, the Z travel is much bigger than you can use with the current setup. I'm thinking about making an L bracket that attaches to the plate and lowers the router down beyond the bottom of the plate, not sure, the machine is just meant to make plates and plates engraving so trying to just keep the stiffness up. I just happened to have a spare 3030 lying around that length easier to square and stiffer with a single column
     
  22. Colin Russon

    Builder

    Joined:
    Dec 4, 2013
    Messages:
    47
    Likes Received:
    24
    Would it be possible to see the machine graphics (sketchup and step) split into X, Y, Z axis etc. with the relevant BOM'S for each section listed with them as identified on your main BOM? To clarify the sections parts lists? Also, are the spacers used on the Wheel sets 6mm or 1/4in?
     
    #142 Colin Russon, Aug 4, 2015
    Last edited: Aug 4, 2015
  23. Rick 2.0

    Rick 2.0 OpenBuilds Team
    Staff Member Moderator Builder Resident Builder

    Joined:
    Dec 20, 2013
    Messages:
    2,899
    Likes Received:
    1,556
    Could you not just rotate the Z-axis C-Beam 180 degrees (joining plate to plate) and mount the router on the back allowing the router and C-Beam to move up and down as one?
     
    Mark Carew likes this.
  24. Mark Carew

    Mark Carew OpenBuilds Team
    Staff Member Moderator Builder Resident Builder

    Joined:
    Jun 28, 2013
    Messages:
    2,763
    Likes Received:
    2,448
    This is a good idea, if there is an updated needed to the files we will look into breaking it down this way as well.
    They are 6mm

    You can do it this way and in fact we had done it this way initially with two C-Beam gantry plates mounted to the V-Slot gantry plate, but it made more sense to go this route (because it was a little confusing to build this way) and it also kept the cost down by reducing one of the C-Beam gantry plates. This could make a great mod!
    Mark
     
    Laurence Carroll likes this.
  25. FredP

    FredP Rebel without a clue
    Builder

    Joined:
    Dec 31, 2013
    Messages:
    9
    Likes Received:
    7
    OpenBuilds CBeam Machine_double.png
    I was playing in sketchup again, by replacing a few parts, all stock you get a double, think it will work?
     
  26. Mark Carew

    Mark Carew OpenBuilds Team
    Staff Member Moderator Builder Resident Builder

    Joined:
    Jun 28, 2013
    Messages:
    2,763
    Likes Received:
    2,448
    @FredP that is awesome! lol :thumbsup:
    I see no reason why this would not work
     
  27. Rick 2.0

    Rick 2.0 OpenBuilds Team
    Staff Member Moderator Builder Resident Builder

    Joined:
    Dec 20, 2013
    Messages:
    2,899
    Likes Received:
    1,556
    Why not replace your Y rails with 1000mm pieces and make it a quadruple.... :)
     
  28. charliex

    charliex New
    Builder

    Joined:
    Jan 19, 2015
    Messages:
    30
    Likes Received:
    15
    yep that is definitely something i planned to try, first i just wanted to fix the two vertical columns and see how the machine performed as is, and making mods with bits i had lying around while my precise bits collets for the dewalt arrived, which they did last night so hoping to do some aluminium cutting this weekend with it.
     
  29. Mark Carew

    Mark Carew OpenBuilds Team
    Staff Member Moderator Builder Resident Builder

    Joined:
    Jun 28, 2013
    Messages:
    2,763
    Likes Received:
    2,448
    Hey guys we have an update that you may find useful.
    We have been working with the C-Beam Machine for a while now and its been reported that the if you do not get a good bite with the 8 self tappers going into the MDF they can (in time) work their way loose causing what looks like backlash. We have posted in the video build that you may want to consider using some low profile screws to bolt the MDF to the aluminum build plate. You can recess the heads into the MDF so the spoiler board will still sit flush and on the bottom you could use M5 nuts or Tee Nuts. This will ensure a strong connection with no room for wiggle down the road. On our machine we backed out the screws and added a dab of wood glue to each hole and reinserted them. This has made a good strong bond as well, but we do plan to bolt the MDF down in the future.
    This is a good first mod that is pretty easy to do and will not take too long. Thank you for the MDF mounting tip Jim :thumbsup:

    On another note: we have been working with David as he is working to create spiral boring (makes it easier to bore circles into harder materials like aluminum) for SketchUcam!
    We have been running some of the test codes and it is work very well so far. Keep up the good work David and thank you!


    View attachment 10199
     
    #149 Mark Carew, Aug 5, 2015
    Last edited: Aug 5, 2015
    Serge E. and David the swarfer like this.
  30. charliex

    charliex New
    Builder

    Joined:
    Jan 19, 2015
    Messages:
    30
    Likes Received:
    15
    Fety Mann and Mark Carew like this.

Share This Page

  1. This site uses cookies to help personalise content, tailor your experience and to keep you logged in if you register.
    By continuing to use this site, you are consenting to our use of cookies.
    Dismiss Notice