Welcome to Our Community

Some features disabled for guests. Register Today.

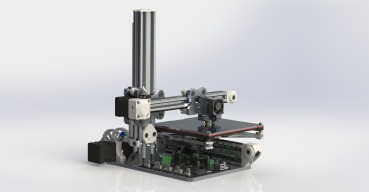
IndieLC

Discussion in '3D printers' started by Indieflow, Apr 11, 2015.

  1. Jaspion3d

    Jaspion3d New
    Builder

    Joined:
    Jun 15, 2015
    Messages:
    9
    Likes Received:
    0
    Hi IndieLC and everybody,

    Studpid question do you guy believe the open build guys will provide me a quote if I only provide them with the BOM file they will provide me back with the total .

    I Already have printed the 3d parts and I will be ordering the Laser cut parts which I will also put the note about the HotEnd change.
     
  2. Indieflow

    Indieflow Journeyman
    Builder

    Joined:
    Mar 28, 2014
    Messages:
    127
    Likes Received:
    135
    Exactly my thoughts! I believed the only variations of Nema's within their range was single or double shaft, obviously apart from current, holding torque etc!

    Thanks for the positive feedback :thumbsup: I'm sure if you put the extra steppers to one side you'll be able to use your new printer to make something that uses them! Maybe even dual extruders!

    Would be nice if they can, quite surprised they don't add a one click order feature to build pages! Must admit finding items out of stock all the time is the only thing that I hate about OpenBuilds. A system of placing an order and waiting for full stock to come in (save on postage) would be ideal!

    The Laser cut parts haven't changed for the new RepRapPro Quickset HotEnd if thats what you are worried about!
     
    dawie22 likes this.
  3. Jaspion3d

    Jaspion3d New
    Builder

    Joined:
    Jun 15, 2015
    Messages:
    9
    Likes Received:
    0
    Which hot end kit should I buy from Reprap?
    - ormerod
    - huxley duo
    - Mendel 3
     
  4. Jaspion3d

    Jaspion3d New
    Builder

    Joined:
    Jun 15, 2015
    Messages:
    9
    Likes Received:
    0
    Also since I'm looking for all the parts inside Openbuilds, another one is about the Eccentric Spacers.

    The BOM list a 1/4" Eccentric Spacer and open build has to options of 1/4" :

    the Mini
    the Full

    which one should I take it?

    Thanks
     
  5. Indieflow

    Indieflow Journeyman
    Builder

    Joined:
    Mar 28, 2014
    Messages:
    127
    Likes Received:
    135
    I believe the difference between the kits is the wiring loom (which I wouldn't use with this build) and the heater cartridge voltage (Huxley 19V, Ormerod and Mendel 12V). Now the PCB Heated Bed by RepRapPro is designed for 19V (though I run it just fine on 12V, just slower to get up to heat). So if you are going to run your setup on 19V then go for the Huxley kit (same voltage heater cartridge) or if you plan to use 12V (I would) then go for either the Ormerod or Mendel kit.

    I hadn't realised that they have now released a specific Mini Wheel variant, thanks for the heads up! :thumbsup: I have always used the original variation (now known as Full Wheel) with no problems though I guess you may as well go for the Mini Wheel type as this design is built around the Mini Wheels.
     
  6. dawie22

    dawie22 New
    Builder

    Joined:
    Aug 29, 2014
    Messages:
    19
    Likes Received:
    1
    Hmmm interesting. But yes I will put them aside for now and sure will use somewhere lol.

    But with all the above, my lil printer is put together, just wiring and controller to sort now hehe :D:D.

    Such a simple but awfully well thought out design.... :D:D
     
  7. Indieflow

    Indieflow Journeyman
    Builder

    Joined:
    Mar 28, 2014
    Messages:
    127
    Likes Received:
    135
    Well can't wait to see some pictures! Sometimes freaks me out how many people view/download designs, though as the designer you never see them pop up anywhere! For example across the sites I have uploaded this design it has been downloaded over 500 times and all I have seen is one picture of one part online! Rant over :) lol

    Are you happy with the wiring? Shout if you need advice!

    Thanks :thumbsup: though wait until you see the next iteration! :p Would love to hear your feedback on the build so far, must be something you'd change/mod, like to see added etc?
     
  8. calebdev2048

    Builder

    Joined:
    Jul 15, 2015
    Messages:
    3
    Likes Received:
    0
    How difficult would it be to increase the build volume? It seems like the Z axis would be pretty easy to lengthen although I'd be much more interested in increasing the X and Y axes. I'm not talking about anything extreme, maybe increase the volume to 160x160x160. I know you would have to use a different heatbed, but would any of the printed or laser cut parts need to be modified?
     
  9. DiggerJ

    DiggerJ Journeyman
    Builder

    Joined:
    Sep 2, 2014
    Messages:
    412
    Likes Received:
    109
    Not sure if it helps, but we are playing with a steroided version of something like this with a 300x300 platform. Only in the planning stages, but looking to use C-Beam for the Z-axis and the Y-axis, with probably 20x40 or 40x40 for the X-beam. Just have to clean up some other builds before I allow myself to play again.

    When you think of it, the main thing is the spreading of the platform support for the bed plate on the Y-axis. The Lautr3k and MendelMax go to 300x300 easily and the C-Beam width with inside and outside wheels would make this a rock solid platform for a build plate. The IndieLC already has the strength for the Z-height and the additional weight of a Bowden E3D v6 on a bit longer extrusion should be no big issue, so if you are spending money for motors, extrusion, electronics, etc........I say....if you're gonna be a bear, be a Grizzly!

    RobotDigg has really 300x300 nice heaters for $24 delivered, and I usually bring in my boro from Aleph (Lulzbot) since I know their quality. Automation Technologies has pretty decent nema 17's for under $10 delivered in the US if you buy 10 at a time. Go in on some with a friend, and save.
     
    #69 DiggerJ, Jul 16, 2015
    Last edited: Jul 16, 2015
    calebdev2048 likes this.
  10. Indieflow

    Indieflow Journeyman
    Builder

    Joined:
    Mar 28, 2014
    Messages:
    127
    Likes Received:
    135
    Nope, 160mm shouldn't be a problem at all (I wouldn't go over 200mm on this design)! Just increase your V-Slot rail lengths :) Obviously like you say the HeatBed and laser cut carriage would need to change, though should be an easy modification.

    The only concern with extending any of the Axis on this build would be the extra leverage on the laser cut parts that join the X and Z Axis! For that reason I am well on the way to changing the design over to Aluminium plates for version 2!
     
    calebdev2048 likes this.
  11. Indieflow

    Indieflow Journeyman
    Builder

    Joined:
    Mar 28, 2014
    Messages:
    127
    Likes Received:
    135
    Sounds interesting going that large! I personally have never considered anything larger than 200x200 as it just takes too long to print anything big! I am currently printing a vase design I have done on the IndieLC that is 100x100mm and it is taking 14 hours! I like to print fine (currently using 0.3mm nozzle) with small layer heights!

    I think if I was going for that size bed I would use double Y-Axis rails at either side with a belt system in the middle (like the Mendel 90).
     
  12. DiggerJ

    DiggerJ Journeyman
    Builder

    Joined:
    Sep 2, 2014
    Messages:
    412
    Likes Received:
    109
    We were thinking aluminum plates and 6 or 8 wheels on the carriage rolling up and down the Z-axis C-Beam. Beefy and resistant to improper movement. With only a slight modification, a nema 17 will fit into the pocketed channel of the C-beam.

    We are on the downhill side of revamping our makerspace CNC router and I suspect it will be making plates for this one-armed weirdness.
     
  13. Indieflow

    Indieflow Journeyman
    Builder

    Joined:
    Mar 28, 2014
    Messages:
    127
    Likes Received:
    135
    Can wait to see some pictures being posted! :D
     
  14. DiggerJ

    DiggerJ Journeyman
    Builder

    Joined:
    Sep 2, 2014
    Messages:
    412
    Likes Received:
    109
    Will do, when we get that far, but many irons in the fire right now, and I stay pretty busy printing parts for builds. I have all of the motors, extrusions. electronics, glass, bed, etc. just have to stop mental designs and stay on task to finish the existing list. Luckily, our group of people jumping in to the printer build arena at our space is growing and some are willing to help.
     
  15. calebdev2048

    Builder

    Joined:
    Jul 15, 2015
    Messages:
    3
    Likes Received:
    0
    Wow, 300x300 is quite large! I'm not sure I can think of anything that big I would want to print! I suppose I could print a near full size model of my Grandmother (she's quite small)... I like the idea of having the ability to print that large, even though I wouldn't most of the time. Better to have and not need than to need and not have... Please post details when you get to that point!
     
  16. DiggerJ

    DiggerJ Journeyman
    Builder

    Joined:
    Sep 2, 2014
    Messages:
    412
    Likes Received:
    109
    Big??? It barely holds both half's of a beer bottle stein .stl! My experience with the 180mm and 200mm heated beds have been dismal. Temp measuring around the plate seems very inconsistent. People complain on every board about prints lifting and/or popping loose on those beds. My beds hold great heat consistency with the external Mosfet board and power supply, and I can go from room temp to 103C in 4minutes, 10 seconds. I hate limitations. "RackDaddy", the space printer will be 600x600 to print whole printer parts plates at one time. Come to Area515 Makerspace, pick a printer plan, and we intend to be able to print the parts, have class and you get to leave with a complete, working printer. That is the goal, and I think we can make it happen. It will generate news and support for our group.
     
  17. calebdev2048

    Builder

    Joined:
    Jul 15, 2015
    Messages:
    3
    Likes Received:
    0
    Thanks for the reply! I have a bunch (probably enough to build four or five of your design) of 20x40 aluminum extrusion sitting in my closet waiting to be used. Since I have so much I figured I'd see about making a printer with a larger build volume. What I'd really like to do is design something simple like yours, but try to avoid using any custom parts (3D printed, lasercut, etc). I really appreciate that you have the parts for your build available for purchase. Most builds I've seen require access to a printer or laser cutter directly, to keep the costs reasonable. I think a lot of people who want to build a 3D printer can't because of the cost of having the parts made through a service. I think a simple, inexpensive design using standard off the shelf parts would help a lot of people (myself included). Anyway, great work, thanks for the inspiration and motivation!
     
  18. Marcel Valcarce

    Builder

    Joined:
    Jun 15, 2015
    Messages:
    12
    Likes Received:
    1
    I got my parts from Open Builds, and motors on order. I want to get the LC parts cut using ponoko.com as they will cut and ship from the US. My problem is the line colors are not correct so they kick back the file. I can use Illustrator to change the colors, but when I open the file it asks for scale and when using the "original scale" it wants to set 1 unit to 1 point (I don't think that's what I want). But when I change the Illustrator units to mm it states that 1 unit will be 0.3528mm. I am not used to working with these types of files but that seems strange to me. I just want to make sure if I mess with the file I don't screw the scaling up.

    For ponoko the line color needs to be RGB: 0, 0, 255 for cutting and RGB 255, 0, 0 for line engraving.

    Edit: I noticed their acrylic is 3mm, and 4.5mm or 5.6mm. Do you think the 4.5mm would be troublesome?
     
    #78 Marcel Valcarce, Jul 17, 2015
    Last edited: Jul 17, 2015
  19. Indieflow

    Indieflow Journeyman
    Builder

    Joined:
    Mar 28, 2014
    Messages:
    127
    Likes Received:
    135
    I totally agree on the whole standardised parts point, hence why I love the products that OpenBuilds have produced for hobbyists. That said though they can't supply every item, plus everyone wants to tweak parts for their own needs! I guess that is why I love 3D Printers, Laser Cutters and CNC machines. They make the process of tweaking easy :D

    Glad you like the build and hope you enjoy building! Can't wait to see pictures of a bigger versions!
     
  20. Indieflow

    Indieflow Journeyman
    Builder

    Joined:
    Mar 28, 2014
    Messages:
    127
    Likes Received:
    135
    If you are just changing the colours the scale won't matter! Sounds like the software you are using hasn't detected that the files are in mm! I personally use AutoCad or OpenScad (free trial!) for dxf files! See if that works for you, if not let me know and I will see what I can do for you.
     
  21. Marcel Valcarce

    Builder

    Joined:
    Jun 15, 2015
    Messages:
    12
    Likes Received:
    1
    That is true I guess. I have been wanting to take a look at OpenScad, so maybe now is the time to try it. When I referred to 4.5mm that is the thickness of the acrylic they have. If I go that route the pieces will be slightly thinner so I will have to deal with that when assembling. It's only half a mm, but I am worried about tolerances...
     
  22. Indieflow

    Indieflow Journeyman
    Builder

    Joined:
    Mar 28, 2014
    Messages:
    127
    Likes Received:
    135
    Sorry I totally forgot to respond about the Acrylic thickness! I personally would go thicker (5.6mm) for the extra strength! The only down side I can see you having would be the screw length! Worst case scenario you could just hand router little pockets around the fixing holes or use the next length up screw (cutting off excess thread where needed). To be honest most Acrylic suppliers say that their supplies could alter in thickness by +/- 0.5mm anyway!
     
  23. Marcel Valcarce

    Builder

    Joined:
    Jun 15, 2015
    Messages:
    12
    Likes Received:
    1
    Turns out that once I was able to get a price quote on having it cut it was more expensive than ordering yours (even with shipping to US). So I just ordered your last set :)

    Now I just need to get my plastic printer going and print the parts. I am waiting on a new print bed, a base to use the geckotek PLA printing surface.
     
  24. Indieflow

    Indieflow Journeyman
    Builder

    Joined:
    Mar 28, 2014
    Messages:
    127
    Likes Received:
    135
    How mental is that! Oh well the parts are in the post to you now :D
     
  25. dawie22

    dawie22 New
    Builder

    Joined:
    Aug 29, 2014
    Messages:
    19
    Likes Received:
    1
    Almost have mine build and ready to run, looking to run mine of a 24v psu (with some step downs) and looking into a thermal protection circuit lol.

    I have one question through, on the heatbed, do you have the enabe pin connected to the Minitronics PCB? and if so how have you interfaced it (onto AUX1 D30)?

    Again thank you for all the help.

    regards,

    Mr Me (Darv)
     
  26. Indieflow

    Indieflow Journeyman
    Builder

    Joined:
    Mar 28, 2014
    Messages:
    127
    Likes Received:
    135
    Originally I was going to use that exact method and supply the Heated Bed with it's own independent 19V supply (I use 12V for Minitronics and HotEnd) though instead opted to stick to using 12V throughout (also saves on making any adjustments to the firmware). So instead I wired up the Heated Bed as normal avoiding the onboard Mosfet. I hope this makes sense?

    [​IMG]
     
    #86 Indieflow, Jul 21, 2015
    Last edited: Jul 21, 2015
  27. dawie22

    dawie22 New
    Builder

    Joined:
    Aug 29, 2014
    Messages:
    19
    Likes Received:
    1
    Ahhhh, you cheeky so n so. lol. so your using the mosfet on the actual control board to drive the head-bead. was wondering why there was a second on the actual heat-bead hehe.

    Thank you.

    May complicate things a little for the thermal protection circuit I'm thinking about, but will work something out hehe.

    I was thinking of using the enable line as an indicator as to whether the heat-bed was in use or not. May have to tap off the actual power line instead, pass it through an opto-isolator and work with it that way.
     
  28. harry

    harry New
    Builder

    Joined:
    Aug 17, 2014
    Messages:
    1
    Likes Received:
    0
    Great design, by the way. Would it be possible to export the exploded diagrams in .pdf or some other format which can be enlarged/scaled? Enlarging the jpegs only makes them impossible to read. Thank you!
     
  29. Indieflow

    Indieflow Journeyman
    Builder

    Joined:
    Mar 28, 2014
    Messages:
    127
    Likes Received:
    135
    If you go to my GitHub you can download the high res versions :thumbsup: I hope this helps?
     
  30. kingfisher

    Builder

    Joined:
    Jan 10, 2015
    Messages:
    1
    Likes Received:
    0
    If you ever design a version based around Nema 17's I'f be very interested too. Love the thought and design that has go into this build. I've got a few spare 17's that i would happy use on something like this....
     

Share This Page

  1. This site uses cookies to help personalise content, tailor your experience and to keep you logged in if you register.
    By continuing to use this site, you are consenting to our use of cookies.
    Dismiss Notice