Welcome to Our Community

Some features disabled for guests. Register Today.

IndieLC

Discussion in '3D printers' started by Indieflow, Apr 11, 2015.

  1. greg hughes

    Builder

    Joined:
    Jul 27, 2015
    Messages:
    4
    Likes Received:
    0

    hey indieflow,

    super keen to start this build but if a newer version is in the works i'd be just as keen to build that! how far off do you think you are off the larger format version??
     
  2. Indieflow

    Indieflow Journeyman
    Builder

    Joined:
    Mar 28, 2014
    Messages:
    127
    Likes Received:
    135
    Hi Greg,

    Thanks for the comments, I would suggest you get building then if you are super keen! :thumbsup:

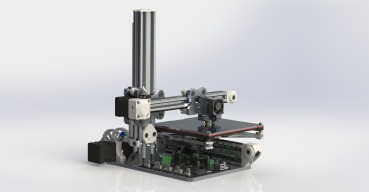
    The current design can easily be extended in the Y and Z axis just by extending the V-Slot rails and belts (plus obviously the heated bed side of things!). The main limiting factor of this design is the stress on the laser cut plates if the X axis boom is lengthened (leverage)! To combat this you could always get aluminium plates made to use instead of the aluminium plates!

    The version I am currently designing aims to tweak and improve on that of the IndieLC design with parts that can be easily fitted to either design (this way people can upgrade the sections they like when they want).

    Additionally I am basing the next version on Ali plates which will obviously increase the price of the build, though also the frame strength (allowing larger frames).
    Time wise I am half way through building a prototype, I am considering starting a build in progress page. Though I'm not sure when I will be happy enough to release the final design as a working model!

    I hope this information helps, though please start building if you are interested (you can always upgrade at a later time) ;)
     
    greg hughes likes this.
  3. Indieflow

    Indieflow Journeyman
    Builder

    Joined:
    Mar 28, 2014
    Messages:
    127
    Likes Received:
    135
    My current redesign is still based around Nema 14's though I'm altering aspects to allow room for Nema 17's which will then just require a few tweaks to certain parts ;)
     
  4. DiggerJ

    DiggerJ Journeyman
    Builder

    Joined:
    Sep 2, 2014
    Messages:
    412
    Likes Received:
    109
    Would there be interest in one with a 300mm print bed and Nema 17's with almost all OB parts and no machining except to cut the extrusions to length?
     
  5. greg hughes

    Builder

    Joined:
    Jul 27, 2015
    Messages:
    4
    Likes Received:
    0

    Thanks heaps for the reply! Much appreciated. I'm gonna do it! i'll order the parts off you today. I can always cut the aluminium plates at a later stage on my cnc if i think i need them. Thanks again!
     
  6. Indieflow

    Indieflow Journeyman
    Builder

    Joined:
    Mar 28, 2014
    Messages:
    127
    Likes Received:
    135
    Greg, not at all! Shout any time you need advice etc. Also thanks for the purchase, I will get your parts in the post shortly :thumbsup:
     
  7. greg hughes

    Builder

    Joined:
    Jul 27, 2015
    Messages:
    4
    Likes Received:
    0
    Cheers for that mate! more than likely will need your help along the way!
     
  8. Indieflow

    Indieflow Journeyman
    Builder

    Joined:
    Mar 28, 2014
    Messages:
    127
    Likes Received:
    135
    Hence the beauty of RepRap and Opensource, welcome to the community! Someone will always be able to help!
     
  9. Carlos Joel

    Builder

    Joined:
    Apr 3, 2015
    Messages:
    4
    Likes Received:
    0
    Hi :)

    I wonder what's the maximum resolution it can handle? and if "exotic" filaments can be used like bronze fill or aluminum PLA.

    Thanks
     
  10. Indieflow

    Indieflow Journeyman
    Builder

    Joined:
    Mar 28, 2014
    Messages:
    127
    Likes Received:
    135
    Same as any other FDM printer! Should be able to handle any filament, the only one that I've heard of that you'd struggle with is super flexible filaments due to the bowden extruder!
     
  11. greg hughes

    Builder

    Joined:
    Jul 27, 2015
    Messages:
    4
    Likes Received:
    0
  12. Indieflow

    Indieflow Journeyman
    Builder

    Joined:
    Mar 28, 2014
    Messages:
    127
    Likes Received:
    135
  13. Camini

    Camini New
    Builder

    Joined:
    Jun 26, 2015
    Messages:
    9
    Likes Received:
    4
    [​IMG]
    Work in progress!
    I made some change to mount an E3d lite6.
     
    mario likes this.
  14. Indieflow

    Indieflow Journeyman
    Builder

    Joined:
    Mar 28, 2014
    Messages:
    127
    Likes Received:
    135
    Very nice :thumbsup: You'll have to let me know how you get on with the mount! Plus if you don't mind you could send me the file and I can post it on this build page for others?
     
  15. Camini

    Camini New
    Builder

    Joined:
    Jun 26, 2015
    Messages:
    9
    Likes Received:
    4
    For the moment, the only problem that i see, i s for the screw under the Bed , there are 2 M5*25 that touch under the bed (the wood) , i have to cut them at around 18mm.
    My friend is going to post the X carriage for the E3d on thingi in the next few day.
     
  16. Indieflow

    Indieflow Journeyman
    Builder

    Joined:
    Mar 28, 2014
    Messages:
    127
    Likes Received:
    135
    Yes unfortunately those screws need cutting flush with the nuts as the design stands! I didn't want to alter the fixings to 20mm causing people to buy more vitamins (packs of 25!) so left them long. When I convert to aluminium plates these fixings will be removed and the bed rotated 90 degrees.

    Thanks for posting your mount on Thingiverse, I will add a link to the main page when I get round to updating it.
     
  17. Camini

    Camini New
    Builder

    Joined:
    Jun 26, 2015
    Messages:
    9
    Likes Received:
    4


    First try !
     
  18. Camini

    Camini New
    Builder

    Joined:
    Jun 26, 2015
    Messages:
    9
    Likes Received:
    4
    I just add a spoolholder /handle for my printer :p
    [​IMG]
     
  19. dawie22

    dawie22 New
    Builder

    Joined:
    Aug 29, 2014
    Messages:
    19
    Likes Received:
    1
    20150823_125359.jpg Machine.jpg

    Good morning all,

    I have my Girl built and almost ready to print :D:D:eek:.

    Run her through the test program for the board and all moved and responds a should so cant be bad.

    You may see a few "add on's" in the pics. these are simply voltage reg's as i already had a PSU. it was easier to place these in line than source another PSU. also added a second cooling fan for the PCB as them drivers ger HOT!!!!:ROFL::eek::eek:

    My only head ache at the moment is software. Having never done this before im at a los as what sender to use. looking through the posts i cannot see any referance's to this.

    So i have had a look at "ReplicatorG". may i be cheeky and ask what others are using?
    and more so if any one here is also using ReplicatorG? If so what what machine have you selected??

    Thank you in advance.

    Regards Mr ME (darv)
     
  20. dawie22

    dawie22 New
    Builder

    Joined:
    Aug 29, 2014
    Messages:
    19
    Likes Received:
    1
    Hello there, na im using 14's all round. As mentioned i have only put her through a test program and suspect the hot drivers is due to the current limmiting settings (that im due to re-visit in the next few days).

    Plus when I say hot, I'm talking about to the toutch. Not mesured there actual temp as yet, this was going to be done after the recheck of the current limiting settings.
     
  21. Indieflow

    Indieflow Journeyman
    Builder

    Joined:
    Mar 28, 2014
    Messages:
    127
    Likes Received:
    135
    Nice idea! Does the weight effect the stability of the printer at all when printing? Just wondering if the Laser Cut base flexes!

    Keep up the updates, loving the videos/pictures/files :)
     
  22. Indieflow

    Indieflow Journeyman
    Builder

    Joined:
    Mar 28, 2014
    Messages:
    127
    Likes Received:
    135
    Sounds the same to me! What voltage do you get across your stepper drivers? (Place positive probe on the trim pot and negative on the earth if you wasn't sure). I imagine you have your trims set way too high! The Minitronics uses the circuit board as a way of spreading the heat and just requires a fan blowing from below (included with board). Mine are cool to the touch all the time!

    Software wise I can highly recommend Printrun/Pronteface for your control software as it is extremely easy to use. Same goes for Octoprint and a RaspberryPi on your wifi network!
     
  23. Indieflow

    Indieflow Journeyman
    Builder

    Joined:
    Mar 28, 2014
    Messages:
    127
    Likes Received:
    135
    Just realised the spelling on the video (can't search for it on YouTube), any chance you can edit it to add the e?

    Also what covering are you using on your heated bed as I can't quite tell? I personally use Kapton tape as I find it never fails for me, though hate the lines between strips!
     
  24. dawie22

    dawie22 New
    Builder

    Joined:
    Aug 29, 2014
    Messages:
    19
    Likes Received:
    1

    Good morning,

    Apologies, i thought i had replied last night.

    Ya with regards to the drivers and temp, it is on my to-do list for tonight/tomorrow. It is something that needs to be revisited (check and double check everything before initial long run)

    As for the software, thank you for the suggestions, I will investigate the Printrun/Pronteface setup as well Octoprint (since i have a spare PI around somewhere hehe).

    As always, thank you all for the prompt and great replies :thumbsup::thumbsup::D:D
     
  25. Camini

    Camini New
    Builder

    Joined:
    Jun 26, 2015
    Messages:
    9
    Likes Received:
    4
    I change the name on youtube :p
    I use Buildtak on the bed , so i don't need to use the heatbed for PLA .
    For my spoolholder, i need to made some change in the design , but the printer hold it well for the moment.
    The only problem i have for the moment is the X-carriage. The 3mm acrylic part flex a little bit and the wheel are loose on the V-slot . i'm searching for making this part with aluminium (maybe the base and the bed holder too)
     
  26. Indieflow

    Indieflow Journeyman
    Builder

    Joined:
    Mar 28, 2014
    Messages:
    127
    Likes Received:
    135
    I'm currently just trialling aluminium plates for the main structure parts, updates hopefully up soon!
     
    mario likes this.
  27. dawie22

    dawie22 New
    Builder

    Joined:
    Aug 29, 2014
    Messages:
    19
    Likes Received:
    1
    This is all getting very exciting now :D:D. Ali parts sounds rather interesting. Something worth investigating. Will have to keep an eye on that development.

    Quick question if I may (and hope this will be the last one, and thank you all so much for the hand holding), I have Octopi up and running. all is well and swell until it comes to Slicing with Cura.

    Now from what I can see I need a profile. What boggles me is that I can effectively "upload" one for Cura, I assume this would be the config.ini. But looking though example configs a large majority of the parameters are configured within Octopi its self.

    Have I missed something :banghead:o_O....
    Or do I have to create and upload effectively a config.ini??

    This is as I say though all rather Brilliant. I can control my printer from my Phone :eek::jawdrop::jawdrop::jawdrop:

    How Kewl/Sad is that!!!!!

    Of cause it goes without saying, never leave the printer unattended but Dude, from me phone lol!!!

    (Ok if you look into the details is a web front end to the services on the PI, web browser on phone and away you go...... just love it)

    hehe

    Thank you in advance,

    Mr Me (Darv)
     
  28. Indieflow

    Indieflow Journeyman
    Builder

    Joined:
    Mar 28, 2014
    Messages:
    127
    Likes Received:
    135
    Unfortunately I can't really comment on Cura or Slicing on the Octopi! Due to the limited processing power of the RaspberryPi I Slice my Gcode on my home computer and then upload it to Octopi!

    Plus I use Slic3r rather than Cura!

    Totally agree though, it is really impressive to use Octopi on your phone, iPad etc, especially when you have a PiCam linked :)
     
  29. nilrog

    nilrog New
    Builder

    Joined:
    Sep 3, 2015
    Messages:
    6
    Likes Received:
    1
    Impressive design :)

    I'm thinking about building one but with slightly bigger build volume, probably max 200x200x200. But gathering all the parts might take a while since this stuff is not easily available here and shipping cost can be expensive. I also saw that you are working on a v2 design. How much will that design differ from this one besides doing more in aluminium instead of plastics? Will the Openbuilds parts stay more or less the same, not counting screws?
     
  30. Indieflow

    Indieflow Journeyman
    Builder

    Joined:
    Mar 28, 2014
    Messages:
    127
    Likes Received:
    135
    Hi, thanks very much for the comment!

    Unfortunately I am a little behind with the V2 design as I have been focusing on my OX so that I can produce Aluminium plates. Hopefully I will get some info out this weekend on the Openbuilds site. My aim is to keep as close to the original design as possible so that people can carry out an upgrade to their current machines, meaning the bulk of the components should stay the same!

    Additionally I am making it so that the design can be used for a 200x200 design, though I am looking at using a length of C-beams for the Y-axis to give better stability of the heat bed.

    Where in the world are you as I could maybe help with sourcing parts?

    Thanks
    Simon
     

Share This Page

  1. This site uses cookies to help personalise content, tailor your experience and to keep you logged in if you register.
    By continuing to use this site, you are consenting to our use of cookies.
    Dismiss Notice