Welcome to Our Community

Some features disabled for guests. Register Today.

LCD Based SLA Resin Printer

Discussion in '3D printers' started by evilc66, May 3, 2016.

  1. evilc66

    evilc66 Journeyman
    Builder

    Joined:
    Jan 9, 2015
    Messages:
    393
    Likes Received:
    154
    Lol, no. Nothing printed yet. This project has fallen to the evil ways of feature creep (where the designer can't leave well enough alone with the design, even before it's finished). The iPad screen was the obvious first choice, but it's snowballed out of control as I have found other LCD options.

    I'm hoping to have one of the versions of this printer finished soon. The bathroom remodel is coming to a close, so I will have more free time to tinker.
     
  2. Mysta

    Mysta New
    Builder

    Joined:
    Feb 23, 2017
    Messages:
    32
    Likes Received:
    1
    Ahh, it happens, what'd the materials aside from LCD run you?

    I just ordered a duplicator 7(the wanhao lcd printer) and i'm wondering how easy it'll be to just modify it to ha bigger screen/print area.
     
  3. evilc66

    evilc66 Journeyman
    Builder

    Joined:
    Jan 9, 2015
    Messages:
    393
    Likes Received:
    154
    If you don't count the LCD, it's adapter board, and the computer to drive the LCD, then I've put about $350 into it so far, most of that being parts from Openbuilds.

    I think we agreed in a much earlier post that it was completely possible to do a good high res printer for under $1k with computer. 4K resolutions makes that harder, but I think still doable.
     
  4. Dan Walker

    Builder

    Joined:
    Dec 1, 2016
    Messages:
    2
    Likes Received:
    0
    Out looking around for adapters for the Pi I found this project: mipi-dsi-display-shieldhdmi-adapter. Looks sort of dead, the links I've found to the manufacturer (creotech) are all dead. I sent them an email to see if they still had them, but it seems that Github has the PCB layout HDMI-to-MIPI/tree/master/HDMI-to-LH550WF1.

    Haven't had the time to price it out yet, but considering the Fire HDX screen is only $50 or so I'm reluctant to spend another $100-$130 just for an adapter.

    Out of curiosity has anyone compared cure times for the daylight and UV resins?
     
  5. evilc66

    evilc66 Journeyman
    Builder

    Joined:
    Jan 9, 2015
    Messages:
    393
    Likes Received:
    154
    Doesn't look like it was intended to support anything more than 1080p, but that may have been a limitation they imposed because of the same default 1080p output of the HDMI port on the pi. I will agree that the cost of the other adapters is a bit steep, but beggars can't be choosers.

    Now, $50 gets you the replacement HDX display, but with the touch interface and front glass bonded to the screen. That's not good, as those additional layers will affect the print definition. I have yet to find a source for only the lcd, unless you have uncovered something.

    As for cure times, UV will cure faster on a DLP printer due to the large amounts of UV the mercury arc lamp puts out. Using UV resins on an LCD printer though may or may not work depending on the resin. Resins like G+ will cure at 460nm, but slowly. Some others may not cure at all. Will it be faster or slower than daylight resins? Not sure yet, but I'll be able to tell you soon ish. I have a bottle of Makerjuice G+ and Photocentric3D firm gray resin ready for use.
     
  6. evilc66

    evilc66 Journeyman
    Builder

    Joined:
    Jan 9, 2015
    Messages:
    393
    Likes Received:
    154
    Looks good, if not a little overkill. The ballscrew is HUGE. The way the numbers work is like this: for a 3205 ballscrew, the 32 designates the diameter as 32mm, and the 05 is the lead of the screw, meaning that for every revolution you get 5mm of travel. You can find much smaller ballscrews with shorter leads that will reduce cost and increase resolution. 1204 ballscrews are pretty common (12mm diameter, 4mm lead). That will get you 0.0025mm per step at 1/8 microstepping. Just don't forget the bearing blocks (required for proper ballscrew operation).

    Ballscrew End Supports1pcs 1204 ballscrew End Support CNC Parts for SFU1204-in Linear Guides from Home Improvement on Aliexpress.com | Alibaba Group

    Also, with the shorter lead on the ballscrew, you don't need as much torque to move the linear stage, even with a lot of weight. While there is nothing wrong with a 425oz/in NEMA23 motor, it might not be required.
     
  7. fantasy2

    fantasy2 New
    Builder

    Joined:
    Feb 13, 2017
    Messages:
    8
    Likes Received:
    0
    @evilc66 maybe strange request, but could you be so kind and measure the distance between the top bezel on the sides and the active display area of the 15,4" LCD? I guesstimate that this is about 0.15 to 0.3mm. Measuring the thickness at the mounting points is probably OK as well as it is bent sheet.

    I think I cracked this thing to make a very nice(and robust) design with this panel but need a few more numbers :)
     
  8. Mysta

    Mysta New
    Builder

    Joined:
    Feb 23, 2017
    Messages:
    32
    Likes Received:
    1
    Are you going to use FEP or some sort of oxygen permeable material for your vat to increase speed like a lot of the newer LCD printers?
     
  9. evilc66

    evilc66 Journeyman
    Builder

    Joined:
    Jan 9, 2015
    Messages:
    393
    Likes Received:
    154
    I'll get a measurement tonight (if I remember :) ), but I think it's about 0.1mm thick. Mounting tabs are 0.8mm +/- 0.2mm from the front face according to the datasheet, with a max thickness of 2.9mm
     
  10. evilc66

    evilc66 Journeyman
    Builder

    Joined:
    Jan 9, 2015
    Messages:
    393
    Likes Received:
    154
    Yes, FEP film will be used. I think I have about 10ft square of the stuff at 0.005" thick. You can get large sheets of the stuff from McMaster Carr.
     
  11. Mysta

    Mysta New
    Builder

    Joined:
    Feb 23, 2017
    Messages:
    32
    Likes Received:
    1
    Nice,

    I may look into modifying the cheap LCD printer I get to be slightly bigger using this build(then build another later)
     
  12. evilc66

    evilc66 Journeyman
    Builder

    Joined:
    Jan 9, 2015
    Messages:
    393
    Likes Received:
    154
    @fantasy2, looks like the polarizer is 0.05mm thick
     
  13. Mysta

    Mysta New
    Builder

    Joined:
    Feb 23, 2017
    Messages:
    32
    Likes Received:
    1
    Debating building in tandem with you. Are there any changes you'd make so far? Any BOM put together yet in rough form?(No worries if not just checking)
     
  14. evilc66

    evilc66 Journeyman
    Builder

    Joined:
    Jan 9, 2015
    Messages:
    393
    Likes Received:
    154
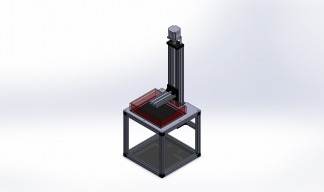
    No real changes as of yet to the original design for the iPad screen version. The 5.5" 2K screen and 15.6" 4K screen versions will just be bigger or smaller versions of the same concept. For the original design, the basic BOM is as follows:

    13x 250mm 2020 V-Slot
    8x Cube corner connector
    6x cast corner bracket
    1x 500mm C-Beam assembly w/stepper
    pile of 8mm and 10mm long M5 screws

    After that, it's just whatever you want to clad the outside of it in, be it aluminum, acrylic, wood, etc...
     
    #255 evilc66, Feb 28, 2017
    Last edited: Feb 28, 2017
  15. Mysta

    Mysta New
    Builder

    Joined:
    Feb 23, 2017
    Messages:
    32
    Likes Received:
    1
    Think the bigger screen(5.5) will fit on this one(I assume so)? Also thoughts on brains?
     
    #256 Mysta, Feb 28, 2017
    Last edited: Feb 28, 2017
  16. evilc66

    evilc66 Journeyman
    Builder

    Joined:
    Jan 9, 2015
    Messages:
    393
    Likes Received:
    154
    The 5.5" screen is smaller than the initial design, which used an iPad 3/4 screen at 9.7"

    As for brains for the 5.5" setup, you could most likely use a Raspberry Pi and run NanoDLP. Officially, the HDMI port is only supposed to support up to 1080p resolutions, but some adventurous hackers have managed to squeak out 4K (at low refresh rates, but that doesn't matter to us). As a result, 2K shouldn't be a problem, but will require a little research. The Pi will also be able to connect to an Arduino Uno with a stepper driver (running Marlin firmware) for Z-axis control and end stop.
     
  17. Mysta

    Mysta New
    Builder

    Joined:
    Feb 23, 2017
    Messages:
    32
    Likes Received:
    1
    Ahh right, for some reason was thinking middle one and looking at 5.5. Makes sense, I think the only extra small screen I have laying around is a Venue 8 Pro. So may just buy the 8.9 inch. What are we thinking print times will be like or is that really to be seen? I know the Wanhao is very similar setup around 30mm/h
     
  18. evilc66

    evilc66 Journeyman
    Builder

    Joined:
    Jan 9, 2015
    Messages:
    393
    Likes Received:
    154
    The Wanhao is backlit with a powerful UV LED array, so it makes it a little different than this, and cure times will be vastly different. A closer approximation would be to compare it to the Photocentric3D printers, as they are using the LCD backlight.
     
  19. Mysta

    Mysta New
    Builder

    Joined:
    Feb 23, 2017
    Messages:
    32
    Likes Received:
    1
    Ahh I see, so how does that work with the LCD to create a detailed image exactly?(sorry to derail)
     
  20. evilc66

    evilc66 Journeyman
    Builder

    Joined:
    Jan 9, 2015
    Messages:
    393
    Likes Received:
    154
    Basically, NanoDLP works just like Repetier/Pronterface/Simplify3D where you feed it an STL/OBJ file, and it slices it up and generates the gcode to make it all work. The difference is that the slicer just creates complete images of the layers, rather than creating the path for the print head to move. Once one layer is complete, the Z-axis moves up, and the next layer is presented on the LCD.
     
  21. Mysta

    Mysta New
    Builder

    Joined:
    Feb 23, 2017
    Messages:
    32
    Likes Received:
    1
    Oh sorry I mean the LED array + LCD.
     
  22. evilc66

    evilc66 Journeyman
    Builder

    Joined:
    Jan 9, 2015
    Messages:
    393
    Likes Received:
    154
    Oh, no problem.

    So what they are doing is modifying the case for the LCD so there is no back, and no reflective films like you would normally find behind and LCD (that's so the light from the edges of the display come through the front). With the back removed, you can then shine a much higher power light source through the back, and be more selective about what wavelength to use. We can do this too, but it's a little risky with the more expensive displays, as you can easily damage them. Wanhao is most likely getting them custom made from an LCD manufacturer.

    What Wanhao is doing though that we can't easily do is use a 405nm light source. Normally, on a color LCD, the color filters and the polarizer will severely limit the amount of light coming through the display of wavelengths shorter than about 450nm. Wanhao is overcoming this one of two ways. They are either pumping so much light at the LCD that the resulting light on the print side of the LCD is substantial enough to get fast cure times (very low efficiency doing this), or they are using a monochrome LCD, which are very hard to find normally, and very expensive. I don't think anyone knows just yet which way they are doing it.
     
  23. Mysta

    Mysta New
    Builder

    Joined:
    Feb 23, 2017
    Messages:
    32
    Likes Received:
    1
    Okay so that's kinda what I had put together in my head but seemed to simple, the efficiency part makes sense then. Is Slash3D doing the same?[Edit - found this so I assume so]

    Optical System 5000 Lux blue LED array
    Refractive index matched liquid cooling
    Ultra high resolution LCD


    So then I assume based on the previous post of the LCD specs matching the HDX, that it's in some way modifiable to be compatible with this. So either it works well with this LED array or it's as you said inefficient?(More power for faster printing?)

    I assume for speed purposes on normal LCD light you just go much slower or use more sensitive resins then if you need to go faster?
     
  24. evilc66

    evilc66 Journeyman
    Builder

    Joined:
    Jan 9, 2015
    Messages:
    393
    Likes Received:
    154
    Slash3D is using a 460-470nm blue LED array, which falls within the transmission range of the color filters and polarizer. It will be pretty high efficiency, but it forces you to use daylight curable resins, where the Duplicator 7 will be able to use UV cure resins. There are a lot more options with UV resins than daylight cure.

    As for speed, you aren't going to be able to speed things up without increasing the light intensity. For daylight cure resins, there just isn't that much selection. Even in the UV cure resins, there isn't really a "fast cure" resin and a "slow cure" resin. Cure times will be very much dependent on the intensity of the light source.
     
  25. evilc66

    evilc66 Journeyman
    Builder

    Joined:
    Jan 9, 2015
    Messages:
    393
    Likes Received:
    154
    So, this is **** funny :D

    I was hunting around the web today looking for additional information about the Wanhao Duplicator 7 and came across this video on Youtube about replacing the LCD.


    IT'S THE EXACT SAME LCD AS THE ONE I ORDERED, ADAPTER BOARD AND ALL!!!!!!!!

    I found this to be very funny, but very informative also. The backlight peels off really easily. I was hoping to get a good look at their LED setup, but it's just out of view.
     
  26. Mysta

    Mysta New
    Builder

    Joined:
    Feb 23, 2017
    Messages:
    32
    Likes Received:
    1
  27. evilc66

    evilc66 Journeyman
    Builder

    Joined:
    Jan 9, 2015
    Messages:
    393
    Likes Received:
    154
    I was actually just about to post that link :D

    So, looks like it's a 30W LED. That's a lot of power in for not a lot of light through the LCD. Oh well. Sometimes brute force is the way to go. At least knowing this you can make it work for other LCDs too. It's just a matter of scaling it up. You can also crank up the LED output to speed up cure times, but that would require increasing the cooling ability for the LED.

    I'm curious about the uniformity of light that the reflector provides.
     
  28. Mysta

    Mysta New
    Builder

    Joined:
    Feb 23, 2017
    Messages:
    32
    Likes Received:
    1
    So basically to replicate we would just need something to control the LED, power it, maybe a reflector of some sort, and remove the back panel of the LCD. Did you buy the 5.5 screen? Luckily I got an extra with my D7 order so I'll have one to mess around with but I kinda want to try the 8.9 too.

    Also just curious, why'd you put motor on top?
     
    #269 Mysta, Feb 28, 2017
    Last edited: Feb 28, 2017
  29. evilc66

    evilc66 Journeyman
    Builder

    Joined:
    Jan 9, 2015
    Messages:
    393
    Likes Received:
    154
    I bought both the 5.5" screen that's in the D7, and the 8.9" HDX screen that's in the Slash.

    To control the LED backlight, I'm sure there is a somewhat simple way to turn it on and off between layers through NanoDLP, whether it be a setting, or custom g-code. Still looking into that. It should be simple hooking up the LED driver to one of the spare outputs on a Ramps 1.4 board.

    A reflector can be made easy enough. While highly reflective materials work (Miro IV coated sheet is ideal, but spendy), you can make it very easily from aluminum roof flashing. It's dirt cheap and easy to cut and form. It's a matte surface, but a coat of flat white paint will make it extremely reflective and refractive (refractive in this case will be better than just reflective as it will make the light distribution more uniform). Again, I'm curious as to how even the light distribution is with a reflector like this.

    A better approach for more even light distribution is to use an array of multiple smaller LEDs with a diffusion layer over the top. It's a little more complicated to set up, but if you need the best quality available, you do what you have to do.
     

Share This Page

  1. This site uses cookies to help personalise content, tailor your experience and to keep you logged in if you register.
    By continuing to use this site, you are consenting to our use of cookies.
    Dismiss Notice