Welcome to Our Community

Some features disabled for guests. Register Today.

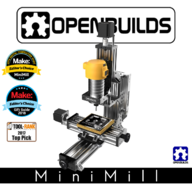
OpenBuilds MiniMill

Discussion in 'CNC Mills/Routers' started by Mark Carew, May 26, 2017.

  1. Stewart McMillan

    Builder

    Joined:
    Feb 6, 2018
    Messages:
    29
    Likes Received:
    12
    This is the better video...
     

    Attached Files:

    KurtM and Mark Carew like this.
  2. Cowbell321

    Builder

    Joined:
    Nov 24, 2017
    Messages:
    15
    Likes Received:
    17
    how big has anyone expanded the x axis? I'm thinking of wanting at least 2" - 3" more than stock. I think I just need a larger c beam and rod to match.
     
  3. BNiner

    BNiner New
    Builder

    Joined:
    Sep 25, 2015
    Messages:
    2
    Likes Received:
    0
    Beautiful machine! I like the flexibility this machine offers. The portability is a great advantage too! Good job guys! Looks like the starter machine I will get.
     
  4. Stewart McMillan

    Builder

    Joined:
    Feb 6, 2018
    Messages:
    29
    Likes Received:
    12
    Here is my Mini set up at Las Vegas at the Glass Buils trade show. Running BCNC from a PI and sending CNC programs from our window and door CNC software.
     

    Attached Files:

  5. Mark Carew

    Mark Carew OpenBuilds Team
    Staff Member Moderator Builder Resident Builder

    Joined:
    Jun 28, 2013
    Messages:
    2,763
    Likes Received:
    2,448
    Really nice set up @Stewart McMillan ! Love to hear how the MiniMill does at the show. Thank you for sharing :thumbsup:
     
  6. Xionoxid

    Xionoxid New
    Builder

    Joined:
    Sep 28, 2018
    Messages:
    1
    Likes Received:
    0
    Hello,

    I would like to buy the MiniMill but I've doubts about its accuracy to engrave jewels.

    The description mentions a accuracy of 0.05 to 0,1 mm. Is it enough to make engraving as you can see on pictures below ?

    Did anyone engraved jewels with the machine ? Can you send me pictures ?

    Thank you in advance.

    1.png 2.png 3.png 4.png
     
  7. MaryD

    MaryD OpenBuilds Team

    Joined:
    Apr 13, 2016
    Messages:
    649
    Likes Received:
    639
    The MiniMill, thanks to it's small travel, is a great machine for engraving.

    Take a look at some of these examples made on the MiniMill....some of it depends on your bits, material, speed, number of passes etc. Both of these guys have great Instagram feeds worth exploring.

    Nick Wiegand on Instagram: “I’m super happy with how this Brass Ace of Spades turned out. Ace of Brass perhaps? It is a Poker Card Protector. Swipe for other side.…”
    upload_2018-10-2_8-54-0.png


    Here is some heirloom engraving done with our ACRO System

    FIST Blades on Instagram: “FIST Blades time lapse video of several hours of work shorted down to just a minute. Herloim quality etching/engraving that will last…”
    upload_2018-10-2_8-55-59.png
     
    #277 MaryD, Oct 2, 2018
    Last edited: Oct 2, 2018
    Mark Carew likes this.
  8. Rick 2.0

    Rick 2.0 OpenBuilds Team
    Staff Member Moderator Builder Resident Builder

    Joined:
    Dec 20, 2013
    Messages:
    2,899
    Likes Received:
    1,556
    Additionally if you need to improve resolution even more you can always install lead screws with a smaller lead. (i.e. TR8*2, TR8*4, M8x1.25,etc.)
     
    MaryD likes this.
  9. Doug Rowley

    Builder

    Joined:
    Aug 10, 2017
    Messages:
    4
    Likes Received:
    3
    Will the light ring operate on 12 volts?
     
  10. Mark Carew

    Mark Carew OpenBuilds Team
    Staff Member Moderator Builder Resident Builder

    Joined:
    Jun 28, 2013
    Messages:
    2,763
    Likes Received:
    2,448
    Hello Doug. The Spindle/Router LED Light Ring has 6x LEDs in a series which needs around 20v to light up. Therefore, a 24V Power Supply would be required. You are going to love the bright lights. It makes it so much easier to watch your projects come to life.
     
  11. David Bunch

    David Bunch Veteran
    Builder

    Joined:
    Oct 27, 2014
    Messages:
    624
    Likes Received:
    433
    I have been looking at building either this mini mill, the C-beam or sphinx to cut aluminum. I currently do not have any projects that need to cut any larger than what this mill does & like the small size & portability of this. The only problem I currently have with this design is the exposed 8mm lead screws to the chips of metal coming off the cutter. I get the reason they are exposed is because the nutblock is attached to the carriage and needs to be on that side. How are people dealing with these chips of metal in those cavities? Are they fairly easy to just vacuum up afterwards? I saw the sponge mod someone else mentioned. Is this the best solution for this? The MakerSL Customized OB Minimill I was wondering if a piece of sheet metal or maybe a thin 3d printed flat part screwed to the outer edges of the gantry cart & bent slightly up would deflect these chips away from the screws. After pondering this a little more, I came up with this simple 3d print model that could be screwed between the top of the xy gantry & under the MDF board. The side closest to the back might have to be adjusted to miss the vertical, maybe just leave that off & put some clear wide packing tape across it loosely.
     

    Attached Files:

  12. Techvette

    Techvette New
    Builder

    Joined:
    Oct 1, 2017
    Messages:
    63
    Likes Received:
    23
    For the X axis, you can flip it over so that the lead screw is on the bottom rather than the top. For the others, some have had luck making a bellows that protects the screw. (This is similar to what many large, professional CNC machines use.) I believe McMaster-Carr has bellows in various sizes available - lord knows they sell everything else under the sun - but I don't have a catalog link handy.

    In retrospect, I wish I'd gone with the C-Beam Machine instead of the Mini Mill. It's less portable - the mill is very easy to move and has a very small (mini) footprint - but it's significantly more rigid. For an extra $160, it seems like a good deal. Of course, if you want to upgrade your mill to the C-Beam Machine later on, all you'd need is some longer extrusions and lead screws.
     
    Mark Carew likes this.
  13. Mark Carew

    Mark Carew OpenBuilds Team
    Staff Member Moderator Builder Resident Builder

    Joined:
    Jun 28, 2013
    Messages:
    2,763
    Likes Received:
    2,448
    Cool idea @David Bunch :thumbsup: To be honest on my machine I usually just vacuum up after the fact but there is a cool little bellows maker that may help to make up a great set for you - Bellows Maker
     
  14. Rick 2.0

    Rick 2.0 OpenBuilds Team
    Staff Member Moderator Builder Resident Builder

    Joined:
    Dec 20, 2013
    Messages:
    2,899
    Likes Received:
    1,556
  15. Techvette

    Techvette New
    Builder

    Joined:
    Oct 1, 2017
    Messages:
    63
    Likes Received:
    23
    Wow - that's cheap.
     
  16. Rick 2.0

    Rick 2.0 OpenBuilds Team
    Staff Member Moderator Builder Resident Builder

    Joined:
    Dec 20, 2013
    Messages:
    2,899
    Likes Received:
    1,556
    Hopefully they're not 'too cheap' to be of any use. I have a set on order so I'll know shortly.
     
  17. David Bunch

    David Bunch Veteran
    Builder

    Joined:
    Oct 27, 2014
    Messages:
    624
    Likes Received:
    433
    Thanks for all the info. Looks like the bellows that Rick gave a link to seems the best option. I will ponder it and look at the build guides more thoroughly for another month before deciding. On a side note, is there a way to download an entire openbuild forum thread to view offline on my tablet? I could print each page to a PDF & then combine them, but that is a pain.
     
    #287 David Bunch, Oct 22, 2018
    Last edited: Oct 22, 2018
    Kyo and Mark Carew like this.
  18. Techvette

    Techvette New
    Builder

    Joined:
    Oct 1, 2017
    Messages:
    63
    Likes Received:
    23
    What kind of tablet? There are different apps available that’ll save the page. On a PC it’s as simple as File|Save. You’d still have to do it individually for each page in the thread, though
     
  19. David Bunch

    David Bunch Veteran
    Builder

    Joined:
    Oct 27, 2014
    Messages:
    624
    Likes Received:
    433
    Yes, but as you said I would need to do that for every page just as I would for printing to PDF as I mentioned. This thread would not be too bad at 10 pages, but look a the C-Bot thread which is 107 pages. If there was a setting to display all messages in the thread on one page, that would work for me.
     
    Kyo likes this.
  20. JustinTime

    JustinTime Veteran
    Builder

    Joined:
    Dec 18, 2013
    Messages:
    784
    Likes Received:
    259
    Rick, are you going to use it 'flat' as it is or are you going to 'fold' it into a U shape or something similar? I'm asking since it doesn't seems to me to be too useful in it current shape but I can't figure out how to fold it without it losing it's stretching ability.
     
  21. Rick 2.0

    Rick 2.0 OpenBuilds Team
    Staff Member Moderator Builder Resident Builder

    Joined:
    Dec 20, 2013
    Messages:
    2,899
    Likes Received:
    1,556
    I had just planned to use it flat. It extends out an inch both sides of the rail which should be sufficient to keep chips out.
     
  22. MaryD

    MaryD OpenBuilds Team

    Joined:
    Apr 13, 2016
    Messages:
    649
    Likes Received:
    639
    The OpenBuilds MiniMill honored with Make: Magazine's editor's choice awards. Read more about it in the Make: Magazine - 2019 Digital Fabrication Guide.

    upload_2018-12-3_13-1-10.png
    EditorsChoice_2019_fabrication_award_graphic.PNG EditorsChoice_award_graphic.PNG
     
  23. Techvette

    Techvette New
    Builder

    Joined:
    Oct 1, 2017
    Messages:
    63
    Likes Received:
    23
    Awesome! Congrats. It's a great product.
     
    Mark Carew likes this.
  24. Kevin Adam

    Builder

    Joined:
    Sep 15, 2018
    Messages:
    1
    Likes Received:
    0
    Can get move travel like 18 inch x and y I have project needs that travel amount
     
  25. Rick 2.0

    Rick 2.0 OpenBuilds Team
    Staff Member Moderator Builder Resident Builder

    Joined:
    Dec 20, 2013
    Messages:
    2,899
    Likes Received:
    1,556
    With some minor modifications you can achieve 11" x 6" but that's about as far as it'll reasonably stretch.
     
    Kevin Adam likes this.
  26. David the swarfer

    David the swarfer OpenBuilds Team
    Staff Member Moderator Builder Resident Builder

    Joined:
    Aug 6, 2013
    Messages:
    3,497
    Likes Received:
    1,927
    then what you need is a Sphinx or Workbee or LEAD or C-Beam
     
    Peter Van Der Walt likes this.
  27. wegunterjr

    Builder

    Joined:
    Apr 22, 2014
    Messages:
    3
    Likes Received:
    0
    How did you make that enclosure? That is awesome.
     
  28. Rick 2.0

    Rick 2.0 OpenBuilds Team
    Staff Member Moderator Builder Resident Builder

    Joined:
    Dec 20, 2013
    Messages:
    2,899
    Likes Received:
    1,556
  29. KurtM

    KurtM New
    Builder

    Joined:
    Sep 1, 2016
    Messages:
    2
    Likes Received:
    0
    Did you design the limit switch mounts, or did you find them posted somewhere? I like the design of the them, would you consider posting a link to them?

    Kurt
     
  30. KurtM

    KurtM New
    Builder

    Joined:
    Sep 1, 2016
    Messages:
    2
    Likes Received:
    0
    What spindle and rpm are you running, and what tool are you using? I really like the way your setup is working!!

    Kurt
     

Share This Page

  1. This site uses cookies to help personalise content, tailor your experience and to keep you logged in if you register.
    By continuing to use this site, you are consenting to our use of cookies.
    Dismiss Notice