Welcome to Our Community

Some features disabled for guests. Register Today.

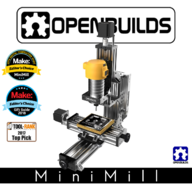
OpenBuilds MiniMill

Discussion in 'CNC Mills/Routers' started by Mark Carew, May 26, 2017.

  1. Paul4d

    Paul4d New
    Builder

    Joined:
    Feb 17, 2015
    Messages:
    15
    Likes Received:
    3
    Has anyone used a touch probe with the mini mill? If so which one?
     
  2. Mark Carew

    Mark Carew OpenBuilds Team
    Staff Member Moderator Builder Resident Builder

    Joined:
    Jun 28, 2013
    Messages:
    2,759
    Likes Received:
    2,438
    I have not seen this done on the MiniMill yet but it would be a cool addition. :thumbsup:
     
  3. David Paxson

    Builder

    Joined:
    Oct 4, 2017
    Messages:
    5
    Likes Received:
    1
    We're nearing completion on our MiniMill, using a Bosch Colt router. What would be the recommended speed/settings for milling Aluminum and also for acetal (Delrin)?
     
  4. MaryD

    MaryD OpenBuilds Team

    Joined:
    Apr 13, 2016
    Messages:
    649
    Likes Received:
    639
    On December 20th, OpenBuilds is offering a Limited Edition, High Torque MiniMill at no additional charge.

    FREE Motor Upgrade (if motor option selected)
    FREE Shipping on all MiniMills within Continental US
    ONE DAY ONLY - December 20th

    This is all thanks to Zachary. You can read his story and how the OpenBuilds Community is coming to his rescue here.

    Merry Christmas!
    high_torque_nema23_crop.jpg
     
  5. SuperDave42

    Builder

    Joined:
    Mar 23, 2017
    Messages:
    1
    Likes Received:
    5
    oh no ! I missed the sale :-(
     
  6. marmageek

    marmageek New
    Builder

    Joined:
    Feb 24, 2015
    Messages:
    19
    Likes Received:
    0
    I just purchased on a Mini Mill on impulse during the 12/20 sale. I am a total NOOB so I apologize up front for the potentially stupid questions. First off, is this the right forum for me to post my OB MM NOOB questions?

    I still have not received my OBMM yet but in the mean time, I am looking to fast-track some knowledge. I am an MSEE by education and want to use this mill for a number of things including: PCB layout, part construction, etching.

    I currently own a Rigid 2 HP plunge router and zero bits/mills. Is this sufficient to start with or should I bite the bullet here and buy something else? If so what? What bits/mills (sorry if I am using the wrong terms here-- please correct me). What is a good set to get for PCB (i.e., ultra-fine), starboard, wood, brass, AL, CU, and anything else this machine will let me cut ;-) ?

    Is there a good tutorial on CNC Milling applicable to the OBMM? The workflow here is something that I have zero experience with. I probably have the most experience with Onshape CAD currently and I am a macOS user. So linux workflow is more preferred than a PC workflow. I purchased the kit with he PS and the CNC xPro 3 blindly without research.

    What CAM software is available compatible with macOS and Onshape? Is this one are where I bite the bullet and spend $$$ on?

    Ideally that is a book or in-depth tutorial somewhere which will guide through a relevant workflow: CAD >> CAM >> CNC (bits/mills, speeds, etc.). Any suggestions?

    Anxiously waiting to join the fray…

    Thanks, Jon
    W1JP
     
  7. Scotty Orr

    Scotty Orr Journeyman
    Builder

    Joined:
    May 21, 2015
    Messages:
    315
    Likes Received:
    178
    Congratulations on your impulse buy - you won't regret it! First of all, your router might be too large for the MiniMill. The spindle mount will handle max diameter of 71mm - weight would also be a consideration. Typically, something like the Bosch Colt, the Dewalt 611, or the Makita RT0701 (all palm routers) is used.

    For CAM software, you can checkout the Sketchup/SketchUCam combination (free). I have been using the Fusion 360 CAD/Cam lately and it is what I would recommend (also free for hobby use). To send G-Code to the controller, you will probably want something like UGS (Universal G-Code Sender). It works natively on a Mac (I am a Mac guy too).

    I'm sure others will chime in here, but dive in - it's a lot of fun!
     
  8. viljami

    viljami New
    Builder

    Joined:
    Aug 24, 2017
    Messages:
    16
    Likes Received:
    3
    I’m just getting started with my MiniMill. I would also recommend Fusion 360 as a CAM-software for mechanical parts. It can be used as CAD as well but it feels too complicated, laggy and buggy compared to Onshape...

    I believe the best free software for making gcode from gerber files is FlatCam. I haven’t used it myself yet but there are a few videos on Youtube. In think ”V”-shaped mills are usually used for making PCBs.

    One of the biggest problems you will run into is the lack of flatness of bare PCB blanks. Even 0,1mm of difference in heigth can ruin thin traces. To mitigate this issue you can use software to probe the height of the board at different places (the cutter closes a circuit when it touches the board). Then it interpolates the boards heigth at every X and Y and compensates it in the Z axis. This lets you have consistent engraving and small traces. At least bcnc has this sort of functionality. It is a gcode sending software written in Python which I much prefer over UGS(Universal Gcode Sender) which runs on Java.

    If you want to do a bit of modding, you can add RPM control with SPI to a Makita RT0700 router which is quite cheap.
    Makita RT0701C - G-code control of spindle speed project
     
    marmageek likes this.
  9. Cowbell321

    Builder

    Joined:
    Nov 24, 2017
    Messages:
    15
    Likes Received:
    17
    I assume you know this but you said you were a noob and this was an impulse buy, but you do need a controller, power supply, wiring, etc. As far as end mills go, I would say start off with some cheaper 1/8" flat end mills with 2 flutes.
     
  10. viljami

    viljami New
    Builder

    Joined:
    Aug 24, 2017
    Messages:
    16
    Likes Received:
    3
    I myself made the mistake of buying the first cheap Chinese end mills I could find. Later I read up on speeds and feeds and learned that the 4 flute HSS end mills are almost useless for a hobby CNC with high RPM spindle/router.

    You probably want to get ones with 3 flutes or less. I’m quite pleased with Chinese ZCCCT AL-2E carbide end mills to cut aluminium. Cheaper HSS end mills work well with wood.
     
  11. David Paxson

    Builder

    Joined:
    Oct 4, 2017
    Messages:
    5
    Likes Received:
    1
    Last night, we finished the first real milling with our MiniMill. The results turned out pretty good. We milled out a slot in a side of 20x20 rail to recess a quarter scale servo for the FIRST Tech Challenge robot. Now to assemble and make sure it is all inbounds.
     
  12. viljami

    viljami New
    Builder

    Joined:
    Aug 24, 2017
    Messages:
    16
    Likes Received:
    3
    What sort of depths and widths of cut would you recommend for cutting aluminium? I have the feeds and speed sorted with G-Wizard but I feel like I’m taking quite small cuts. First I tried 1mm deep, 1.5mm wide with a 3D adaptive and it was way too aggressive. Then I dialed it down to 0.5mm deep and wide. It sounds allright but it is going quite slow.

    I’m trying to pocket a large aluminium plate so I could use it as my build plate for my MiniMill. I’m using 4 and 5mm 2 flute carbide end mills.
     
  13. Scotty Orr

    Scotty Orr Journeyman
    Builder

    Joined:
    May 21, 2015
    Messages:
    315
    Likes Received:
    178
    I am using a 2-flute 3/32" bit (2.38mm) at 12000 rpm. My max stepover is 1/2 bit diameter (1.19mm), max depth/pass is 0.3mm. My feed rate is 762 mm/min. I use a dust shoe and no lubrication. This has worked fine for me with 2024 and 6061 aluminum.
     
  14. David Paxson

    Builder

    Joined:
    Oct 4, 2017
    Messages:
    5
    Likes Received:
    1
    We went very conservatively, stepping in 0.3mm increments in z and 0.5mm in y. The feed rate for the first cut across was at 40 and the feed rate for the other cuts back and forth (in the x axis) was at 120. We had a 1/16" end-mill that broke. We ended up using a bit from a rotary tool we had laying around to do the milling and wanted to make sure not to break it as we had no other spares. The spindle speed was set to 20,000 RPM.
     
  15. Cowbell321

    Builder

    Joined:
    Nov 24, 2017
    Messages:
    15
    Likes Received:
    17
    Just got my Mini Mill working today. I cut some HDPE with ease and then stepped up to 60601 aluminum. It cut fantastic with these 2 flute 1/8" kyrocera endmills! I did .5mm doc with 1/2 step over and 550mm/min. I made a wrench for the colt collet and it looks great. I will post a project of it soon.
     
    GrayUK likes this.
  16. viljami

    viljami New
    Builder

    Joined:
    Aug 24, 2017
    Messages:
    16
    Likes Received:
    3
    Cool I will try to widen my cut a little. With the settings I tried previously it would have taken 11 hours to make my cut... :)
     
  17. Cowbell321

    Builder

    Joined:
    Nov 24, 2017
    Messages:
    15
    Likes Received:
    17
    I have noticed the x axis clicking sometimes. Any ideas of what is causing this.
     
  18. Scotty Orr

    Scotty Orr Journeyman
    Builder

    Joined:
    May 21, 2015
    Messages:
    315
    Likes Received:
    178
    The 8mm threaded rod is slightly undersized and it is clicking on the inside of the bearing most likely. Another contributing factor is that on both the X and Y axis, the extra shim between the wheel and the plate is pulling up on the rod a bit. (This was mentioned earlier in this thread I believe - or maybe another thread.)

    To fix, you can put some teflon tape around the rod where it rides in the bearing to quiet it down. You can also remove the precision shims from the wheels or add a thin spacer between the nut-block and the plate. I applied the tape fix and removed the wheel shims on mine. (I also applied the tape to my Z-axis rod, but don't remove the shims on that one.)
     
  19. marmageek

    marmageek New
    Builder

    Joined:
    Feb 24, 2015
    Messages:
    19
    Likes Received:
    0
    I received my mill in the mail yesterday and have been building them. I noticed that in the video the axis move much 'easier' than mine. It takes me a fair bit of torque to move my axis. I followed the directions to where the anti-backlash nut blocks are not levered (i.e. no pressure from friction screw lever thingy). But it is a high-friction fit even with out any lever strain.

    Is this going to be a problem?
     
  20. marmageek

    marmageek New
    Builder

    Joined:
    Feb 24, 2015
    Messages:
    19
    Likes Received:
    0
    Looking at my z axis, I see that there is a misalignment between the stepper axis and the z lead axis. While the coupler will handle this, it will create vibration and torque variance on the lead.
    0E22DFg7TtGAPWRRKFc3QA.jpg

    Maybe this is not a big deal. But curiously — why isn't a high-torque NEMA-23 motor not mounted properly with four corners on the end-plate?
     
  21. Cowbell321

    Builder

    Joined:
    Nov 24, 2017
    Messages:
    15
    Likes Received:
    17
    I felt mine was tight too, but you really want to make sure there is a bit of preload on those bearings so the machine is stiffer. My machine is working great now and I built it yesterday.
     
  22. marmageek

    marmageek New
    Builder

    Joined:
    Feb 24, 2015
    Messages:
    19
    Likes Received:
    0
    Finished my mill build, now looking to complete the wiring.

    I purchased an CNC xPro control board. I am reading about the high-torque NEMA 23 motors and they require 3.0 A/phase and the xPro can only do 2.5 A/phase. So it appears that I purchased the wrong controller board. I'd like to return the one I have and purchase the higher capacity ones... How do I go about doing that?
     
  23. Peter Van Der Walt

    Peter Van Der Walt OpenBuilds Team
    Staff Member Moderator Builder Resident Builder

    Joined:
    Mar 1, 2017
    Messages:
    14,917
    Likes Received:
    4,290
    Rated to 3A. Not 'require 3A'. You can run them just fine with a 2.2A setting on the XPRO. Someday when you want to upgrade you can add some DQ542MAs alongside the XPRO
     
  24. viljami

    viljami New
    Builder

    Joined:
    Aug 24, 2017
    Messages:
    16
    Likes Received:
    3
    I just read up on bCNC. It looks like it has all sorts of features, pretty much everything I had hoped for and more :)
    Here is a workflow for making PCBs which tells you everything that you need to do after you have made your gcode with FlatCAM or something similar.
    PCB 101 First time · vlachoudis/bCNC Wiki · GitHub
     
  25. Peter Van Der Walt

    Peter Van Der Walt OpenBuilds Team
    Staff Member Moderator Builder Resident Builder

    Joined:
    Mar 1, 2017
    Messages:
    14,917
    Likes Received:
    4,290
    Also try github.com/LaserWeb/LaserWeb4-Binaries/releases/latest (ignore the word laser, it supports mills, lasers, lathes too. Free, CAM and Host in one
     
  26. David Paxson

    Builder

    Joined:
    Oct 4, 2017
    Messages:
    5
    Likes Received:
    1
    I've been using bCNC and can vouch that it is nice software. I started running on a Windows laptop but yesterday used it on a Raspberry Pi which worked quite well.
     
    viljami likes this.
  27. Cowbell321

    Builder

    Joined:
    Nov 24, 2017
    Messages:
    15
    Likes Received:
    17
    Wow this thing tears through hdpe. I had it set to 1000 mm/min at 2.5mm doc on an 1/8 end mill and it had no problem at all. I now need to make some kind of enclosure to prevent the rain of chips from getting all over the place. Also, has anyone found a good solution to cover the lead screws so they don't get full of chips?
     
  28. viljami

    viljami New
    Builder

    Joined:
    Aug 24, 2017
    Messages:
    16
    Likes Received:
    3
    I added the ”sponge mod” and it seems to wipe the lead screws very clean.
    The MakerSL Customized OB Minimill
     
  29. Lindsey Lewis

    Builder

    Joined:
    May 21, 2015
    Messages:
    14
    Likes Received:
    16
    Hello guys,

    I just got my Mini CNC mill physical assembly done and I am getting ready to start on the electronics (RaspberryPI CNC and 7 inch touch screen). Couple of things I have questions about or noticed during the build.

    1. Can I extend the z Axis head another 40 mm in the y-axis to use the full scale of the y-axis travel (or add spacer blocks behind the z-axis gantry)?
    2. The c-beam endplates have reliefs cut for the low profile 5mm screw heads. Either the screws are not all consistently sized or the end plates I got in my kit did not properly have the reliefs properly sized for the 5mm screw head in all cases. Some were to small or screw heads to large.
    3. Can a guy go with the 40 MM C-beam gantry plate on the bottom of the x-axis assembly to get an extra half inch of travel in the y-axis direction?
    4. Can I put in the stand off plate on the z-axis top motor and then also have a manual knob adjuster for the z-axis as well?
    Prior to building this Mini CNC, I had used an Openbuilds c-beam for a z-axis on a (what I am calling) Micro-Mill that uses the Proxxon KT70 table.

    Current build: 1228171857a.jpg

    Micro CNC: dremel.jpg

    Micro CNC Output using image processing and the smallest Dremel ball end cutter I could find:
    screenshot_Sat_Dec_30_13.57.34.png

    Thanks
     
    GrayUK likes this.
  30. viljami

    viljami New
    Builder

    Joined:
    Aug 24, 2017
    Messages:
    16
    Likes Received:
    3

Share This Page

  1. This site uses cookies to help personalise content, tailor your experience and to keep you logged in if you register.
    By continuing to use this site, you are consenting to our use of cookies.
    Dismiss Notice