Welcome to Our Community

Some features disabled for guests. Register Today.

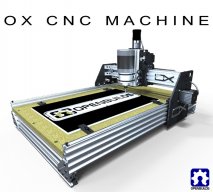
OpenBuilds OX CNC Machine

Discussion in 'CNC Mills/Routers' started by Mark Carew, Dec 15, 2013.

  1. Giarc

    Giarc OpenBuilds Team
    Staff Member Moderator Builder Resident Builder

    Joined:
    Jan 24, 2015
    Messages:
    3,033
    Likes Received:
    1,695
    If it is belted, then perhaps the larger belted 1510 sized machines should be similar, but I do not know what components (pulleys, etc...) you used in your build or what microstepping setting you chose. However, everything you need to know about how to configure your build and calibrate it is right here: gnea/grbl
     
  2. kam

    kam New
    Builder

    Joined:
    Sep 1, 2016
    Messages:
    7
    Likes Received:
    3
    I used 1510 for a base line and adj. xyz through accrual stroke of gantry's. Open build with spark controller v4 and drawing with xcarve pro is like a dream to use and execute. Great hand shake between programs, no stress
     
  3. tazma

    tazma New
    Builder

    Joined:
    May 17, 2018
    Messages:
    31
    Likes Received:
    3
    hola alguien trabaja mach3 con este cnc
     
  4. Azamat O

    Azamat O New
    Builder

    Joined:
    Dec 9, 2015
    Messages:
    3
    Likes Received:
    0
    Hello guys.
    Sorry for my bad eng.
    Please help me.
    I'm already confused.
    I bought ooznest ox cnc on aliexpress (SPAM 3d store).
    1000 * 1000
    And also bought a set of Lolette NVUM V2 and drivers TB6600.
    I collected all the mechanics. And stretched all the wires.
    But with the tuning microstep and "motor tuning"(mach3) - does not work right.
    My machine:
    Belting.
    Belt - GT3.
    GT3 Pulley - 6.35 / 20T
    Motors - 23hd56001y-21b
    Chinese drivers TB6600

    I need to properly set up Microstep on drivers.
    And in MACH3 adjust motor tuning set up.
    the seller has a setup guide.
    But there only for lead-screws version.
    I have the version - belting machine.


    155386161214737378[1].png 1553861839151932081[1].png 61jwFq+OXHL._SL1003_[1].jpg
     
  5. Rick 2.0

    Rick 2.0 OpenBuilds Team
    Staff Member Moderator Builder Resident Builder

    Joined:
    Dec 20, 2013
    Messages:
    2,899
    Likes Received:
    1,556
    Please contact the vendor for support. What you purchased was neither an Openbuilds nor an Ooznest product and is not supported here and there is a strong probability that the copy of Mach3 you received it not legitimate either. While we strongly believe in open source we do not support fraudulent activity.
     
    sharmstr likes this.
  6. tazma

    tazma New
    Builder

    Joined:
    May 17, 2018
    Messages:
    31
    Likes Received:
    3
    [QUOTE = "Azamat O, post: 81091, miembro: 32624"] Hola chicos.
    Lo siento por mi mal eng.
    Por favor, ayúdame.
    Ya estoy confundido
    Compré onocnest ox cnc en aliexpress (SPAM 3d store).
    1000 * 1000
    Y también compró un juego de Lolette NVUM V2 y controladores TB6600.
    Coleccioné todos los mecánicos. Y estiró todos los alambres.
    Pero con el microstep de ajuste y el "ajuste del motor" (mach3), no funciona bien.
    Mi maquina
    Correaje.
    Cinturón - GT3.
    Polea GT3 - 6.35 / 20T
    Motores - 23hd56001y-21b
    Conductores chinos TB6600

    Necesito configurar correctamente Microstep en los controladores.
    Y en MACH3 ajustar la configuración del motor.
    El vendedor tiene una guía de configuración.
    Pero sólo hay para la versión de los tornillos de plomo.
    Tengo la versión - máquina de cinturones.


    View attachment 39837
     

    Attached Files:

    Azamat O likes this.
  7. Mark Carew

    Mark Carew OpenBuilds Team
    Staff Member Moderator Builder Resident Builder

    Joined:
    Jun 28, 2013
    Messages:
    2,763
    Likes Received:
    2,448
    Giarc, Anthony Bolgar and Azamat O like this.
  8. Azamat O

    Azamat O New
    Builder

    Joined:
    Dec 9, 2015
    Messages:
    3
    Likes Received:
    0
    Guys plz halp me.
    Have (belt version) OXCnC 1000*1000.
    And have skew Y+A axis.
    In the extreme forward position, from the side of the axis "A" there is a bias. As in the photo.
    In the extreme rear position (slid all the way in), there is no such bias.
    p.s. sorry for my english i use Google for translate. :(

    Addition:
    I connected wire the motors to driver like this:
    Y Axis - ABCD
    A Axis - DCBA

    Addition2:
    If you raise the edge of the axis A.
    The distortion disappears...

    WhatsApp Image 2019-05-05 at 09.30.53.jpeg WhatsApp Image 2019-05-05 at 09.30.54(1).jpg
     
    #3578 Azamat O, May 4, 2019
    Last edited: May 4, 2019
  9. Giarc

    Giarc OpenBuilds Team
    Staff Member Moderator Builder Resident Builder

    Joined:
    Jan 24, 2015
    Messages:
    3,033
    Likes Received:
    1,695
    Are your extrusions on both side the exact same length? Or is one slightly longer causing it to be out of square?
     
  10. Azamat O

    Azamat O New
    Builder

    Joined:
    Dec 9, 2015
    Messages:
    3
    Likes Received:
    0
    They are absolutely the same.
    This is a set, I did not produce anything myself.
    If you raise the edge of the axis A.
    The distortion disappears...
     
  11. Hector Beltran

    Hector Beltran Well-Known
    Builder

    Joined:
    Oct 14, 2017
    Messages:
    61
    Likes Received:
    26
    Your build is not squared. I had a similar issue with my Workbee which you can search for in this forum. Do this simple test: find a perfectly flat surface, and try to stand your extrusions on either end. You’ll probably notice a slight wobble with respect to the flat surface. This is caused by the threading done to the holes at the ends of the extrusions; it literally bulges the extrusion around the hole ever so slightly. If your extrusions don’t have any threads tapped, then check for square (flat surface against long side of the extrusion). A slight angle will throw off you build. YouTube has a few videos of people that have run different tests on this issue and how to check for square.
    I had mine extrusions recut with a perfectly square miter saw (just a 1 mm or 2 mm) to square it. Other people have used bench top sanders, and others have used shimmies to square their builds.
    Since you bought your kit off of China, you are stuck; you have to fix in which ever way you can. If you have access to a precision metal machine shop, you can ask them (pay them) to square them for you. Do not try filing them by hand as you’ll make them worse.
     
  12. Gaou²

    Gaou² New
    Builder

    Joined:
    Nov 17, 2014
    Messages:
    20
    Likes Received:
    2
    Guys i need some help. I am looking for an updated plan of the plate for the z axis . i want the 23 nema plate but i cant find anything on the net. i thought i have seen this somewhere in the past but i can recall where.
     
  13. Rick 2.0

    Rick 2.0 OpenBuilds Team
    Staff Member Moderator Builder Resident Builder

    Joined:
    Dec 20, 2013
    Messages:
    2,899
    Likes Received:
    1,556
    Check the Files and Drawings tab at the top of the page.
     
    Gaou² likes this.
  14. Gaou²

    Gaou² New
    Builder

    Joined:
    Nov 17, 2014
    Messages:
    20
    Likes Received:
    2
    thanks for ur reply but i couldn't found it . maybe i am not looking carefully enough. anyway i draw it and cut it already but thanks anyway.
     
  15. wingtime

    wingtime New
    Builder

    Joined:
    Mar 18, 2015
    Messages:
    19
    Likes Received:
    12
    Anybody running the new Blackbox controller on an OX?

    I just got around to switching mine over from a Tiny to the blackbox. I'm looking for help with the grbl settings. I'm using the Openbuilds control software and the only preset machines they have are all leadscrew machines. It been sooo long since I set up my TinyG I can't find my notes on steps etc.

    Thanks
     
  16. Rick 2.0

    Rick 2.0 OpenBuilds Team
    Staff Member Moderator Builder Resident Builder

    Joined:
    Dec 20, 2013
    Messages:
    2,899
    Likes Received:
    1,556
    Have a look at Mark Carew's post about 9 posts up.
     
  17. David the swarfer

    David the swarfer OpenBuilds Team
    Staff Member Moderator Builder Resident Builder

    Joined:
    Aug 6, 2013
    Messages:
    3,496
    Likes Received:
    1,927
    For belt steps you can use GRBL settings calculator
    and then calibrate because belts stretch
     
  18. wingtime

    wingtime New
    Builder

    Joined:
    Mar 18, 2015
    Messages:
    19
    Likes Received:
    12
    Once I finally got back to working on the OX it turns out it was pretty simple. Had to set $4=1 (enable) X and Y steps to 26.667 and Z to 200 steps. Moving around good now!
     
    Peter Van Der Walt likes this.
  19. Kevon Ritter

    Kevon Ritter Veteran
    Builder

    Joined:
    Apr 30, 2015
    Messages:
    597
    Likes Received:
    294
    You need to calibrate it. Those numbers are ideal everything to exact spec numbers. Move the machine to one end as far as it can go. Use the spindle/router to leave a tiny dot. Move to the opposite end on the same axis. Leave another dot. Note the difference between theoretical and actual. Repeat with the other axi. Z is a little more difficult, but can be done with an object whose exact height is known. From there just go with the feeler gauge (paper) method.

    Theoretical / Actual * Th.Steps = Ac.Steps
     
  20. Peter Van Der Walt

    Peter Van Der Walt OpenBuilds Team
    Staff Member Moderator Builder Resident Builder

    Joined:
    Mar 1, 2017
    Messages:
    15,299
    Likes Received:
    4,360
    OpenBuilds-CONTROL > Wizards and Tools > Calibrate...

    Way easier! :)
     
  21. wingtime

    wingtime New
    Builder

    Joined:
    Mar 18, 2015
    Messages:
    19
    Likes Received:
    12
    Measured the actual machine movements and it is dead on.
     
  22. Damonfauer

    Builder

    Joined:
    Oct 7, 2018
    Messages:
    1
    Likes Received:
    0
    For the large version i need to side V-Slot rails 750 to 1500 ? Is it just a problem to extend the sides? sorry for my bad language
     
  23. Rick 2.0

    Rick 2.0 OpenBuilds Team
    Staff Member Moderator Builder Resident Builder

    Joined:
    Dec 20, 2013
    Messages:
    2,899
    Likes Received:
    1,556
    The longer you make them the more flexible they get which will have a bad impact on the quality of the cut. If you do wish to make them that long it is helpful to turn the platform framing below the spoil board 90 degrees and connect them the side rails as this will greatly stiffen the side rails. Another issue with using longer side rails is stretch in the belt. You will probably want to use a double belted setup to reduce stretch.
     
  24. Gaou²

    Gaou² New
    Builder

    Joined:
    Nov 17, 2014
    Messages:
    20
    Likes Received:
    2
    Guys i need some help . I am trying to find an easy way to strengthen my z-axis on the cheap . I do have a lot of flexibility and when it comes to drillling aluminum it can't center itself. Did anyone come over this and solve it ? If so, how ?
     
  25. Rick 2.0

    Rick 2.0 OpenBuilds Team
    Staff Member Moderator Builder Resident Builder

    Joined:
    Dec 20, 2013
    Messages:
    2,899
    Likes Received:
    1,556
    We need some really good photos of what you have in order to offer suggestions on modifications. Also can you identify the specific point of weakness? Is it just the Z or does flex in the X-axis play into the problem.
     
  26. Gaou²

    Gaou² New
    Builder

    Joined:
    Nov 17, 2014
    Messages:
    20
    Likes Received:
    2
    i haven't did anything in z axis . it is stock ox 1500x1000 . i have some flex on the whole carriage that runs on the double 60x20 profile but i dont mind . What is bother me is the flex on the z axis. When it comes to drill then it is flexing along y axis. i mean instead of going down vertically ( z-axis) when it touch the part then it flexs a little on the y axis.
    [​IMG][​IMG]
     
  27. Rick 2.0

    Rick 2.0 OpenBuilds Team
    Staff Member Moderator Builder Resident Builder

    Joined:
    Dec 20, 2013
    Messages:
    2,899
    Likes Received:
    1,556
    The easiest solution is just to extend the spacer blocks. Looks like you could easily add 60mm to them. The additional leverage adds a fair amount of rigidity.

    spacer blocks.jpg
     
    Gaou² likes this.
  28. Gary Caruso

    Gary Caruso OpenBuilds Volunteer
    Staff Member Moderator Builder

    Joined:
    May 19, 2016
    Messages:
    1,194
    Likes Received:
    534
    Yes, this or do the C-Beam upgrade (Ox HD)
     

    Attached Files:

    Peter Van Der Walt likes this.
  29. Gaou²

    Gaou² New
    Builder

    Joined:
    Nov 17, 2014
    Messages:
    20
    Likes Received:
    2
    the c-beam upgrade needs internal mini wheels, or it is just the outside wheels ?
     
  30. Gary Caruso

    Gary Caruso OpenBuilds Volunteer
    Staff Member Moderator Builder

    Joined:
    May 19, 2016
    Messages:
    1,194
    Likes Received:
    534
    At first I was using the standard Ox HD that Chrisclub cuts (no inside wheels), but have since designed my own plates (the ones in the pic) that do have the inside wheels as well.
    see pics
    Cheers
    Gary
     

    Attached Files:

    Mark Carew likes this.

Share This Page

  1. This site uses cookies to help personalise content, tailor your experience and to keep you logged in if you register.
    By continuing to use this site, you are consenting to our use of cookies.
    Dismiss Notice