Welcome to Our Community

Some features disabled for guests. Register Today.

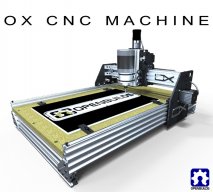
OpenBuilds OX CNC Machine

Discussion in 'CNC Mills/Routers' started by Mark Carew, Dec 15, 2013.

  1. GrandpawB

    GrandpawB Well-Known
    Builder

    Joined:
    Dec 23, 2013
    Messages:
    122
    Likes Received:
    3
    Thank you very much. I have SP3 , Sketchup and SketchUCam all loaded up and working fine. Runs extremely slow, but it works. :)
     
  2. Vunics

    Vunics New
    Builder

    Joined:
    Feb 20, 2014
    Messages:
    2
    Likes Received:
    0
    Hi,

    This looks good, but I'm wondering if you can use to machine G-10 and FR-4? or is this strictly for wood and maybe aluminum?!
     
  3. Phillikl

    Phillikl New
    Builder

    Joined:
    Mar 18, 2014
    Messages:
    15
    Likes Received:
    17
    From my understanding with proper speeds and bit selection these epoxy impregnated fiberglass materials are about as easy to mill as aluminum, you will definitely eat more bits though. However with that being said, your dust collection system needs to be top notch to handle the airborne contamination it will produce. Me personally (from the advice of a seasoned machinist) will not touch the stuff until I get a professional dust collection system and out of my garage.
     
    #813 Phillikl, May 26, 2014
    Last edited: May 26, 2014
    trigger and Robert Hummel like this.
  4. Vunics

    Vunics New
    Builder

    Joined:
    Feb 20, 2014
    Messages:
    2
    Likes Received:
    0
    Thanks, the the primary reason I want to build a CNC machine is to make jigs using G-10. So, I will definitely install some sort of dust collection on top. Can you tell me what the resolution and accuracy of this machine is?
     
  5. MechEng

    MechEng New
    Builder

    Joined:
    Mar 2, 2014
    Messages:
    15
    Likes Received:
    4
  6. chip_breakin

    Builder

    Joined:
    May 9, 2014
    Messages:
    13
    Likes Received:
    1
    I'm sure it is pretty sturdy but with the introduction of those nylon spacers its going to flex quite a bit with some weight on it or when machining hard stock like aluminum or a hardwood.

    I have 3 1/2in thick HDPE mounts on my spindle now and it flexes wayyyy too much for comfort. Aluminum mounts are the way to go if you can do it.
     
  7. MechEng

    MechEng New
    Builder

    Joined:
    Mar 2, 2014
    Messages:
    15
    Likes Received:
    4
    Yes the nylon spacers were more of a, "test and see" prototyping part than a functional part. If they prove to be too flexible, a person could easily swap them with something like cheap fender washers. I'm also looking for a low profile nut that might make it so the clamps can mount directly to the v-slot and get rid of the spacing washers all together.
     
  8. Phillikl

    Phillikl New
    Builder

    Joined:
    Mar 18, 2014
    Messages:
    15
    Likes Received:
    17
    Resolution and accuracy are based on countless factors. I will try to give a quick breakdown.

    Resolution: software, controller board, stepper drivers and steppers all play into this. Remember with increased resolution you will loose torque. Technology brought us micro - stepping capabilities; while 256 micro steps sound pretty cool and may give you a better finished product, chances are it will not. Gecko produces one of the best stepper drivers made and they only go to 10 micro steps, there is a reason for that. These options are up to you and what you require.

    Accuracy: this machine has a potential to be extremely accurate. However there are many more factors to create a less accurate machine than accurate. Some things to take in consideration when determining your needs:

    Size: normally bigger means harder to make accurate.
    Workmanship: taking time to ensure cuts are square and accurate as possible.
    Spindle: while a router provides a great substitute for a VFD spindle, they will wear bushings much faster, thus creating inaccuracies. Also mounting for a spindles normally seem much tighter tolerances.

    As you can see, with all these factors involved it's almost impossible to say "how accurate this machine is"; However some maybe able to say how accurate their machine is.

    While this is a great starter build, there is a reason Thompson linear (and similar) rails are priced an arm and a leg. If you are looking for a hobby grade machine, this is a great start. If you are looking to mill aircraft parts, then you may want to look elsewhere and plan to spend 10X the $$.
     
  9. GrayUK

    GrayUK Openbuilds Team Elder
    Staff Member Moderator Builder

    Joined:
    May 5, 2014
    Messages:
    1,668
    Likes Received:
    627
    Well that depressed me! :(
     
  10. Tweakie

    Tweakie OpenBuilds Team
    Moderator

    Joined:
    Jan 18, 2014
    Messages:
    784
    Likes Received:
    326
    Don’t be depressed my friend, I think Phillikl has given a pretty accurate summary of the factors affecting accuracy and resolution – the final machine quality and it’s capability is very much in the hands of the builder.


    Tweakie.
     
  11. Serge E.

    Serge E. Journeyman
    Builder

    Joined:
    May 6, 2014
    Messages:
    730
    Likes Received:
    252
    I finally have all the parts for my OX - somehow got M3 instead of M5 for some screws (saga continues). Then found a local Fastenal outlet just across street !! Actually on other side of the Whisky storage buildings in "backyard". It opened mere weeks ago, so not listed anywhere. Just have to buy larger quantity packs (100 or 50) so plenty of spares ...

    As mentionned earlier, I'll be pimping my OX as well. LED light rope ordered, thinking of trying Plasti-Dip for other parts of the OX, filling tracks as you did, dressing up wiring, ... Like you say, mechanics is only a few hours assembling. However, from there, it will take time to get things just as one would want and working properly.

    As I assembled the gantrys, found a few needed tweaks and tricks - pictures to follow :

    - if the Y axis steppers are mounted in the "high" position, regular head screws worked fine without rubbing on V-slot. Otherwise, need to add a shim to clear.

    - to assemble the front plate (Z-axis) to back plate (forming X-axis assembly), propping front plate sub assembly with long screws allows doing all 4 corners (sequence of spacer/eccentrics shim, wheel) a dream, place back plate on top, followed by nuts with a few twists. That is it. Tighten and you are done.

    - using regular head screws on front plate requires adding an extra shim to the wheel sequence of X-axis, shifting everything just enough to clear V-slot. I was forced to rob from other end of sequence as I was short 2 shims ... Might not be good for the wheel bearing now directly against last spacer/eccentric ??

    - to mount the Y and X axis NEMA 23, rather than tapping the steppers, use the screws saved from the wheel kits and bolt steppers from back. These screws are otherwise shelved for an other project. Yes, a bit long, but the stepper casing is longer still, so no one will notice. My steppers did not allow for tapping - larger holes than required for tapping !

    - same "recycling" can be done with mounting the wheels for Z-axis. The extra thread sticking out should come in handy for mounting ... Something. I didn't reach that point yet ;) Or, it will be in the way ... ;(

    - somehow, I need to get 2 M5 x 20 mm to mount the ACME block on Z plate... Using the 15 mm (actually have 16 mm) is way too short and anything more than 25mm will rub the V-slot.

    Now I have to cut the 1500 mm 20x80 in half, cut a piece of 20x60 for the Z, do loads of tapping at their ends (not looking forward to this part) and mechanical assembly will be "done".

    A few good points made by others from your mounting the table beneath for added Z travel will make me think again on taking that approach. But the table must add strength as well as being "true".

    Going with a 750 (Y) x 1500 (x) going for an "infinite" length x 4' wide work area with an eventual "open" bottom area to add extra depth (as when working on the body mold for scale monster truck needing total of 6+") and having a 4th axis (ie turn the body mold at least a 1/4 turn to "clear "head/tool assembly over mold - manual keyed rotation at first). In fact, for front and back body work, the piece would need to be mounted vertically mostly beneath the table as it can be 20+" long).

    I might find out that an all in one machine is not better than a few "specialised" machines. But the garage is only so bib, as is the budget ...

    I will be on the road this coming weekend (niece's college grad), so i'll disappear again for a few days. Following weekend should have my OX fully assembled ;)) Then comes the fun part : making it work !
     
  12. Serge E.

    Serge E. Journeyman
    Builder

    Joined:
    May 6, 2014
    Messages:
    730
    Likes Received:
    252
    There are kits for anodizing "at home". Mark has one listed in the ressources here. But it is not cheap (was it 500+$ just to get started ?). It involves acid (!) and other chemicals. The process, even for small parts, is not one you would want to do just once in a while for one or two parts. Otherwise you waste (get vapours!) ...

    Maybe try the spray on chrome finish instead ? Might not be as durable, but can respray as needed just about any time ... Could do some fancy colour effects with paint on approach. Of courae, it does not add anything to base material property.
     
  13. brjig

    brjig New
    Builder

    Joined:
    May 22, 2014
    Messages:
    15
    Likes Received:
    6
    The 8mm threaded rod in the store is 1000mm in length.
    Does that need to get cut down in length for this project? 1000mm is 3feet. I doubt that the Z-axis of travel is 3 feet.

    Thanks
     
  14. dddman

    dddman Journeyman
    Builder

    Joined:
    Mar 2, 2014
    Messages:
    468
    Likes Received:
    187
    @brjig

    Yes you have to cut it down and you'll have plenty left for other projects!
     
  15. bobt

    bobt Well-Known
    Builder

    Joined:
    Dec 4, 2013
    Messages:
    89
    Likes Received:
    38
    But then again having a 1000mm Z axis has to help somewhere.

    Bob
     
    Phillikl and Duane like this.
  16. Serge E.

    Serge E. Journeyman
    Builder

    Joined:
    May 6, 2014
    Messages:
    730
    Likes Received:
    252
    Vertical milling/routing with a lot less ... Y axis. Move it up against a wall and carve into the drywall or plaster ? Would it still be Z axis or just a regular OX on its side ?

    Wasit here that I saw the HandyCNC or on KickStarter ? I forget the exact name ... It's an open "bottom" cnc router which is held over the work surface while it does its magic. Hold it against a wall, let it "crawl" a piece of 2" x whatever to cut stair beam, etc. Neat idea, not sure it would be fast enough not to bore heck out of user though. I would cramp ...

    How about a cnc pole carver ? Let it go up a pole and carve a totem replica as it spirals its way down (4 axis) or have four or more offset heads working at same time as it slides down. If it can handle square posts, carve the gazebo/pergola/deck posts after the fact. Just set it, get a few beers and job done.
     
  17. GrayUK

    GrayUK Openbuilds Team Elder
    Staff Member Moderator Builder

    Joined:
    May 5, 2014
    Messages:
    1,668
    Likes Received:
    627
    Come on Serge E. Stop holding that imagination back. :cool: You know you can do better. :D
     
  18. Serge E.

    Serge E. Journeyman
    Builder

    Joined:
    May 6, 2014
    Messages:
    730
    Likes Received:
    252
    3D graffiti : sneak the cnc pole carver over telephone or light poles late nights and... With the right bits, it should be able to handle the concrete and metal poles, right ? It would just need to self adjust for the varying diameter and other imperfections... It would need a power source ... Small engine acting as generator, built in to avoid long cables. It would have to be relatively quiet though. Raccoon skin camo ?? A beaver skin might be more appropriate, eh ? Call it the "Beav" !

    Cities would probably pay for the service, no ? Lay a quick dry layer of paint, mill some of it off to highlight carving... What about several layers of different colours and then really show off your 3D milling skills by carving a coloured image ! Now that's falling off the edge of ridiculous.

    Come to think of it, just how small can we make a micro / baby OX ? Can it be small enough to engrave / carve on a grain of rice ? If a few people can do it bare handed, why not a cnc ? Those few people are not shrunk ... that much. Not that it would be as commercially viable as the 3D pole/totem carver.

    Combine the two and get a carved chopstick maker !

    There's a few challenges to tackle.

    ;)
     
  19. Tweakie

    Tweakie OpenBuilds Team
    Moderator

    Joined:
    Jan 18, 2014
    Messages:
    784
    Likes Received:
    326
    Now that, I think, is a brilliant idea :thumbsup:

    Tweakie.
     
  20. brjig

    brjig New
    Builder

    Joined:
    May 22, 2014
    Messages:
    15
    Likes Received:
    6

    Its doable, if you know how thick each layer of paint it and you move the mill down only that distance per pass it can look quite amazing
     
  21. KerryH

    KerryH New
    Builder

    Joined:
    May 26, 2014
    Messages:
    63
    Likes Received:
    21
    Back on topic, how foolish would it be to have the gantry plates milled from 1/2" aluminum as opposed to purchasing 1/4" aluminum specifically for the job? I understand I would probably need to do some pocket milling to 1/4" in areas that are dependent on that thickness. Reason being I have a 12x24 sheet left over from a previous project so it is considered free to me at this point.

    Also, would there be enough of a benefit to justify tying the bottoms of the gantry plates together underneath the table?

    Also thank you for creating this project, I have been looking at cnc routers for quite some time now, and had not found one that I was suitably happy with the design for the but the Ox sits well with me in so many ways!
     
  22. GrayUK

    GrayUK Openbuilds Team Elder
    Staff Member Moderator Builder

    Joined:
    May 5, 2014
    Messages:
    1,668
    Likes Received:
    627
    There you go Serge E, I knew if we through you a bone, you'd run with it!!!! :D

    Life seems so quiet now, doesn't it! :sleepy:

    Cheers Gray
     
  23. mw.design

    mw.design New
    Builder

    Joined:
    May 24, 2014
    Messages:
    6
    Likes Received:
    0
    Finally got my OX plates, let the build begin....
     
  24. GrayUK

    GrayUK Openbuilds Team Elder
    Staff Member Moderator Builder

    Joined:
    May 5, 2014
    Messages:
    1,668
    Likes Received:
    627
    mw.design
    Don't forget, start a new Thread, and keep us informed of the good bits :) and the bad bits. :banghead: Pictures or video would be great if you can manage it. :cool: Don't keep it to yourself, share the experience.

    Good Luck
    Gray
     
  25. GrayUK

    GrayUK Openbuilds Team Elder
    Staff Member Moderator Builder

    Joined:
    May 5, 2014
    Messages:
    1,668
    Likes Received:
    627
    Hi KerryH.
    I think some of us would bite your hand off for some of that plate. I think you need to check out and confer with Robert Hummel on the subject of Gantry plates. (He's the Gantry Man!) I don't really see there to be problems with that though. I certainly intend to beef up the gantry once the initial machine is constructed. It's one on those few machines that can actually rebuild and make itself better!

    Good Luck
    Gray
     
    KerryH likes this.
  26. KerryH

    KerryH New
    Builder

    Joined:
    May 26, 2014
    Messages:
    63
    Likes Received:
    21
    Ya I know what you mean, especially considering it is 7050 alloy. But it is honestly not being used for anything else right now or in the near future so I figure it would be a good place to save a little money vs buying new plate. I'm torn because it is such nice material to use on this application, but I have 0 use for it currently.
     
  27. GrayUK

    GrayUK Openbuilds Team Elder
    Staff Member Moderator Builder

    Joined:
    May 5, 2014
    Messages:
    1,668
    Likes Received:
    627
    Use it, or sit and polish it? :confused:
     
  28. Robert Hummel

    Robert Hummel Custom Builder
    Moderator

    Joined:
    Nov 14, 2013
    Messages:
    978
    Likes Received:
    715
    I would have to say it would be un-needed weight added to the wheels causing faster wear.
    1/4" is more then enough IMO.
     
    KerryH likes this.
  29. GrayUK

    GrayUK Openbuilds Team Elder
    Staff Member Moderator Builder

    Joined:
    May 5, 2014
    Messages:
    1,668
    Likes Received:
    627
    I knew you would respond to the word "Gantry", Robert. :)
    How fast are we talking here? What would be the "normal" life of a solid wheel, and how much would it be reduced to? Roughly. Approximately. Ball park. Round About. Somewhere near. :D
    Cheers
    Gray
     
    Robert Hummel likes this.
  30. Robert Hummel

    Robert Hummel Custom Builder
    Moderator

    Joined:
    Nov 14, 2013
    Messages:
    978
    Likes Received:
    715
    Just a stab but I would stay two times the amount of wear as it's twice the weight lol.

    I'm not sure of wear really just figure what one would look for is light and strong.
     

Share This Page

  1. This site uses cookies to help personalise content, tailor your experience and to keep you logged in if you register.
    By continuing to use this site, you are consenting to our use of cookies.
    Dismiss Notice