Welcome to Our Community

Some features disabled for guests. Register Today.

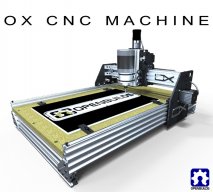
OpenBuilds OX CNC Machine

Discussion in 'CNC Mills/Routers' started by Mark Carew, Dec 15, 2013.

  1. Mopar32985

    Mopar32985 Well-Known
    Builder

    Joined:
    Dec 7, 2013
    Messages:
    128
    Likes Received:
    47
    Hey guys was wondering if you all might be able to help me out before i give up on my hobbycnc board. Is there specific math into finding out your motor tuning for velocity and acceleration. Every once in a blur moon i will have bad chatter in a curve cut and then miss steps i think its to do with the hobbycnc board kicking the power down to 50% when one axis is not moving. But dont want to give up and buy a new board if it could be a simple tuning problem. Thanks for any help or insight i would be happy to post pics of the tuning window in mach 3 so you can see my settings. Thanks
     
  2. Nickies

    Nickies New
    Builder

    Joined:
    Apr 7, 2015
    Messages:
    18
    Likes Received:
    10
    Hello everyone! I'm starting to receive parts to build my own OX. This forum is what won me over from planning to buy an X-Carve kit. I can't wait to start using the final build. I'm already off to a slight bad start: I accidently ordered the Xtreme V wheel kits rather than the Solid Xtreme kits. Needless to say, I'm not going to spend the money right now to replace them. However, I realize I will need some solid ones to act as idlers for the belt. The low Canadian dollar makes shopping a lot more expensive so I can't replace them all at once. They've been out of stock in Canadian suppliers.

    For the build I'm using:
    - 6mm aluminum plates ordered from EBay
    - Nema 23 for everything
    - Dual belt setup
    - CNC Xpro control board with 24V power supply
    - 6 limit switches
    - 400W Brushless DC Spindle with 48V power supply
    - Planned to use all solid Xtreme v wheels. Eventually I will
    - 20x60 v-slot Z-axis

    I'd like to thank everyone that has been posting in this discussion. You have all been a great help in giving me ideas and understanding what I will be faced with during the build process.
     
  3. Rick 2.0

    Rick 2.0 OpenBuilds Team
    Staff Member Moderator Builder Resident Builder

    Joined:
    Dec 20, 2013
    Messages:
    2,899
    Likes Received:
    1,556
    Check with Fuzztech. They are showing 50 in stock.
     
  4. Nickies

    Nickies New
    Builder

    Joined:
    Apr 7, 2015
    Messages:
    18
    Likes Received:
    10
    Thanks Rick 2.0!
    I originally ordered from Openbuilds because Fuzztech was out of stock when I ordered my v-slot. I noticed they have the full kit in stock now but no individual wheels. I'll have to suck it up and order 6 kits so I'll at least have "idlers" on all axis. I'm worried how much rigidity I'll lose by using v wheels instead of solid wheels. Hopefully the fact that they are the Xtreme v wheels should be some help. Just frustrating to have spent $200CDN on 28 wheel kits and realize I ordered the wrong ones and will eventually have to order all new ones.

    Should I order solid wheels for the Z-axis at the same time or will the v-wheels do until I can afford to replace all the other wheels?

    .
     
  5. dddman

    dddman Journeyman
    Builder

    Joined:
    Mar 2, 2014
    Messages:
    468
    Likes Received:
    187
    @Nickies PM me, we will arrange something :)
     
    Nick W, Nickies, Darus and 1 other person like this.
  6. Nickies

    Nickies New
    Builder

    Joined:
    Apr 7, 2015
    Messages:
    18
    Likes Received:
    10
    A BIG thanks to Dany from http://www.fuzztech.ca/ I'll be back on track to get my build done properly from the beginning!
     
    Nick W and Darus like this.
  7. matthewb

    matthewb New
    Builder

    Joined:
    Jan 31, 2015
    Messages:
    17
    Likes Received:
    5
    X axis mod, belt on belt.

    I ran another axle and set of wheels to the rear X axis plate so that i could run belt on belt transmission.
    Photo attached. I glued down 5mm belt to the bottom of the track and ran the 5mm on top. I have ordered some 9 and 6mm belt to try 9mm glued down to the bottom and 6 on top- i think this may be an improvement on my set up- but too early to tell yet.
    I am only at the beginning of the journey but so far motion is controlled and quiet.
    anyway just in case anyone is interested!
     

    Attached Files:

    sgspenceley likes this.
  8. GrayUK

    GrayUK Openbuilds Team Elder
    Staff Member Moderator Builder

    Joined:
    May 5, 2014
    Messages:
    1,668
    Likes Received:
    627
    mathewb:
    Thanks for keeping us up to date. It looks good.
    If I may suggest, it might be better to put all this in a new thread, and then we can all keep up to date with you and your machine. It just makes it easier to find you, rather than amongst this huge thread.

    Gray
     
  9. Nickies

    Nickies New
    Builder

    Joined:
    Apr 7, 2015
    Messages:
    18
    Likes Received:
    10
    I noticed you have 4 sets of wheels on top of your x-axis. Did you add the two extra holes or use a different model? I'm planning to use the dual belt setup and wanted to use a second set of wheels. dddman had I nice idea for idlers to increase pulley engagement, but more wheels does two jobs at once.
     
  10. matthewb

    matthewb New
    Builder

    Joined:
    Jan 31, 2015
    Messages:
    17
    Likes Received:
    5
    @GrayUK yes good plan.

    @Nickies The extra set of wheels are to make sure that enough teeth are engaged for belt on belt to work properly. this is an assumption. I did not try belt on belt with only a single wheel either side- i figured just fit the extra wheels. added bonus of a better belt wrap around the driven pinion and better tooth engagememnt there as well.
    The front x plate already had the holes for the wheels but yes i had to drill the rear x plate. I also fitted eccentrics on all wheel on the x carriage and furthermore i shimmed differently to the original build log as i found my wheels were too far spaced and not sitting correctly in my bolted together x rail.
     
    GrayUK and Nickies like this.
  11. Macchp

    Macchp New
    Builder

    Joined:
    Mar 14, 2014
    Messages:
    42
    Likes Received:
    5
    @matthewb I have the dual belt installed on my OX (1000 X 1500mm) and it works pretty well with the standard set of wheels only. So far I used it for "easy to cut" materials such as plywood. Don't sure how it will cope with alu or other harder material.
    Even if I really like the idea to have more belt wrap, I don't like the idea to take it apart to drill new holes and mount it again
    .
     
  12. Nickies

    Nickies New
    Builder

    Joined:
    Apr 7, 2015
    Messages:
    18
    Likes Received:
    10
    Lucky me, my machine is still in pieces and I can easily add extra holes. I can order an extra couple wheels when I order the V-slot to make my aluminum bed. I should have everything for the rest of the build by next weekend. I hope I can calibrate my electronics as quickly and easily as I did with my 3D printer
     
  13. GrayUK

    GrayUK Openbuilds Team Elder
    Staff Member Moderator Builder

    Joined:
    May 5, 2014
    Messages:
    1,668
    Likes Received:
    627
    You guys did see earlier - the bit about using longer bolts on the motor mounts and using them for additional idlers.

    Gray
     
  14. Nickies

    Nickies New
    Builder

    Joined:
    Apr 7, 2015
    Messages:
    18
    Likes Received:
    10
    Yes, I saw dddman' post. But since my machine isn't assembled, I can have the best of both worlds. I just found out my Spindle mount is wider than the 20x60 v-slot. Time to break out the vertical mill and make an adapter plate
     
    GrayUK likes this.
  15. matthewb

    matthewb New
    Builder

    Joined:
    Jan 31, 2015
    Messages:
    17
    Likes Received:
    5
    Well if macchp belt on belt is working with a single wheel either side then my method is probably redundant.
    My reasoning for going for 2 wheels either side of the pinion was so that I would get a lot of tooth engagement/mesh in the belt on belt system. An added bonus was more teeth engaged on the pinion. An idler wheel using the motor mount would help pinion tooth engagement but does nothing to assist the belt on belt meshing.
     
  16. Nickies

    Nickies New
    Builder

    Joined:
    Apr 7, 2015
    Messages:
    18
    Likes Received:
    10
    The patented "servo belt" design has one large wheel on either side of the pulley and then a smaller wheel (used as an idler) to help with belt meshing. So both options give you the intended results.

    Using an idler on the motor mount allows for better belt engagement which is the intent in the patented design. The existing wheel then ensures the belt meshing. The second set of wheels does the same thing. The slight benifit is that you slightly reduce the distance from the meshing location to the pulley. But with this design, that is no major performance boost. The only real advantage is that you have another pair of wheels on your x-axis. This is great for rigidity and load distribution; especially on machines that are using larger spindles. So it is a matter of which design best suits your needs or your willingness to take things apart.

    I was planning on using the wheel design that was on the original schematic. It was dddman's upgrade that caught my eye and I was going to incorporate it into my build...... BUT then I saw matthewb's post. No brainer option for me. I'm still in the building process so it is only to clamp my plates together, clamp it in the vise of my vertical mill, use a alignment bit and then drill the holes.
     
  17. dddman

    dddman Journeyman
    Builder

    Joined:
    Mar 2, 2014
    Messages:
    468
    Likes Received:
    187
    I really start to like my OX :) 2.5D rough
     

    Attached Files:

    JWhitten, Chris Laidlaw and Nick W like this.
  18. Nick W

    Nick W Well-Known
    Builder

    Joined:
    Oct 22, 2014
    Messages:
    99
    Likes Received:
    61
    @dddman I haven't tried any 2.5 carves yet. I'm trying to get good at 2d stuff first. I also need to pick up some small ballnose endmill bits so I can do 2.5d right.
     
  19. Nick W

    Nick W Well-Known
    Builder

    Joined:
    Oct 22, 2014
    Messages:
    99
    Likes Received:
    61
  20. Tweakie

    Tweakie OpenBuilds Team
    Moderator

    Joined:
    Jan 18, 2014
    Messages:
    784
    Likes Received:
    326
    Very neat work @Nick W - looks like an excellent addition. :thumbsup:

    Tweakie.
     
    Nick W likes this.
  21. Nickies

    Nickies New
    Builder

    Joined:
    Apr 7, 2015
    Messages:
    18
    Likes Received:
    10
    Does anybody know the speed difference between using a GT2 (3mm) belt with a 20 tooth pulley and a Tr8*8 4 start lead screw on an axis? I'm thinking it is 60mm vs 8mm per one rotation of the motor. Debating if a "Acme" Rod upgrade would be a nice future upgrade on the x and y axis. But if my numbers are right, it is way too slow.
     
    #2301 Nickies, Apr 13, 2015
    Last edited: Apr 13, 2015
  22. Nickies

    Nickies New
    Builder

    Joined:
    Apr 7, 2015
    Messages:
    18
    Likes Received:
    10
    The 1/4" spacers for the fixed wheels are not listed on the build parts list. Guess I won't be getting the OX frame built until I place another order.
     
  23. Rick 2.0

    Rick 2.0 OpenBuilds Team
    Staff Member Moderator Builder Resident Builder

    Joined:
    Dec 20, 2013
    Messages:
    2,899
    Likes Received:
    1,556
    When the parts list was originally created for the Ox, the spacers were included as a part of the wheel kits so it wasn't necessary to list them separately. As that has all now changed it is time for the creator to update the list. Rechecking the screw count wouldn't be a bad idea either.
     
  24. sgspenceley

    sgspenceley Veteran
    Builder

    Joined:
    May 27, 2014
    Messages:
    249
    Likes Received:
    293
    Excellent modification Nick!
     
    Nick W likes this.
  25. Nick W

    Nick W Well-Known
    Builder

    Joined:
    Oct 22, 2014
    Messages:
    99
    Likes Received:
    61
    @sgspenceley thanks. I just finished a 3 hour job and it worked very nicely. The belts were clean and nothing got onto the wheels.
     
    sgspenceley likes this.
  26. Nickies

    Nickies New
    Builder

    Joined:
    Apr 7, 2015
    Messages:
    18
    Likes Received:
    10
    It is a really well designed and clean looking modification. Great job! Good to see it works as well as you hoped.
     
    Nick W likes this.
  27. davidbrowne

    Builder

    Joined:
    Jul 25, 2014
    Messages:
    30
    Likes Received:
    20
    I've been throwing a rag over the wheels and drive, as one of my projects has a deep gouge when
    a big chip got thrown onto the track. I LOVE this idea and it will be my next project.
    Beautifully thought out and executed.
    Bravo!
     
    Nick W likes this.
  28. Nick W

    Nick W Well-Known
    Builder

    Joined:
    Oct 22, 2014
    Messages:
    99
    Likes Received:
    61
    Thanks for the positive comments. I will make another pair using my latest design. If it works well enough I'll share the files. Hopefully I'll knock it out this weekend.
     
    Mark Carew likes this.
  29. Dekes1

    Dekes1 New
    Builder

    Joined:
    Feb 20, 2015
    Messages:
    13
    Likes Received:
    7
    This was briefly mentioned about 40 pages ago but not much response... have any of you had to deal with noise in your limit switch wiring that causes spurious triggering? i'm using a run-of-the-mill chinese parallel port 5-axis breakout board and 3 conductor wire and get tons of false triggers. Its clearly electrical interference becuase if i turn off my stepper drivers, the triggers never flilcker or flash but do repeatedly when the steppers are powered. I'm stuck

    -Is it safe to increase the debounce setting in Mach3?
    -Will shielded wire make much of a difference?
    -Any comments on adding caps or pullup resistors to the BOB inputs?
    -Add ferrite cores on the stepper wires?
    -Other?
     
  30. Nick W

    Nick W Well-Known
    Builder

    Joined:
    Oct 22, 2014
    Messages:
    99
    Likes Received:
    61

Share This Page

  1. This site uses cookies to help personalise content, tailor your experience and to keep you logged in if you register.
    By continuing to use this site, you are consenting to our use of cookies.
    Dismiss Notice