Welcome to Our Community

Some features disabled for guests. Register Today.

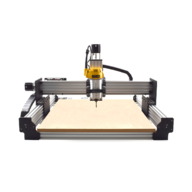
WorkBee CNC Machine

Discussion in 'CNC Mills/Routers' started by Ryan Lock, Sep 21, 2017.

  1. Aaron D

    Aaron D New
    Builder

    Joined:
    Nov 23, 2017
    Messages:
    11
    Likes Received:
    6
    Hi everyone hope everyone had a good Christmas and that hopefully somebody can offer some advice.

    I am using the xpro to control my spindle using PWM. I have it working in that I can turn the spindle on and set a speed. If I send the command M3 S24000 then the spindle will spin up to about 20,000 RPM and the voltage on the PWM line goes up to 4.10V.

    My understanding is that the PWM signal is 0-5v but the maximum I can get is only 4.10v (this is measured at the xpro). Any suggestions?

    Thanks.
     
  2. Aaron D

    Aaron D New
    Builder

    Joined:
    Nov 23, 2017
    Messages:
    11
    Likes Received:
    6
    I honestly have no idea. I thought it would be a cool tool to have. Now I just need to think of some things to make!
     
  3. Awestruck

    Awestruck New
    Builder

    Joined:
    Dec 17, 2017
    Messages:
    76
    Likes Received:
    13
    @Aaron D Can you elaborate a little bit more about your system and connections? What output are you using on the xPro? What is it connected to on the other end? The measurement you took was with the system connected? Or is the measurement with just the xPro output and nothing else connected?

    I wonder if you are reading 4.1 because the voltage is pulled down by your external equipment.
    I've not played with xPro and spindles (yet) and if i compare it to other industrial equipment I played with you may need to map the RPM of your spindle to specific commands or adjust the drive/card/system controlling the Spindle.
     
    #123 Awestruck, Dec 26, 2017
    Last edited: Dec 26, 2017
  4. Aaron D

    Aaron D New
    Builder

    Joined:
    Nov 23, 2017
    Messages:
    11
    Likes Received:
    6
    @Awestruck, I am using a generic Chinese Huanyang 1.5kw VFD and spindle.

    I have configured the the VFD to accept 0-5v PWM signal.
    pins D11 and GND are connected to the VFD
    xpro is then configured to a max RPM of 24,000 using $30=24000.

    Even when I have the VFD powered off the maximum voltage from D11 is 4.1v
     
  5. Awestruck

    Awestruck New
    Builder

    Joined:
    Dec 17, 2017
    Messages:
    76
    Likes Received:
    13
    @Aaron D I'm looking at the schematic for the xPro and I see that D11 has some sort of jumpers as it could also be used for the Z Limit. I suspect you knew this and confirmed all the jumpers are correct.

    Could you check the voltage with no wire attached to the VFD? Just temporarily remove it at the xPro or VFD. On the xPro do you need to do any other configuration that says some thing like 24000 = 5V? I've not read into the configuration info yet, just asking how the xPro knows to do full PWM/5V for the $30=2400 command.

    (maybe my asking can lead you to solve the problem)
     
  6. Awestruck

    Awestruck New
    Builder

    Joined:
    Dec 17, 2017
    Messages:
    76
    Likes Received:
    13
    Another thought, still doing some googling, is that there is a configuration within the firmware to set the max and minimum RPM speed. This should then map to the PWM output. On an old post here on OpenBuilds I found the following two lines, it may be old cold or it may be in the firmware now. You would need to change SPINDLE_MAX_PRM to 24000. If this isn't set, it may be mapping some other RPM and that is why you get 4.1V. Though I still wonder if the VFD is just weighing down the output.

    #define SPINDLE_MAX_RPM 1000.0 // Max spindle RPM. This value is equal to 100% duty cycle on the PWM.

    #define SPINDLE_MIN_RPM 0.0 // Min spindle RPM. This value is equal to (1/256) duty cycle on the PWM.
     
  7. Aaron D

    Aaron D New
    Builder

    Joined:
    Nov 23, 2017
    Messages:
    11
    Likes Received:
    6
    I had come across these settings during my Google searches, I was going to recompile GRBL but could not find these parameters in the GRBL source for v1.1f. Thats why I ended up setting $30

    I have not messed around with Jumpers, I figured as I was getting a voltage that followed in line with the speed settings that they were correct.
     
  8. Awestruck

    Awestruck New
    Builder

    Joined:
    Dec 17, 2017
    Messages:
    76
    Likes Received:
    13
    @Aaron D OK, I'm doing more reading, and now looking at v1.1f specifically. I think you are right in setting $30 = 24000. This is my reference: Grbl v1.1 Configuration · gnea/grbl Wiki · GitHub

    Does your VFD have a display? If so, when you command xPro to max RPM, does the VFD show it is doing 24000 or max output? Or are you just going by the voltage reading on the D11 line?
     
  9. Aaron D

    Aaron D New
    Builder

    Joined:
    Nov 23, 2017
    Messages:
    11
    Likes Received:
    6
    The VFD displays the RPM, the RPM is tracking with the PWM signal but is about 4k RPM behind. So S24000 = about 20k RPM and equally S12000 = 8k RPM.

    The voltage was measured on D11 after executing S24000, my expectation was that it should be 5v but was only 4.1v. This difference seems to track all the way through 0-5v.
     
  10. Awestruck

    Awestruck New
    Builder

    Joined:
    Dec 17, 2017
    Messages:
    76
    Likes Received:
    13
    hmmm....well, with this information and display, a "hacked" way of getting what you want is to program $30 to something higher such that the higher value will correlate to the 24000 on the VFD. Then test some other values to see if it all maps linearly.
     
  11. Kyle Barrett

    Builder

    Joined:
    Dec 5, 2017
    Messages:
    28
    Likes Received:
    10
    well after many winter storms and power coming back online over christmas I got everything together for testing. Machine is working good, limits work, spoilerboard supports in place.

    I am trying to test a simple file but I can't figure it out. Can anyone help, I'll let you know I'm using Aspire and UGS.

    I have the correct processor, gcode mm.tap

    I'm thinking its either my XY Datum is wrong or its a conflict between inches and mm. I'd perfer to work in inches, did a bunch of different combinations to no avail.

    Anyone got a config that I can use to start with?
     

    Attached Files:

  12. michielproce

    Builder

    Joined:
    Mar 23, 2017
    Messages:
    15
    Likes Received:
    5
    What exactly is going wrong when you load the gcode?
    Are you setting the work position to zero ("Reset Zero" in Universal Gcode Sender) before starting?
     
  13. Ryan Lock

    Ryan Lock Veteran
    Builder

    Joined:
    Oct 12, 2014
    Messages:
    530
    Likes Received:
    294
    @Kyle Barrett What is the issue you are having exactly? Are parts coming out too big?

    @Aaron D I am going to speak with mike at spark concepts and see what could be causing this.

    Ryan
     
    kev p likes this.
  14. Kyle Barrett

    Builder

    Joined:
    Dec 5, 2017
    Messages:
    28
    Likes Received:
    10
    No actually I can't actually get it to cut. It errors out. I'm positive I have a setting off somewhere.

    I get some sort of gcode error in ugs and it stops the program. Tells me it is beyond machine limits or something of that nature. I'll get a screen of the error if I can. Also I'm assuming the machine runs in mm/min in grbl CNC xpro
     
  15. Kyle Barrett

    Builder

    Joined:
    Dec 5, 2017
    Messages:
    28
    Likes Received:
    10
    here are the errors, running mm/min in aspire, datum is upper right corner,(same as machine home), units mm, post processor (gcode mm.tap), cut depth is 4mm,

    This is just testing yet, I haven't hooked up the spindle yet as I need to wire it for 220. All I have ready is 110. American Standard :p

    Took some screen caps from Aspire and UGS. I know its something simple. Its gotta be.
     

    Attached Files:

  16. Awestruck

    Awestruck New
    Builder

    Joined:
    Dec 17, 2017
    Messages:
    76
    Likes Received:
    13
    @Kyle Barrett I'm just throwing out some questions, as I haven't gotten to play with any of this yet.

    Were you able to home the machine properly? (limit switches worked and machine moved to find these ok)
    What did you set for soft limits? (in UGS1 it looks to complain about this in the first error message)
     
  17. Kyle Barrett

    Builder

    Joined:
    Dec 5, 2017
    Messages:
    28
    Likes Received:
    10
    yes, machine homes perfect. it limits at each switch and backs up -3mm. From here I believe I hit reset zero.
     
  18. Awestruck

    Awestruck New
    Builder

    Joined:
    Dec 17, 2017
    Messages:
    76
    Likes Received:
    13
    @Kyle Barrett From videos I've seen of CNC work, again not running my own yet so I could be wrong, you usually put down your work piece and then jog the x, y, and z to set the 0 based on the work piece. This zero point corresponds to how you defined zero when generating your cam output. Usually lower left hand corner of the work piece. Maybe you are doing this already.
     
  19. Kyle Barrett

    Builder

    Joined:
    Dec 5, 2017
    Messages:
    28
    Likes Received:
    10
    ok i think thats a lead. Im not cutting anything yet. I dont have the router hooked up yet. I'm just in the testing phase. So I'm not setting z-height of anything, I have nothing on my table.

    So is that function easily accessible in UGS.
     
  20. Awestruck

    Awestruck New
    Builder

    Joined:
    Dec 17, 2017
    Messages:
    76
    Likes Received:
    13
    Having not used UGS yet either, yet I believe you can jog. I'm looking at the screen shot and see something noting jog.
    Though you don't have the spindle hooked up yet, you can "air cut" so setting the x, y, z to some imagined material.

    After homing, I'd then jog to somewhere around the center of the table. I'd zero all three axis (jog z axis down some, maybe half way).
    Then once you have this, I'd tried to run some known program that moves in a square or circle. See if the machine responds as expected.
     
  21. Kyle Barrett

    Builder

    Joined:
    Dec 5, 2017
    Messages:
    28
    Likes Received:
    10
    hmm, not sure im out of the woods yet but I used a stable build of UGS as opposed to a nightly build and it seems to have cooperated. Was able to attach a pen to get the BEE to run some circles on paper. Only problem I get with a stable build of UGS is XYZ positioning does not appear. Always shows 0
     
  22. Awestruck

    Awestruck New
    Builder

    Joined:
    Dec 17, 2017
    Messages:
    76
    Likes Received:
    13
    Greeeeaaattt You got the machine to run automatically!
     
  23. michielproce

    Builder

    Joined:
    Mar 23, 2017
    Messages:
    15
    Likes Received:
    5
    My 1000mm lead screw has a lot of "whip" when turning, especially when the carriage is near one of the ends. Is there a way to reduce this or is this nothing to worry about.
    I tried loosening and retightening the lock collars / flexible coupler but I cannot get the whip to go away

    Video of the whipping in action:
     
  24. Kyle Barrett

    Builder

    Joined:
    Dec 5, 2017
    Messages:
    28
    Likes Received:
    10
    I looked at mine and did a video. Are you talking about the dragchain? Or the acme screw. Here is a link to my video

     
  25. Giarc

    Giarc OpenBuilds Team
    Staff Member Moderator Builder Resident Builder

    Joined:
    Jan 24, 2015
    Messages:
    3,035
    Likes Received:
    1,695
    At the beginning of your video, it looks like your threaded rod may be a little bent, or overly compressed.

    I have my collars and bearings on the outside of the plates so my screws are in tension. However, I designed my own and that was the intention. I get very little whip from a 1500 mm long by 1/2 inch acme screw. The same with my 850 m long 3/8 inch acme screw. It looks to me that your collars are on the inside so you may be compressing the screw.
    It is hard to tell because the plates are not really visible in your video.
     
  26. Kyle Barrett

    Builder

    Joined:
    Dec 5, 2017
    Messages:
    28
    Likes Received:
    10
    I remember threading the Z screw through the block was difficult as the block nut was on a bit of a slant from the two m5 bolts going through, I had to straighten the nut block before tightening down the bolts. Also backed off the whiplash adjustment altogether on mine.

    I screwed the acme z screw in with a drill.
     
  27. Spark Concepts

    Spark Concepts Journeyman
    Builder

    Joined:
    Dec 17, 2013
    Messages:
    131
    Likes Received:
    107
    Hi folks, gonna jump in here with some questions and hopefully some help :)

    @Aaron D: On the voltage output from the spindle speed control - there is a bit of OR'ing logic in the powerpath of the xPRO to keep from backfeeding voltage into your PC that will cause a slight drop in the 5V line. However, 4.1V seems really low - have you tried measuring the voltage without the VFD attached? Have you measure the voltage on the 5V output next to the spindle output?

    @Kyle Barrett: there was a communication protocol change between GRBL version 0.9 and GRBL 1.1. I'm guessing you have the UGS V1.0.9, try hitting the "somewhat stable" build at the bottom of the UGS download page (Download - UGS) and things should clear up for location tracking. For your errors, check you post processor in Aspire (should be something along the lines of GRBL_mm don't have my Aspire available at the moment to confirm the exact name :( ). Also, check that you have a right hand coordinate system setup. Lastly, you can always turn off soft limits, but stay close to the power switch, and see where it wants to go - looks like you have a 20mm move command and 120mm axis length so it should be well within bounds.
     
  28. Kyle Barrett

    Builder

    Joined:
    Dec 5, 2017
    Messages:
    28
    Likes Received:
    10
    Thanks Michael, I think I'm ok now, we'll see. I can't test yet as Im waiting for my Electrician to wire me into 220 so I can use my router. It will be running on 60hz but I think it will be ok. THen I can start cutting :)
     
  29. michielproce

    Builder

    Joined:
    Mar 23, 2017
    Messages:
    15
    Likes Received:
    5
    Hi Giarc,

    This is my first CNC and I ordered the Workbee full kit, so the design isn't mine. Lock collars are on the inside with this build. The video has the lock collars quite loose (no compression)

    I took out the lead screw and it is a little bent. In an attempt to straighten it out a bit I actually made things worse.. So, I'm ordering a new lead screw..
     
  30. Steveastbury

    Builder

    Joined:
    Jul 26, 2017
    Messages:
    5
    Likes Received:
    2
    Ryan, I'm looking at building a large machine. Ive looked at the OX and workbee kits but none of them go up to 2.5m x 1.4m in size, can you tell me if the workbee plates will work with a R&P instead of the standard belt drive setup?
     
    Spark Concepts likes this.

Share This Page

  1. This site uses cookies to help personalise content, tailor your experience and to keep you logged in if you register.
    By continuing to use this site, you are consenting to our use of cookies.
    Dismiss Notice