


This is where I am at right now. I'm still trying to figure out where to attach the cable chains.

This picture shows all the components I was able to machine using the Shpinx CNC. The white blocks are Delrin (Acetal) that I will machine into the ball nut housings.
The Acetal blocks squared up on the mini mill.


Boring the hole for the ball nut.
Acetal ball nut housings and modified ball nuts. The flanges were ground to allow clearance inside the cbeam.
Here's my method for attaching the angled piece that supports the Y axis linear carriages.
Ball nut housing pocket. I had to add the dog bones later as I forgot them initially.

Finished ball nut blocks
Trying to keep a low profile inside the cbeam.
I had to keep very tight tolerances for these to work together.

Captive nut pockets as I can't reach all of these once the plates are installed.


I had to install TouchDRO on my mini mill as I still had the X axis plates left to machine and no operational CNC at this point.
These were fly cut above and the surface finish is meh but I bought a shell mill and you can see the difference below.

This picture was actually take before I installed the DRO and I was till using blue ink.

Looks like I need a small grease gun nozzle haha
Represent!!
Working on the Y axis motor standoffs. The standard 40mm won't work for me. I had to make these 55mm.


55mm Y axis standoffs (Acetal)


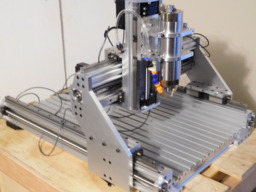
GRANITE 1.0
Build in 'Cartesian Style CNC' published by Michael.M, Dec 25, 2018.
This machine has been in the works for quite a while. Most of the plates were cut with my Shpinx machine. I have a lot more photos and information to share soon.
-
-
Build Author Michael.M, Find all builds by Michael.M
-
- Loading...
-
Build Details
- Build License:
-
- CC - Attribution NonCommercial - Share Alike - CC BY NC SA
-
Parts list
Qty Part Name Part Link Comments 10 PLN-05N Inductive Sensor https://rover.ebay.com/rover/0/0/0?mpre=https%3A%2F%2Fwww... Link