

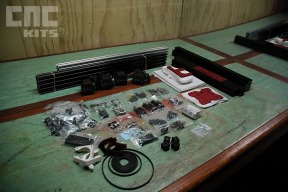
Below you will find a rough pictorial guide to building a Ox router. This is a work in progress so check back often for updates and changes.
Preparation
Cut V-Slot extrusion to required lengths. Optional: mill / sand and cut ends as square as possible to ensure ease of alignment later on.

Tap V-Slot for mounting.

We recommend tapping the following:
Tapping the front lower support for covers / drag chain / support / feet is optional. The front upper support and table support is not required to be tapped.
- Z-Axis - all holes
- Gantry lengths - all holes
- Long X-Axis bottom half x 8, top half optional x 8
A small chamfer helps guide a tap when using a powered drill.

Cut threaded rod to required length. Smooth ends.

Check that bearings fit over the ends (a very light sand with some fine emery paper will help a sticky bearing).

Assembly of Z axis

Thread ACME nut block onto ACME lead screw, with the hex nut closest to V-Slot.

Place a locking collar onto each end.

followed by 8mm spacers on each end,

and lastly a bearing on each end.

Once set up, install upper Z plate using 3 M5 x 15mm screws, each with a spring washer and standard washer. Lightly assemble finger tight.
Install required tee-nuts to front of Z-Axis V-Slot plate. You can use masking tape to hold these in place so they don’t fall out when you are attaching the Z axis to the gantry plates.

(yes we forgot this step and had to slip off the bottom plate and add them later on …. )
Install screw assembly onto V-Slot and top cap and then the lower plate 3 x 15mm M5 screws, each again with a spring washer and standard washer.

Adjust end caps as parallel as possible to the V-Slot.
Snug down all bolts on end caps. Check alignment.
Once snugged down, adjust threaded rod so that 10-12mm extends beyond the top plate. Lock off the 1 x locking collar on the top plate using the grub screw.
Pushing the lead screw towards the top plate, simultaneously pull on the bottom locking collar to apply tension to the lead screw before finally locking off the grub screws on the bottom collar.
When done correctly, there should be no lateral movement or play.
Assembly of Front Carriage Plate

Install spacer blocks to the front carriage plate, using 4 of M5 x 15mm screws. It is good practice at this point to square off.

Install the M5 x 45mm screws (x6) with washers, standard where possible although you may need to use small washers where there could be clearance issues.

Flip over. Check the orientation of the plate to ensure the eccentric holes are on the bottom of the front carriage plate.

Place 1 x 9mm spacer on each of the M5 x 45mm screws on the right hand side of the front carriage plate. On each screw place 1 x wheel (we are using the Solid V Xtreme Wheel kit) and nyloc nut.

On the left hand side of the front carriage plate, place 1 x 6mm eccentric spacer, along with a 3mm spacer on each of the M5 x 45mm screws.
Note: You can do these around the other way (the eccentrics on the right hand side and the 9mm spacers on the left), this is purely our preference.

Install the Z-Axis. Drop wheels onto the right hand side, along with nyloc.
Here comes the tricky part! Whilst holding the front carriage plate up, insert 2 of the M5 x 20mm screws into the ACME nut block.
Lightly snug the 6 wheels. Once all snug, tighten the right hand side (with the 9mm spacers).
On the left hand side, adjust the eccentrics until the wheels have light tension.
Tighten screws into the ACME nut block.
Movement should be smooth.
Assembly of Front Gantry Plate
You can choose to use M5 x 65mm hardware for this. We are using longer hardware cut down to ensure the bearing runs upon a smooth shaft. To note, the M5 x 65mm hardware has issues with the clearance of the front gantry plate as it’s a close fit.
To be continued .....

Small Red OX
Build in 'Cartesian Style CNC' published by Jestah, Jan 10, 2015.
A small router for thin plate stock
-
-
Build Author Jestah, Find all builds by Jestah
-
- Loading...
-
Build Details
- Build License:
-
- CC - Attribution Share Alike - CC BY SA
Reason for this Build
I would like a small router for milling aluminum plate, cutting pcb and making small prototypes.Inspired by
Ox, Ai Ox,